I figured I'd post this, because it might interest someone.

So one of the things I did for the texture of the drill was to print out the UV wireframe and physically "paint" over it. However, this texture is to simulate weathering, wear, and a sloppy paint job. Additionally, I don't really know how to use the weird paints we have around here, so I didn't.
Instead what I did was this:
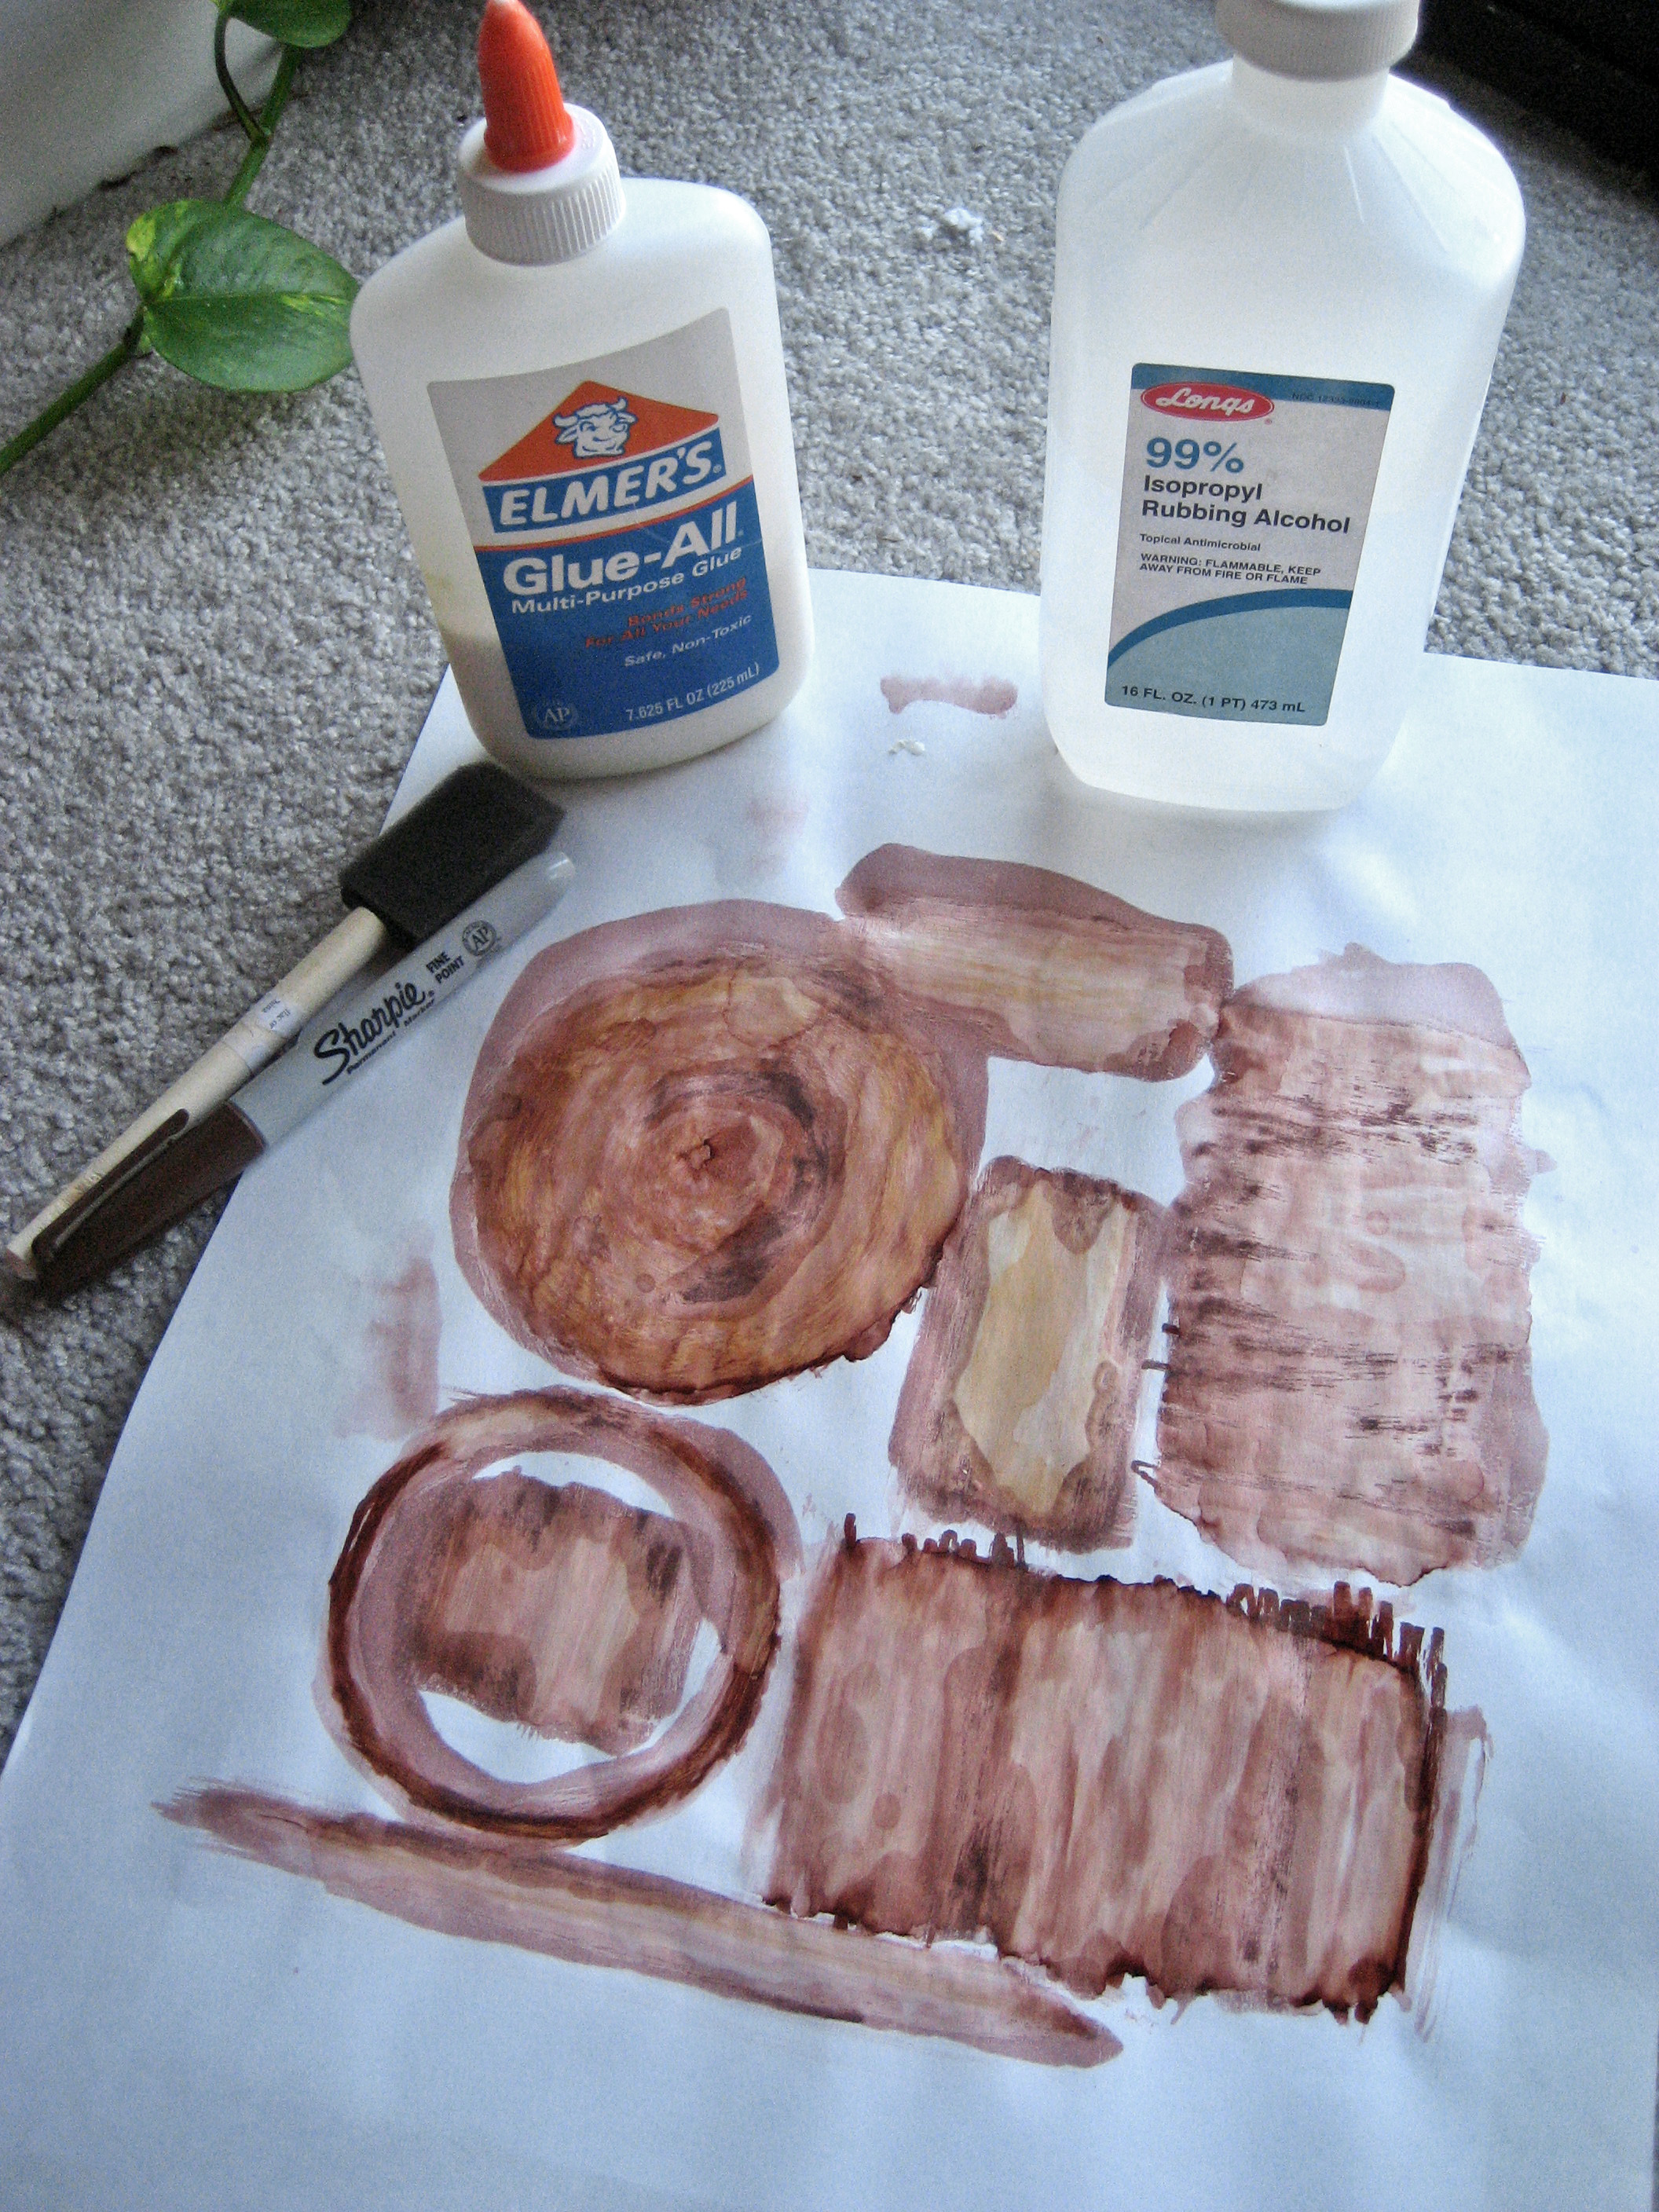
1) Used a foam brush (very, very cheap at any local craft store like Micheal's) to apply several layers of Elmer's glue to the shapes. I generally brushed in the direction that real paint would have been applied to those surfaces, because the glue will ultimately serve as an underlying texture for the color. Fewer layers would mean a more porous surface, which ultimately would result in a darker, harsher smudge. More layers would give a smoother, lighter effect. Being careless and sloppy about applying the glue is pretty much spot on with a good TF2 feel.
")
2) I took a Sharpie permanent marker (I'm not sure if this works with other brands!) and started scribbling on the surfaces, generally in the same directions as I applied the glue. Most of the time the marker would look sloppy and uneven, and possibly even too dense in some spots. This was ok, because it wouldn't really matter for the next step.
3) I used a second foam brush and got it wet with rubbing alcohol. Sharpies dissolve in the stuff! Brushing over the sharpie, I got a whole nice beautiful mess of runny, splotchy brown.
4) I then scanned it (alternately I could have taken a picture with a good camera), brought it into photoshop, and used it for a couple different filtering and adjustment layers.
The other nice thing is that I can reuse it in other materials by copying and pasting various regions of it.