What is this? Why should I care?
$color is a VMT parameter that allows you to tint an existing texture. This is very useful if you want to re-color an existing material without creating a new VTF. For example, this yellow metal wall texture is a stock metal texture with $color applied: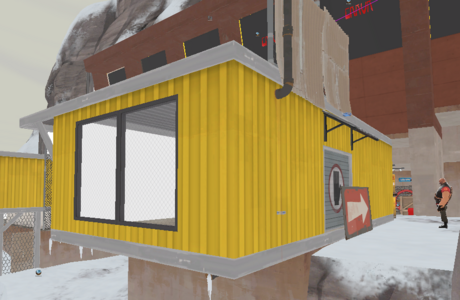
The VMT for this material looks like this:
Code:
"LightmappedGeneric"
{
    "$basetexture" "Metal/wall_island_heavy02c"
    "$bumpmap" "Metal/wall_island_heavy01-ssbump"
    "$ssbump" "1"
    "$surfaceprop" "metal"
    $color    "[1 0.680 0.055]"
    "%keywords" "tf"
}
This VMT is identical to the stock material in the game files, but with a $color of "[1 0.680 0.055]" added. Another use case is if you want to re-color an existing material to match the color of another existing material, which can be useful for adjacent surfaces of different materials, but you want them to appear painted the same color. For example:
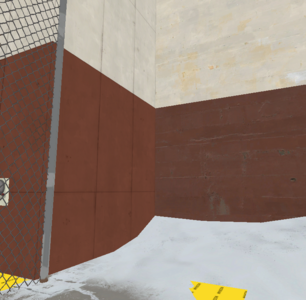
The dark red material on the right is a stock material, while the dark red on the left is a re-color using $color.
This method has some disadvantages. For example, for textures that are not one homogeneous color, you have no control over which parts of the texture get re-colored. For example, the dirt along the bottom of this texture gets recolored with the rest of the wall, which may not be desired:
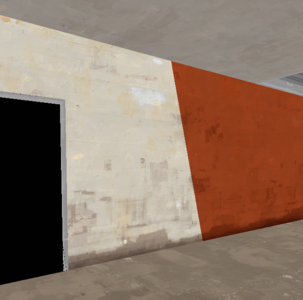
However, I think using $color where you can is generally a better method. It is quicker to implement and quicker to edit, as editing the VMT and saving will automatically update how the material appears in Hammer. It also saves on filesize, which can be very important depending on how many re-colors you use. For example, Snowbase uses about 20 different re-colors, and having unique VTFs for each of those colors would result in a lot of extra data, both in the BSP and for texture memory at runtime. (I do not have any exact numbers on the filesize/performance impacts, so I could be completely wrong about this.)
OK, cool. I'm in. How do I do this?
I am going to assume you have a basic working knowledge of how to create custom content.
First, get a program like VIDE or GCFscape and extract the material you want to edit. Materials are stored as VMT files in the tf2_misc_dir VPK. Once you have this VMT, add a $color line to the VMT. You can specify a color as RGB or as values 0-1. As an example:
Code:
$color "{0 255 127}"
$color "[0 1 0.5]"
These two lines do effectively the same thing, but use different ways of formatting the values. {} indicates values 0-255 while [] indicates values 0-1. You will need to surround the color in quote marks so that it is recognized as a single string. (I think so, at least. Haven't tested.)
Now you have a new custom material that is modified by $color! We do not need a VTF - all you need is a single VMT text file to make a new material. You can tweak the values in the VMT until you get a color you're happy with. Make sure you are using the "3D Textured" viewport when editing your colors, as this will make sure you are seeing the "true" colors of the materials without any shading.
Tweaking these values to match colors is annoying and slow. Can I use image editing software to do this?
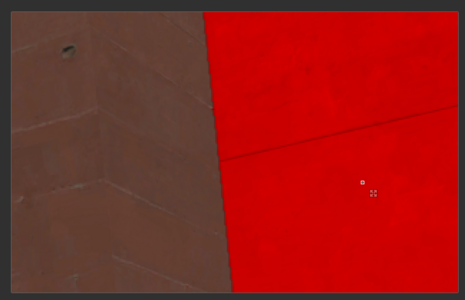
What a specific question! I'm glad you asked, because the answer is yes. While in the "3D Textured" viewport, take a screenshot with your two unedited textures side by side. Then, bring this into your image editing software of choice - I will be using Paint.net.
Create a new layer and color the layer white on top of the texture that you want to re-color. Then, set this new layer to blend as "Multiply":
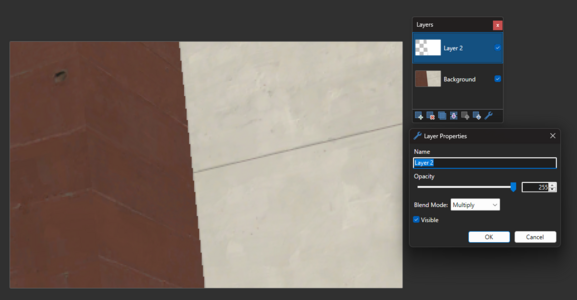
Now you can edit the color of the white region and it will change the color of the material underneath. Tweak the color until the two textures match:
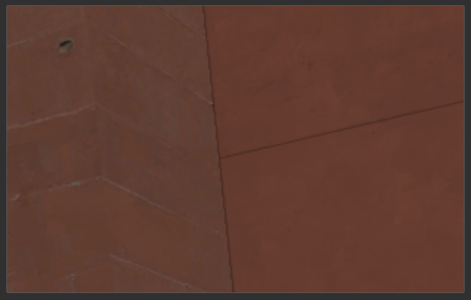
Now you have an RGB value that you could use in the $color parameter... except Source does gamma correction, so this value does not actually work! There is one last step to do. Convert your RGB values from the 0-255 range to the 0-1 range, and then raise each value to the power of 2.2. It should look something like this:
I have made a Google Sheets spreadsheet you can copy to do this math for you.
NOW you actually have the correct values to use in $color. In our case, we will add this line to the VMT:
Code:
$color "[0.4368 0.1450 0.0987]"That's also a bit cumbersome!
Yeah.No matter what I do, I can't match these colors! What gives!?
Some colors may be impossible to match in an image editor, as most image editors do not support colors outside the 0-255 range, and using Multiply blending can only ever make colors darker. If the target color is brighter than the original color in any of the three color channels, matching the colors in an image editor using my method will not work.However! You can still make these materials without creating a new VTF. When specifying a $color with 0-1 values, you can actually use values greater than 1. For example, if you want to make a texture brighter, you might try this:
Code:
$color "[1.2 1.2 1.2]"


