Hey all, recently I've had a lot of requests to write a tutorial on how I do my seamless 3D skyboxes. A lot of the older tutorials are outdated or teach a method that makes making the skybox seamless with your map incredibly difficult.
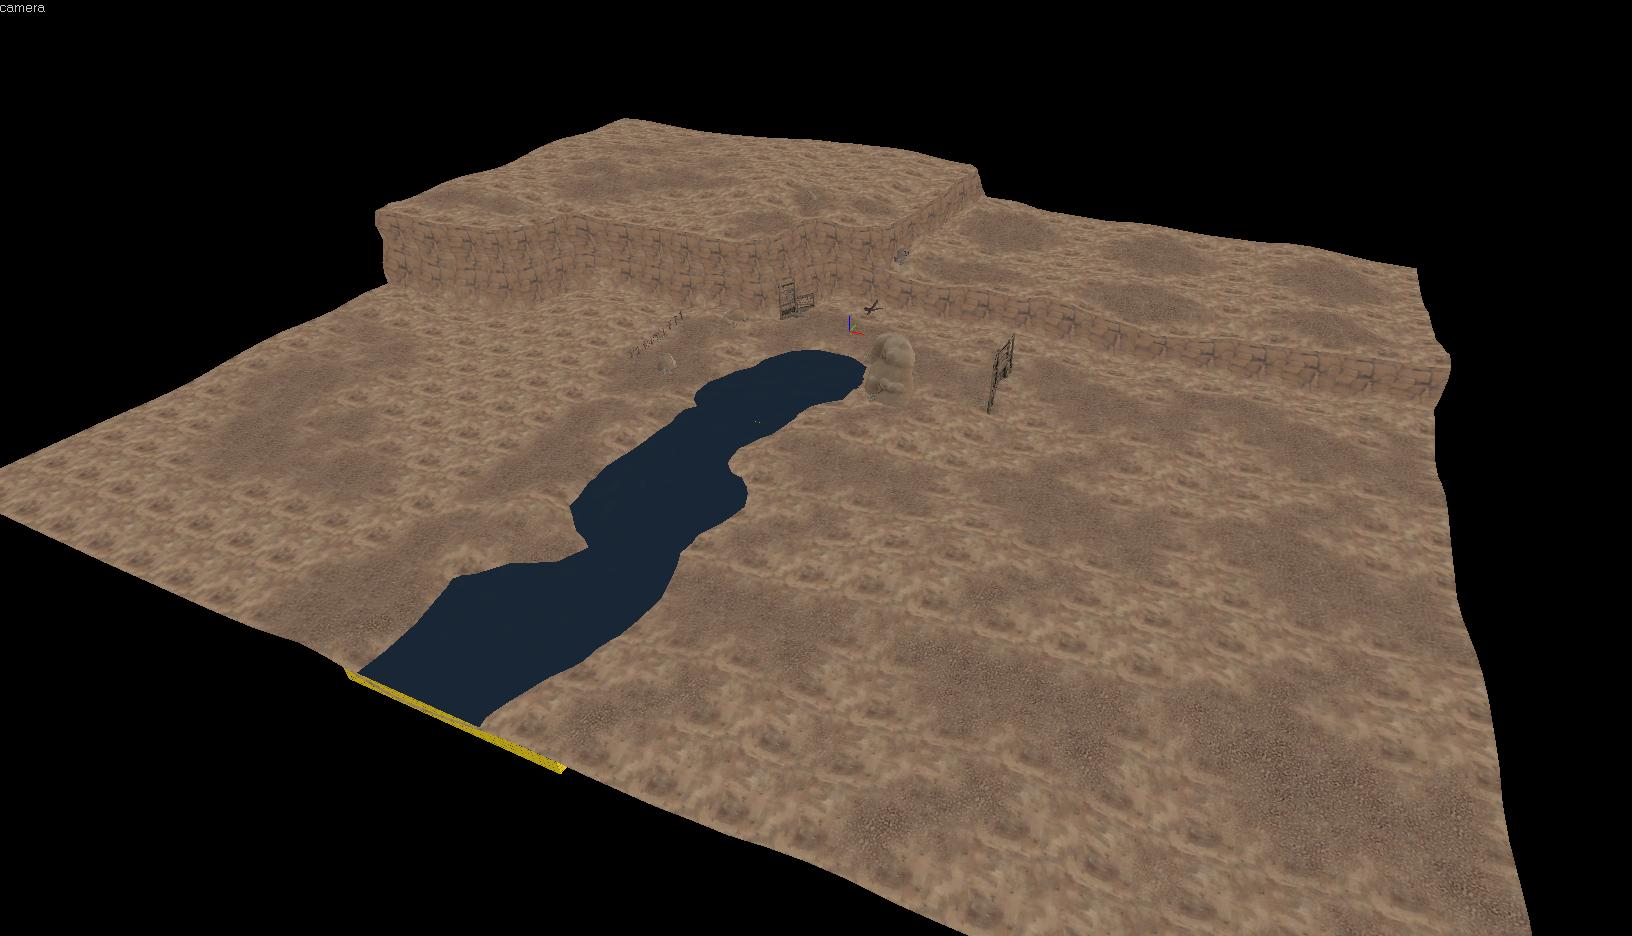
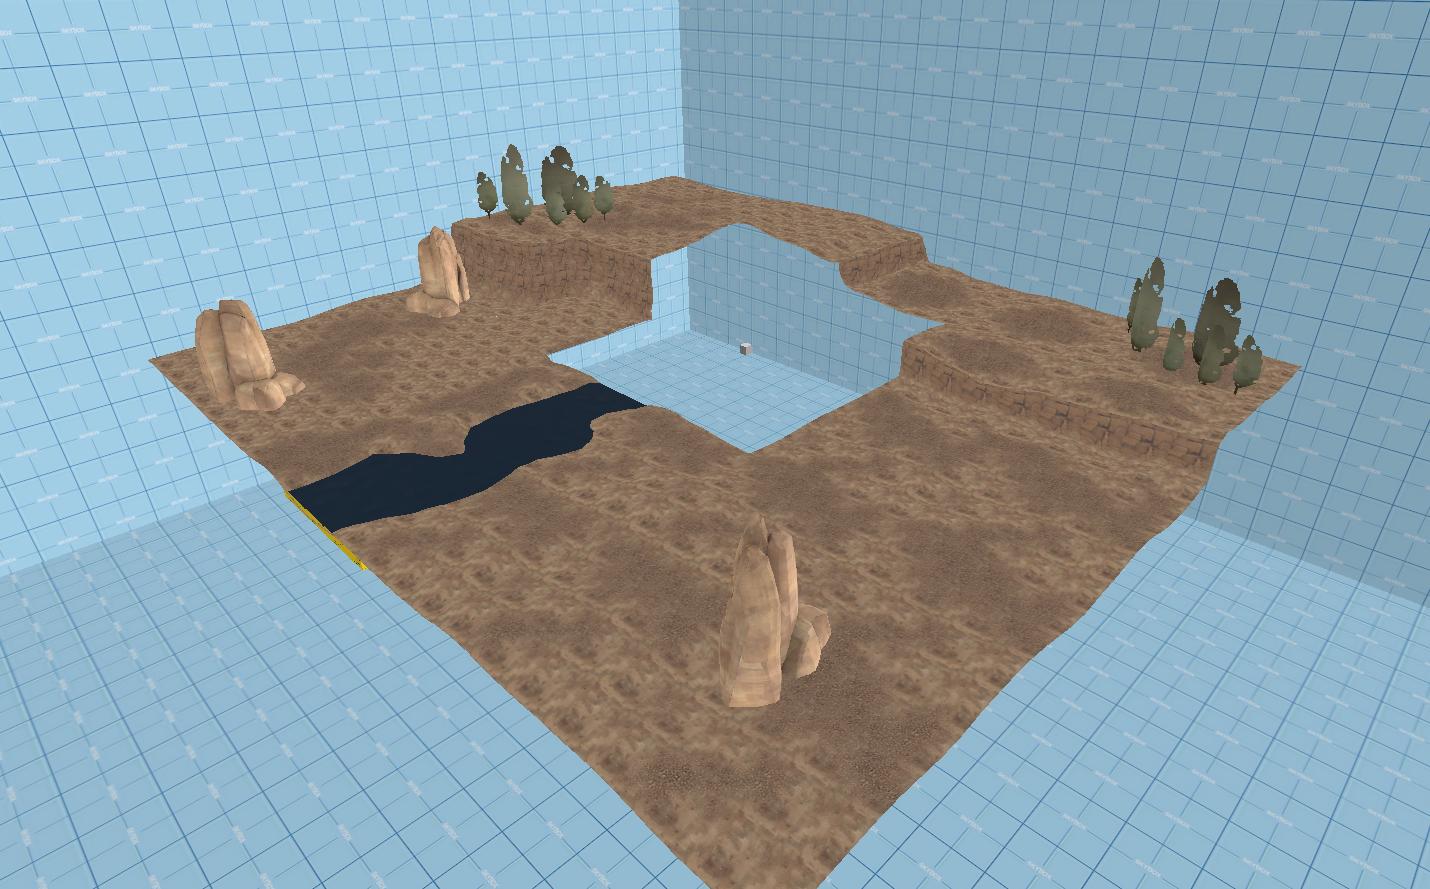
Let's start with your map. Here I've created a small scene to demonstrate making a seamless skybox. You can do this with any shaped map, but I used a simple square here to demonstrate the technique easier.
The key to the seamless skybox technique is to build your skybox around your map in real scale. Sew your displacements and align your textures here, the technique we use to create the skybox will keep these texture scale and alignments from this portion.
Don't place props in this portion, just create a simple base for your skybox out of displacement and brushes only.
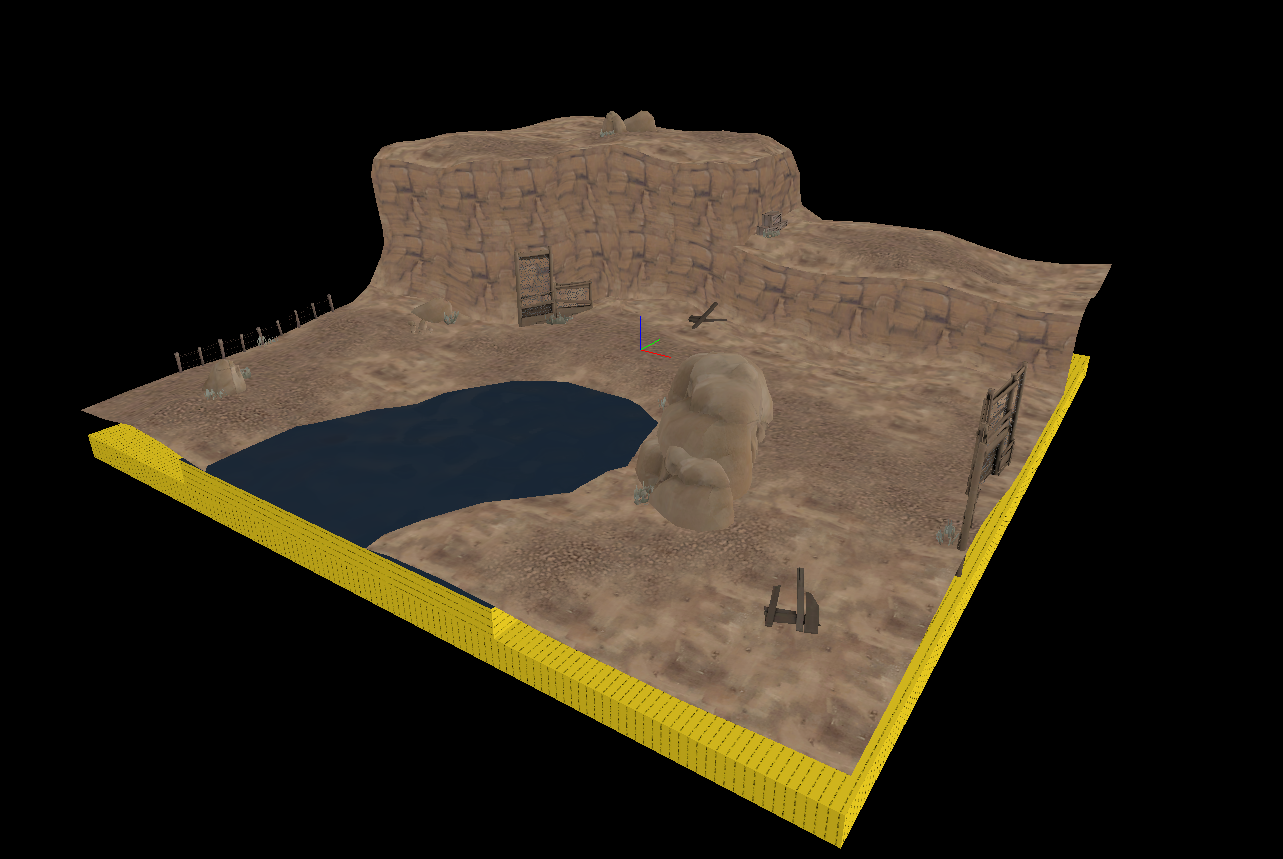
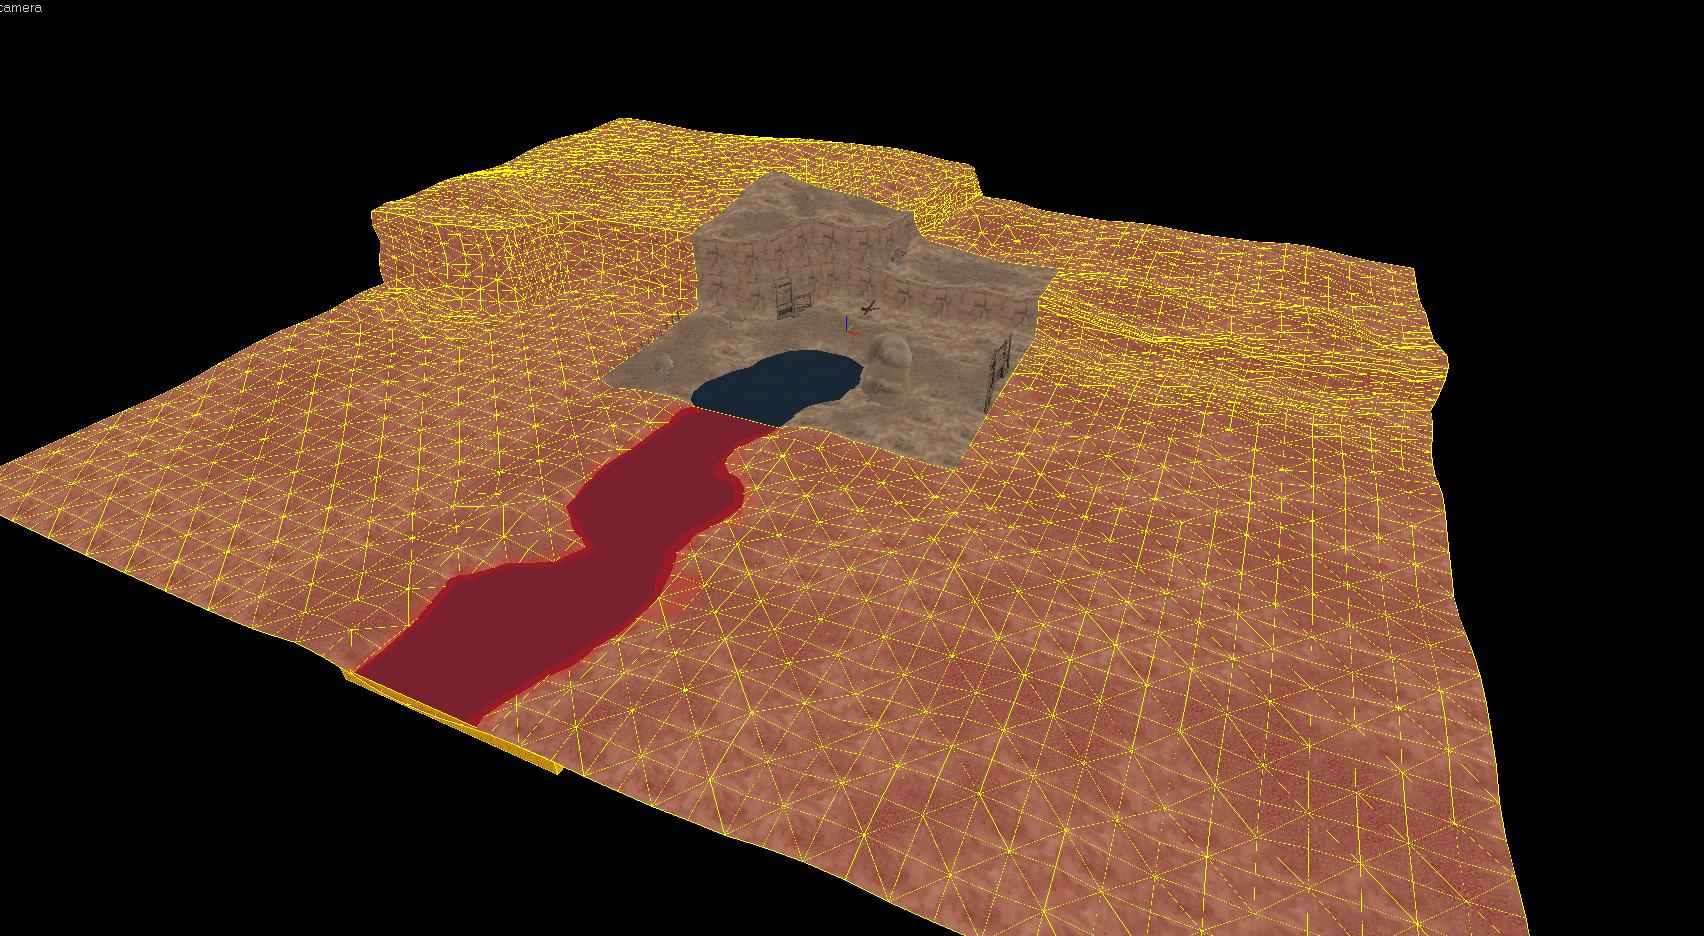
Here I've created an area outside my "map" that will become the 3D skybox. As you can see here, the displacements sew with the map and the water and textures are aligned perfectly with what will say as the "map"
As you can see, I can select everything that will become part of the skybox seperately without selecting anything as part of the map.
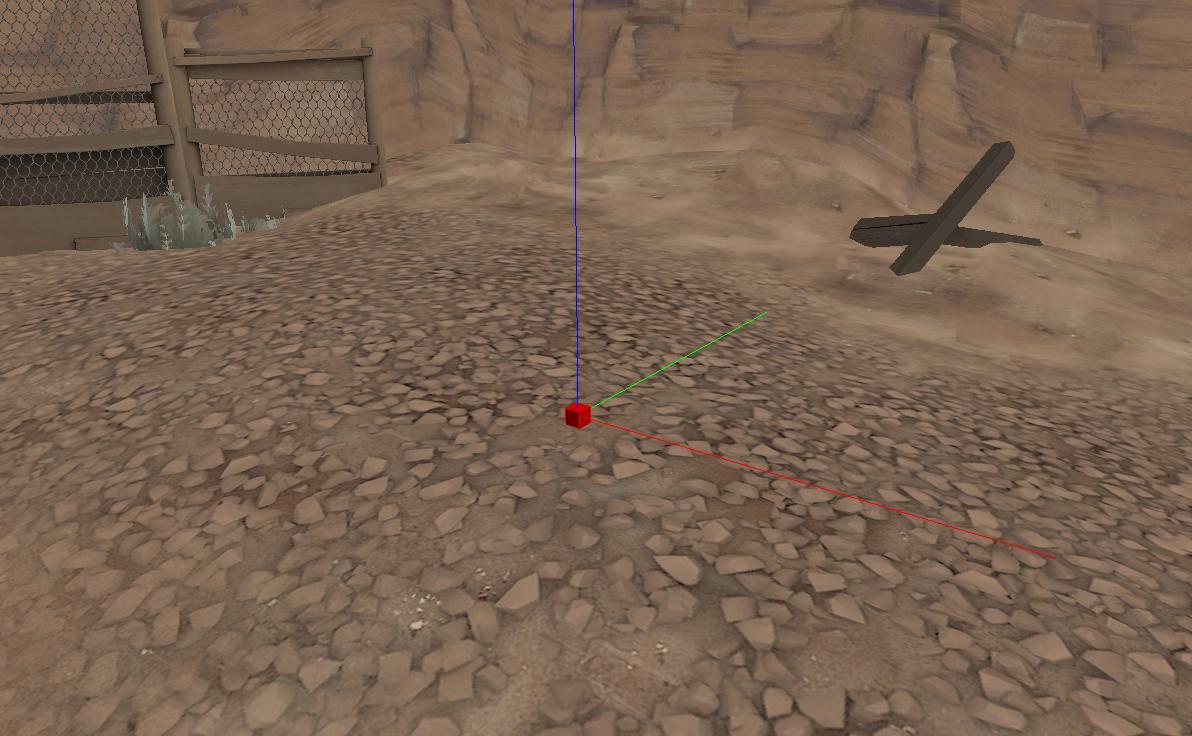
The next step is to find your map origin, the 0,0,0 coordinate position. It is indicated by the three lines, one red, blue and green. You then need to create a point entity, change it's class to sky_camera and move it so it is sitting directly on the 0,0,0 point like this.
We do this because the sky camera is an entity that projects the 3D sky around your map from the origin point. By placing the camera at the origin now, we make sure that it is in perfect position to project our 3D sky exactly as it is represented in full size, seamless with your map right now.
The next step is to select your sky_camera and everything that makes up your skybox as shown earlier. It is an absolute imperative that you have the sky_camera select during this step along with everything else as it will not be able to be placed properly later.
Next, make sure you have both the texture lock and texture scale lock buttons turned on:

This will ensure that when we scale down our 3D skybox to 1/16th size, the textures will not become misaligned.
Next, hit Control-M on your keyboard, select the scale radio button and type 0.0625 (ie. 1/16th) into both the X, Y and Z boxes.
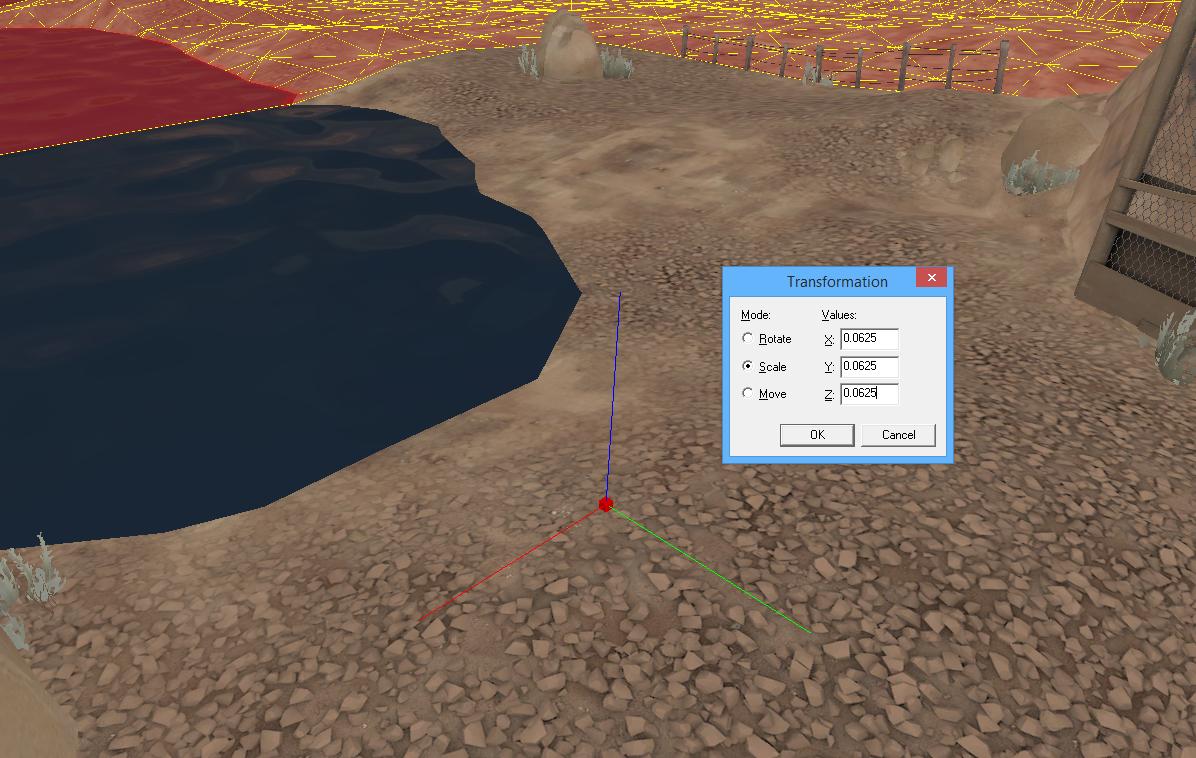
After hitting okay, this will leave you with a still currently selected, 3d skybox version of everything you had selected before. It will have scaled down everything, including the textures (because we had texture scale lock on) and kept everything in perfect relation to the sky_camera we had placed at the origin.
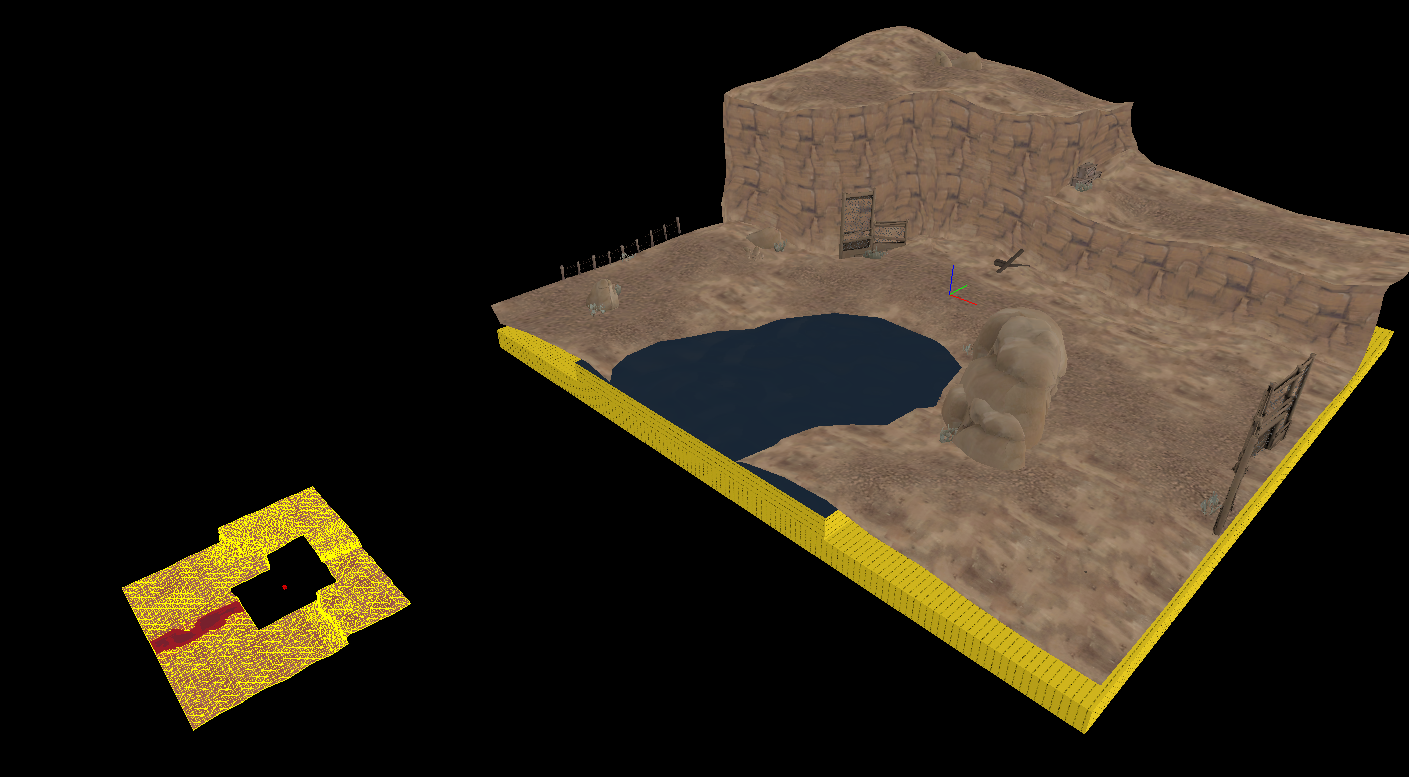
You'll want to drag all this stuff (Make sure texture lock is still turned on!!) somewhere off to the side of your map, it doesn't matter where, just don't put it inside your main map.

Create a skybox box around your 3D skybox, making sure nothing inside it leaks. You'll want to make sure this is textured with skybox too, as it needs to cast light on your 3D skybox in order to appear seamless.

You can now place skybox props here. As props do not scale with the transform tool (control-M) we cannot place them any earlier. Here I have placed some simple decoration props from the props_skybox/ section, such as phallic looking rocks and trees.
We also need to worry about the seamlessness between lighting and fog of our skybox and main map.
Your light_environment will produce the same light to both the skybox and main map, so as long as you don't have anything casting obvious shadows in the main map over the transition between normal map and 3D sky (the 3D sky will cast shadows over the main map, but not the other way around), source will take care of this for you.
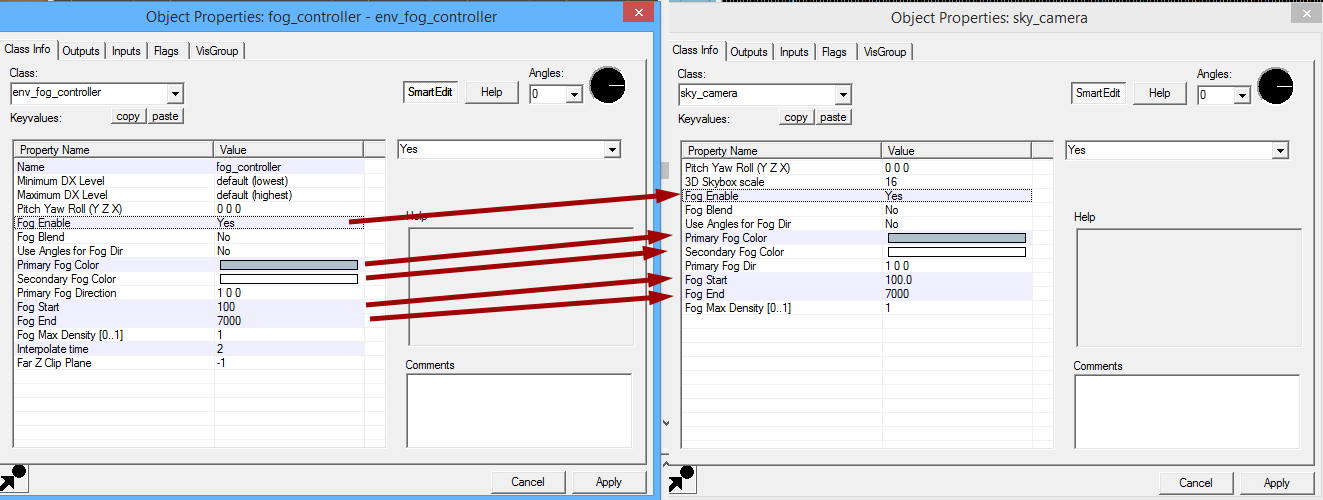
The main concern is the fog. Find your env_fog_controller entity and your sky_camera (now positioned in the 3D sky area you made somewhere olff to the side of your map).
These are the settings that need to be identical in order for fog to be seamless. Often times you can play around withh these settings a bit and have them still appear seamless, but that's up for you to try. Making them identical will guarentee seamlessness.
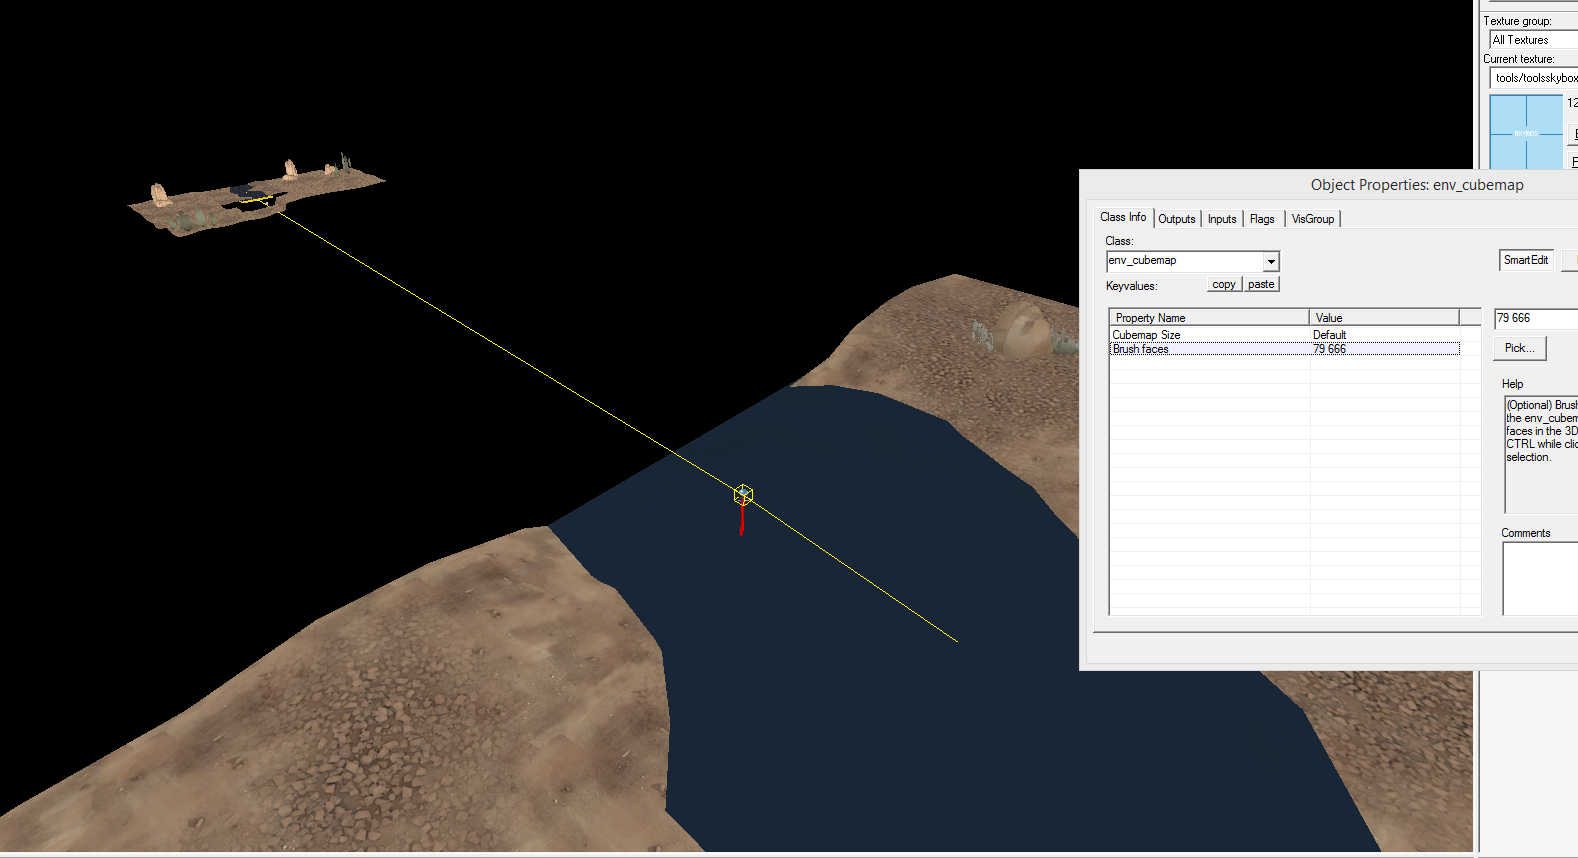
The last thing you need to worry about is if you have water crossing the border between map and skybox like I have here. Even though the water texture is perfectly aligned, due to the seperate physical positions in your VMF of the skybox water and real map water, their reflections will appear different and show a seam.
In order to fix this, create a cubemap entity above the water face inside your map. In the cubemap properties, you can select brush faces for the cubemap to affect. Select both the water face in your map, and the water face in your skybox. Once you hit apply, the cubemap entity will draw lines to the faces it is tied to, so make sure it's pointing to both.
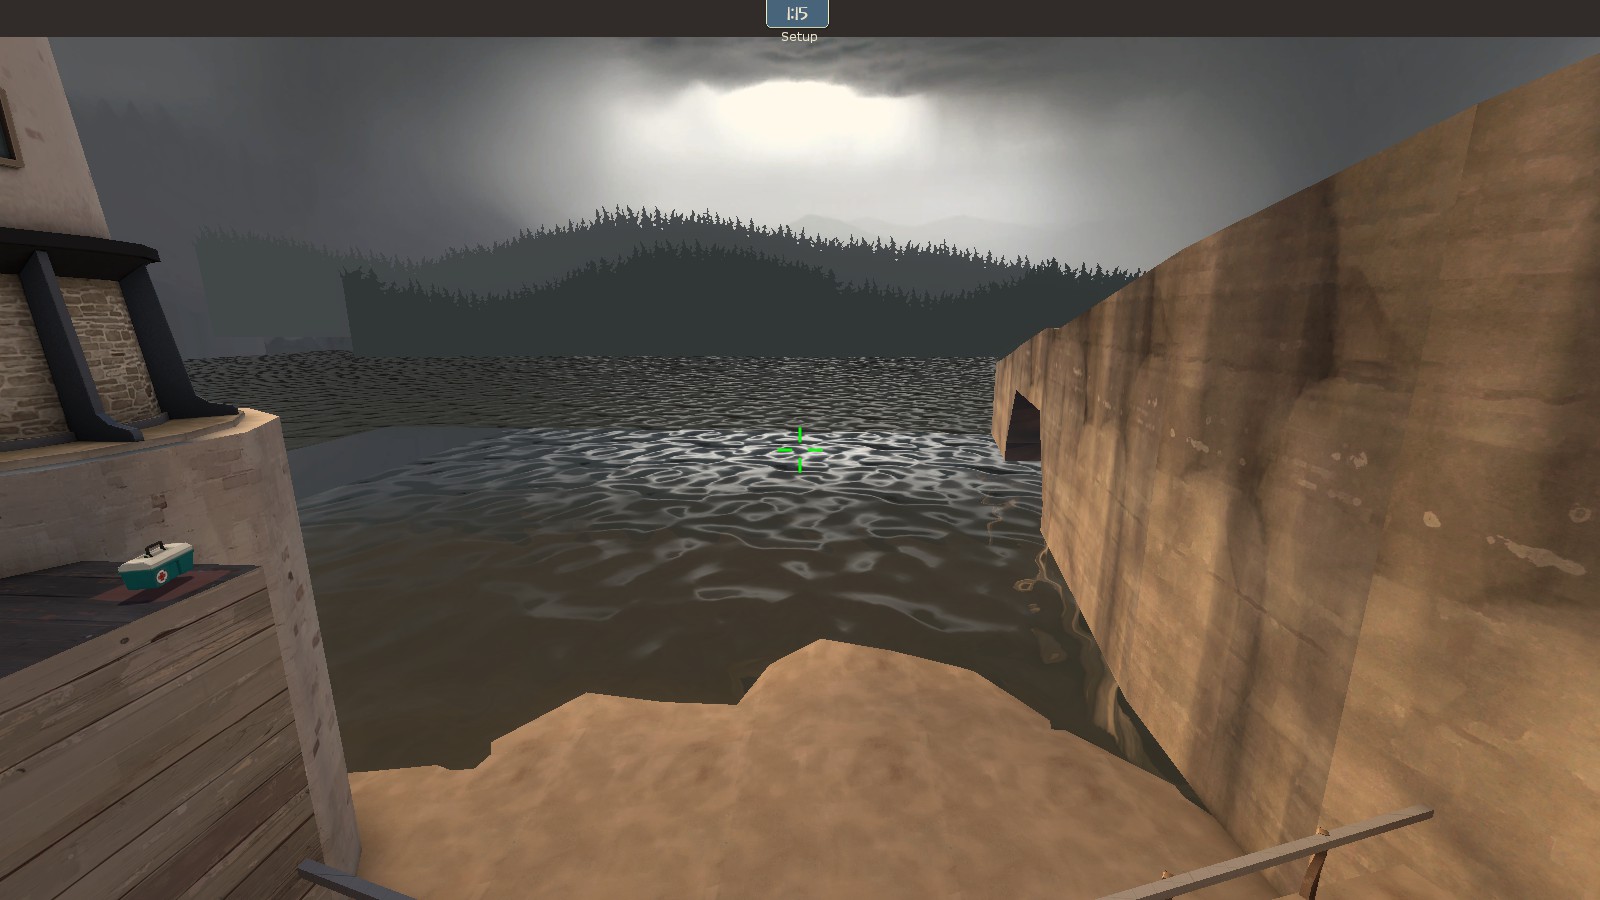
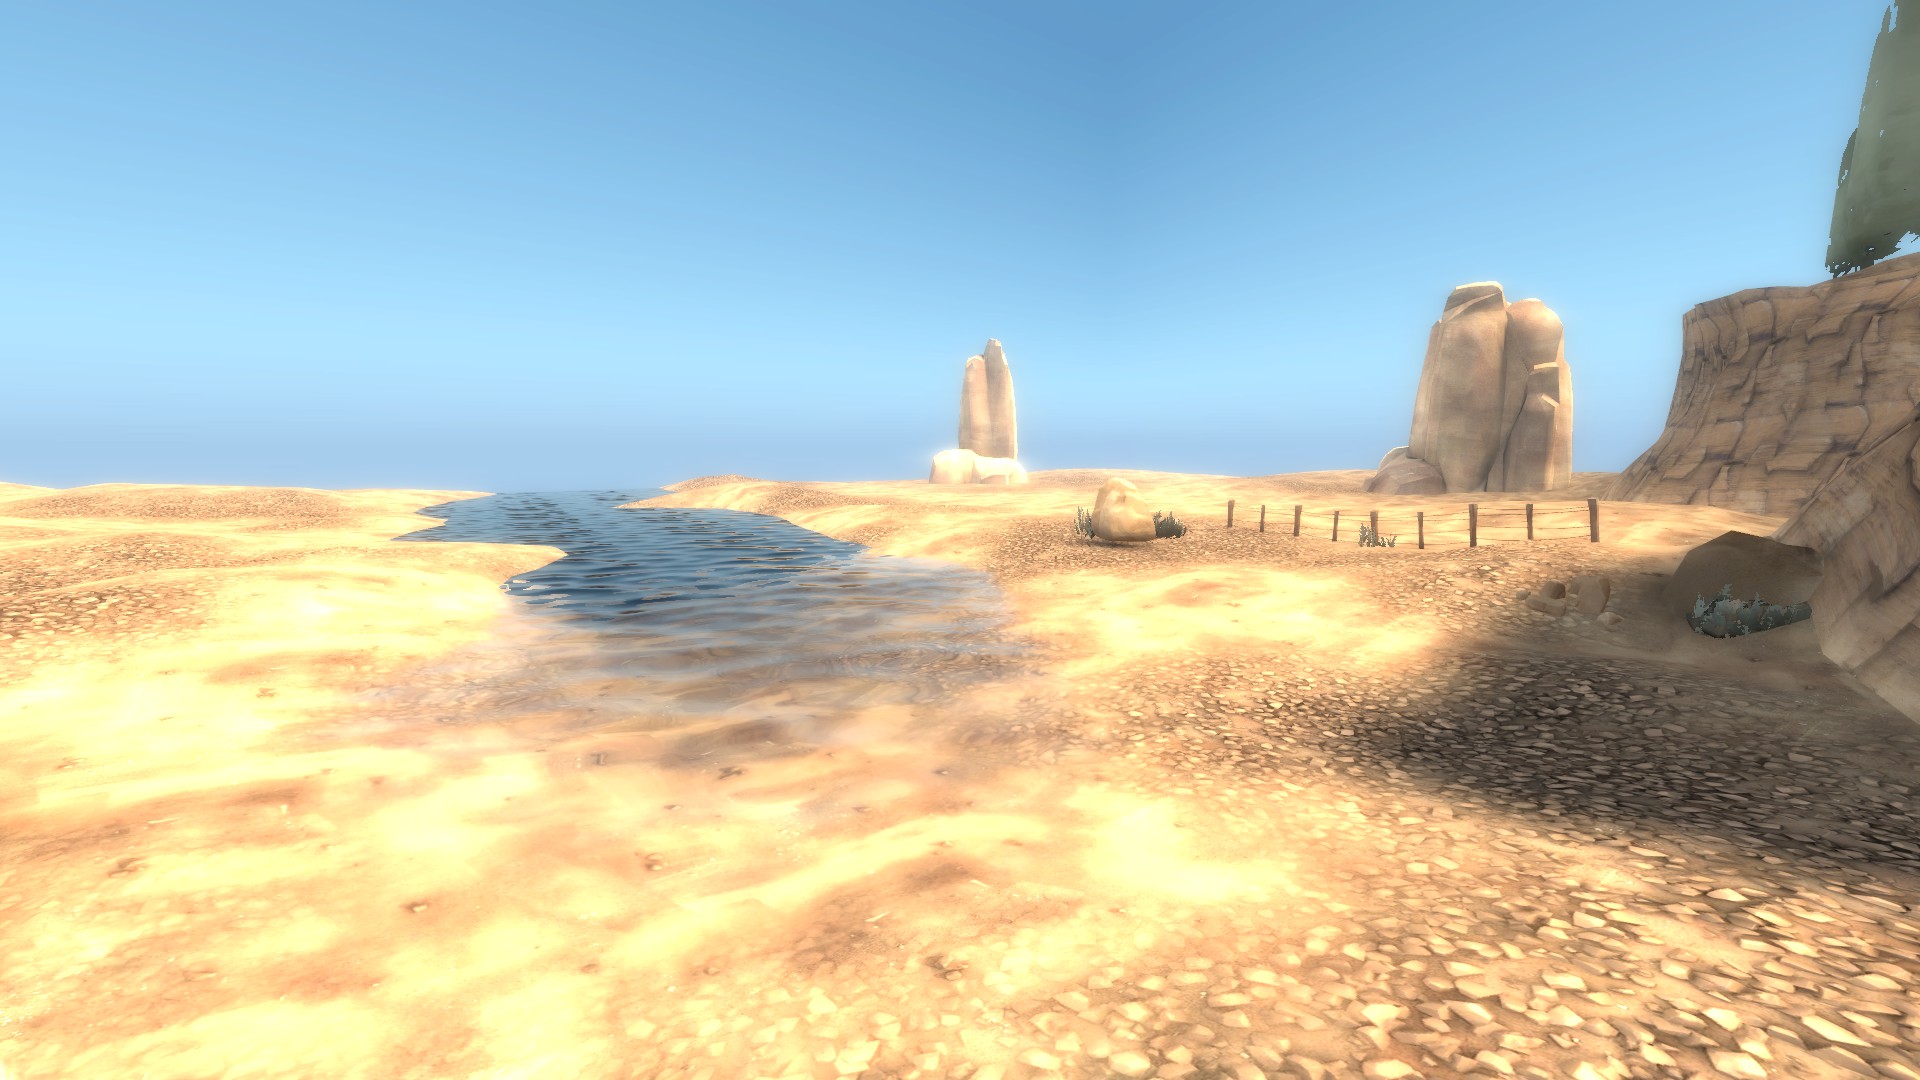
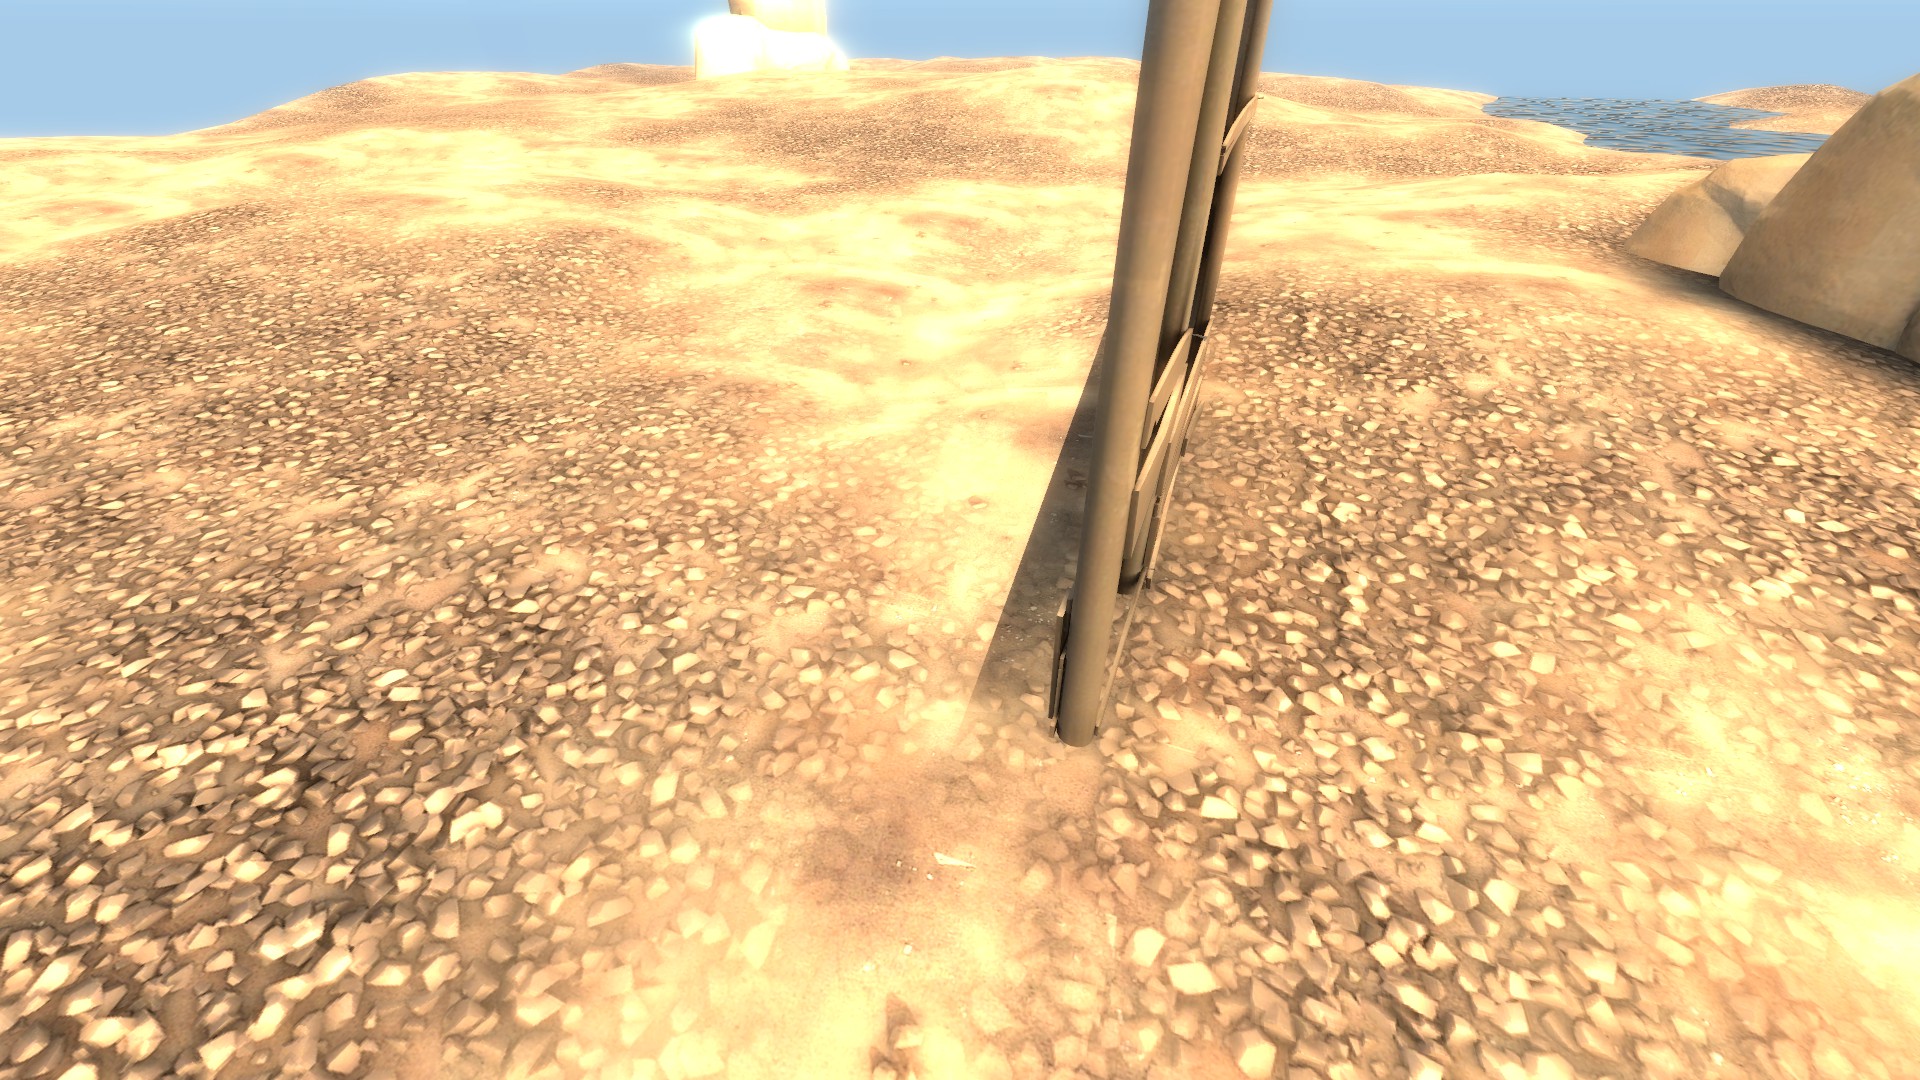
And that's all there is to it, really. If we add a spawn point (because I forgot that) and compile the map, we can see that the skybox appears perfectly seamless with the main map. You can see where I have added fences to mark the transition between the real map and 3D sky from earlier. (Ignore the floating rock...)
However, there are a few issues you need to be aware of.
Firstly, here is an example of where a prop is casting a shadow onto the world that doesn't translate across to the 3D sky.
In this case, I would simply extend the real map to capture the shadow and start the skybox transition later, however often times you can get away with it.
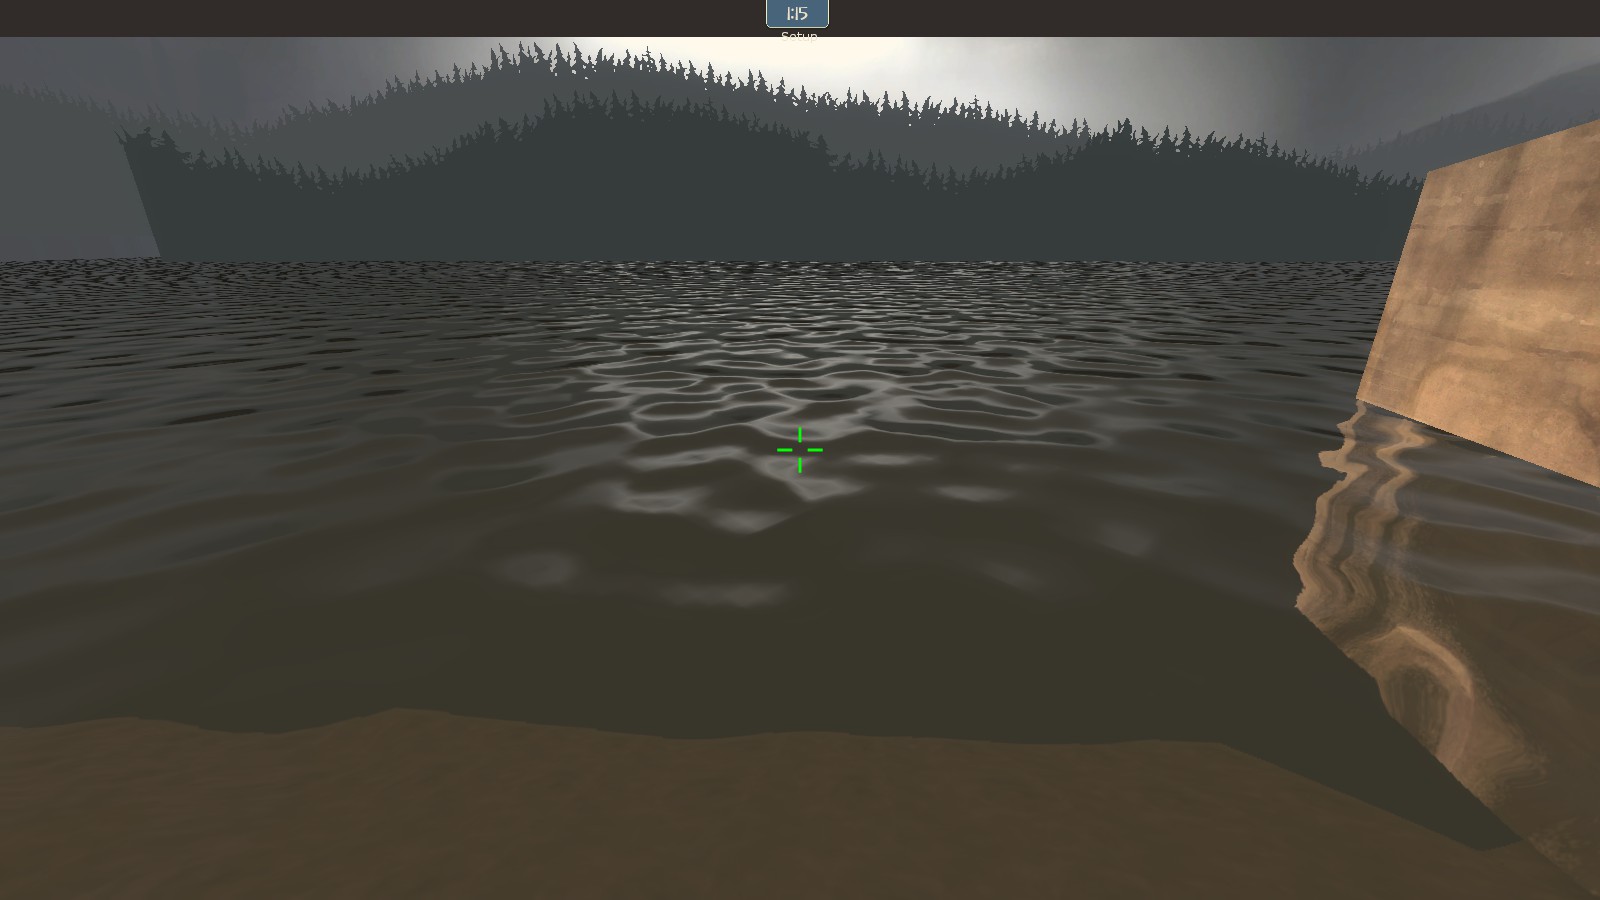
Another issue you may run into is how water is handled across the transition.
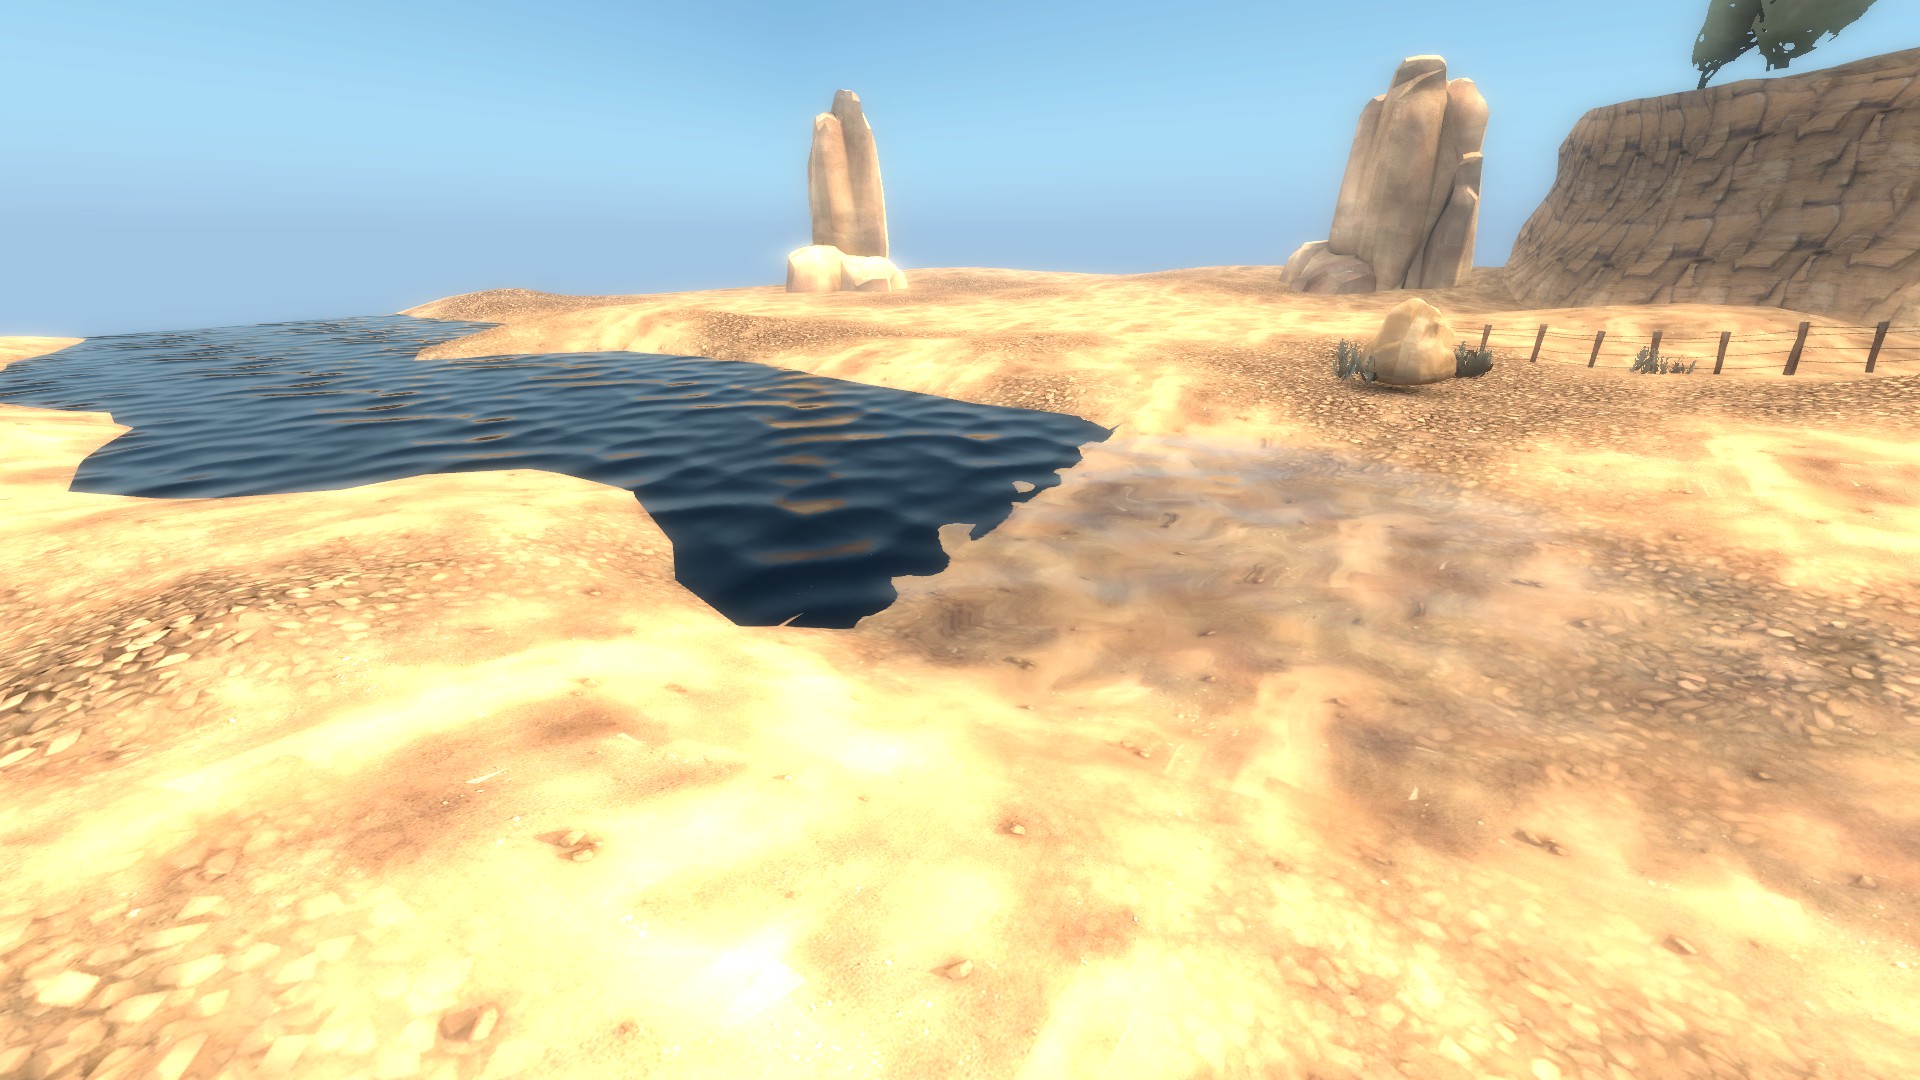
As you can see here, the refracive properties of the water doesn't work properly in the skybox, even though the texture is aligned perfectly. This effect is mostly evident from high angles, and you can allieviate it by increasing the depth of the ground under the water around where it transitions so the change is less evident.
The last issue you may run into is that of the fact that from certain angles, the 3D sky can be rendered behind props inside of your map.
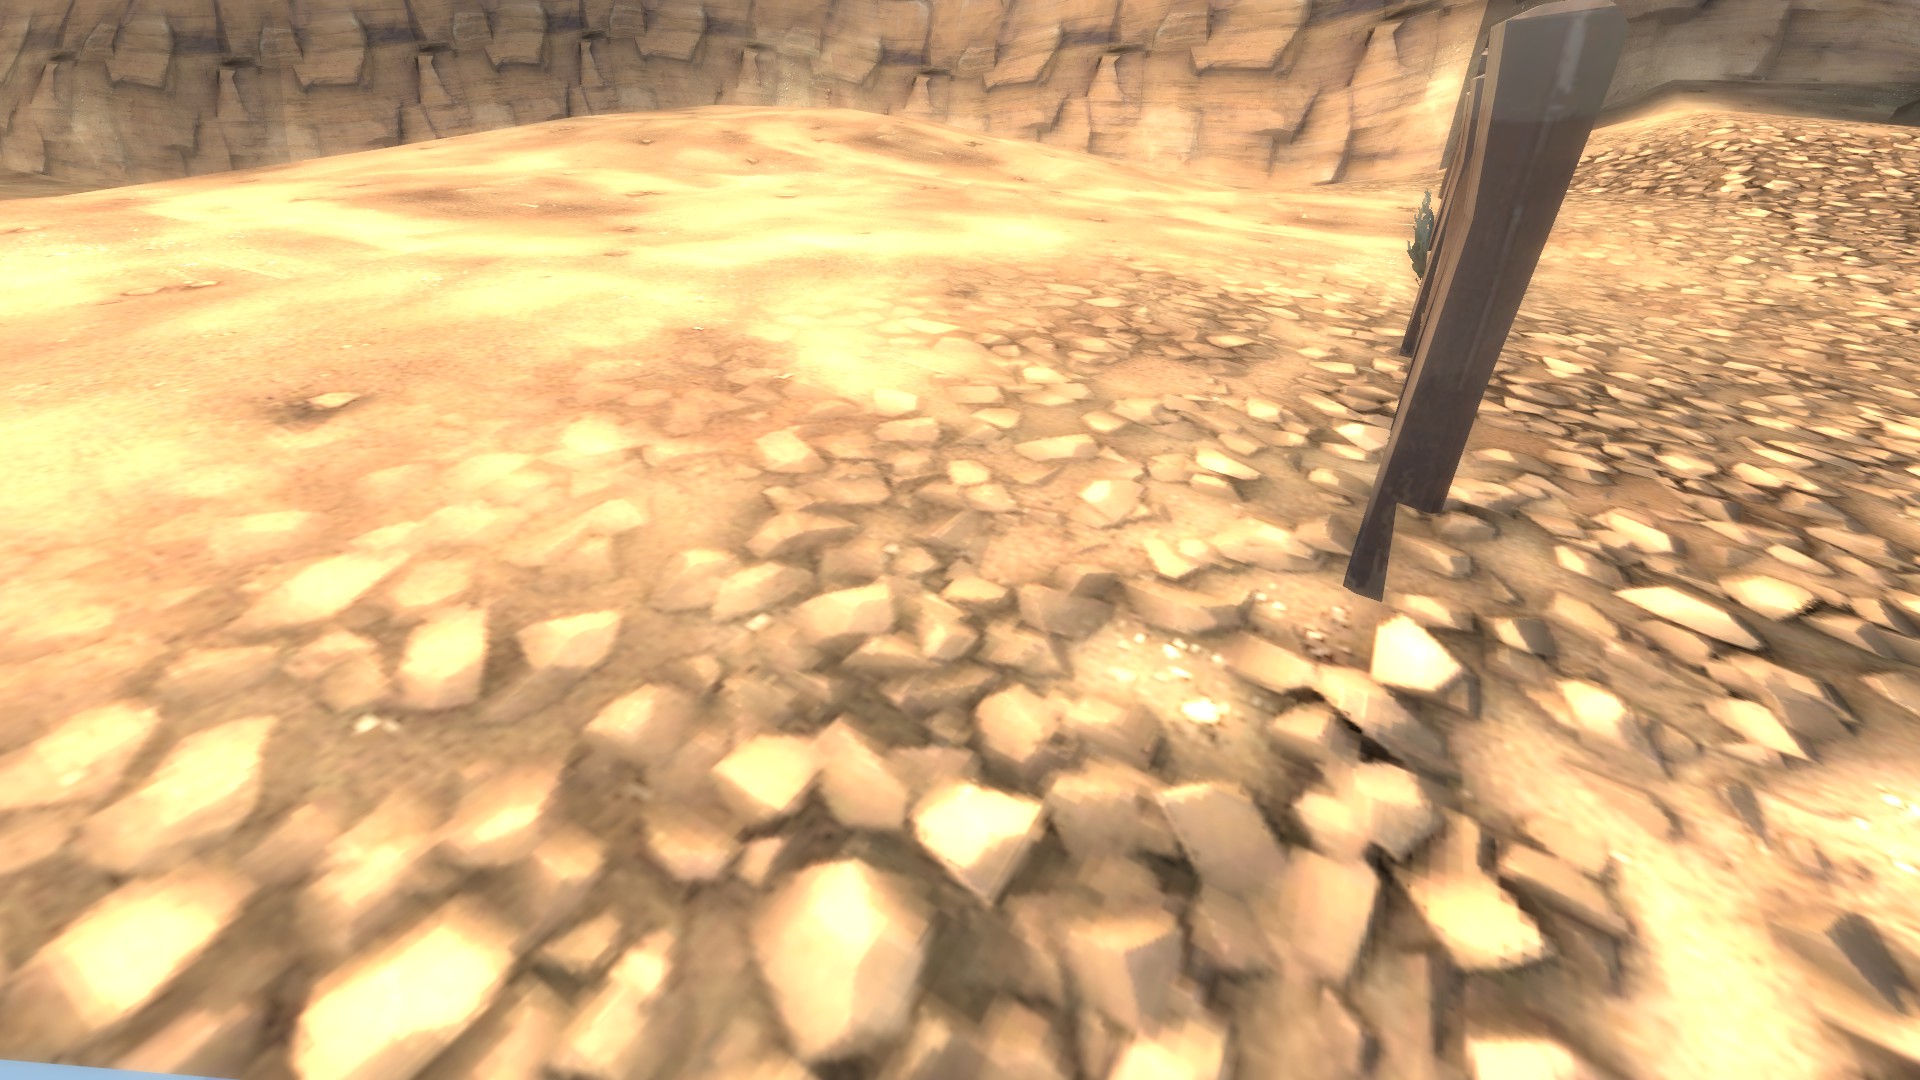
You can't really avoid this as that's just how 3D skies work, so I would suggest, as earlier, extending the real map and starting the skybox transition later.
I hoped this helped you make better 3D skyboxes. If you have any questions or issues, let me know below and I'll try to help.
Let's start with your map. Here I've created a small scene to demonstrate making a seamless skybox. You can do this with any shaped map, but I used a simple square here to demonstrate the technique easier.
The key to the seamless skybox technique is to build your skybox around your map in real scale. Sew your displacements and align your textures here, the technique we use to create the skybox will keep these texture scale and alignments from this portion.
Don't place props in this portion, just create a simple base for your skybox out of displacement and brushes only.
Here I've created an area outside my "map" that will become the 3D skybox. As you can see here, the displacements sew with the map and the water and textures are aligned perfectly with what will say as the "map"
As you can see, I can select everything that will become part of the skybox seperately without selecting anything as part of the map.
The next step is to find your map origin, the 0,0,0 coordinate position. It is indicated by the three lines, one red, blue and green. You then need to create a point entity, change it's class to sky_camera and move it so it is sitting directly on the 0,0,0 point like this.
We do this because the sky camera is an entity that projects the 3D sky around your map from the origin point. By placing the camera at the origin now, we make sure that it is in perfect position to project our 3D sky exactly as it is represented in full size, seamless with your map right now.
The next step is to select your sky_camera and everything that makes up your skybox as shown earlier. It is an absolute imperative that you have the sky_camera select during this step along with everything else as it will not be able to be placed properly later.
Next, make sure you have both the texture lock and texture scale lock buttons turned on:
This will ensure that when we scale down our 3D skybox to 1/16th size, the textures will not become misaligned.
Next, hit Control-M on your keyboard, select the scale radio button and type 0.0625 (ie. 1/16th) into both the X, Y and Z boxes.
After hitting okay, this will leave you with a still currently selected, 3d skybox version of everything you had selected before. It will have scaled down everything, including the textures (because we had texture scale lock on) and kept everything in perfect relation to the sky_camera we had placed at the origin.
You'll want to drag all this stuff (Make sure texture lock is still turned on!!) somewhere off to the side of your map, it doesn't matter where, just don't put it inside your main map.
Create a skybox box around your 3D skybox, making sure nothing inside it leaks. You'll want to make sure this is textured with skybox too, as it needs to cast light on your 3D skybox in order to appear seamless.
You can now place skybox props here. As props do not scale with the transform tool (control-M) we cannot place them any earlier. Here I have placed some simple decoration props from the props_skybox/ section, such as phallic looking rocks and trees.
We also need to worry about the seamlessness between lighting and fog of our skybox and main map.
Your light_environment will produce the same light to both the skybox and main map, so as long as you don't have anything casting obvious shadows in the main map over the transition between normal map and 3D sky (the 3D sky will cast shadows over the main map, but not the other way around), source will take care of this for you.
The main concern is the fog. Find your env_fog_controller entity and your sky_camera (now positioned in the 3D sky area you made somewhere olff to the side of your map).
These are the settings that need to be identical in order for fog to be seamless. Often times you can play around withh these settings a bit and have them still appear seamless, but that's up for you to try. Making them identical will guarentee seamlessness.
The last thing you need to worry about is if you have water crossing the border between map and skybox like I have here. Even though the water texture is perfectly aligned, due to the seperate physical positions in your VMF of the skybox water and real map water, their reflections will appear different and show a seam.
In order to fix this, create a cubemap entity above the water face inside your map. In the cubemap properties, you can select brush faces for the cubemap to affect. Select both the water face in your map, and the water face in your skybox. Once you hit apply, the cubemap entity will draw lines to the faces it is tied to, so make sure it's pointing to both.
And that's all there is to it, really. If we add a spawn point (because I forgot that) and compile the map, we can see that the skybox appears perfectly seamless with the main map. You can see where I have added fences to mark the transition between the real map and 3D sky from earlier. (Ignore the floating rock...)
However, there are a few issues you need to be aware of.
Firstly, here is an example of where a prop is casting a shadow onto the world that doesn't translate across to the 3D sky.
In this case, I would simply extend the real map to capture the shadow and start the skybox transition later, however often times you can get away with it.
Another issue you may run into is how water is handled across the transition.
As you can see here, the refracive properties of the water doesn't work properly in the skybox, even though the texture is aligned perfectly. This effect is mostly evident from high angles, and you can allieviate it by increasing the depth of the ground under the water around where it transitions so the change is less evident.
The last issue you may run into is that of the fact that from certain angles, the 3D sky can be rendered behind props inside of your map.
You can't really avoid this as that's just how 3D skies work, so I would suggest, as earlier, extending the real map and starting the skybox transition later.
I hoped this helped you make better 3D skyboxes. If you have any questions or issues, let me know below and I'll try to help.
Last edited: