NOTE: This tutorial assumes you have knowledge of instances, if you don't know what instances are, please read this article first.
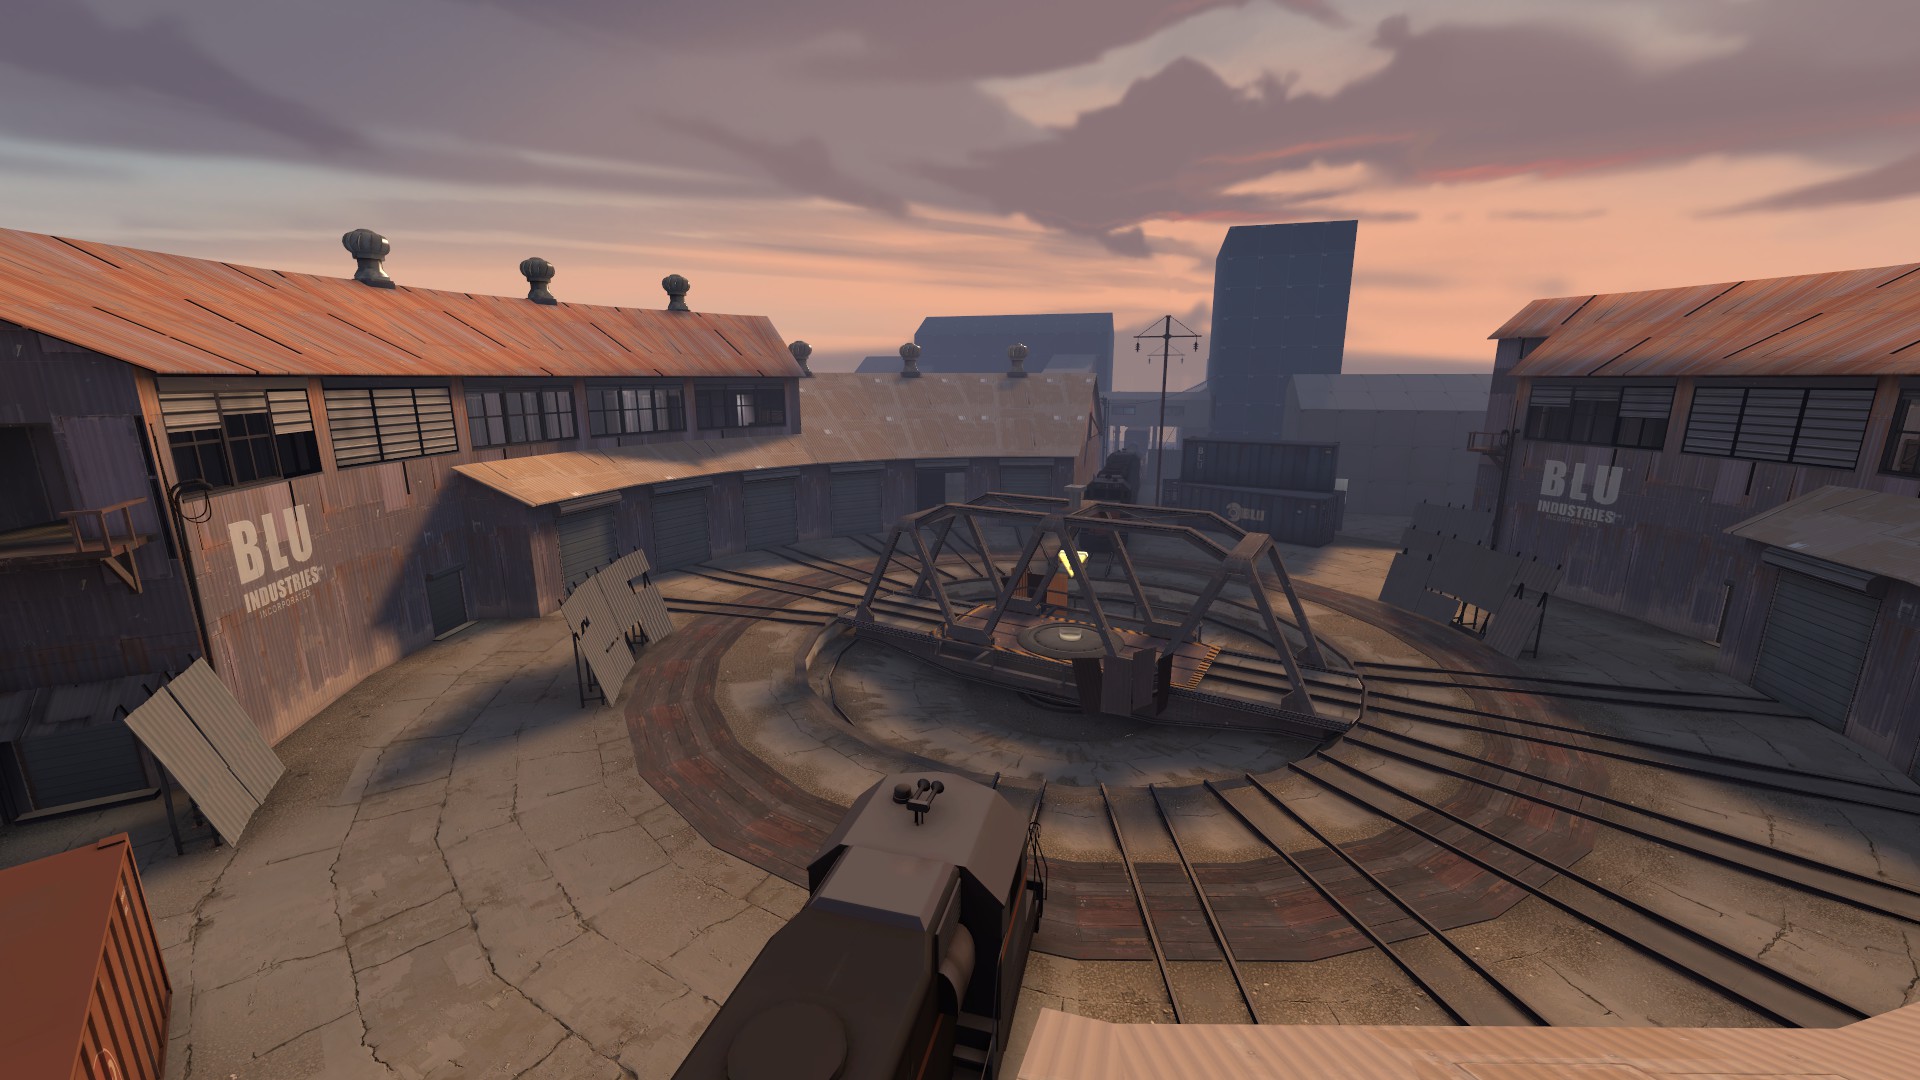
Before I begin, I'd like to give a shout-out to Andrew Weldon who not only created this method, but also KOTH Roundhouse, a rather interesting KOTH map whose mid is completely comprised of curved sections made using this method.
Anyway, I suppose I should get on with the tutorial now..
So first of all, if you're not familiar with it, you may be asking, "what is floating point precision loss?" - to answer your question, the way brushes work is that all of their vertices refer to a point on the grid.
When these vertices start going off grid and then get transformed (moved, resized, rotated etc) in some way, they tend to start losing precision.
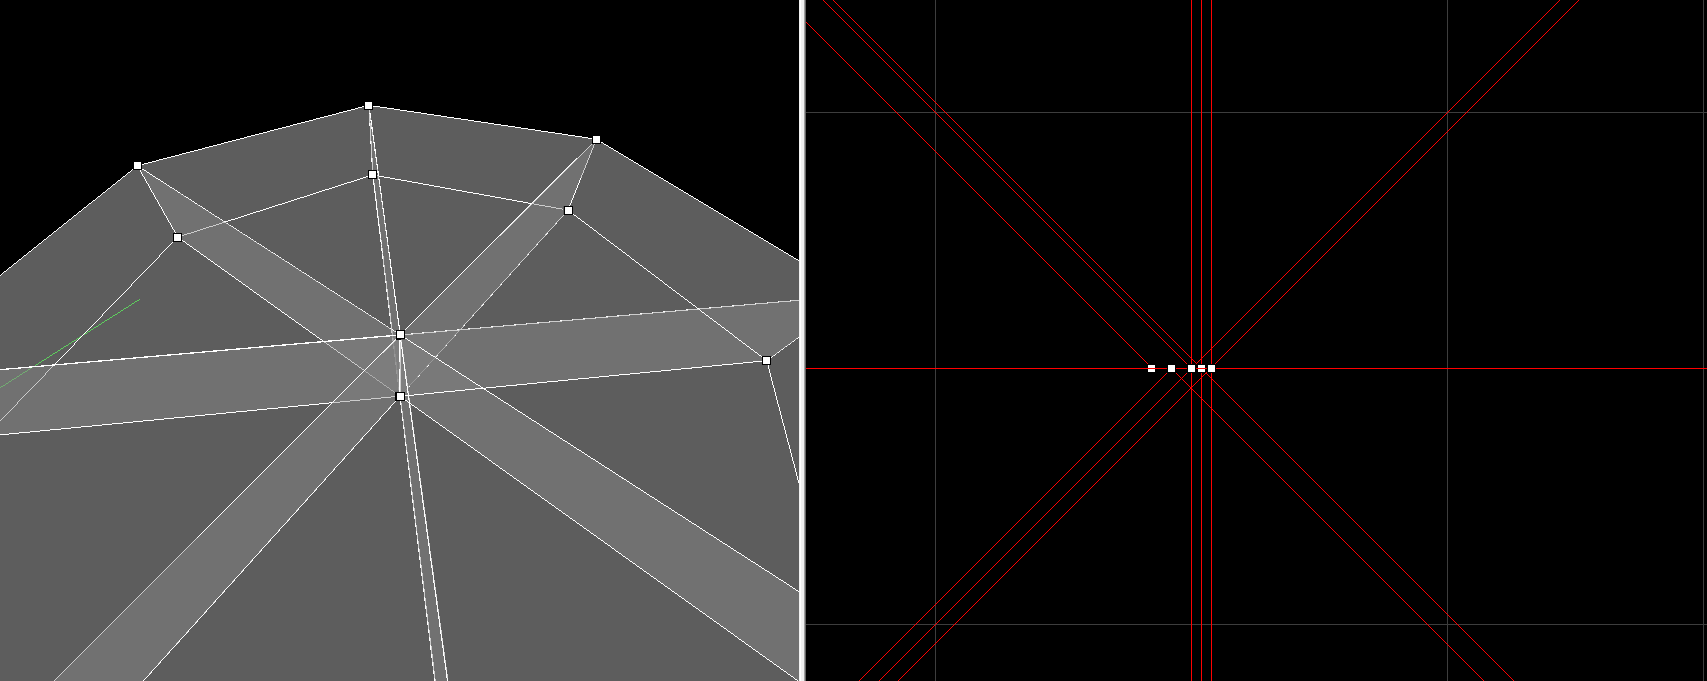
how floating point precision loss can look on the 3D and 2D view
The two biggest reasons this is bad are that this may cause issues with VSBP during your compile, and brushes with floating point loss probably won't be able to seal your map.
If you'd like to know more, ask around the community.
Anyway, now that we've covered what floating point loss actually is, let's move onto the method we're going to use.
First, select the texture tools/toolsskip and draw two 2048x512 brushes opposite each other around the origin, like so, and then select them.
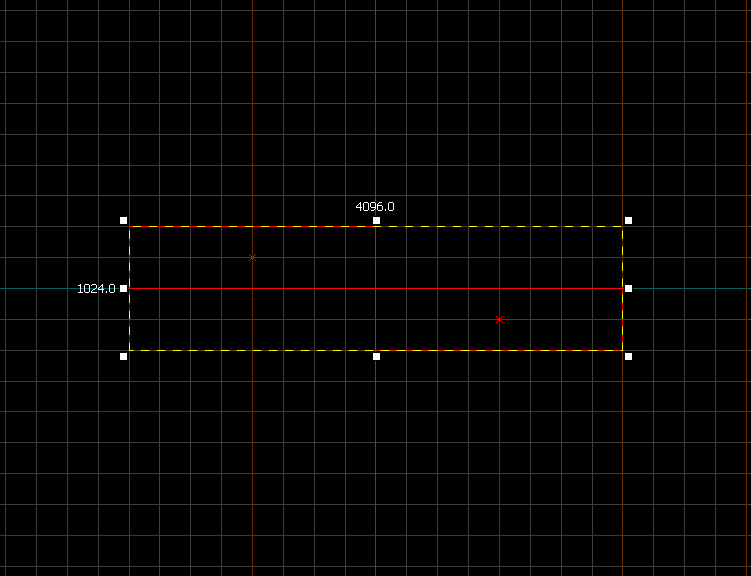
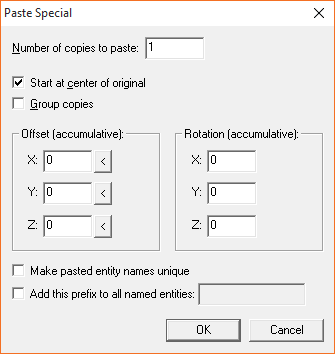
While your brushes are selected, press CTRL+M to open the transform dialogue, rotate them -7.5 degrees on the Z axis. Copy your rotated brushes, and then go to Edit > Paste Special and use these settings.
With your rotated brushes duplicated, select the duplicated brushes and press CTRL+L, this will flip them horizontally.
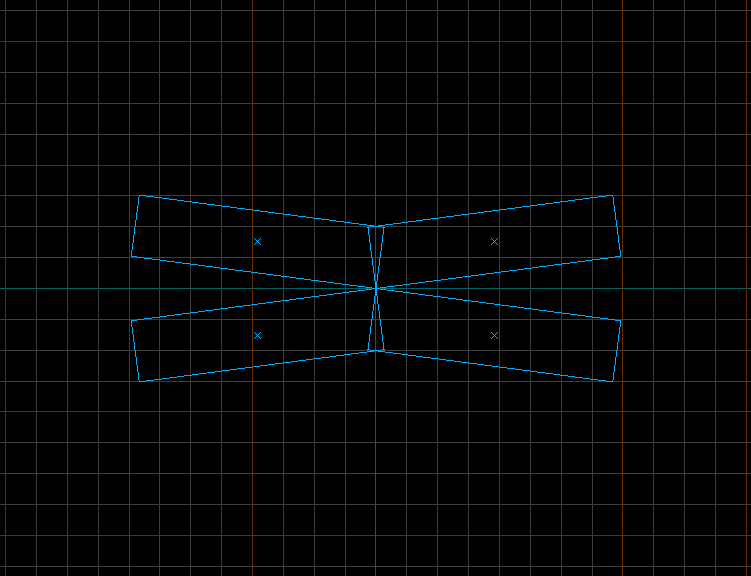
Now select the two brushes on the right, delete them, and then clip off the excess of the other two along the origin. If you've followed all of these instructions, you should end up with something like this.
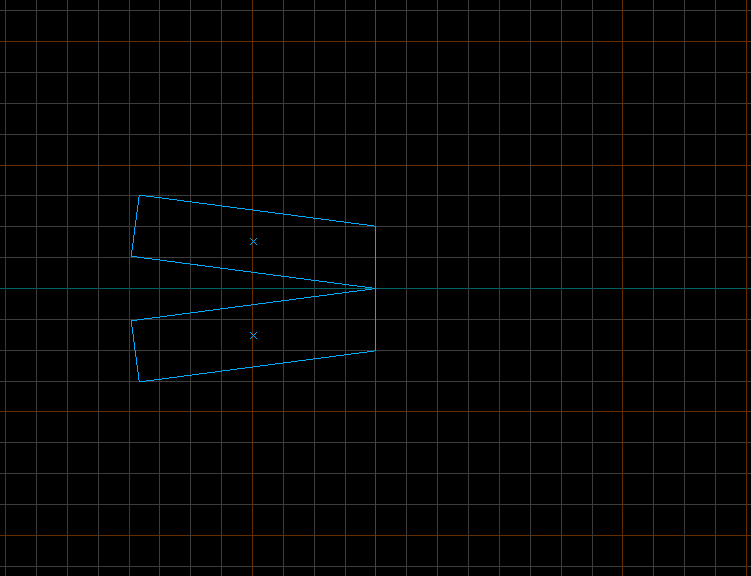
Congratulations, you've successfully created brushes to clip your geometry with.
Now, within the space between these two brushes, create your geometry, do whatever you like. As an example I'm going to try and create a structure in a similar style to the ones on KOTH Roundhouse.
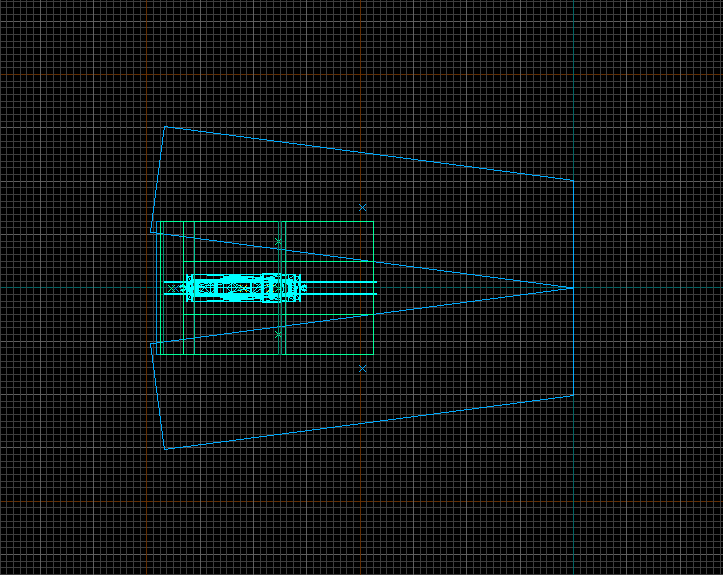
Once your structure is created, make sure it's lined up between the skip brushes to your liking. Once you're happy with the results, select one of the skip brushes and Carve (CTRL+SHIFT+C). Do this step again with the other skip brush.
(Note: This is one of the few instances that carving is okay!)
The sides of your creation will be chopped off and you should be left with a wedge like this.
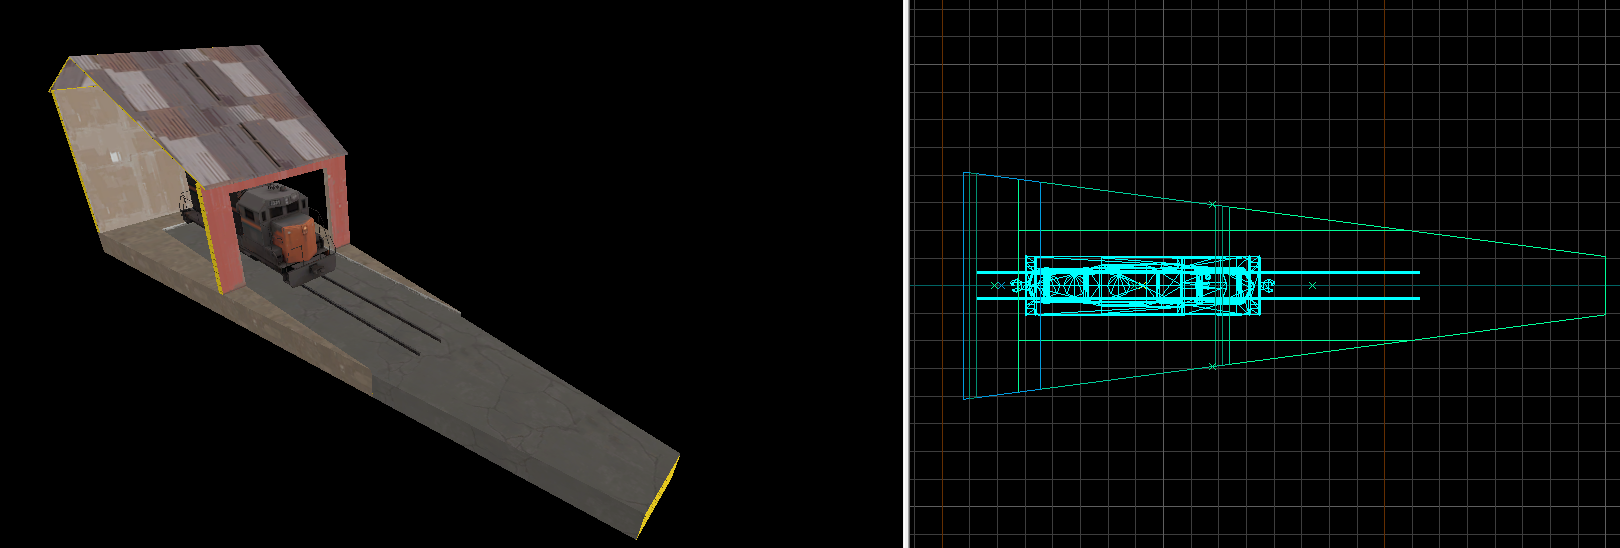
Now save this wherever you keep your instances relative to your main map and close it.
Open your main map and with the entity tool, create a func_instance. Set the VMF filename to whatever you just created and it should appear. Rotate it 15 degrees around the origin of the func_instance and you should see your pieces line up perfectly!
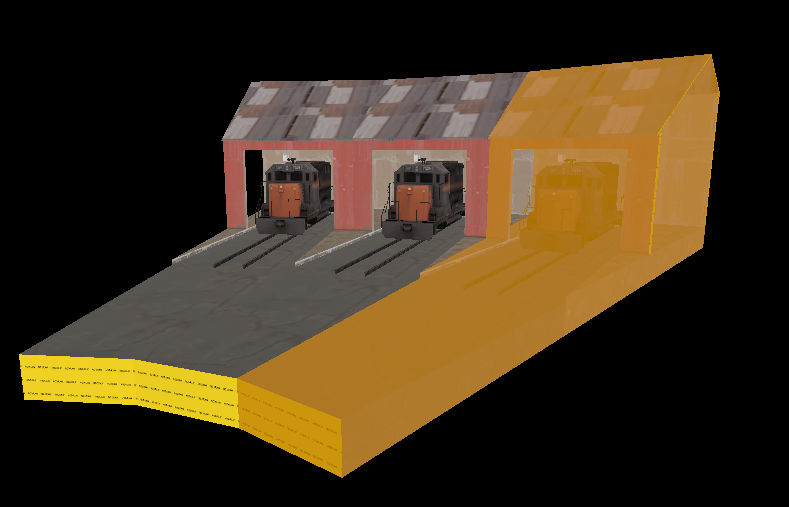
That's all for this tutorial, however there's a few things to note:
Before I begin, I'd like to give a shout-out to Andrew Weldon who not only created this method, but also KOTH Roundhouse, a rather interesting KOTH map whose mid is completely comprised of curved sections made using this method.

Creating Modular Curved Structures with Zero Floating Point Precision Loss
So first of all, if you're not familiar with it, you may be asking, "what is floating point precision loss?" - to answer your question, the way brushes work is that all of their vertices refer to a point on the grid.
When these vertices start going off grid and then get transformed (moved, resized, rotated etc) in some way, they tend to start losing precision.

how floating point precision loss can look on the 3D and 2D view
The two biggest reasons this is bad are that this may cause issues with VSBP during your compile, and brushes with floating point loss probably won't be able to seal your map.
If you'd like to know more, ask around the community.
Anyway, now that we've covered what floating point loss actually is, let's move onto the method we're going to use.
First, select the texture tools/toolsskip and draw two 2048x512 brushes opposite each other around the origin, like so, and then select them.

While your brushes are selected, press CTRL+M to open the transform dialogue, rotate them -7.5 degrees on the Z axis. Copy your rotated brushes, and then go to Edit > Paste Special and use these settings.

With your rotated brushes duplicated, select the duplicated brushes and press CTRL+L, this will flip them horizontally.

Now select the two brushes on the right, delete them, and then clip off the excess of the other two along the origin. If you've followed all of these instructions, you should end up with something like this.

Congratulations, you've successfully created brushes to clip your geometry with.
Now, within the space between these two brushes, create your geometry, do whatever you like. As an example I'm going to try and create a structure in a similar style to the ones on KOTH Roundhouse.

Once your structure is created, make sure it's lined up between the skip brushes to your liking. Once you're happy with the results, select one of the skip brushes and Carve (CTRL+SHIFT+C). Do this step again with the other skip brush.
(Note: This is one of the few instances that carving is okay!)
The sides of your creation will be chopped off and you should be left with a wedge like this.

Now save this wherever you keep your instances relative to your main map and close it.
Open your main map and with the entity tool, create a func_instance. Set the VMF filename to whatever you just created and it should appear. Rotate it 15 degrees around the origin of the func_instance and you should see your pieces line up perfectly!

That's all for this tutorial, however there's a few things to note:
- All the numbers in this tutorial are interchangeable, for example, rotating the skip brushes 7.5 degrees, we do this because our intent is to rotate our pieces by 15 degrees. If you want to rotate your pieces by 10 degrees, you would rotate your skip brushes 5 degrees instead.
- You should keep a copy of your unclipped instance geometry in-case you wish to make any changes.
- Don't change any of your geometry after clipping as this could lead to floating point precision loss.
- If you have any questions, feel free to ask.

