Compiling
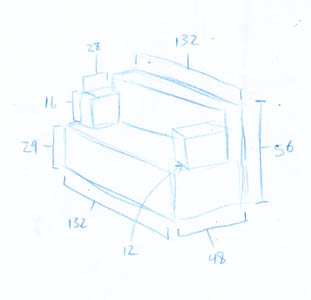
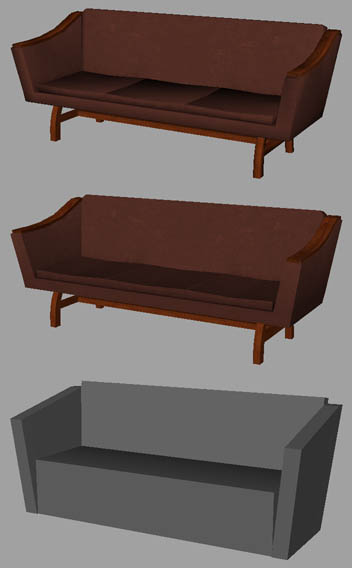
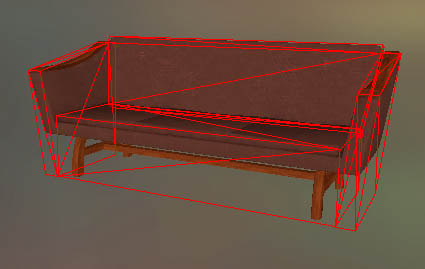
If you've followed all the steps so far, you should have a directory with at least a few .SMD files. There's your main model file, and your collision model, as well as any additional models for levels of detail if you made them. I ended up with three models total. A high-res, a low-res, and a collision model.
One last thing your model needs is a .QC file, which is a text file that designates how the compiler should put your model together.
Here's a plain and basic version of the .QC file for my couch:
Code:
/*
----------------
Officecouch QC
----------------
*/

 officecouch.mdl
 0 0 0 90
 1.0
 "Body" "officecouch_1.smd"

 "carpet"
 Z
 "officecouch/"

 "idle" "officecouch_1.smd" fps 30

 "officecouch_c2.smd"
{
    //Mass in kilograms
     20.0

}
That's just the bare necessities for a QC file. I'll show you some extras you can put in later.
Now, here's a rundown of what each line does, so you know what to change:
The first five lines are just a header to make it look nice, pretty much. It has no bearing on the actual object.
$modelname _________.mdl - this is the official name of your model.
$origin 0 0 0 90
$scale 1.0 - these two lines would allow you to change the size and origin point of the model, but you should do that on your own in your 3D pacakage beforehand.
$body "Body" "___________.smd" - In this line you designate the .SMD file that is your main, full-res model.
$staticprop - your object is a static prop. I'm sure if you're making a dynamic prop this line would be different.
$surfaceprop "_______" - as we did back when we made a material for the object, this lets you designate what the object is made out of. What does it sound like when you walk on it? What do the bullet holes look like? I don't know why we have to set this option in both places (or if we really even have to), but it's easy enough to do. Once again,
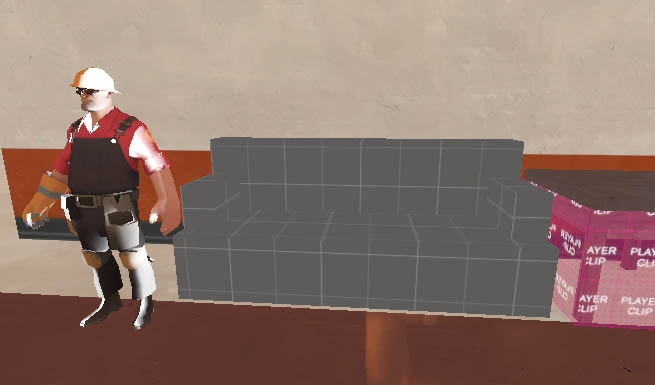
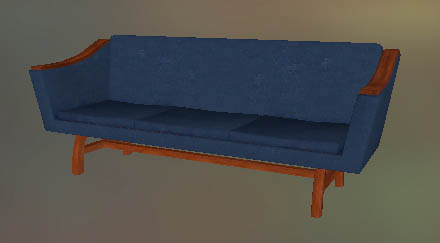
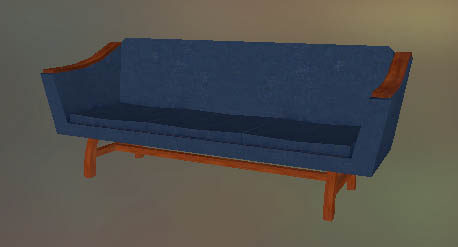
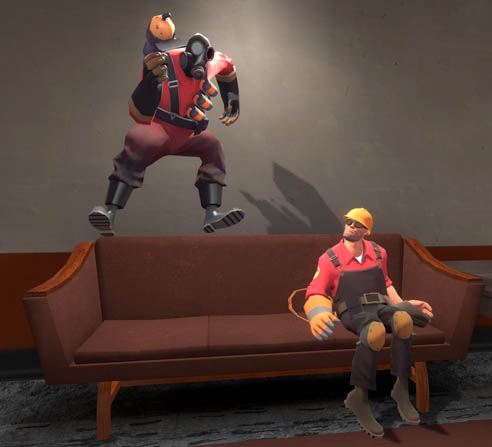
here is that list of different surface properties you can have. You should see my couch getting shot with the "carpet" property. It's great.
$upaxis ___ -
Important! Different 3D software packages choose different things for the "up" axis. 3dsMAX, Maya, XSI, and Mod Tool all use Z to denote height. HOWEVER, Hammer uses Y. What that means is if you don't correct it, your models will come in sideways. If you set the up axis to Z here, it will correct the model for you automatically when it's compiled.
$cdmaterials "__________" - This tells it where your objects materials are located (The .VTF and .VMT files). It assumes you're starting in the \materials directory, so since we're putting textures in their own subdirectory under the model name, your path will be "YourModelName/".
$sequence "idle" "___________.smd" fps 30 - If your model were to animate, this is where you would indicate an animated .SMD file. You'd even be able to designate several animation sequences besides "idle" if you wanted. But if your object doesn't animate, you just need the idle animtaion. You can get that from the main fell-res .SMD that you've entered previously. No animation required.
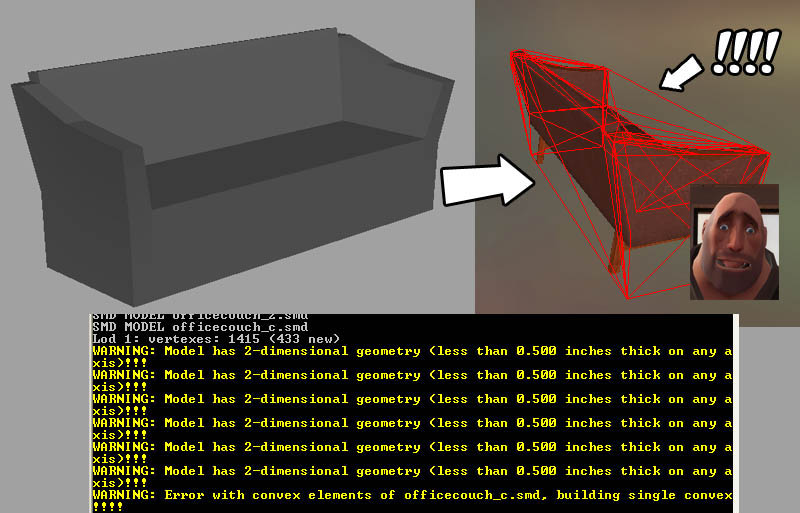
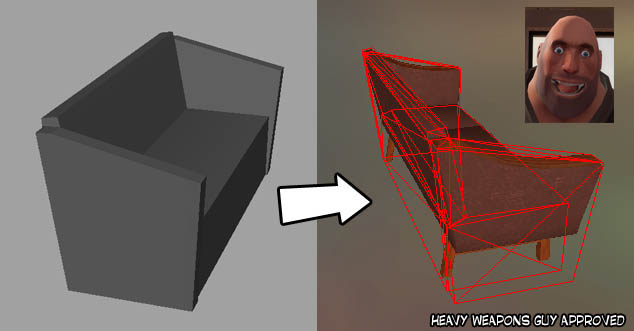
$collisionmodel "___________.smd" - as you may guess, you indicate the collision model in this line. But what follows in the braces is an estimation of the object's weight (in kilograms). I don't know what a couch weighs, so I just guessed 20. Metric weight units are both convenient and scary.
$concave means that the collision model is made up of multiple
objects, so the compiler shouldn't just put one shrink-wrapped shell around the collision model.
That's it! That will give you the ability to compile a basic model. But wait, there are a few features you can add if they apply to your object.
What about level-of-detail models?
If you have a low-res model of your object like the one I made for my couch, you add this little section to your file:
Code:
 50
{
     replacemodel "officecouch_1" "officecouch_2"
}
Remember, officecouch_1 was my full-res model and officecouch_2 was my low-res model.
You can also set multiple levels of detail if you have multiple LOD models:
Code:
 66
{
     replacemodel "officecouch_1" "officecouch_2"
}
 33
{
     replacemodel "officecouch_1" "officecouch_3"
}
And also, what if your model has multiple textures, like a different color set?
When I want to add the blue version of my couch, I add a section
immediately after the $body line:
Code:
 "Body" "officecouch_1.smd"
 skinfamilies
{
	{ "officecouch" }
	{ "officecouch_b" }
}
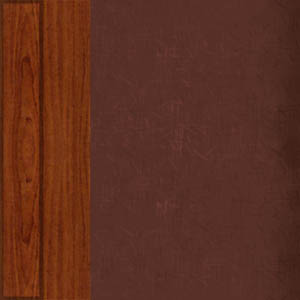
This sets up two skin families. The first is my default material, officecouch.vmt. The second is the blue version, officecouch_b.vmt
So for reference, here is the .QC file for my couch, with all the extras added:
Code:
/*
----------------
Officecouch QC
----------------
*/

 officecouch.mdl
 0 0 0 90
 1.0
 "Body" "officecouch_1.smd"
 skinfamilies
{
	{ "officecouch" }
	{ "officecouch_b" }
}

 "carpet"
 Z
 "officecouch/"

 "idle" "officecouch_1.smd" fps 30

 50
{
     replacemodel "officecouch_1" "officecouch_2"
}

 "officecouch_c2.smd"
{
    //Mass in kilograms
     20.0

}
Are you ready to compile?
Valve created a utility called studiomdl.exe that is run via commandline parameters. It's in the source_sdk\bin\oragebox\bin direcotry. If you don't have a guide or any kind of help for this utility, it can become a very frustrating kink in the pipeline. There are alternatives that create a frontend, but the ones I've tried are pre-OrangeBox and don't seem to work properly. I've worked out a system of creating a .BAT file to compile my models and it removes a great deal of the hassle.
In the direcorty with my .SMD files I create a batch file called "officecouch_compile.bat" that looks like this:
cd c:\Program Files\Steam\steamapps\YourSteamName\sourcesdk\bin\orangebox\bin\
studiomdl.exe -nop4 -game "c:\Program Files\Steam\steamapps\YourSteamName\team fortress 2\tf" "c:\Program Files\Steam\steamapps\YourSteamName\sourcesdk_content\tf\modelsrc\officecouch\officecouch.qc"
pause
See how that works?
The first line switches to the directory where studiomdl.exe is stored.
The second line executes it with these parameters:
-nop4 - disables functions that make Studiomdl think you're using Valve's asset-sharing network.
-game path - sets the path to your Team Fortress 2 directory where the game info is stored.
path - sets the path to the .QC file for your model
Remember, for those paths, you need to change the paths to reflect how the directories are set up on your machine. That "YourSteamName" will actually be your Steam login ID. And of course you won't put "officecouch" or "officecouch.qc" in your batch file, but change those to your new object and its directory.
The thrid line is just "pause". This keeps the DOS window from shutting down before you can look at the results of your compile.
Now, you can simply execute that batch file any time you want to recompile your model. It sure beats opening up a DOS window and typing all the crap over and over again.
EXECUTE IT! Compile your model! If you have all your files ready and in the correct directories, and if the paths are all correct, Studiomdl will begin to compile your model... and it shouldn't take long. When it's finished, you should be able to look through your compile log and check for any errors. If it worked, you'll be able to find your model files in the Team Fotress 2\tf\models directory.
Here's what files my couch resulted in:
officecouch.mdl
officecouch.phy
officecouch.vvd
officecouch.dx80.vtx
officecouch.dx90.vtx
officecouch.sw.vtx
You'll need to copy your material files over from your SourceSDK_content folder to your Team Fortress 2 folder. Put all those .VTF and .VMT folders in the Team Fortress 2\tf\Materials\Yourmodel\ directory.
Now, did your model work? There's one very convenient way to find out...