Here is a guide for people who want their skybox to be mathematically PERFECT.
I might just be making a redundant guide but it seemed to me like there aren't any specific guide dedicated for this. Please tell me if there is already.
Step 1: Create a basic cube map.
This first step involves you drawing a cubemap texture for the skybox. Don't worry anything about distortion just yet.
Like this:
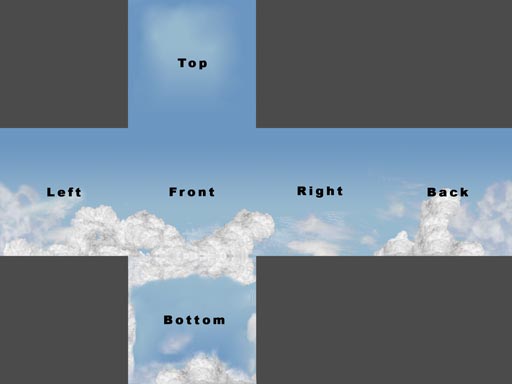
As you can see, each side is not distorted but they show the surroundings.
If you want to know how to connect textures, check this guide on interloper.
Step 2: Open blender
We are going to distort the image using Blender. Its a free 3d modeling tool which you can download from here.
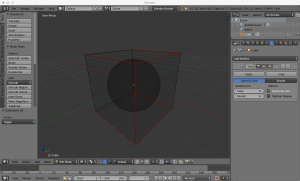
Now that you downloaded the program, open it up!
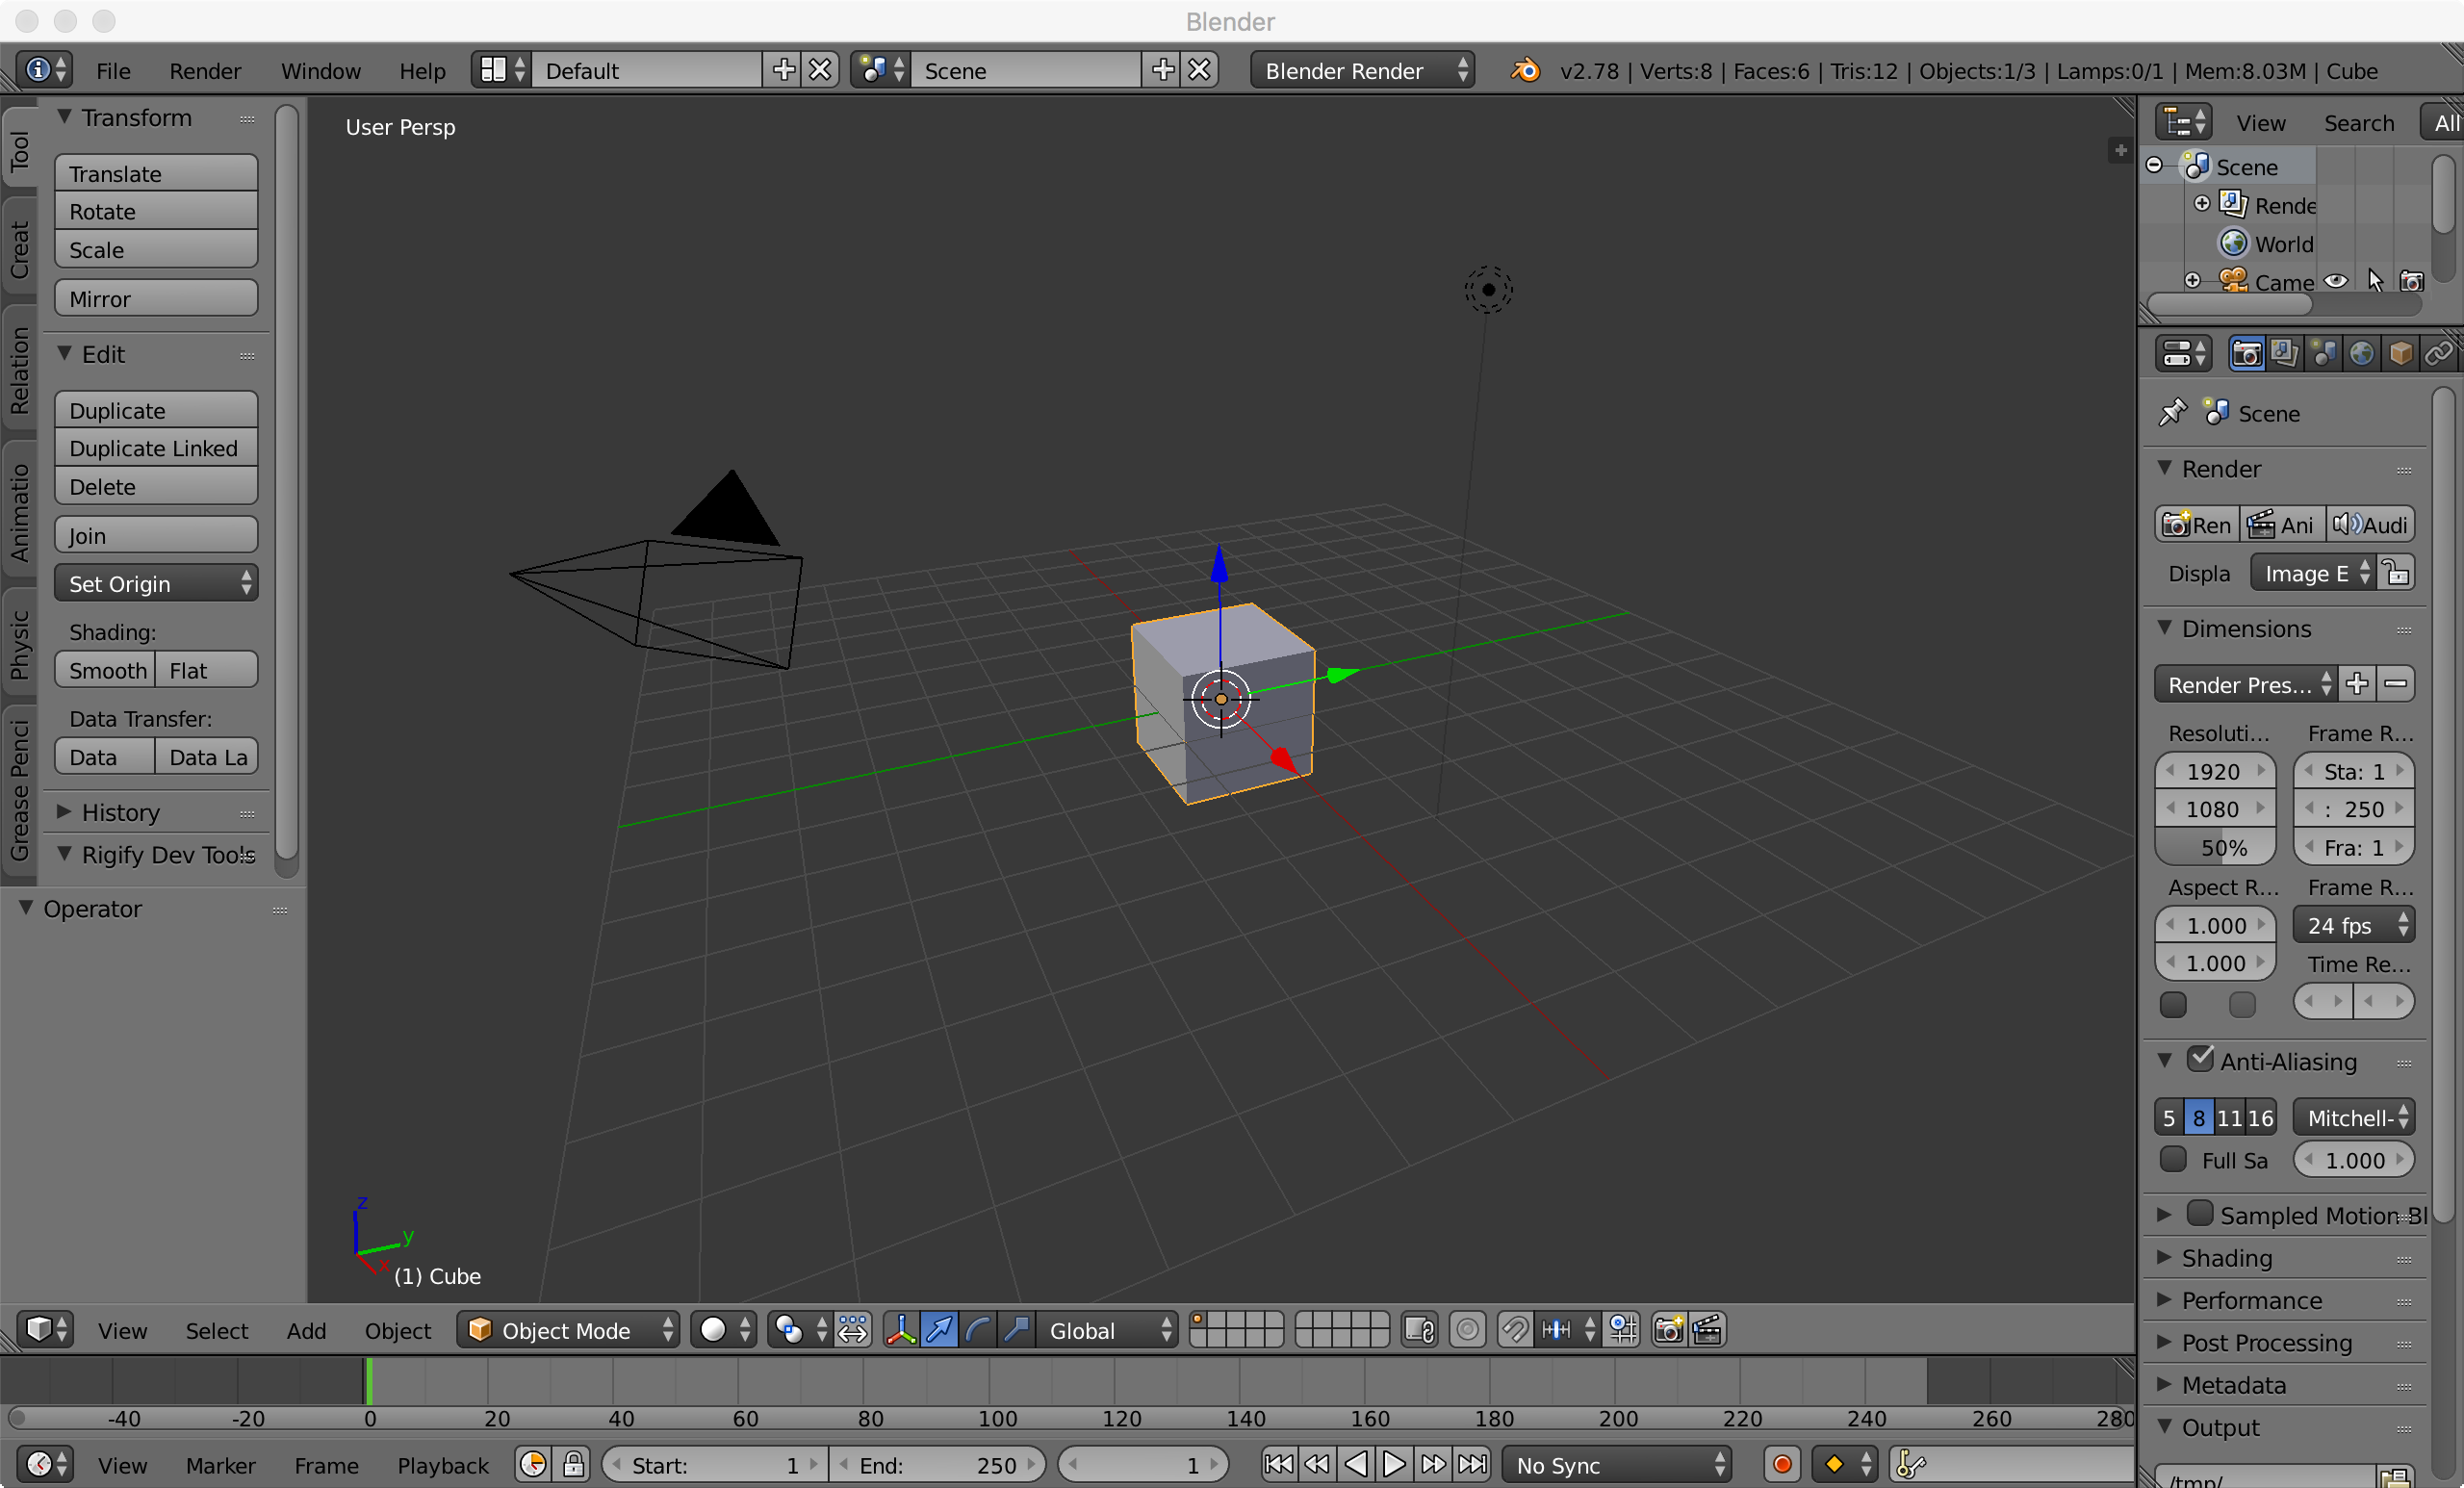
Before we start, these are the controls you'll need in this guide.
Select:
-Right mouse button.
-Shift + right mouse button to select multiple objects.
-Press A to select, deselect everything
Rotate: Press r, input axis (x,y and z), exact angle. Or press r, move your mouse, press left mouse button to apply rotation or right mouse button to cancel rotation. (You won't need to rotate free hand in this guide)
Scale: Press S
Maneuver your view:
-Press Middle mouse button to rotate around
-Use middle mouse button to zoom in/zoom out
-Shift + press middle mouse button to move your view
Copy Paste
-Shift + D NOT ctrl c/v
Delete:
-Press x after selecting.
Ctrl z or Command z
ok, now you'll be able to go through this guide without any problem even if you have never touched a 3D modeling tool before.
Step 3: Setup your blender
You can either follow this guide or skip almost half of this step by downloading this template.
Please take a look at all the steps. It took me 2 hours to write .
.
For those who want to DIY,
Start by deleting everything but the cube in the center.
Select the cube.
Go to the right side of the screen and press this:
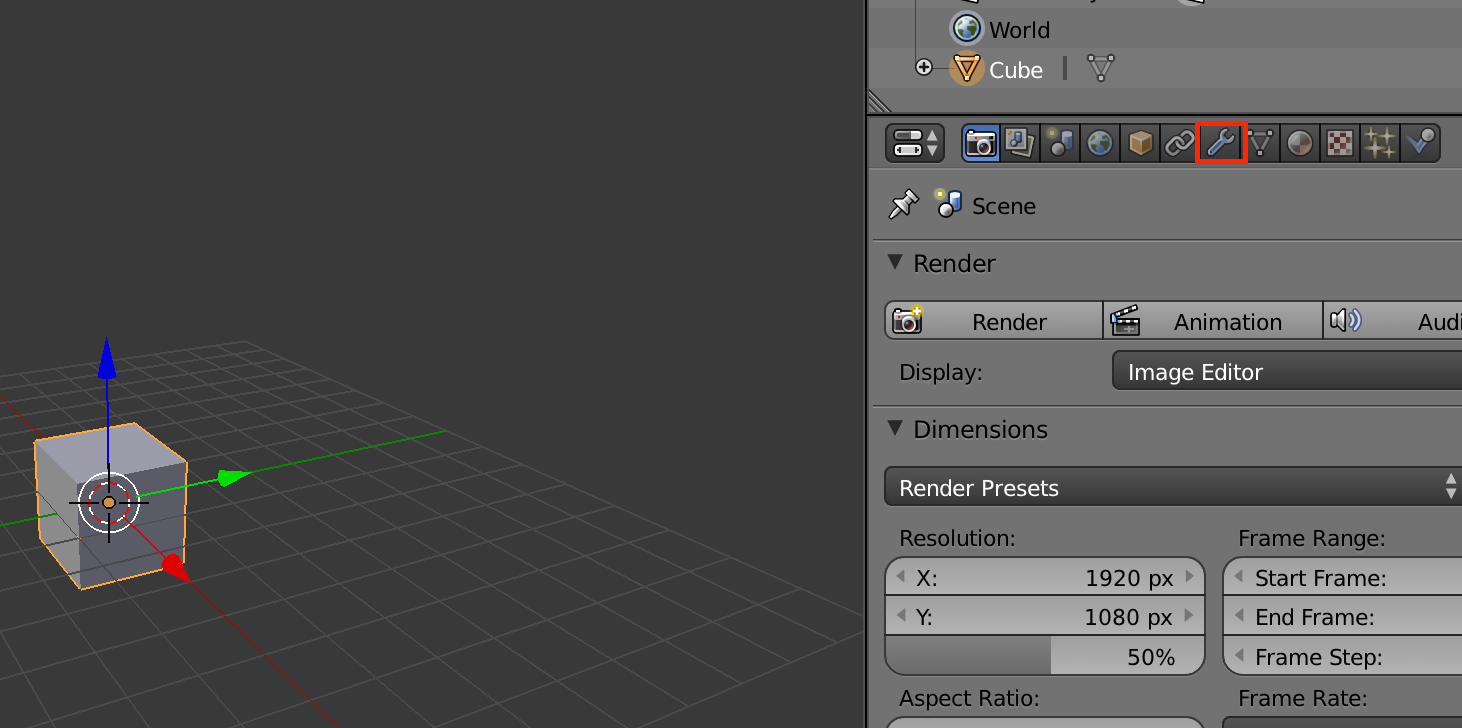
If you can not see the icon, you can drag it to make it show up. Hover your mouse over this line: and drag it.
Do not drag using this. I'll get to this later:

That icon you pressed is an object modifier panel.
Add a modifier and you'll be provided with hosts of options but find 'subdivision surface'
There are a few options to the modifier.
Change View and Render to 6 (maximum).
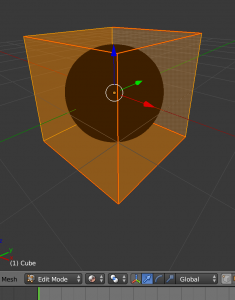
As you can see, the cube is now more sphere-like:
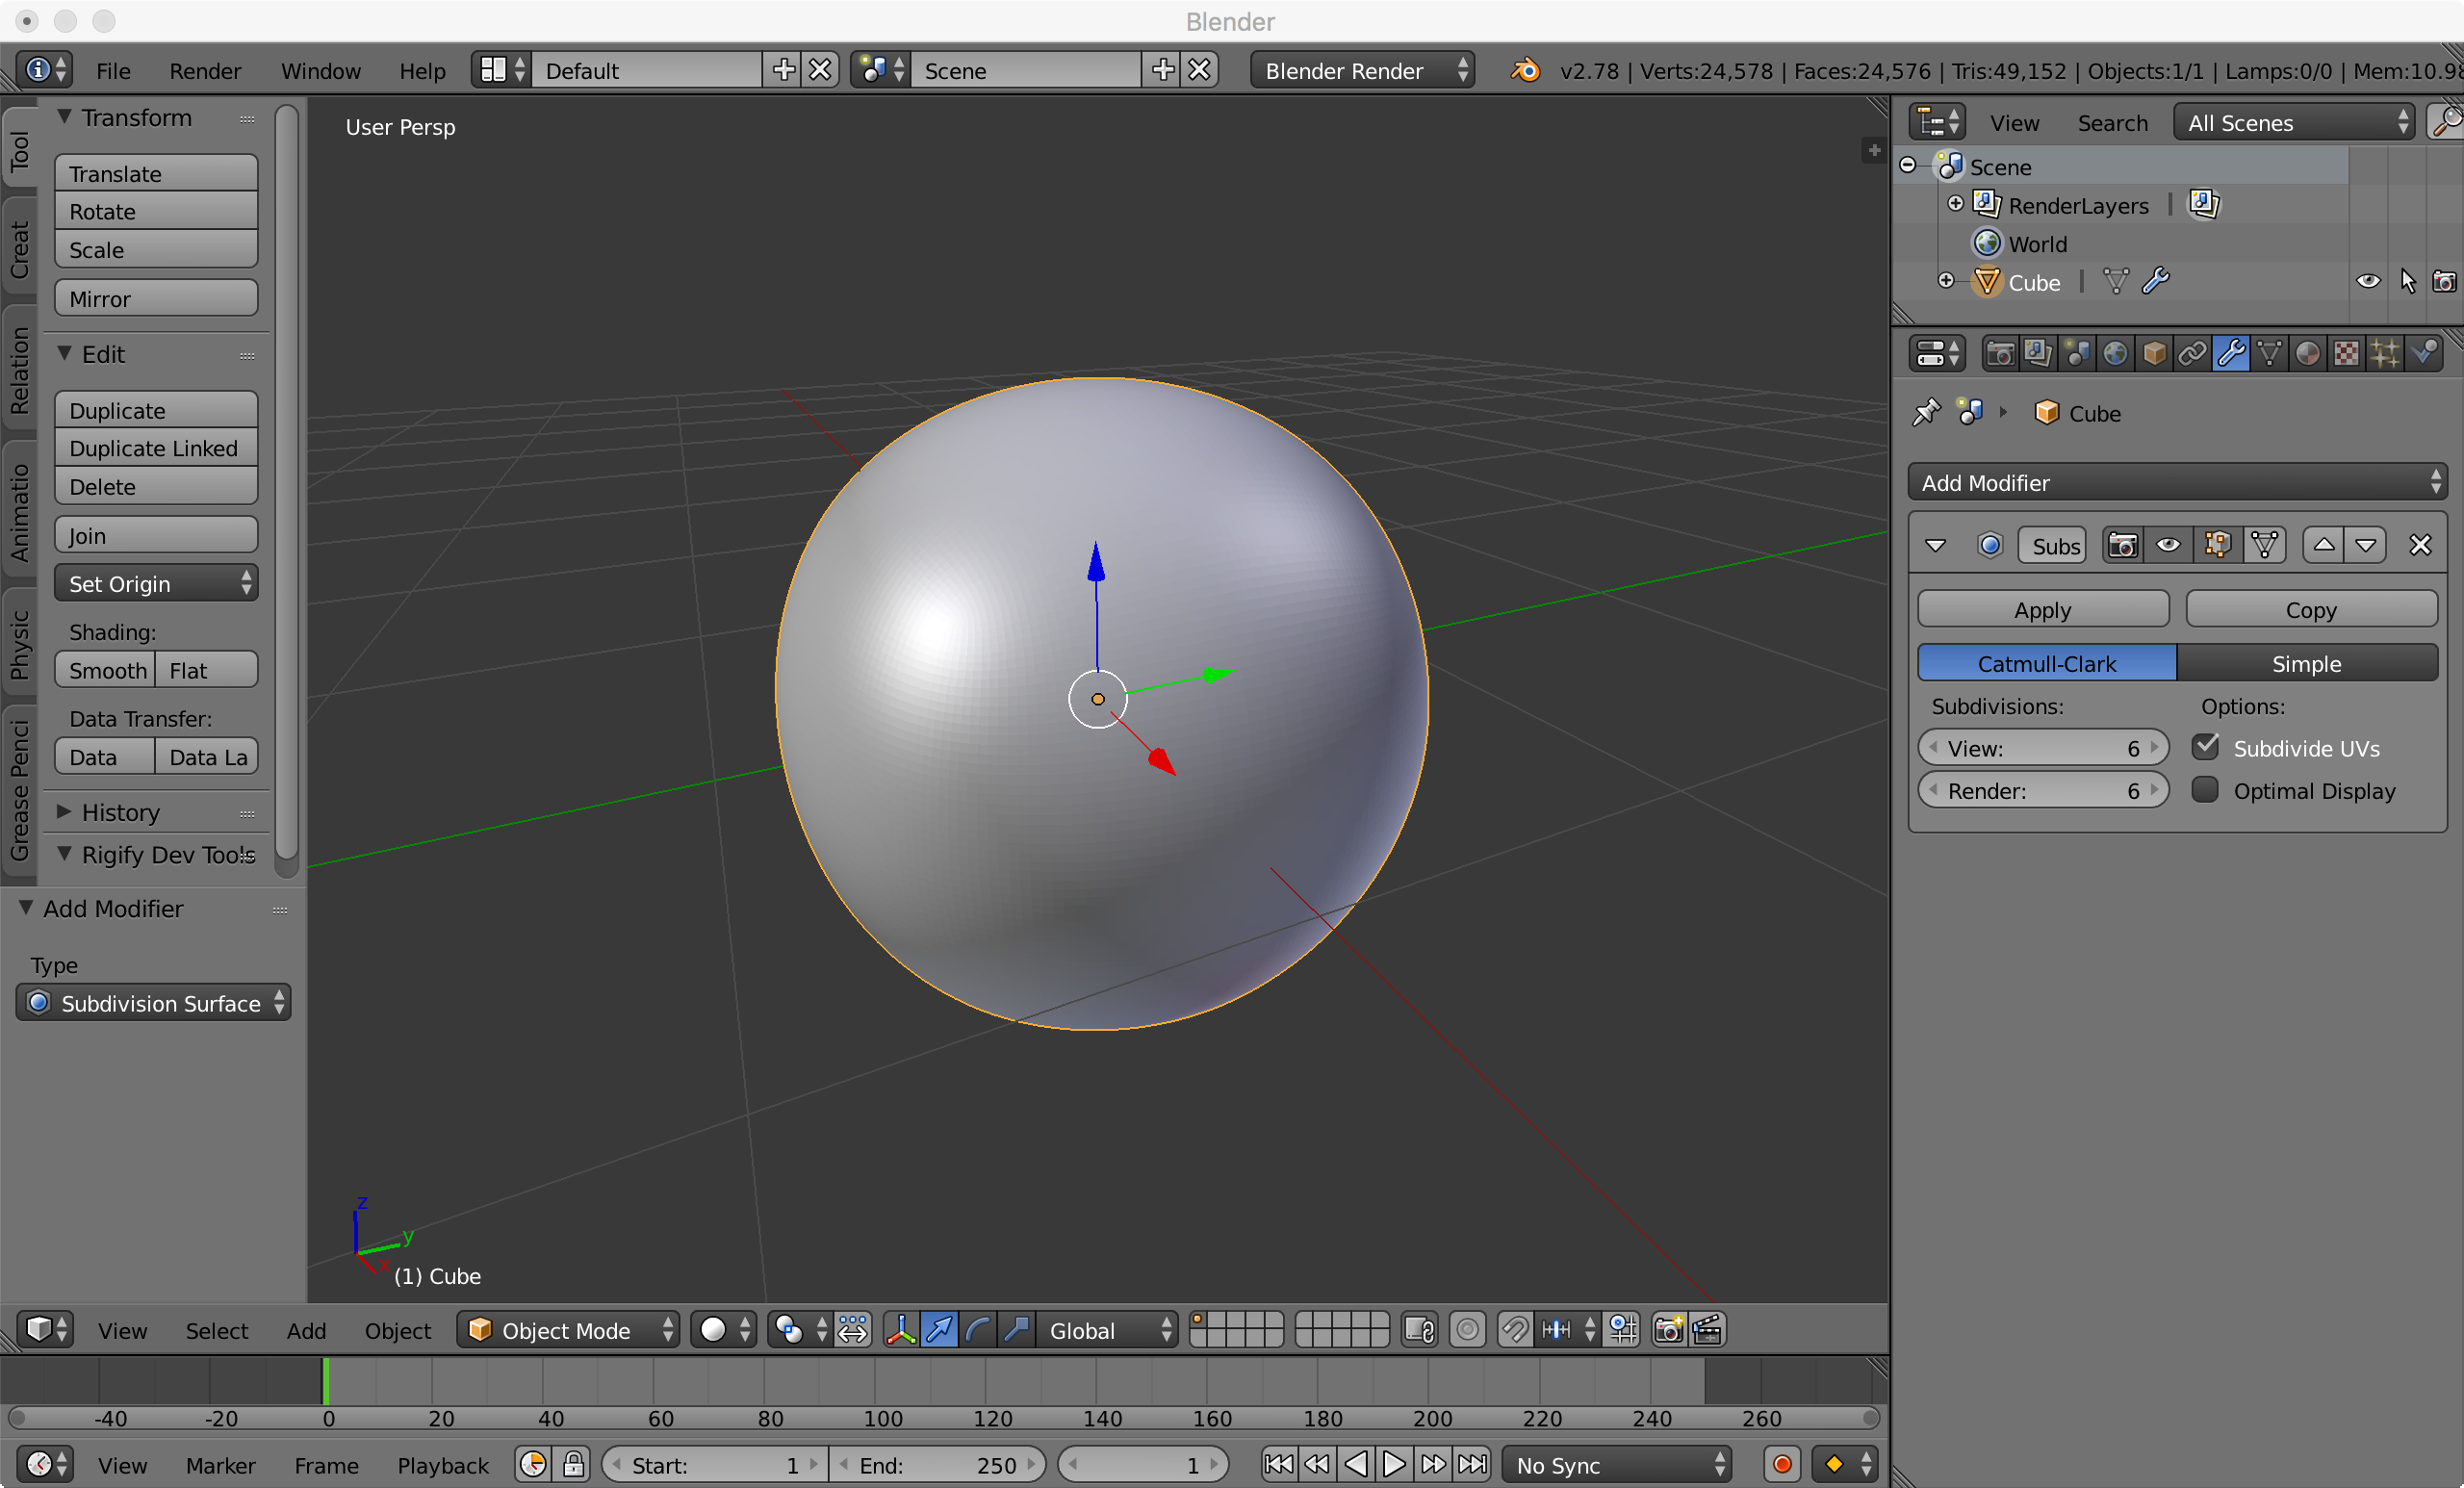
Don't apply the modifier. You dont need to.
Now lets UV unwrap this cube.
First, go into Edit mode by pressing Tab.
Edit mode is where you can edit the object.
When you go into the edit mode, you'll see that the blender still considers the object as a cube.
This is because we didn't apply the modifier. But again, we dont need to and it is easier to not apply it.
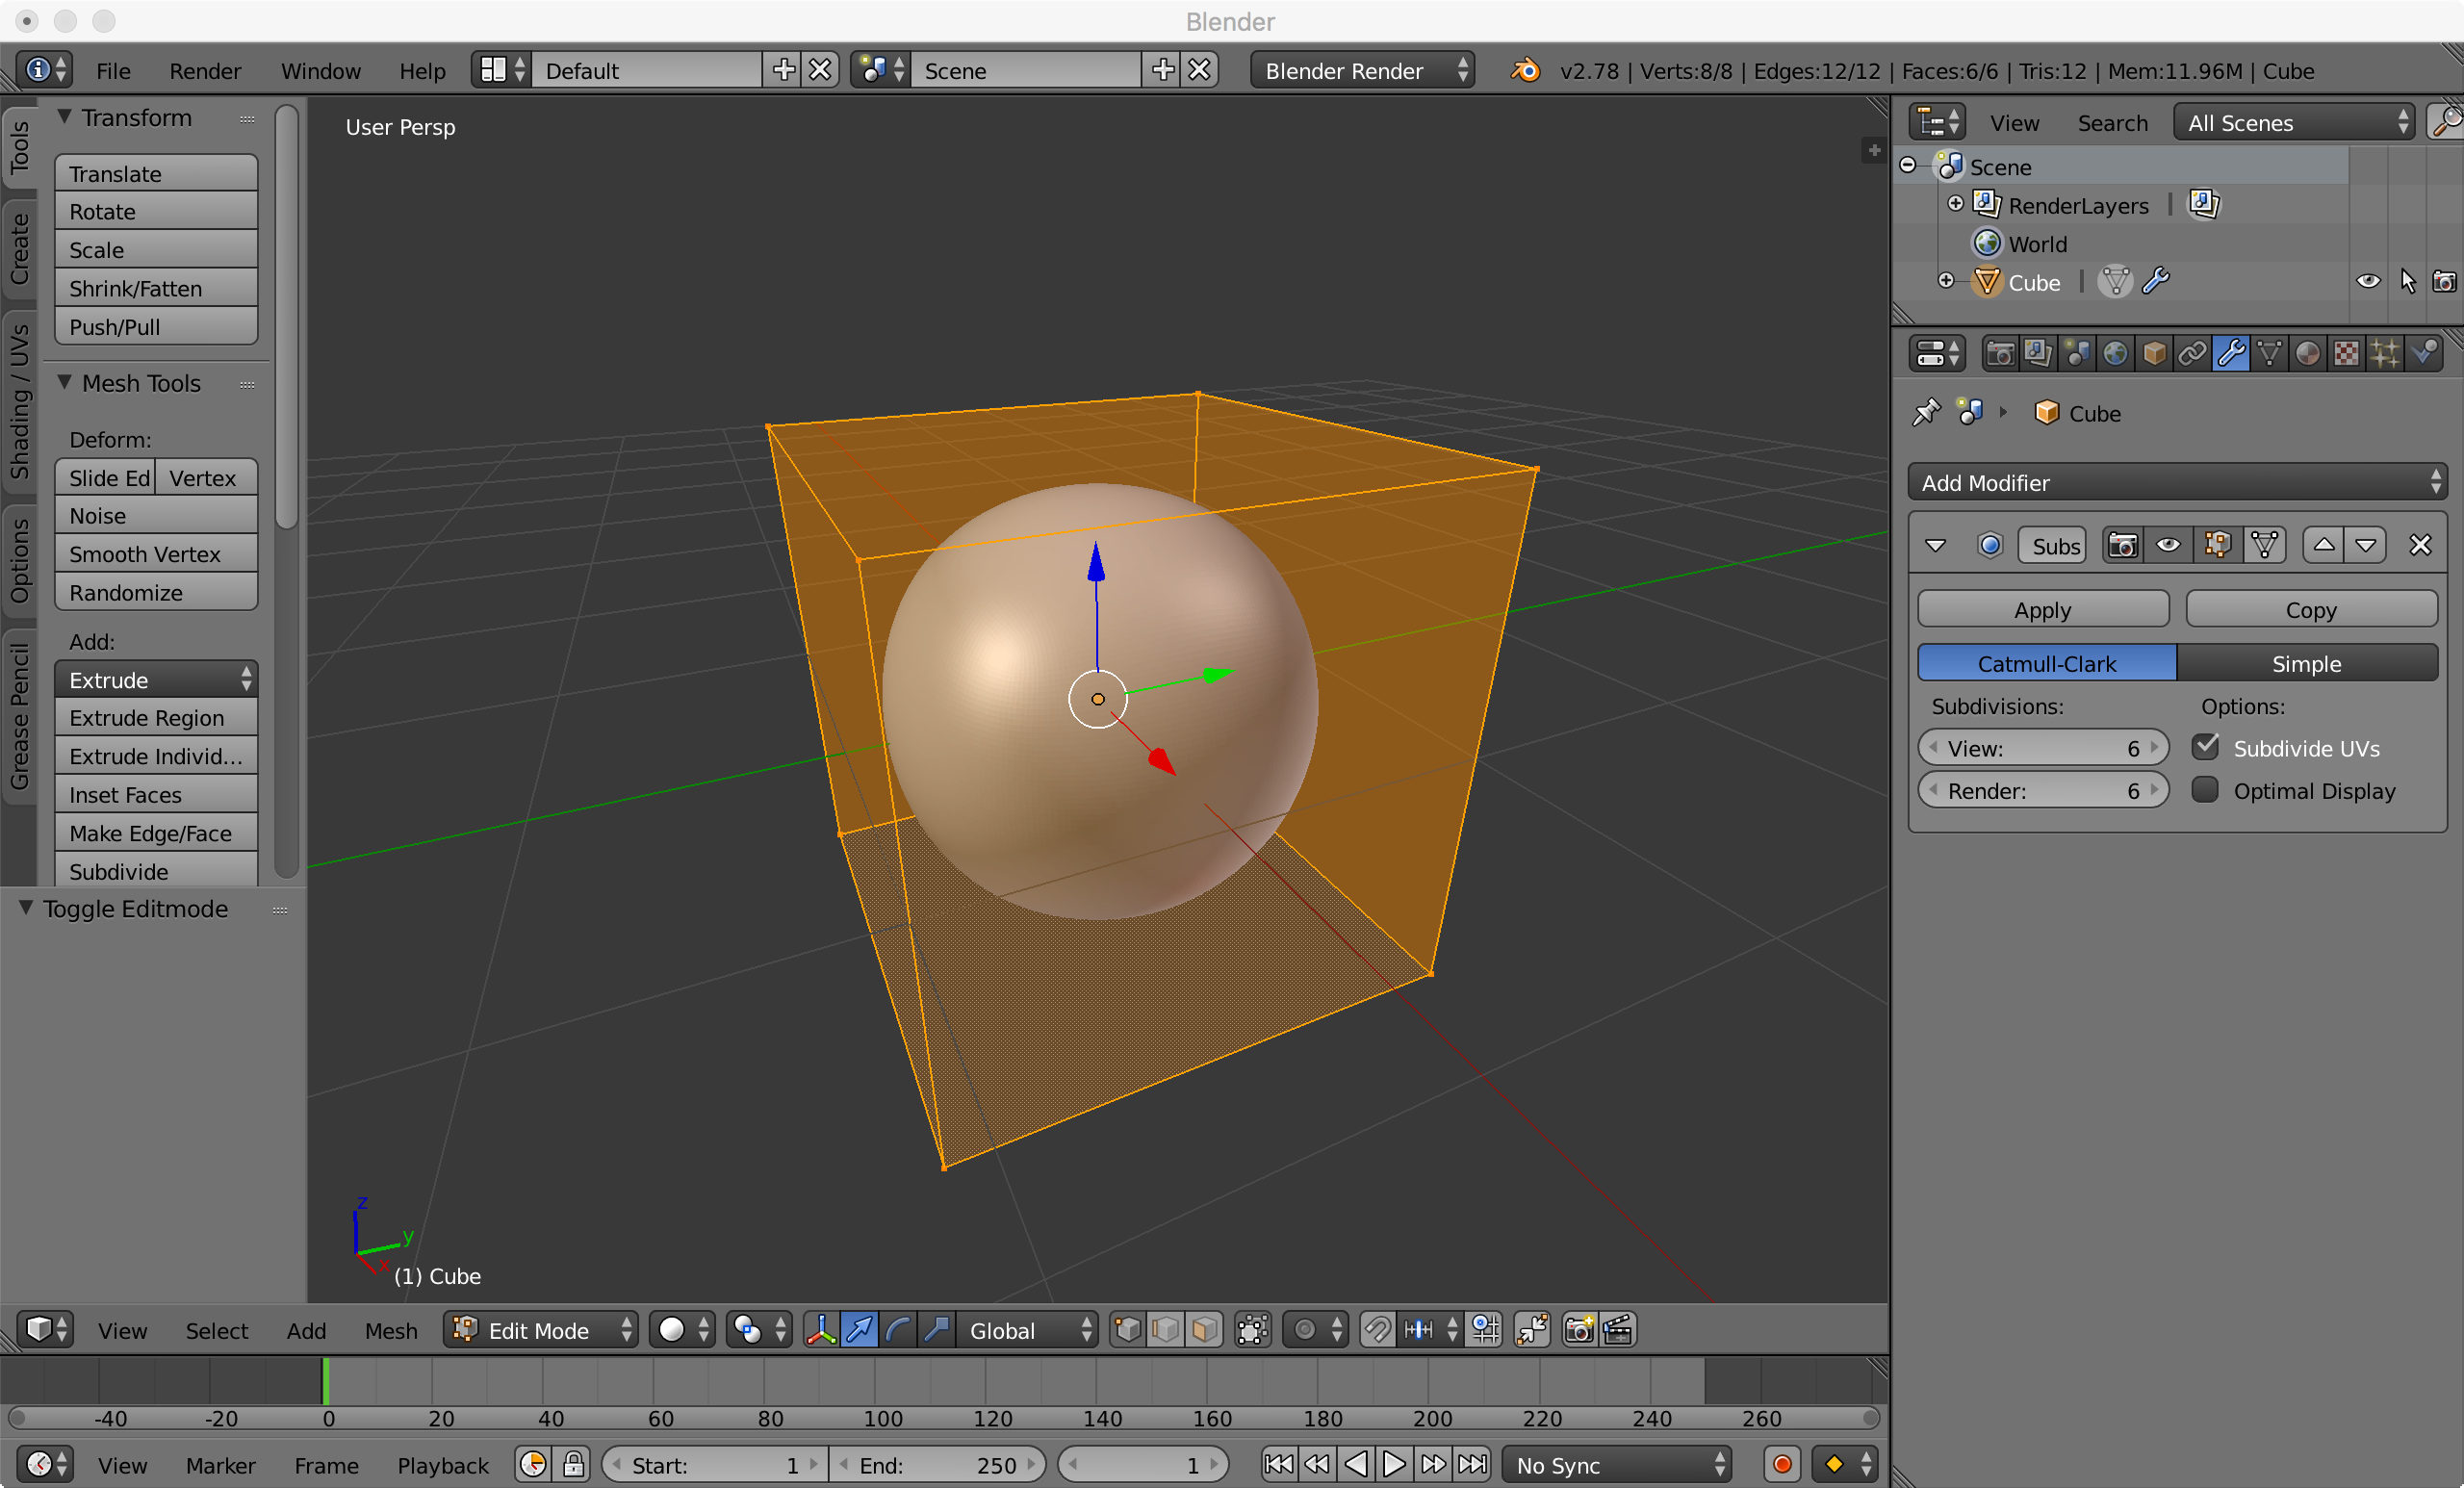
Right now, all the vertices are selected. Press A to deselect everything.
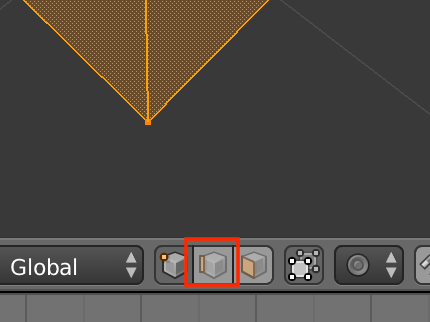
Go into Edge select mode and select these edges:
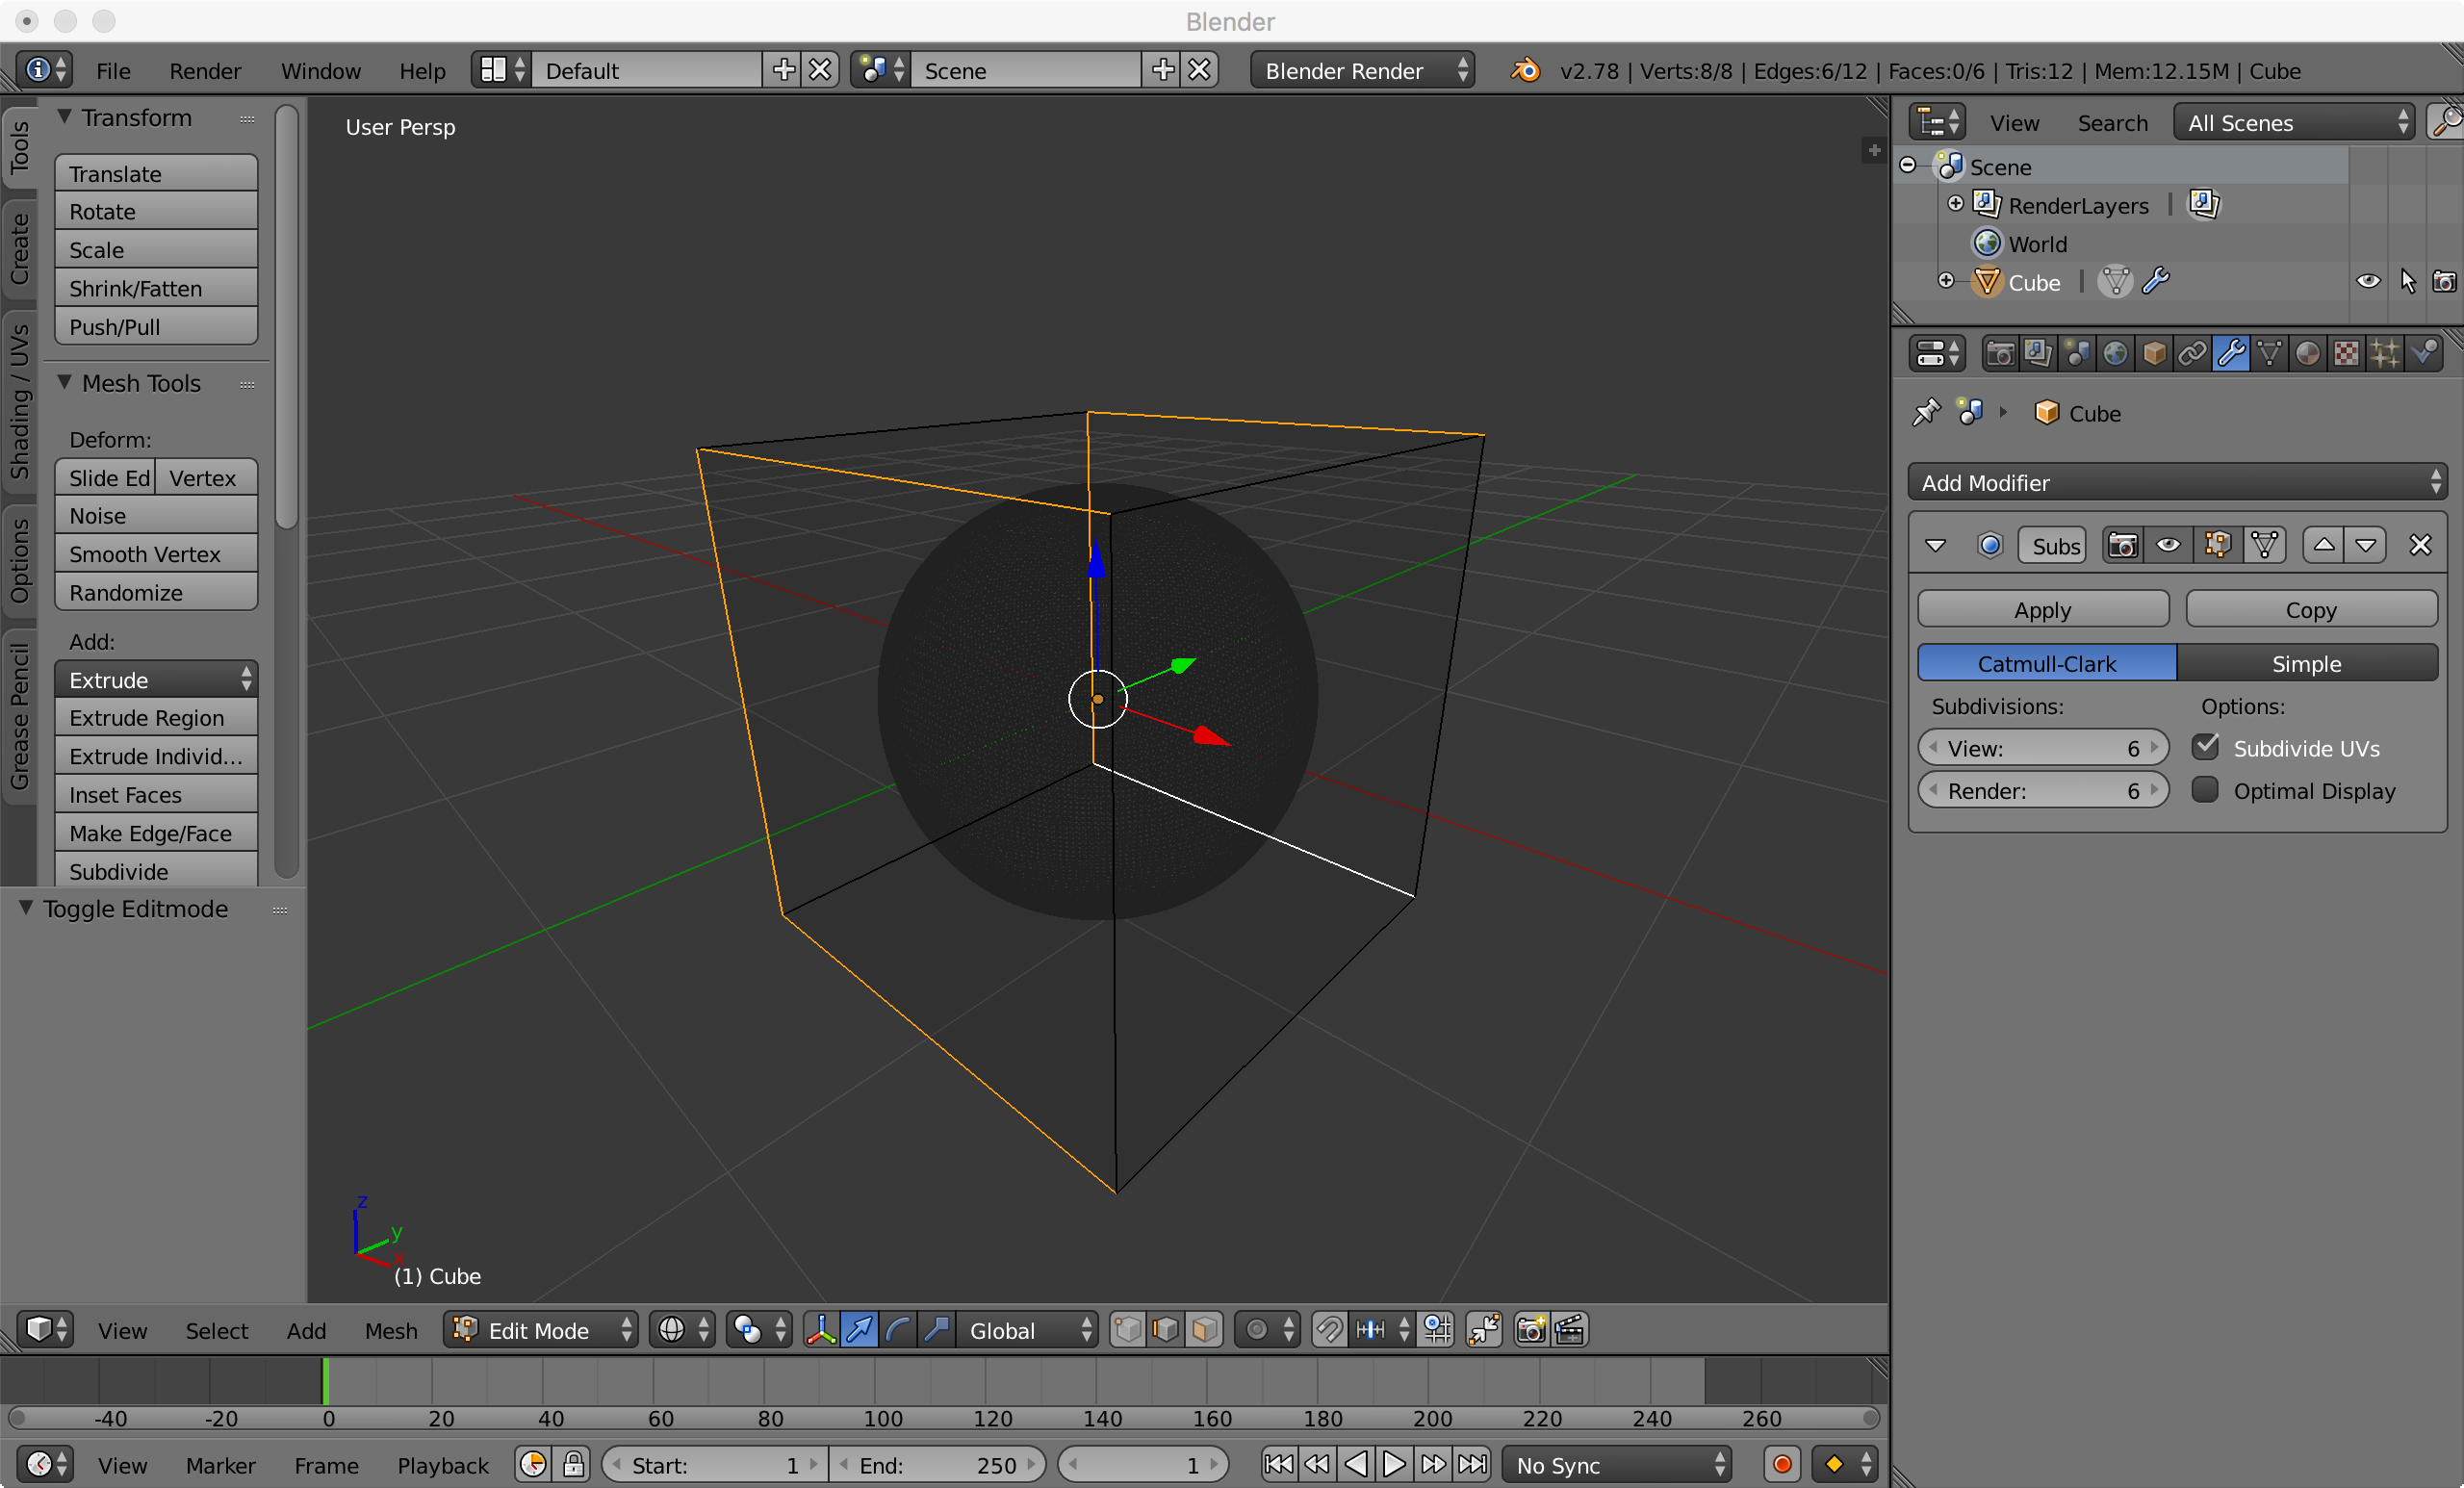
You will have to move your view to select all the edges. If you want to go into wireframe mode like this, press Z.
(You'll notice that screenshots below shows different seems marked differently. Please ignore those. I made a mistake.)
Now press alt + E to go into edges menu.
select 'Mark Seams'
Your edges will now be highlighted red.
Remember this?:
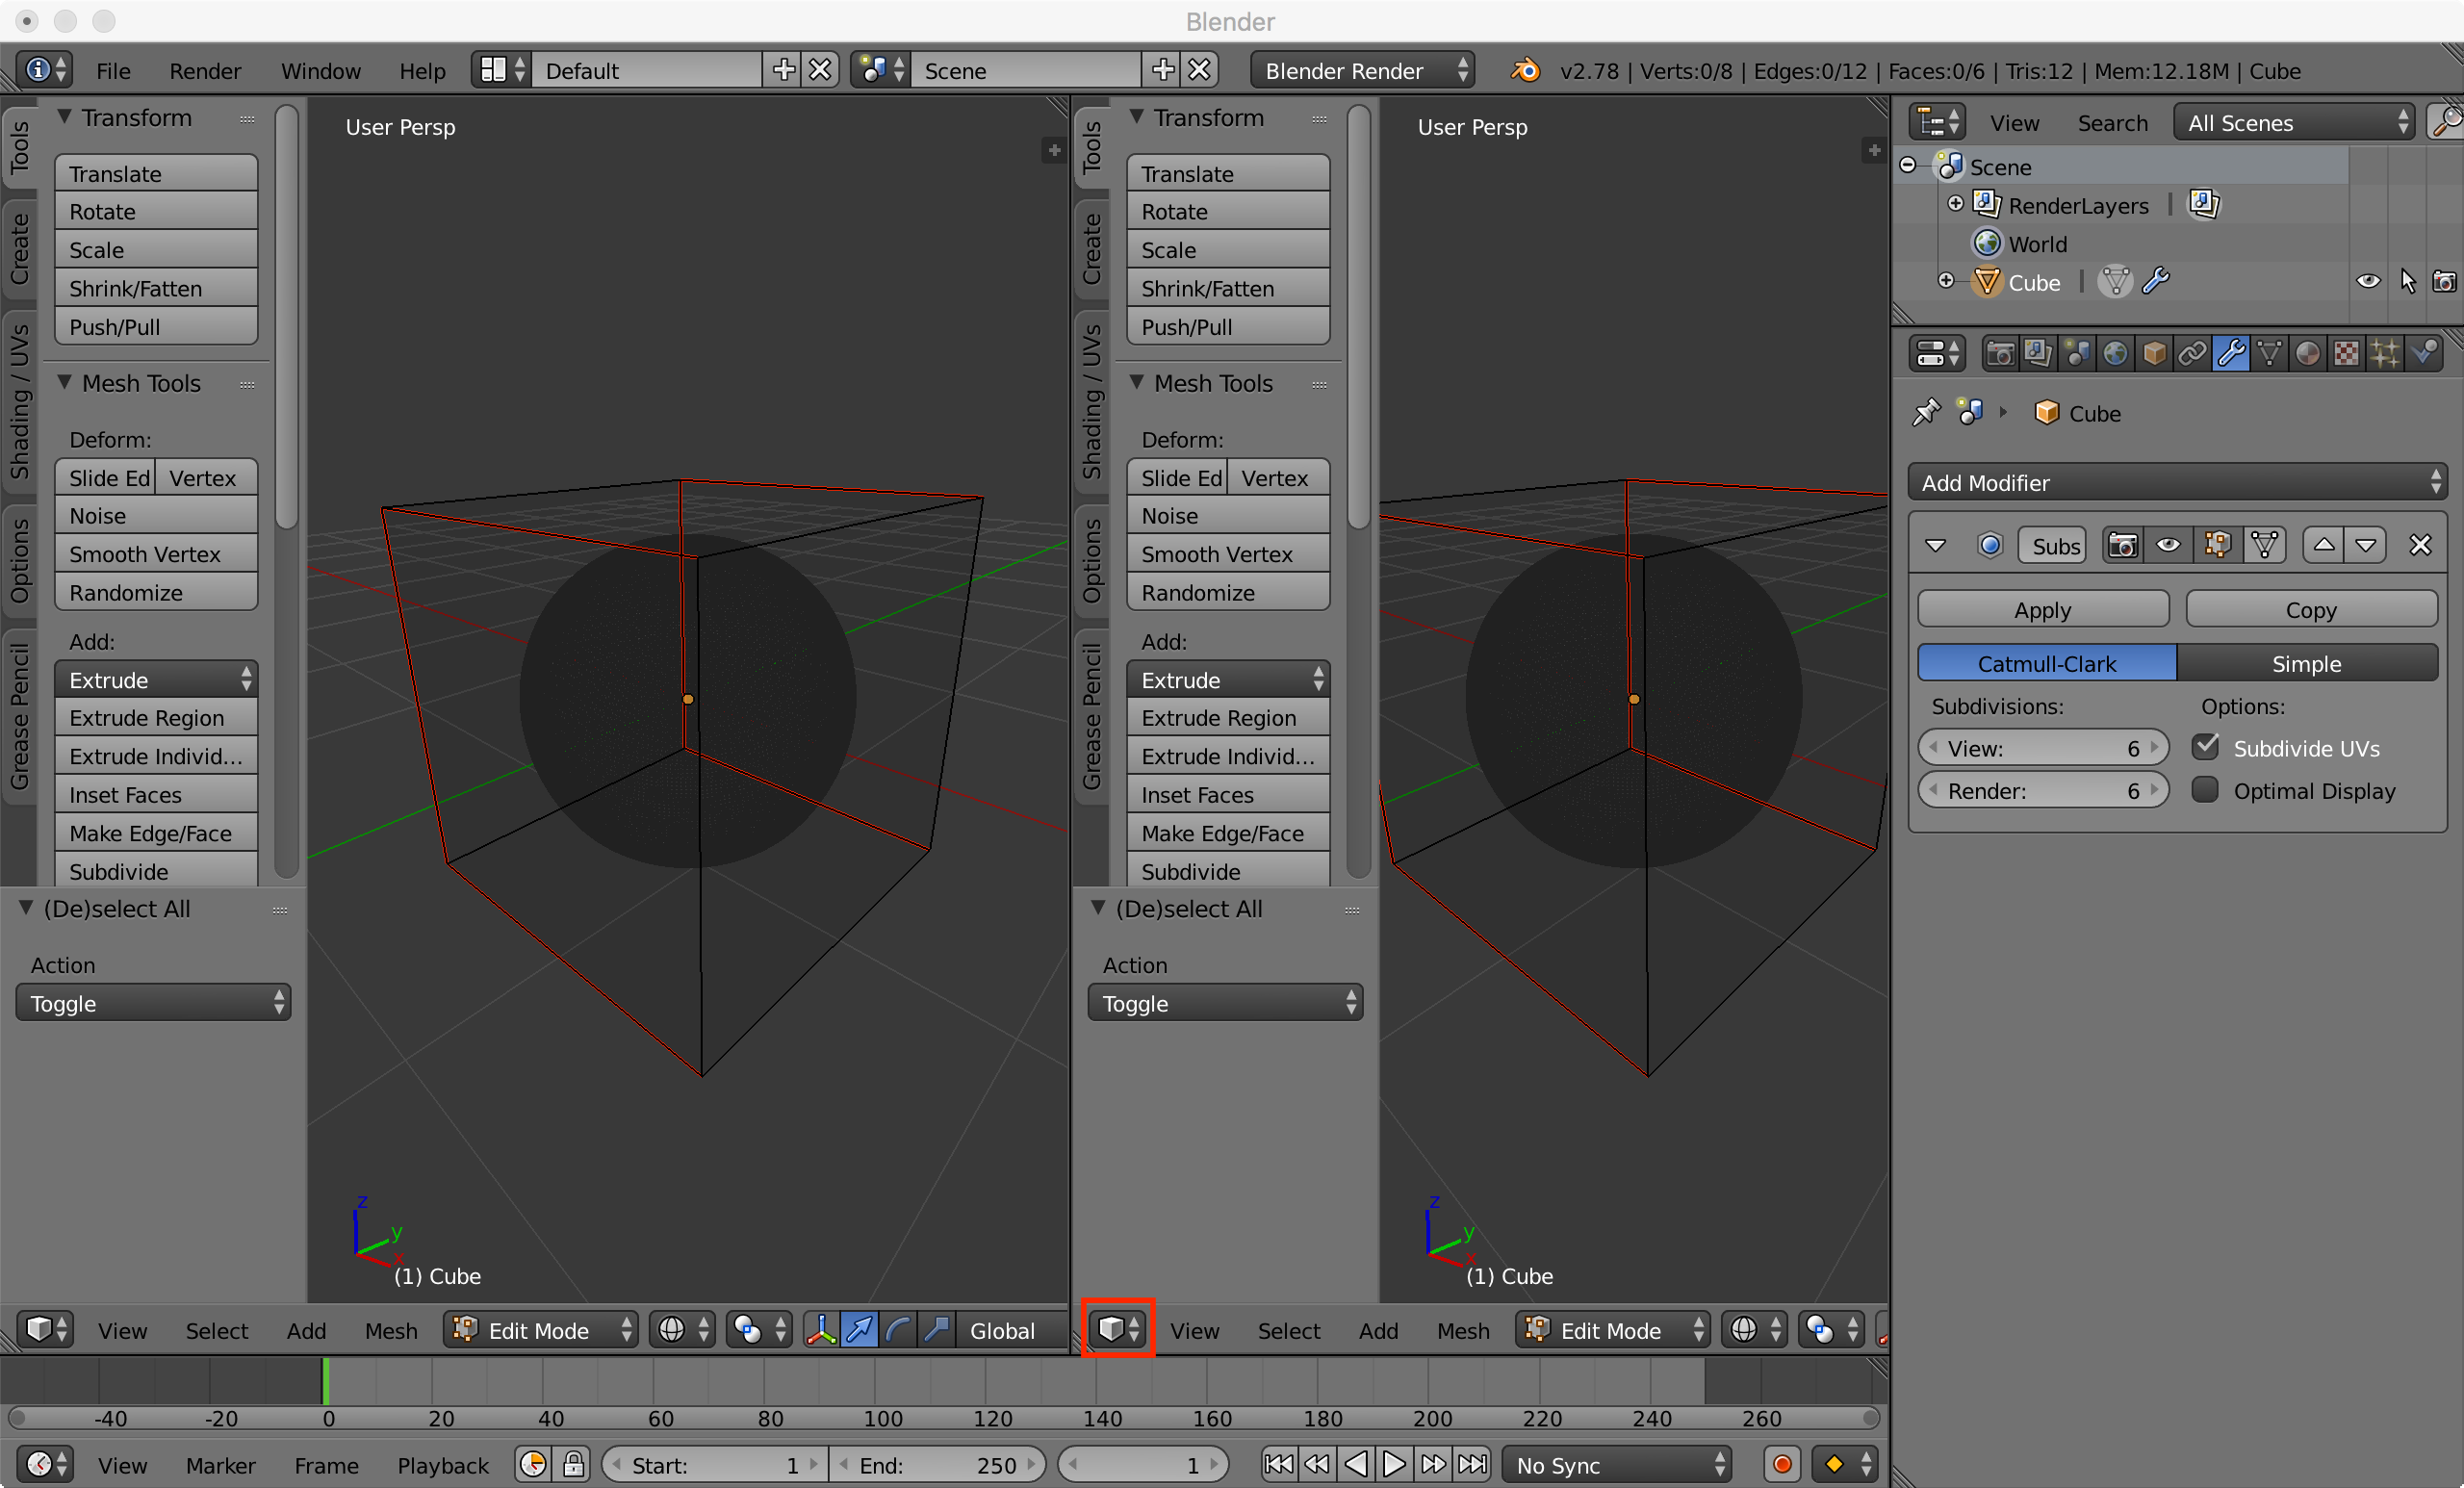
Drag that corner to create a new window:
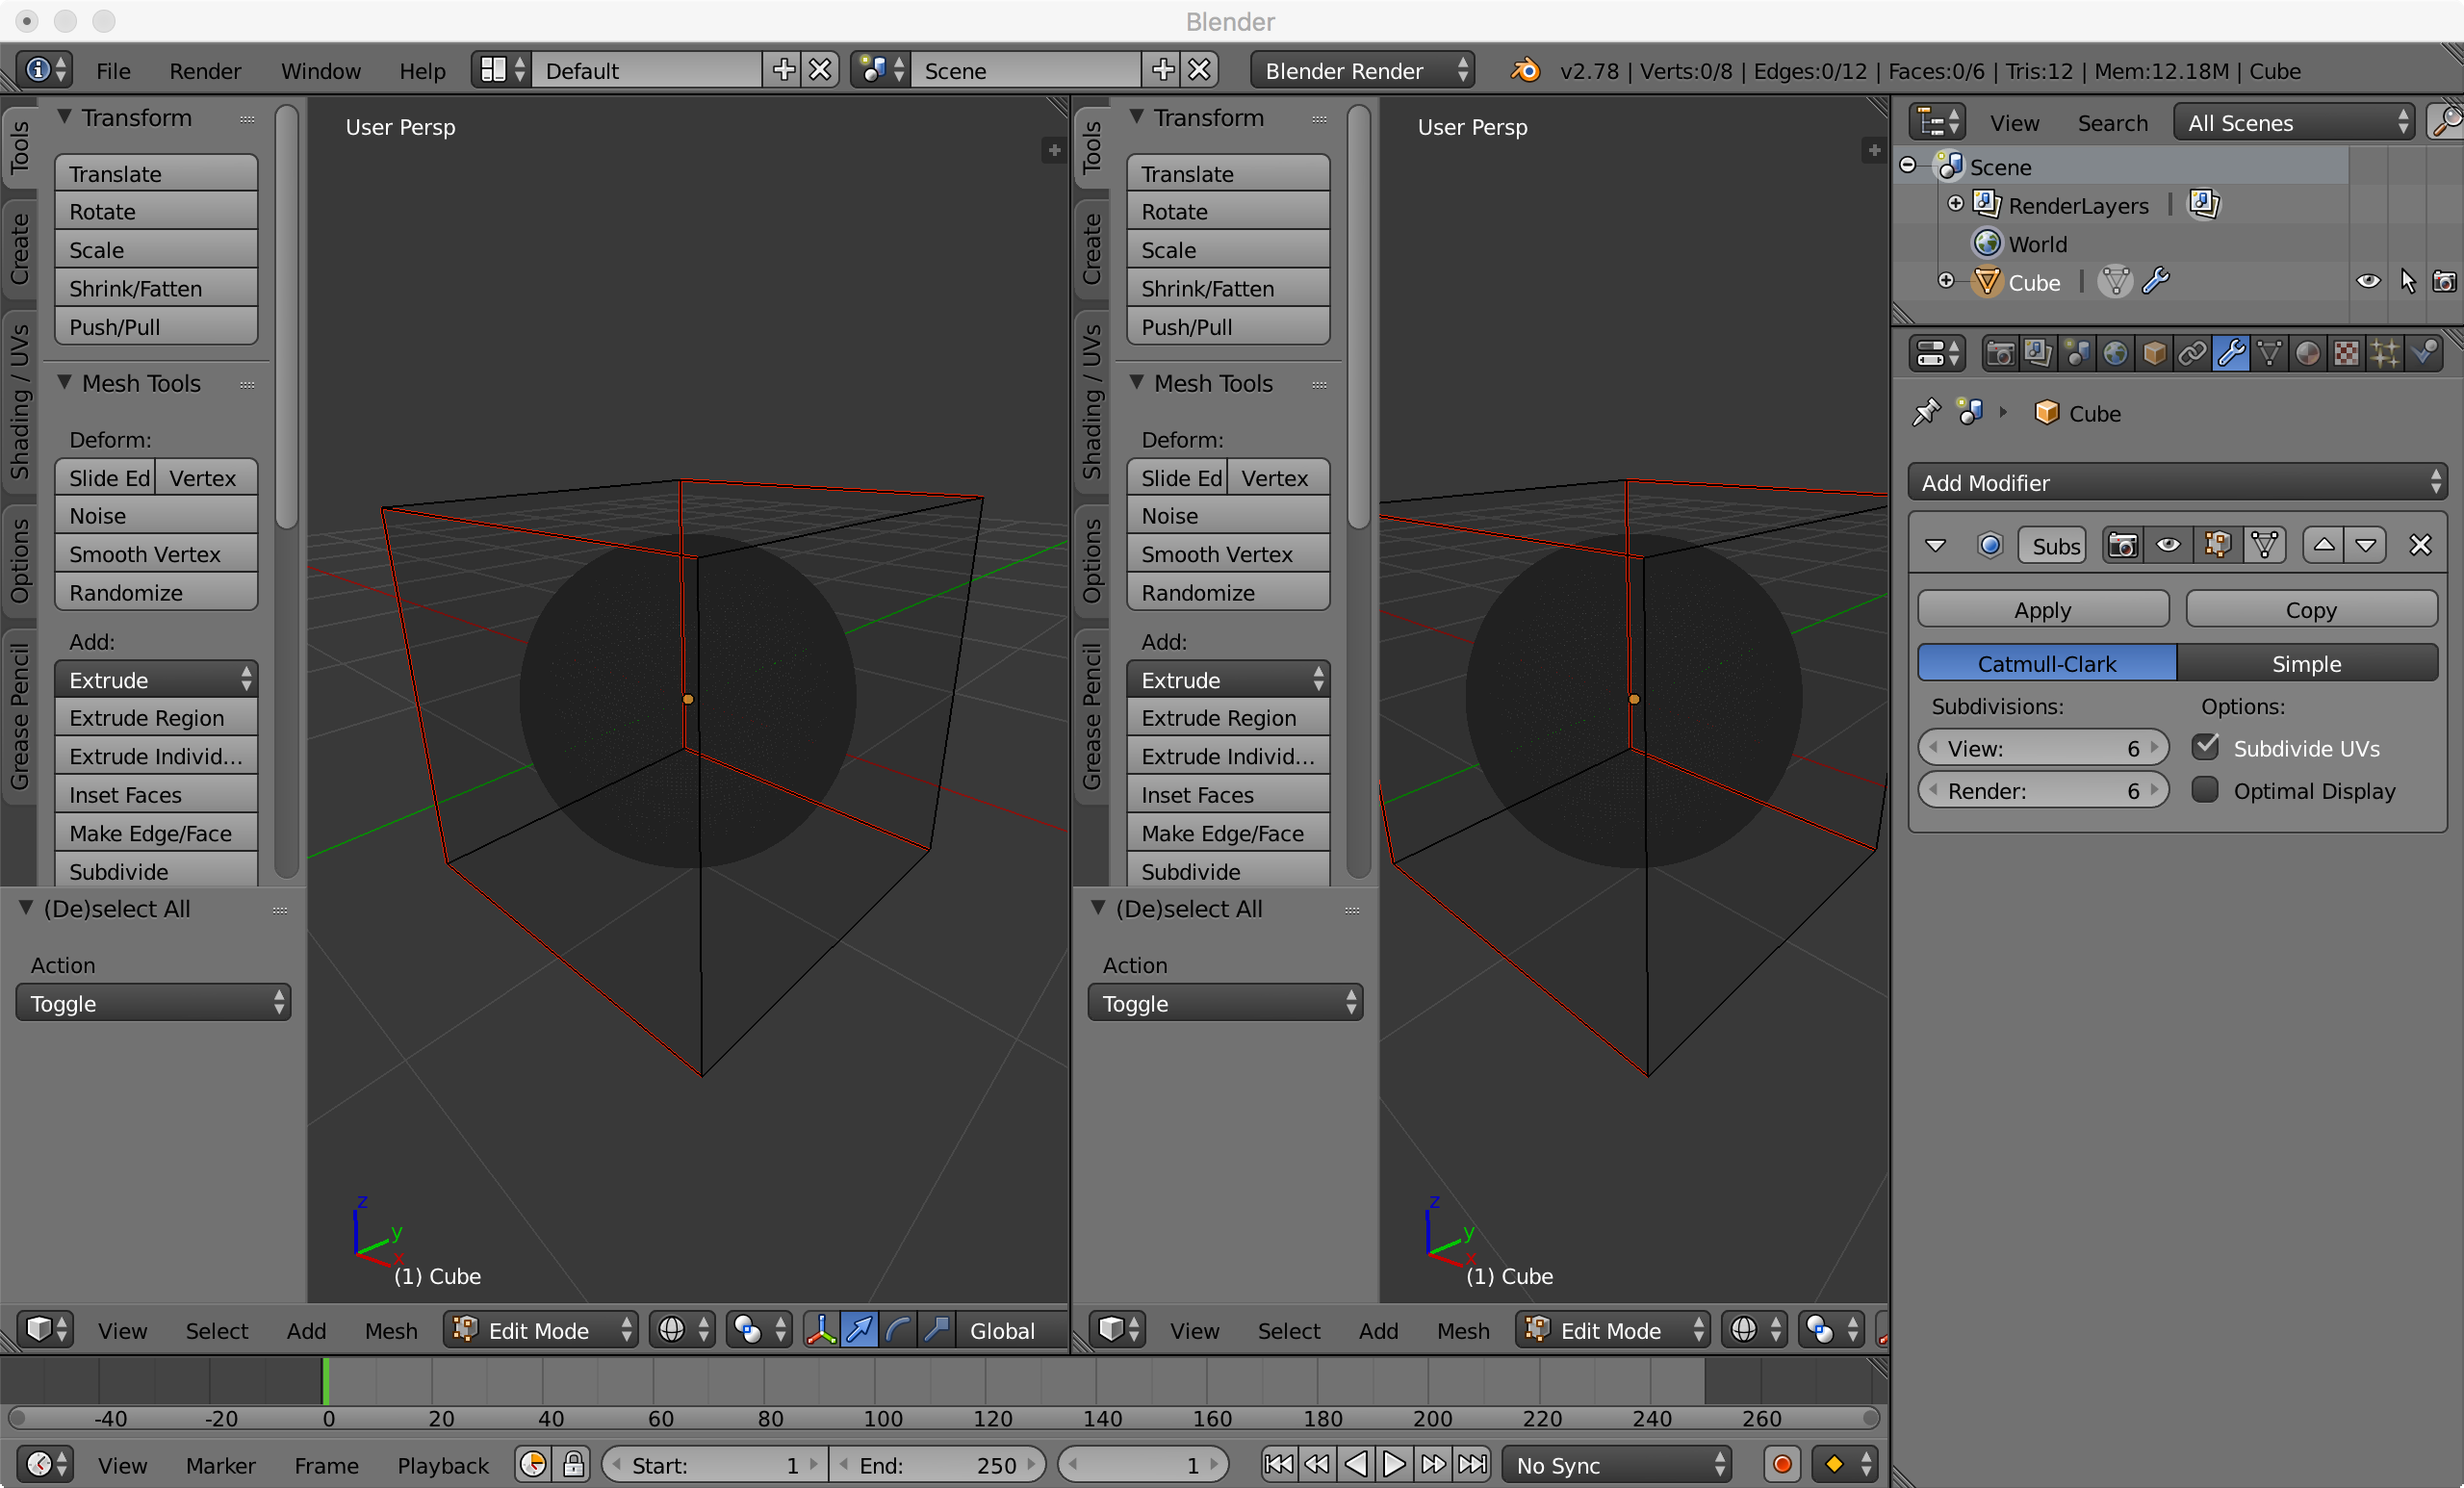
(Again I marked wrong seems here please ignore)
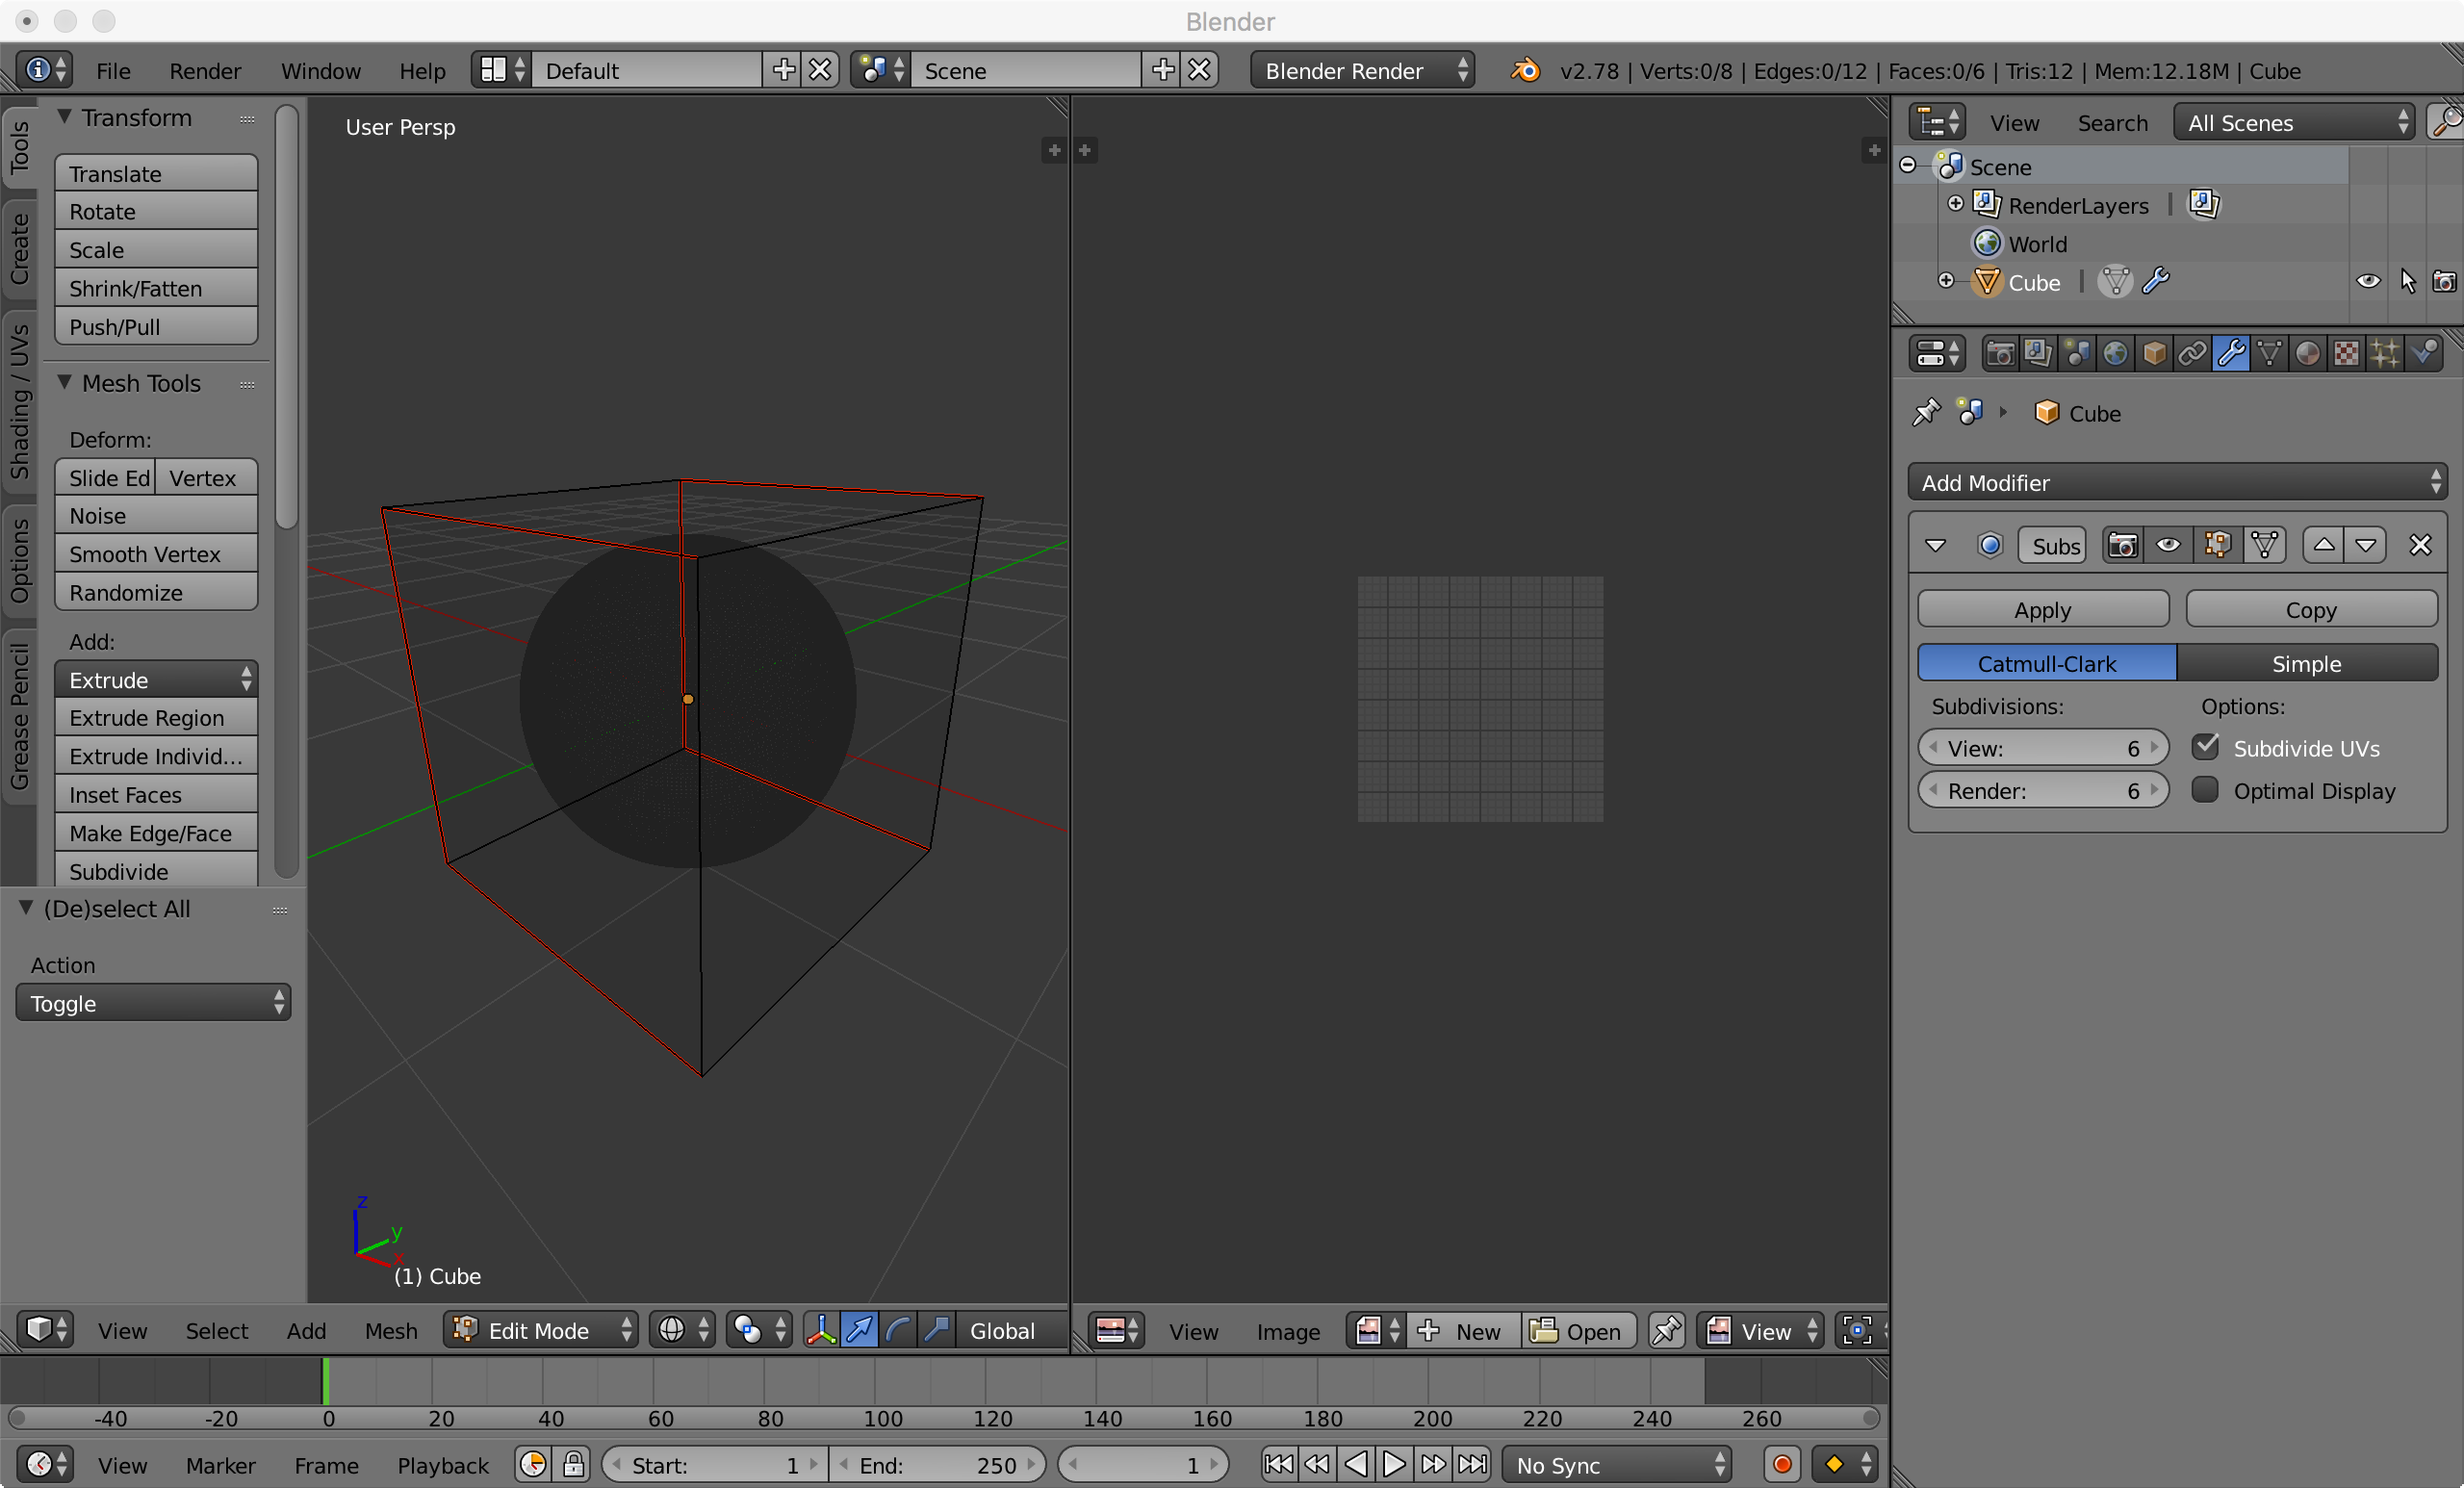
Now make the right side window a UV/Image Editor:
Like this:
Now press U and select unwrap and you'll see the cube is unwraped on the right.
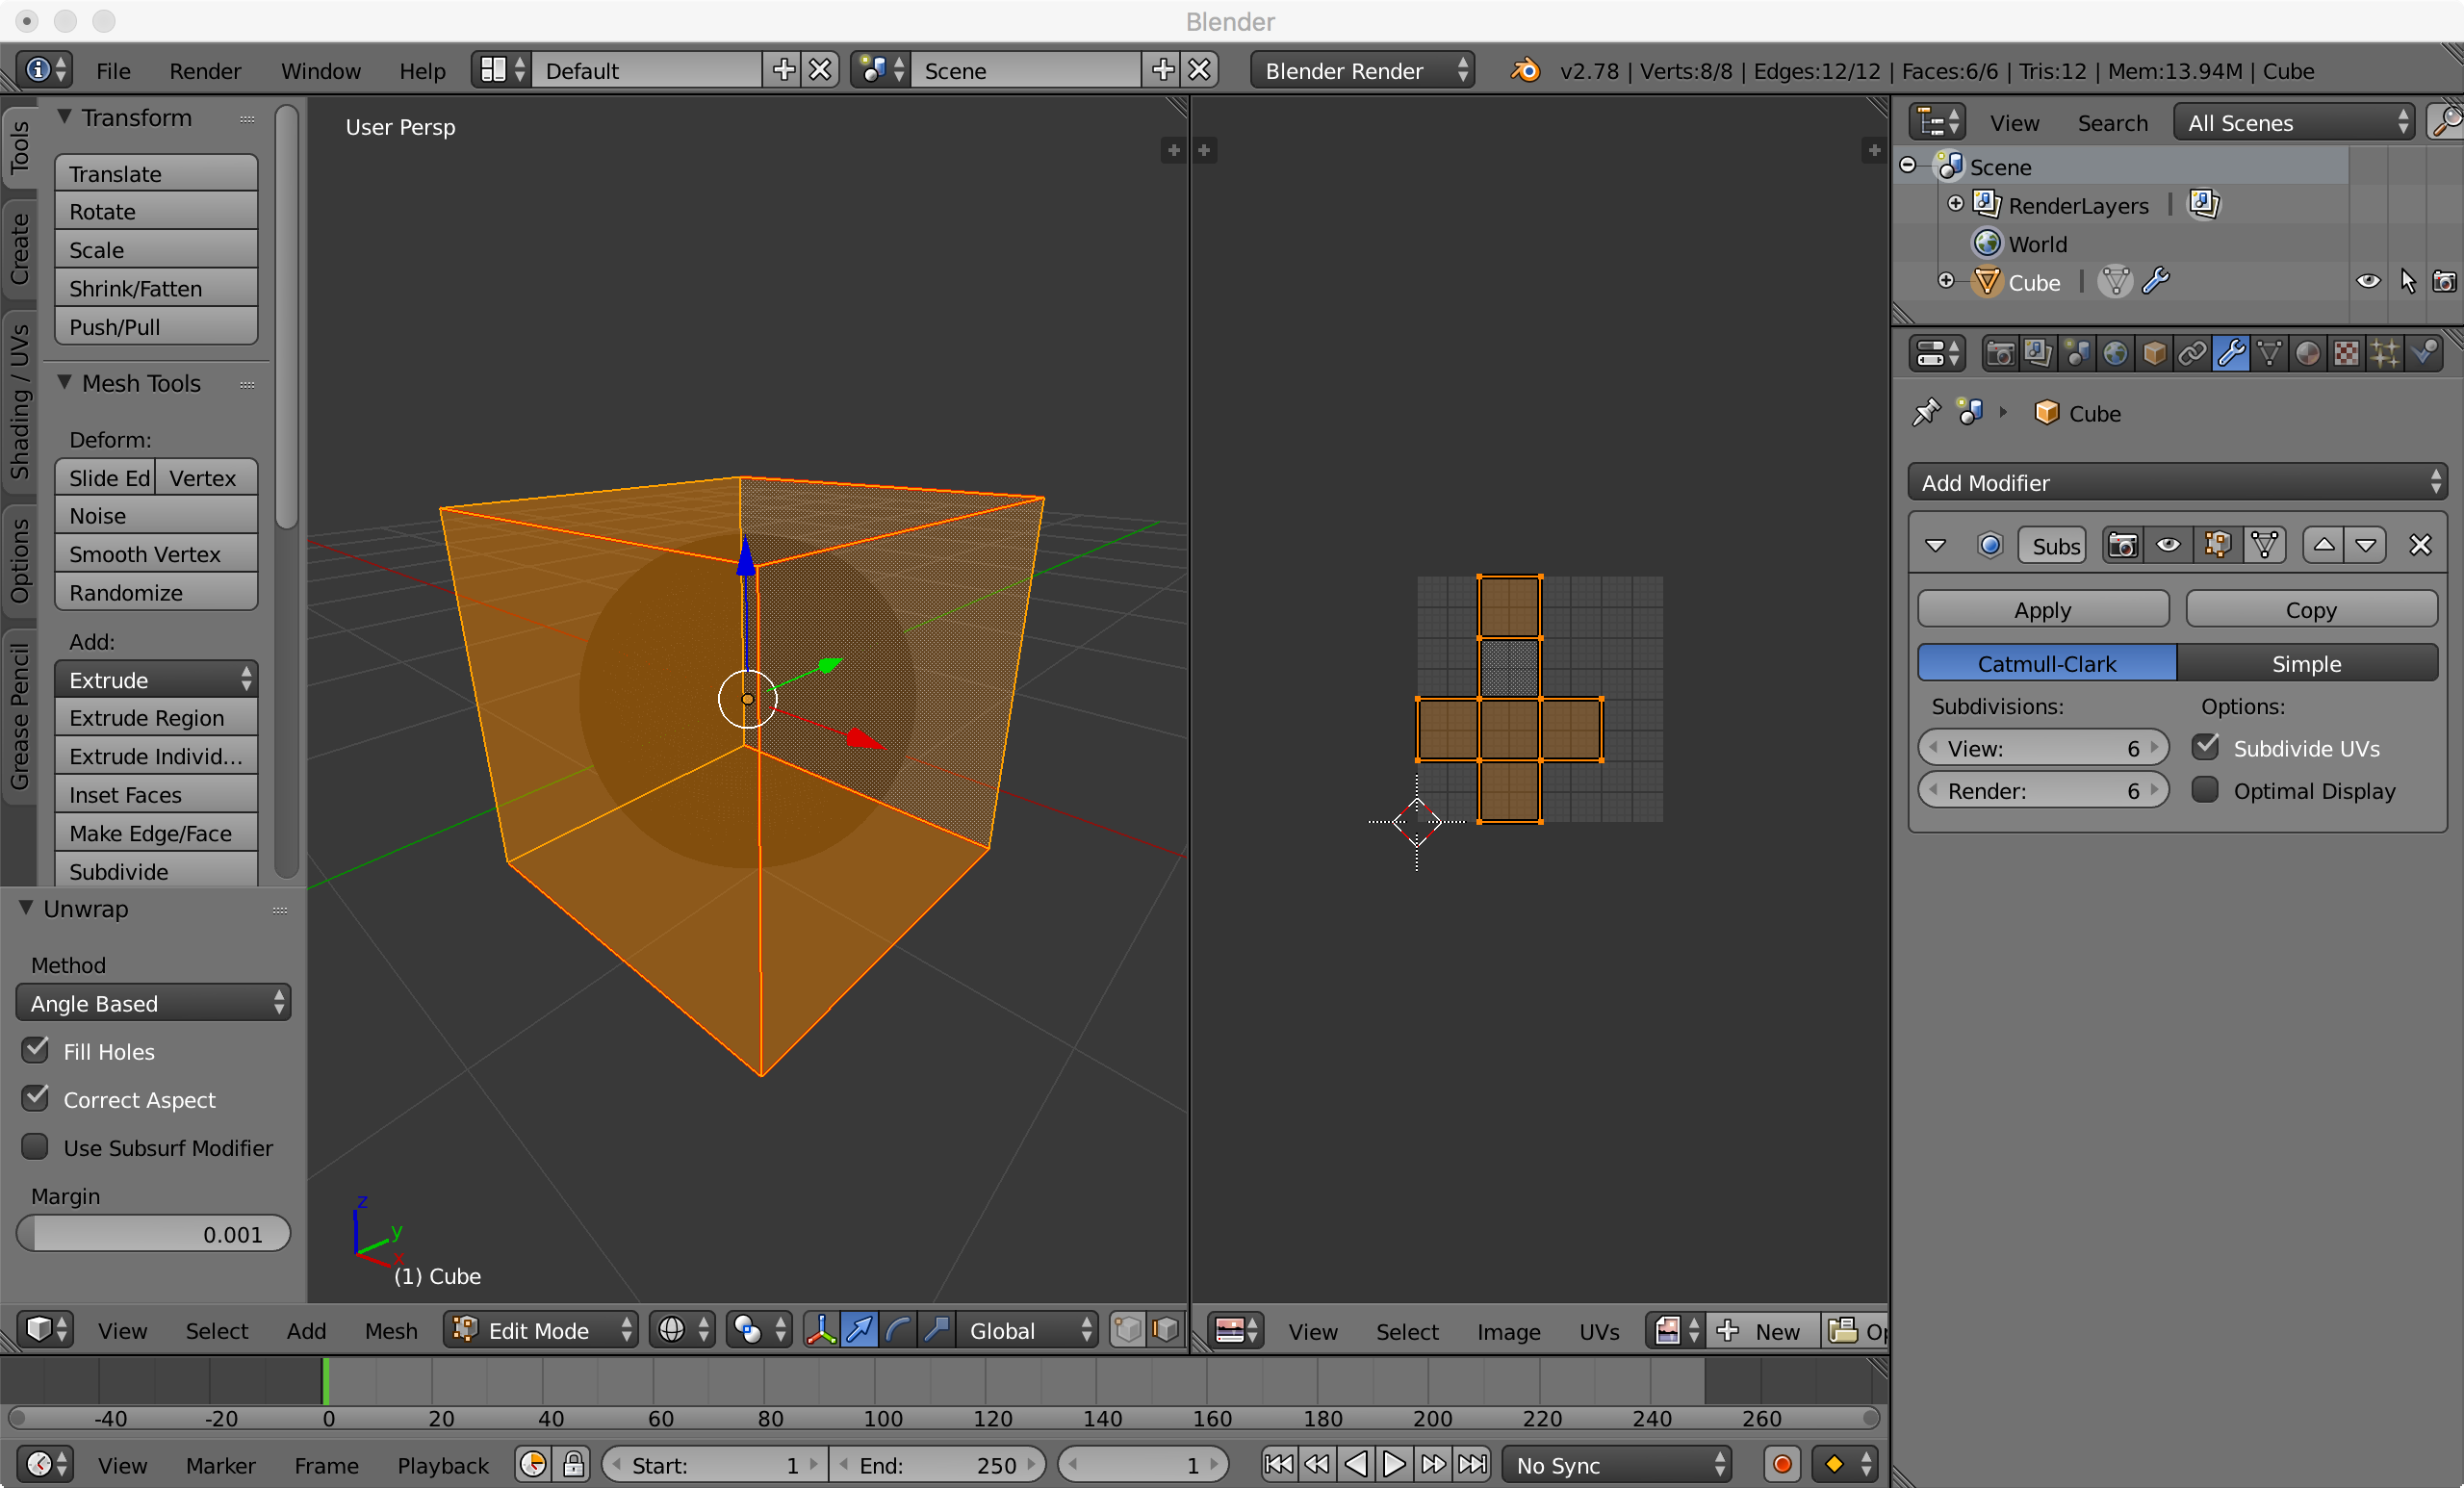
You'll see it's unwrapped nicely but it is rotated. We know this because if you select a face on a 3d view, that face is also selected on the 2d view.
If you place your cursor on the right side, you can treat the unwrapped shape like 3d objects: you can rotate it, scale it, and move the vertices around.
Rotate the uv so that the uv is looks like this:
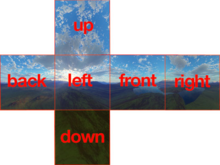
or anyway suitable to your own texture. (back, left, front, and right really doesn't matter obviously)
Now you need to apply the texture to the 'cube' we unwrapped.
Now go to the 'Material' Panel like how you opend the modifier pane; and create 'New' and you'll see this:
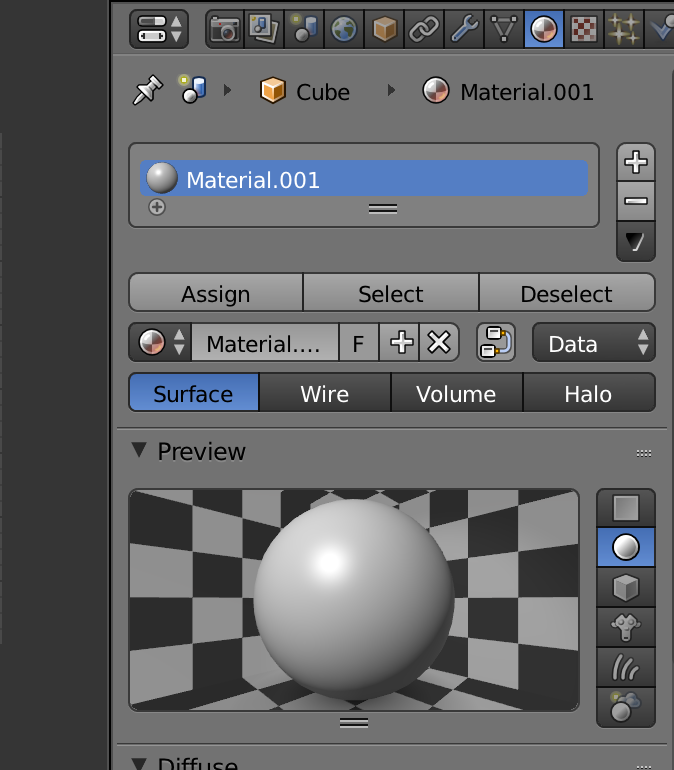
Go to 'Shading' and check 'Shadeless'
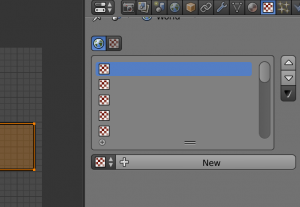
Now open the 'texture' panel and create 'New' like this:
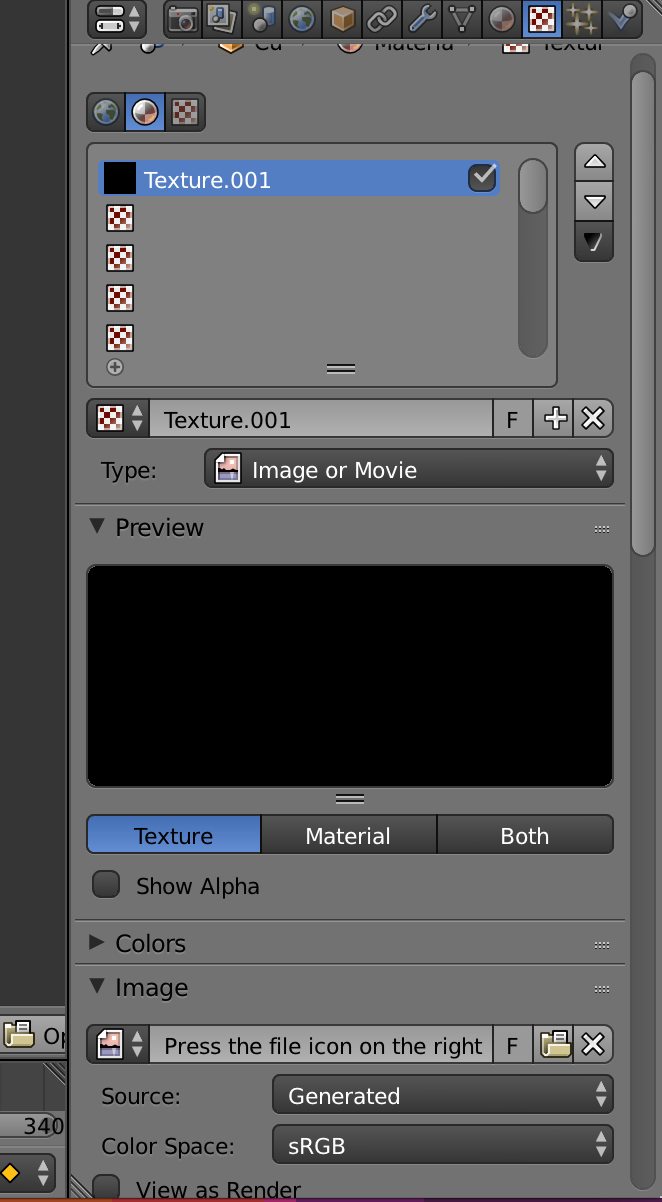
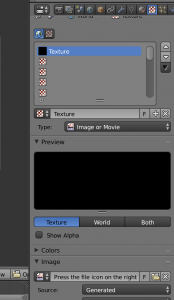
And set 'Type' to be 'Image or Movie'
Under 'Image' open your texture by pressing the file icon on the right to open your texture.
Once you load your texture in, you'll see extra options like 'Source' enabled just like the screenshot. Ignore those.
If you downloaded the template, this step is where you need to pick up.
If you go to the material panel, you'll see the preview now has a sphere with your texture all over it.
Let's go back to the texture panel and set the mapping correct.
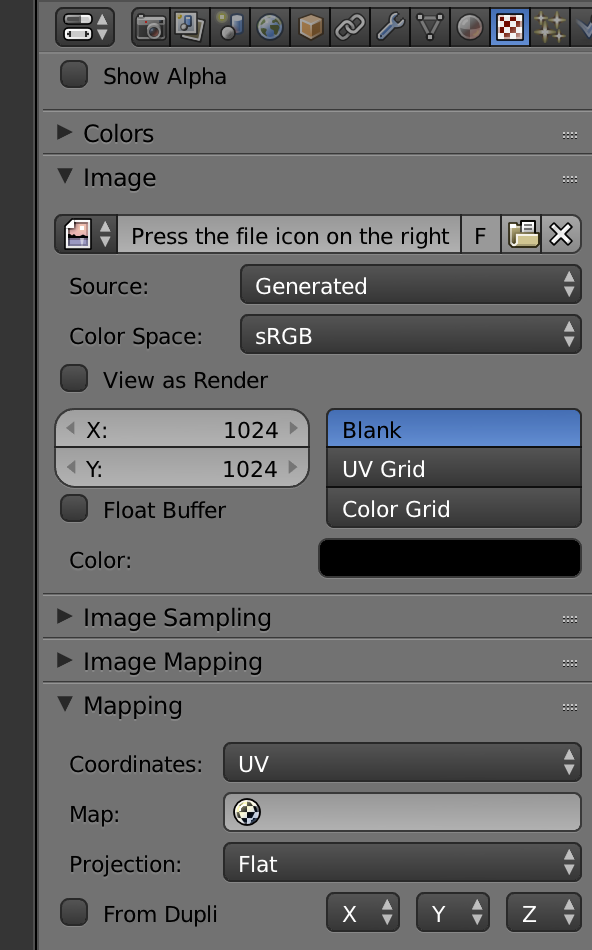
You can see under Mapping, there's a blank space called Map. Press it and you'll be able to select the UVMap you want. You'll have only one uv map so select that.
Now, select this: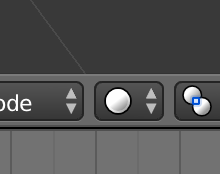 (it's next to the edit mode button)
and change it to Rendered.
Taadaa! It's your texture applied on a cube which has deformed into a shape similar to a sphere!
You might have noticed that this is not what you want. You want the texture to show Inside not Outside don't you? (say yes)
To do this, go to the right side of the screen and select Shading/UVs tab.
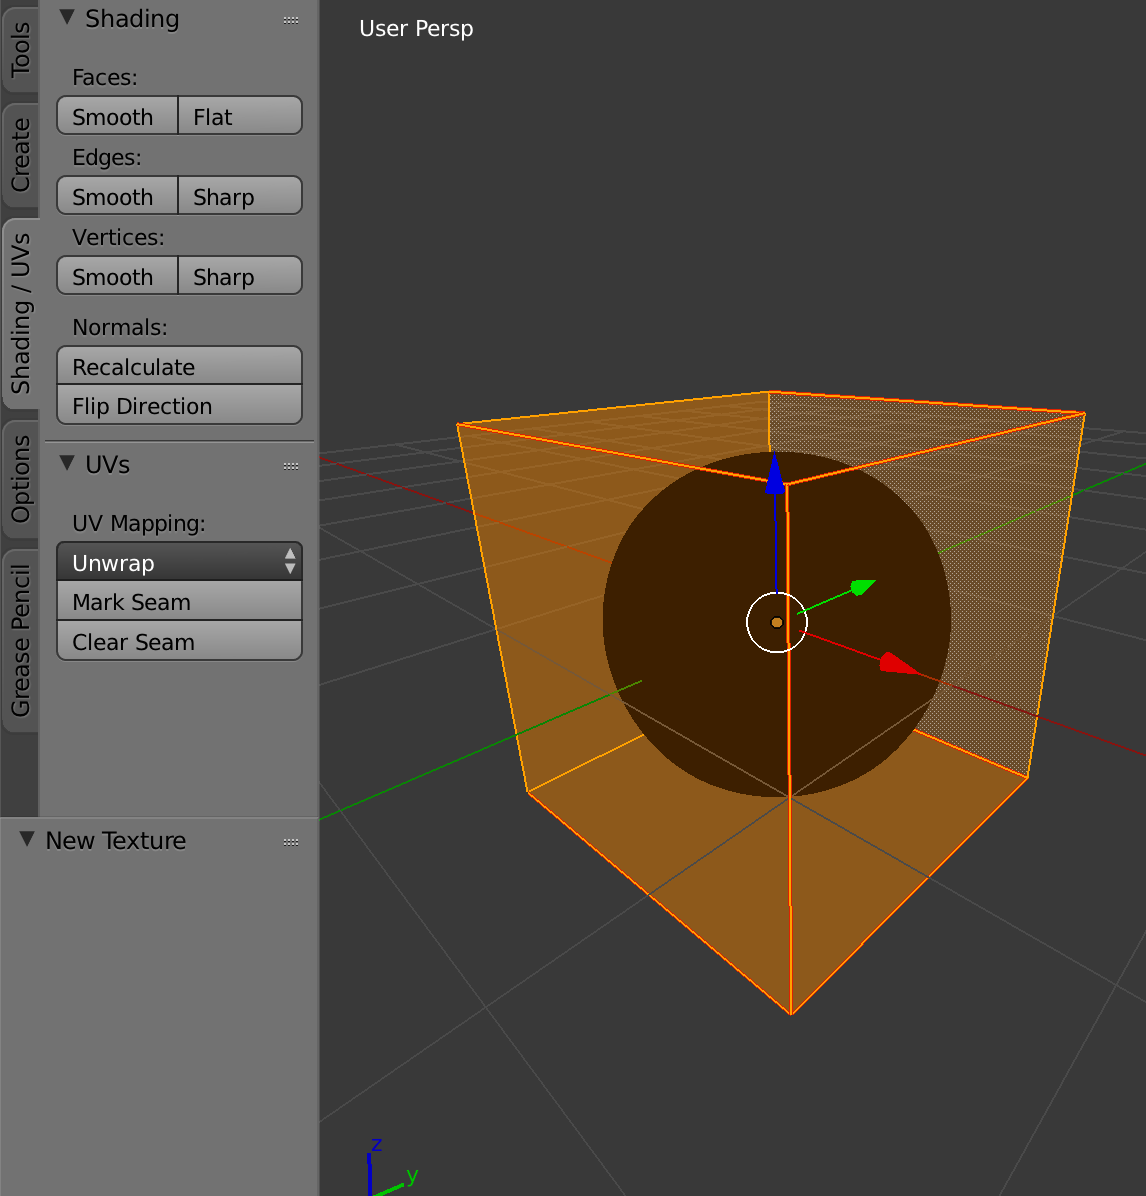
Under 'Normals:' press Flip Direction
This will flip normal of the face inside out which means your textured faces are now inside.
Try moving your view inside the sphere. You'll see that you texture has smoothly formed a skybox.
Now we should setup the camera.
You can't really edit stuff in Rendered viewport shading so change it back to Object.
Get inside the sphere and press shift S and select 'Cursor to Center'
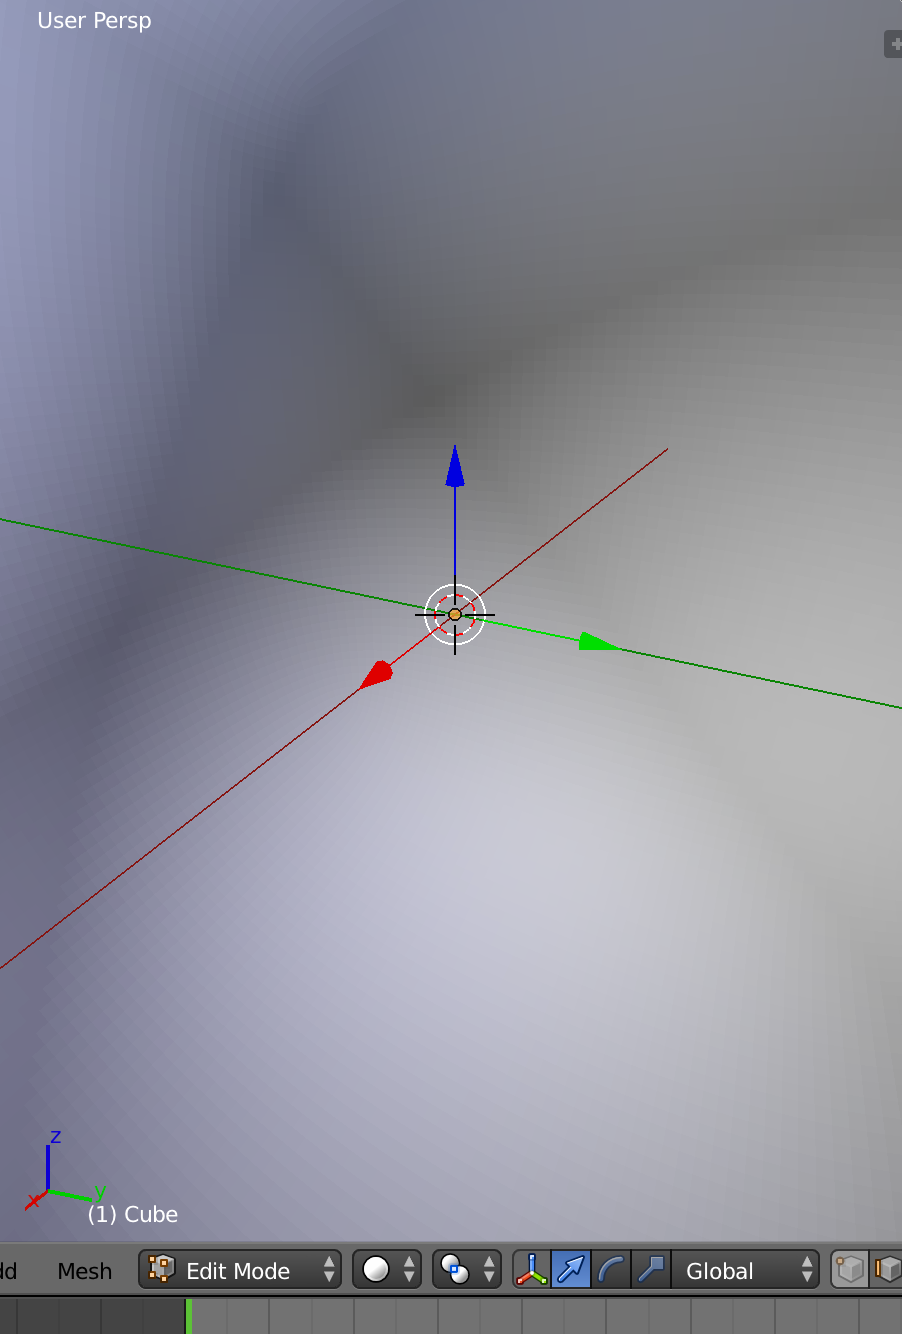
You can see that the 3d cursor is now placed on center. If it was already on center because you didn't press the left mouse button on the 3d view, good for you! This step was for people who accidentally pressed the left mouse button.
Now lets add a camera.
Press Tab to move back to object mode or select object mode button.
Press Shift A and add a camera. It will be placed on the center because your 3d cursor is there.
Zoom out
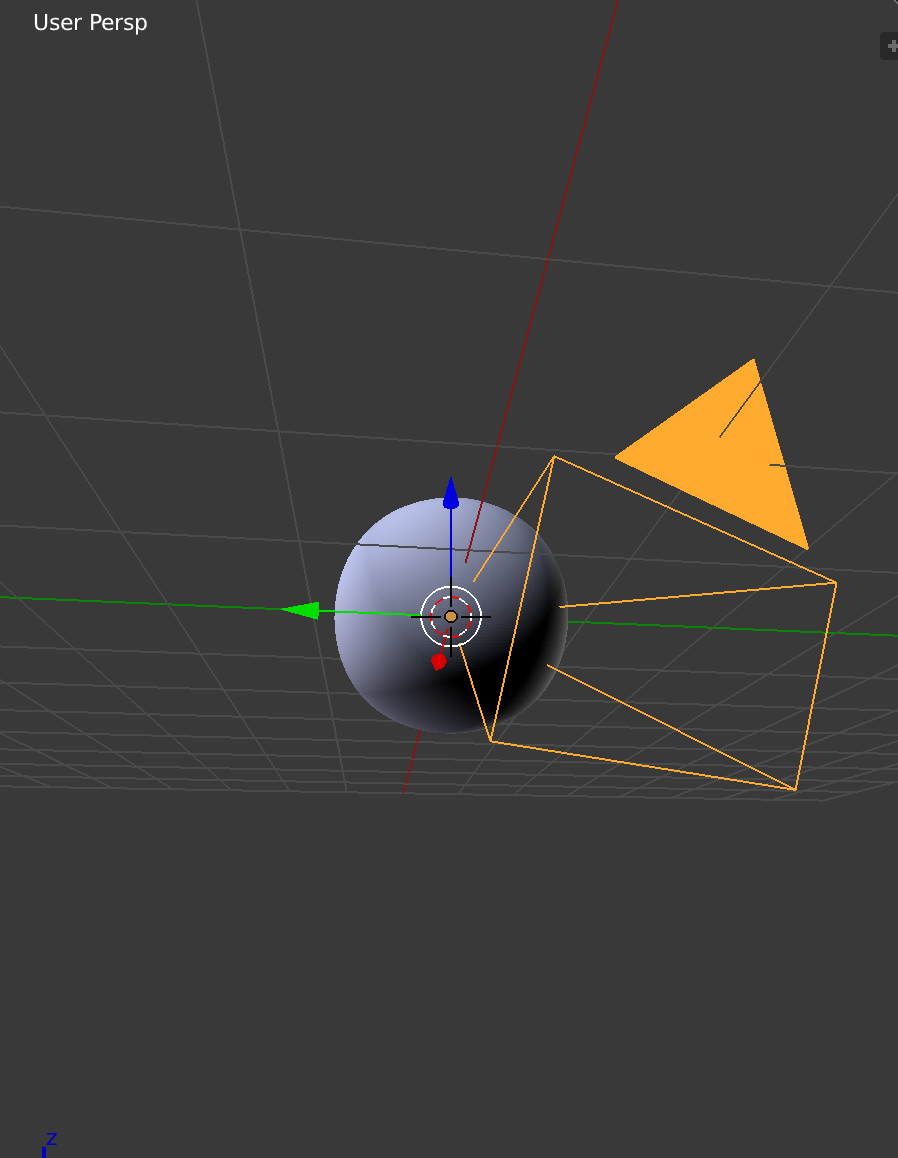
BTW, if your sphere does not have that strange lighting, flip the normal.
Press 'Object' menu -> 'Clear' -> 'Rotation'
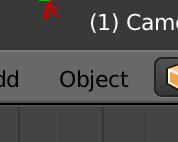 This is the Object menu
Now the Camera will look depressed.
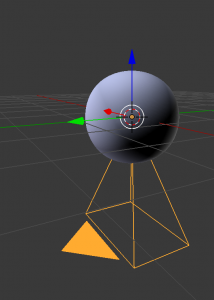
Now we want to change the setting of this camera.
If you select the camera, you'll be able to open this panel:
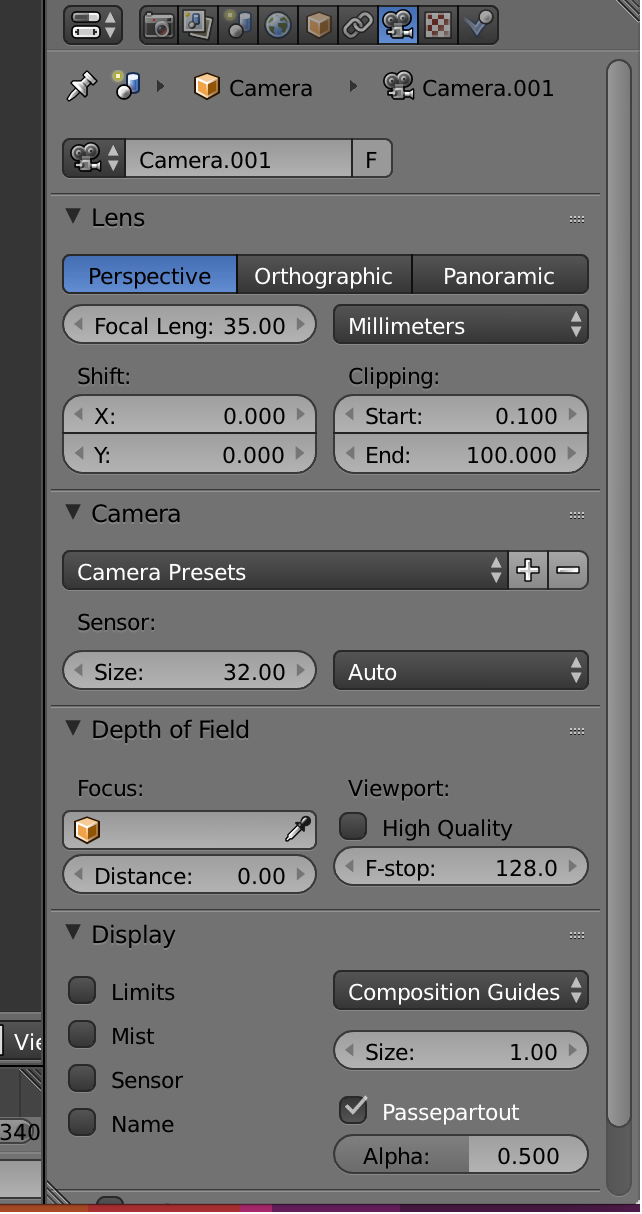
Change 'Millimeters' into Field of View and set the angle to 90 degrees.
Goto this panel:
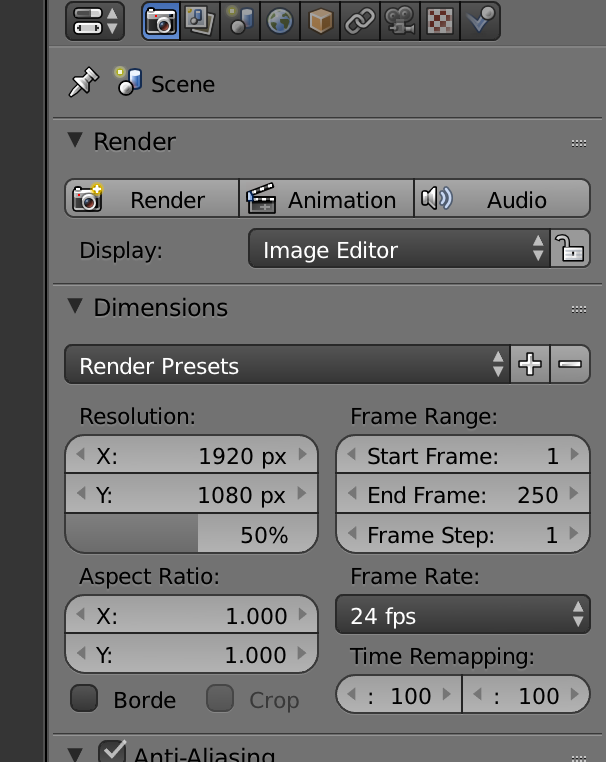
Change the resolution to what you want but keep X and Y Same. (square camera)
Now if you press Render button, it will render the bottom view. You need to change the camera rotation and render all 6 faces of the cube map to create a full set of skybox cubemap texture.
Remember: The triangle on the camera represents top. So keep that in mind when rotating the camera to render 6 faces. Also, Use the rotation command I listed at the beginning of the guide to rotate camera accruately.
Step 5: Render
Render by pressing the big render button.
Step 6: Importing your textures to hammer
You need to make vmt and vmf for each of your textures.
Use this page to do this step.
Step 7: Rate this Post to Show appreciation
If you are reading this, you'll see on the right isde of this page, these buttons
There are quite a few options here from Thanks to Respectfully Disagree.
Please press the Thanks button if you think this guide is helpful.
Please press the Respectfully Disagree button if you think this guide is a complete piece of shit.
Why would you press Funny?
Step 8: Post a reply to ask questions (optional)
This step is all up to you. If you have any problems with my English or explanation, feel free to post a reply.
PM is also good if you want to be secretive about your question.
Thank you for your time.
This took me like 2 hours to write. But the process itself (not including step 1 and step 6) will take you around 15 to 20 minutes. This is my first guide so I hope this was good enough. Thank you again, and have a lovely day.
I might just be making a redundant guide but it seemed to me like there aren't any specific guide dedicated for this. Please tell me if there is already.
Step 1: Create a basic cube map.
This first step involves you drawing a cubemap texture for the skybox. Don't worry anything about distortion just yet.
Like this:
As you can see, each side is not distorted but they show the surroundings.
If you want to know how to connect textures, check this guide on interloper.
Step 2: Open blender
We are going to distort the image using Blender. Its a free 3d modeling tool which you can download from here.
Now that you downloaded the program, open it up!
Before we start, these are the controls you'll need in this guide.
Select:
-Right mouse button.
-Shift + right mouse button to select multiple objects.
-Press A to select, deselect everything
Rotate: Press r, input axis (x,y and z), exact angle. Or press r, move your mouse, press left mouse button to apply rotation or right mouse button to cancel rotation. (You won't need to rotate free hand in this guide)
Scale: Press S
Maneuver your view:
-Press Middle mouse button to rotate around
-Use middle mouse button to zoom in/zoom out
-Shift + press middle mouse button to move your view
Copy Paste
-Shift + D NOT ctrl c/v
Delete:
-Press x after selecting.
Ctrl z or Command z
ok, now you'll be able to go through this guide without any problem even if you have never touched a 3D modeling tool before.
Step 3: Setup your blender
You can either follow this guide or skip almost half of this step by downloading this template.
Please take a look at all the steps. It took me 2 hours to write
For those who want to DIY,
Start by deleting everything but the cube in the center.
Select the cube.
Go to the right side of the screen and press this:
If you can not see the icon, you can drag it to make it show up. Hover your mouse over this line:
Do not drag using this. I'll get to this later:
That icon you pressed is an object modifier panel.
Add a modifier and you'll be provided with hosts of options but find 'subdivision surface'
There are a few options to the modifier.
Change View and Render to 6 (maximum).
As you can see, the cube is now more sphere-like:
Don't apply the modifier. You dont need to.
Now lets UV unwrap this cube.
First, go into Edit mode by pressing Tab.
Edit mode is where you can edit the object.
When you go into the edit mode, you'll see that the blender still considers the object as a cube.
This is because we didn't apply the modifier. But again, we dont need to and it is easier to not apply it.
Right now, all the vertices are selected. Press A to deselect everything.
Go into Edge select mode and select these edges:
You will have to move your view to select all the edges. If you want to go into wireframe mode like this, press Z.
(You'll notice that screenshots below shows different seems marked differently. Please ignore those. I made a mistake.)
Now press alt + E to go into edges menu.
select 'Mark Seams'
Your edges will now be highlighted red.
Remember this?:

Drag that corner to create a new window:
(Again I marked wrong seems here please ignore)
Now make the right side window a UV/Image Editor:
Like this:
Now press U and select unwrap and you'll see the cube is unwraped on the right.
You'll see it's unwrapped nicely but it is rotated. We know this because if you select a face on a 3d view, that face is also selected on the 2d view.
If you place your cursor on the right side, you can treat the unwrapped shape like 3d objects: you can rotate it, scale it, and move the vertices around.
Rotate the uv so that the uv is looks like this:
or anyway suitable to your own texture. (back, left, front, and right really doesn't matter obviously)
Now you need to apply the texture to the 'cube' we unwrapped.
Now go to the 'Material' Panel like how you opend the modifier pane; and create 'New' and you'll see this:
Go to 'Shading' and check 'Shadeless'
Now open the 'texture' panel and create 'New' like this:
And set 'Type' to be 'Image or Movie'
Under 'Image' open your texture by pressing the file icon on the right to open your texture.
Once you load your texture in, you'll see extra options like 'Source' enabled just like the screenshot. Ignore those.
If you downloaded the template, this step is where you need to pick up.
If you go to the material panel, you'll see the preview now has a sphere with your texture all over it.
Let's go back to the texture panel and set the mapping correct.
You can see under Mapping, there's a blank space called Map. Press it and you'll be able to select the UVMap you want. You'll have only one uv map so select that.
Now, select this:
 (it's next to the edit mode button)
and change it to Rendered.
Taadaa! It's your texture applied on a cube which has deformed into a shape similar to a sphere!
You might have noticed that this is not what you want. You want the texture to show Inside not Outside don't you? (say yes)
To do this, go to the right side of the screen and select Shading/UVs tab.
Under 'Normals:' press Flip Direction
This will flip normal of the face inside out which means your textured faces are now inside.
Try moving your view inside the sphere. You'll see that you texture has smoothly formed a skybox.
Now we should setup the camera.
You can't really edit stuff in Rendered viewport shading so change it back to Object.
Get inside the sphere and press shift S and select 'Cursor to Center'
You can see that the 3d cursor is now placed on center. If it was already on center because you didn't press the left mouse button on the 3d view, good for you! This step was for people who accidentally pressed the left mouse button.
Now lets add a camera.
Press Tab to move back to object mode or select object mode button.
Press Shift A and add a camera. It will be placed on the center because your 3d cursor is there.
Zoom out
BTW, if your sphere does not have that strange lighting, flip the normal.
Press 'Object' menu -> 'Clear' -> 'Rotation'
Now the Camera will look depressed.

Now we want to change the setting of this camera.
If you select the camera, you'll be able to open this panel:
Change 'Millimeters' into Field of View and set the angle to 90 degrees.
Goto this panel:
Change the resolution to what you want but keep X and Y Same. (square camera)
Now if you press Render button, it will render the bottom view. You need to change the camera rotation and render all 6 faces of the cube map to create a full set of skybox cubemap texture.
Remember: The triangle on the camera represents top. So keep that in mind when rotating the camera to render 6 faces. Also, Use the rotation command I listed at the beginning of the guide to rotate camera accruately.
Step 5: Render
Render by pressing the big render button.
Step 6: Importing your textures to hammer
You need to make vmt and vmf for each of your textures.
Use this page to do this step.
Step 7: Rate this Post to Show appreciation
If you are reading this, you'll see on the right isde of this page, these buttons
There are quite a few options here from Thanks to Respectfully Disagree.
Please press the Thanks button if you think this guide is helpful.
Please press the Respectfully Disagree button if you think this guide is a complete piece of shit.
Why would you press Funny?
Step 8: Post a reply to ask questions (optional)
This step is all up to you. If you have any problems with my English or explanation, feel free to post a reply.
PM is also good if you want to be secretive about your question.
Thank you for your time.
This took me like 2 hours to write. But the process itself (not including step 1 and step 6) will take you around 15 to 20 minutes. This is my first guide so I hope this was good enough. Thank you again, and have a lovely day.


