Introduction
After numerous requests and questions posed in the group chat (not specifically directed to me), it seems high time that someone took a hold of the situation and created a fully fledged tutorial for modelling for the source engine using Blender. Please note that this tutorial assumes a basic knowledge of how to use Blender 3D and an image editor of your choice. If any corrections or additions are posted in the comments, I will add them to the guide. Feel free to ask any questions, and i'll try my best to help.
Programs
Required Programs
- Team Fortress 2
- Source SDK
- Blender 3D
- GUIStudioMDL
- VTFEdit
- Photoshop (or similar image editor)
How to install the Blender Source Tools
Download the Blender Source Tools, but do not unzip the archive.
Then In Blender:
- Select File > User Preferences
- Move to the Addons tab
- Click Install From File... in the bottom of the window
- Find the downloaded zip file and select it, then click ‘Install from File…’
- Under 'Categories' on the left, click 'Import-Export'
- Find 'Blender Source Tools' in the list and check the tickbox. Wait a moment for activation to complete.
- Click Save User Settings and close the window.
Part 1: Creating a simple static prop
For this section of the tutorial we will be creating a simple snow shovel.
Create a new file in blender and delete all the default items. It's worth noting that 1 blender unit = 1 hammer unit, which means that the model will appear very large in blender. It is therefore worth increasing the view back clipping plane. To do this press 'N', and then under 'View', change the 'Clip->End' to 10000. We can now proceed with modelling our Shovel. For now I won't go into modelling methods, as there are plenty of existing tutorials online, however in the future I may update this section with a video tutorial of the modelling process.
Now that we have something like this:
we need to sort out our smoothing. To do this select the model and set the shading to smooth, and add an edge split modifier. This modifier is what determines our smoothing groups. We can either use the automated 'Edge Angle' field to determine which edges are sharp, or we can do the same task manually and with significantly more precision using the 'Sharp Edges' checkbox. To determine a sharp edge, select an edge in edit mode, press 'Ctrl+E', and click 'Mark Sharp'.
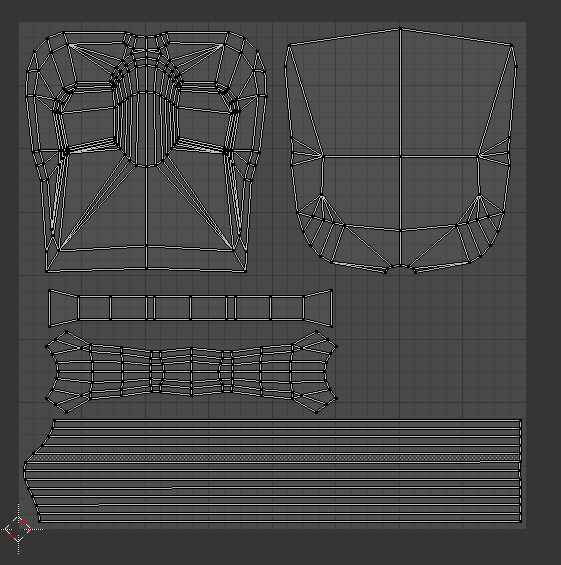
Now that our reference model is complete we can start to texture it. The first step for this process is to UV map our geometry. Switch to the 'UV Editing' View-port Configuration, then in edit mode use the tools available by pressing 'U' to unwrap your model. (To mark a uv seam select an edge, press 'Ctrl+E' and click 'Mark Seam'. A good guideline for this stage is to get each UV island to have a similar pixel density, so each island should roughly correspond to the size of the faces it represents. The islands should not share UV space due to prop light-map and ambient occlusion baking related issues. You should also aim to leave a small gap between islands in order to prevent mipmap related artifacts. We should end up with something similar to this.
Now that we have our model unwrapped it's time to bake ambient occlusion. This is artificial lighting which we use as a base during texturing. In edit mode, select all of your model by pressing 'A', then in the UV pane of the view-port press '+ New'

and click 'OK'. Next switch back into 'Default' view and on the right hand panel, select the Camera icon tab, scroll down to 'Bake', switch the 'Bake Mode' to 'Ambient Occlusion', the 'Margin' to 4, and then click 'Bake'. Switch the viewport shading mode to Textured and you should see AO baked onto the model. Now go back into UV Editing mode and export your AO bake and UV Maps from the 'Image' and UV's tab respectively.
You can now open up your exported bake and map in PhotoShop and get texturing. A graphics tablet is not essential during this stage, but it does make life a lot easier. I'm not going to go into texturing processes here, but a great guide can be found over on polycount. It's worth noting that map props tend to be a bit more detailed in their textures than players or cosmetics. A quick way to help with this is to add a slight Gaussian noise filter as an overlay layer, but this should be complemented with extra painted detail as well. You can use the alpha channel of the texture for a specular map, where white is fully reflective and black is fully matte.
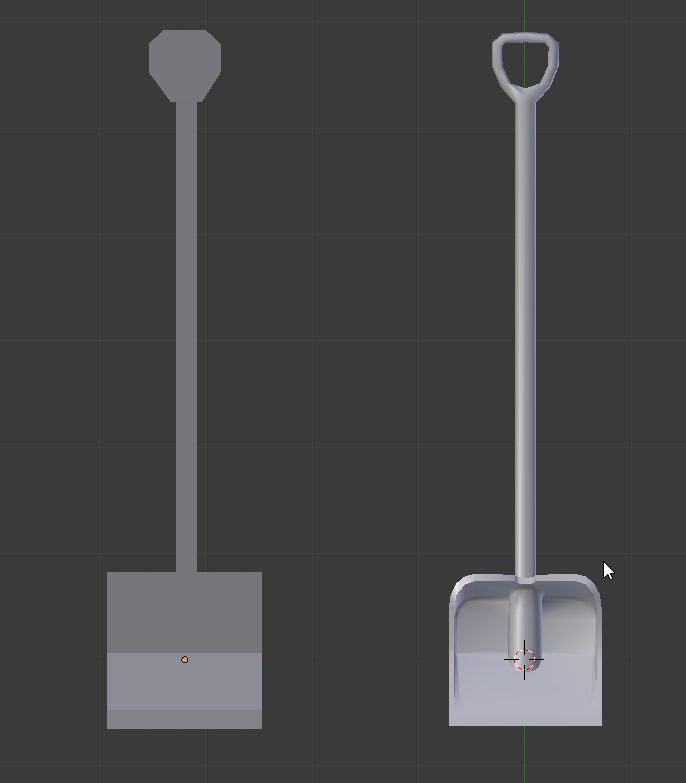
Once you've created your texture/ textures, save them as a .tga at 32 bit/pixel. Back in blender select all your models faces, then click 'Image—>Open Image' and select your diffuse texture. Your model should then show your texture in the textured view. In my case, it looks like this.
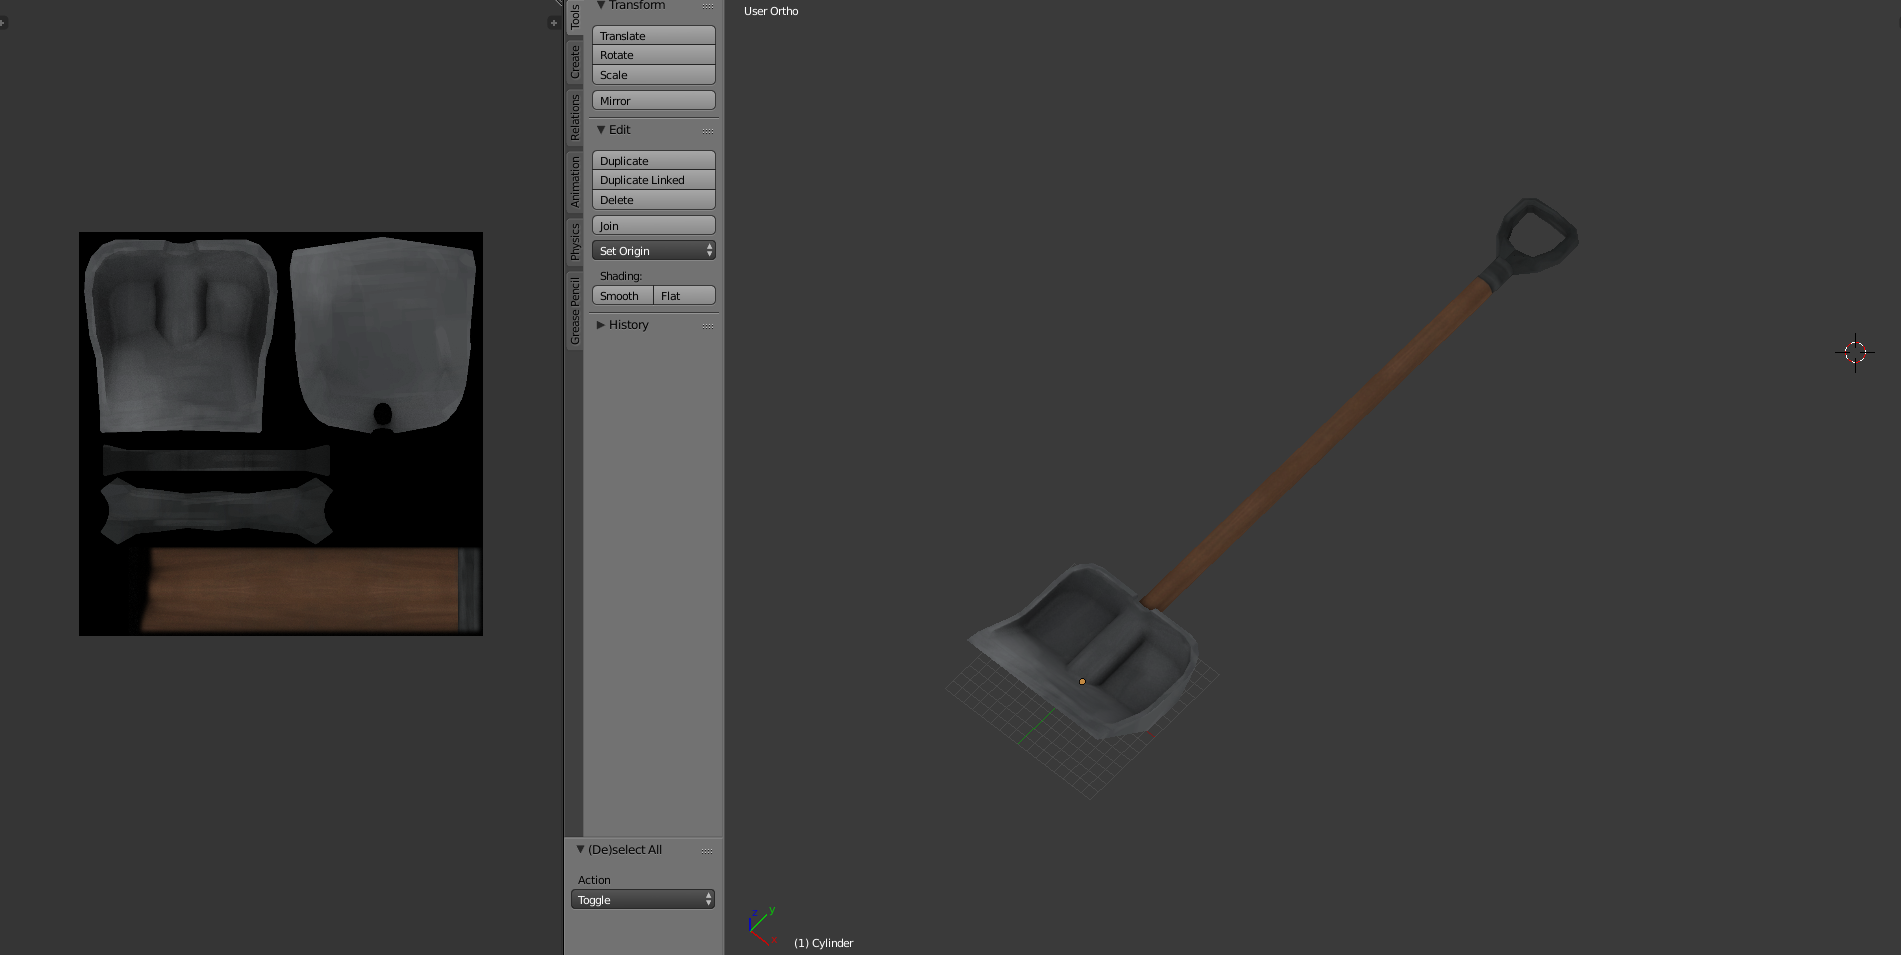
We now need to prepare our model for exporting to source. First go into default view, and add a material named exactly the same as your texture. My texture is named “snow_shovel_diffuse.tga”, so that's what I will call the material. If your model requires multiple material slots, simply add another material named appropriately and assign the corresponding faces to each material.
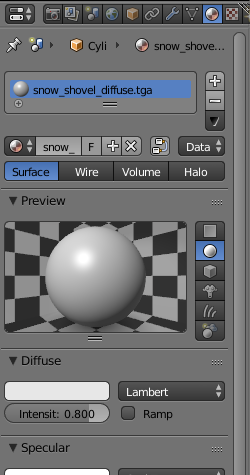
We also want to name the object, I will call mine “snow_shovel_reference”.
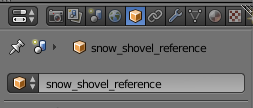
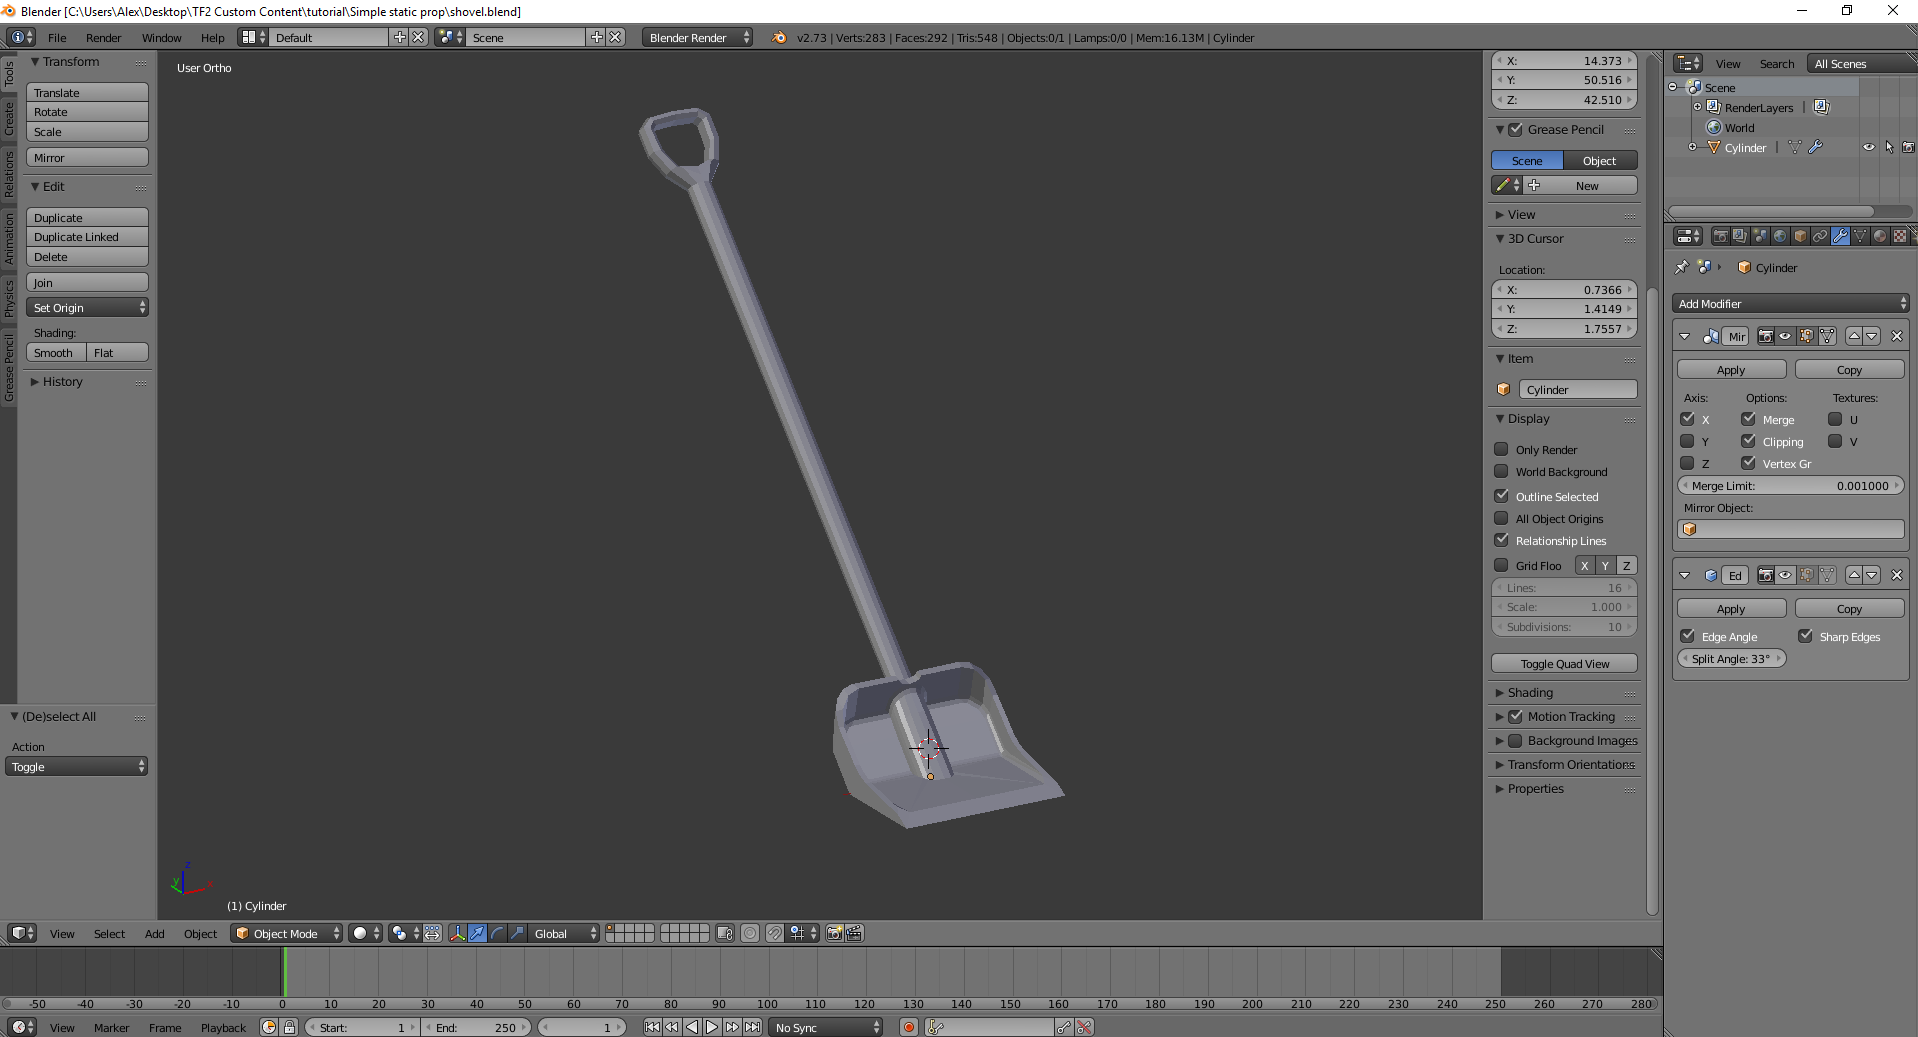
Now that we have the reference model complete, we need to make our LODs. First copy your model and rename it to “snow_shovel_reference_lod1”. Next I use the ‘Decimate’ modifier to automatically generate an LOD.
This can also be done manually for a better result, but doing so requires significantly more work. Repeat this process for as many LODs as you want. We also need to make a collision model. To do this create a cube and size it to the shovel’s bucket. Switch to edit mode, then select all and press ‘Shift+D’ to duplicate the cube and resize it to fit another part of the model. Note that each piece doesn’t have to be a cube, as long as it is convex and a sealed solid. Repeat this until you have something looking like this. Note that all parts of the collision mesh must be within the same model.
Then select the physics model, set it to smooth shading, and name it “snow_shovel_physics”.
We can now proceed with exporting the models. Switch to the ‘Scene’ tab on the right hand menu and scroll down to the ‘Source Engine Export’ tab. Select ‘SMD’ and choose where you want the SMDs to be saved in the ‘Export Path Field’.
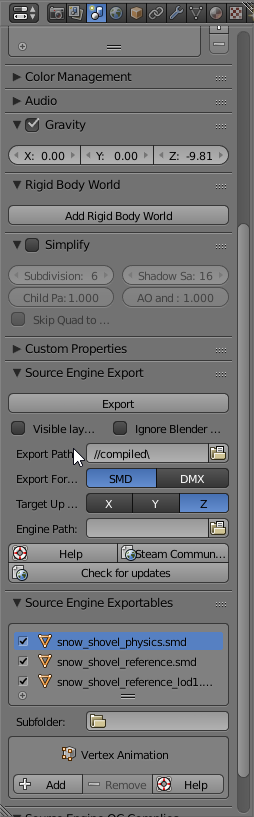
Click ‘Export’, then ‘Scene Export’. navigate to the destination folder you just chose in windows explorer, then duplicate “snow_shovel_reference.smd” and rename the copy to “idle.smd”.
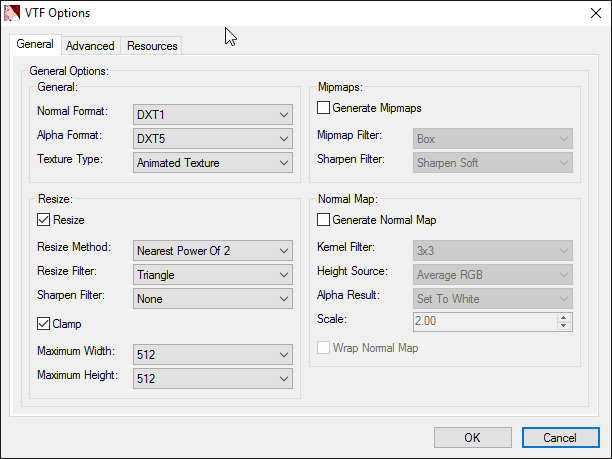
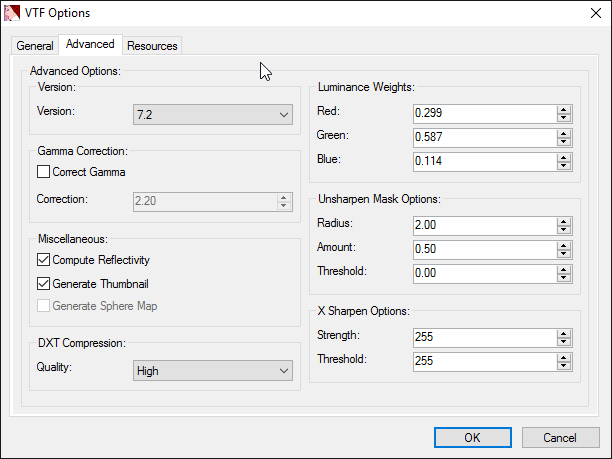
Next we’re going to create our material. Open VTFEdit and click ‘File->Import’ and choose the .tga file you created earlier. In the ‘VTF options’ dialogue which pops up, I use these settings:
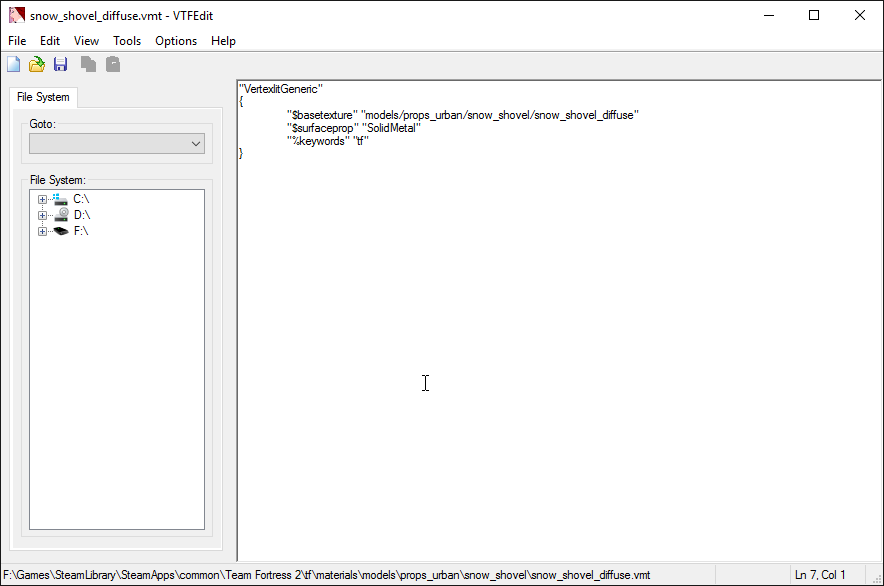
Click ‘OK’ and your texture should appear in the viewport., then select ‘File->Save As...’ and choose a sensible location in “tf/materials/models” in the game files. I will use “tf/materials/models/props_urban/snow_shovel/”. Save the vtf as the same name you chose for the material in blender (minus the .tga). Next click ‘Tools-Create VMT File…’, set ‘Shader’ as ‘VertexLitGeneric’, select/deselect any other options you need, then click ‘Create’, then ‘Save’, then ‘Close’. Open the .vmt file saved in the location you just chose, it should look similar to this:
There are a lot of different options that can be added to determine the materials behavior, but these are the most essential:
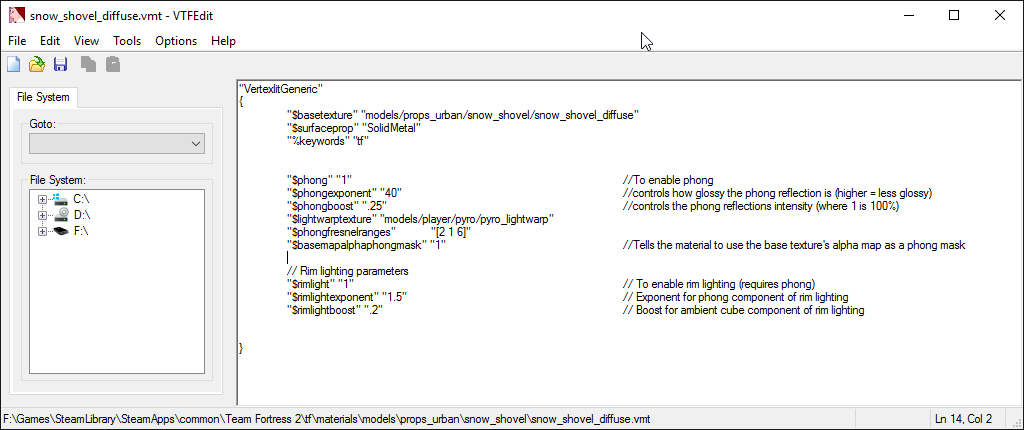
check this page for detailed descriptions of the commands available
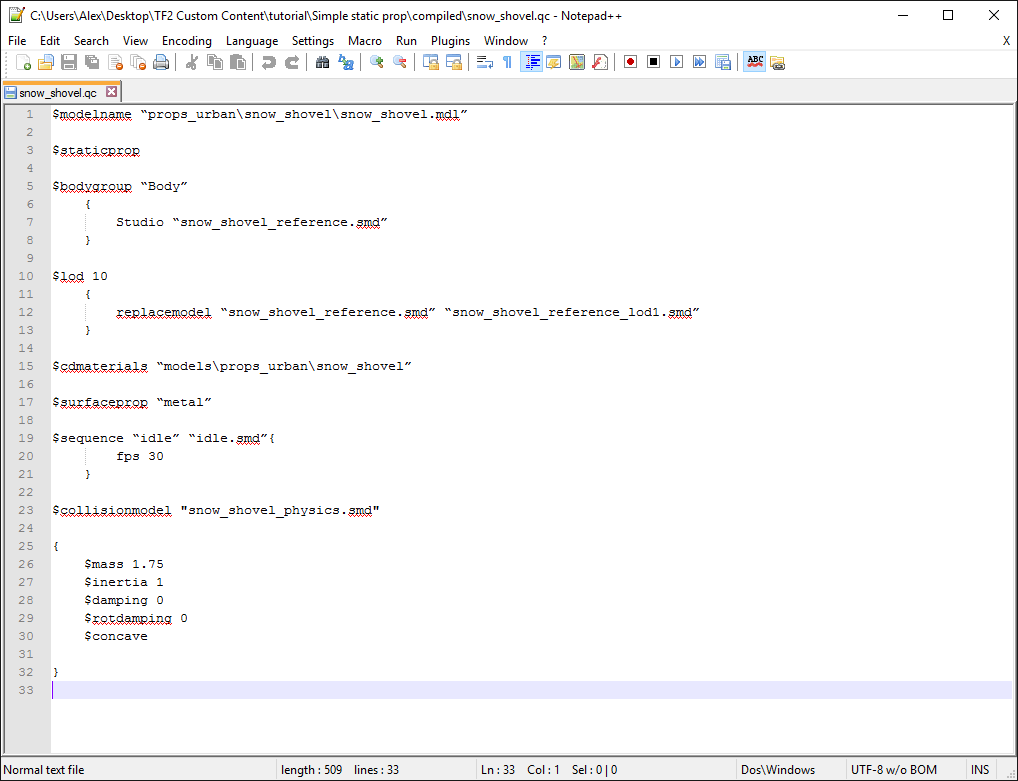
We can now write our QC file. This is a plain text document which tells the compiler (GUIStudioMDL) what to do with our model and material/s. A handy shortcut to this stage is to use GCFScape and Crowbar to decompile a similar existing model’s QC to use, but I’ll be going through the full process. A list of parameters can be found here.
Create a new document in Notepad++, and save it with your .smds as “snow_shovel.qc” with ‘File Type’ Set to ‘All Types’. Each parameter should begin on a new line for the sake of legibility.
First we need
$modelname “props_urban\snow_shovel\snow_shovel.mdl”
This parameter tells the compiler where to place the .mdl file (in relation to tf/models), and what to name it.
Next we add
$staticprop
This tells the compiler that the model can be used as a prop_static.
Next is
$bodygroup “Body”
{
{
Studio “snow_shovel_reference.smd”
}This tells the compiler which .smd to use as lod 0.
Now we want
$lod 10
{
{
replacemodel “snow_shovel_reference.smd” “snow_shovel_reference_lod1.smd”
}The number tells source at what distance to change the lod, and replacemodel defines which .smds to switch between.
Next comes
$cdmaterials “models\props_urban\snow_shovel”
This needs to be the path from tf/materials to the folder where your .vmt is contained
If you have multiple skins, use
$texturegroup skinfamilies
{
{ "snow_shovel_diffuse" }
{ "snow_shovel_diffuse_b" }
{ "snow_shovel_diffuse_c" }
{ "snow_shovel_diffuse_d" }
}
{
{ "snow_shovel_diffuse" }
{ "snow_shovel_diffuse_b" }
{ "snow_shovel_diffuse_c" }
{ "snow_shovel_diffuse_d" }
}
Where the names within the brackets are the names of each .vmt.
Now add
$surfaceprop “metal”
This defines how the models should behave when shot. Replace ‘metal’ with whichever surface prop you like.
Now we need
$sequence “idle” “idle.smd”{
fps 30}
fps 30
This tells the compiler which .smd to use as the idle animation sequence.
Finally we add
$collisionmodel "snow_shovel_physics.smd"
}
This tells the compiler which .smd to use as the collision model. $mass defines the objects mass in kg, $inertia, $damping and $rotdamping are multipliers of their respective parameters, and $concave tells the compiler that the collisionmodel is concave (remember that each element must be convex)
{ $mass 1.75
$inertia 1
$damping 0
$rotdamping 0
$concave
$inertia 1
$damping 0
$rotdamping 0
$concave
Once all these are added, and our document is saved, our .QC should look similar to this:
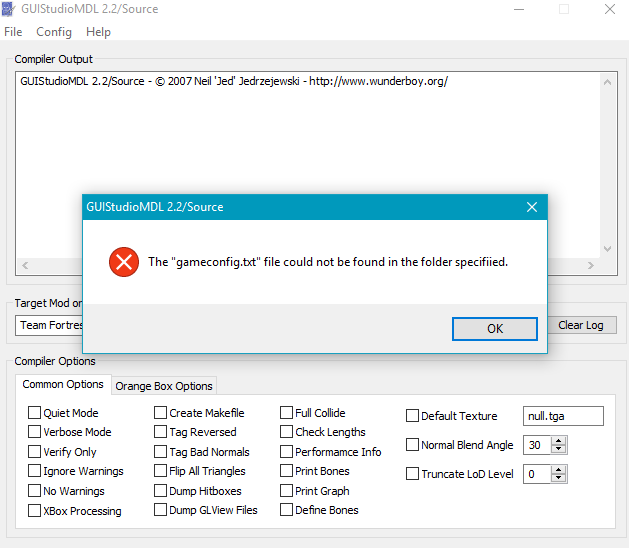
Now we can set up GUIStudioMDL for compiling. The first time you run GUIStudioMDL you will get a message telling you that your SDK Tool Paths aren't yet set. What you need to do is tell it where the studiomdl.exe is located for Orange Box based games. Click ‘Config->Set Orange Box Tools Path…” then navigate to and select the folder containing studiomdl.exe. This is usually located in “TeamFortress2\bin”. Under ‘SDK Version’ in the main GUIStudioMDL window, select ‘Orange Box’ then click ‘Add’ under ‘Target Mode or “GameInfo” path’. Select ‘gameinfo.txt’ located in “Team Fortress 2/tf”. “Team Fortress 2” should now show in the ‘Target Mode or “GameInfo” path’ dropdown.
Click ‘File->Load QC File…’ and select ‘snow_shovel.qc’, then click compile. If everything has been setup correctly, the window should look like this:
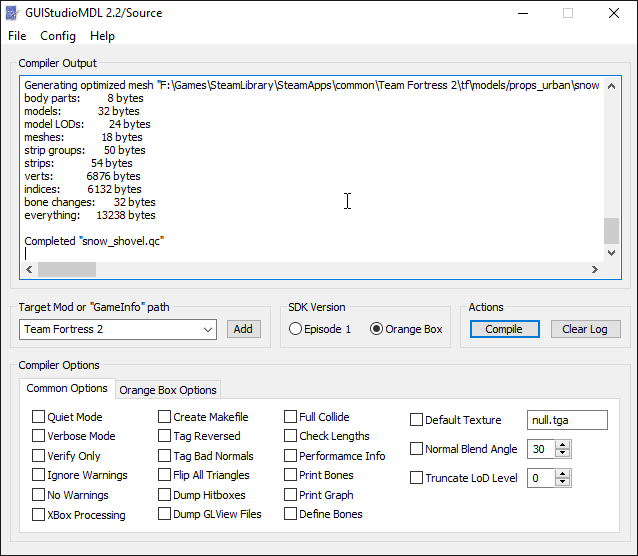
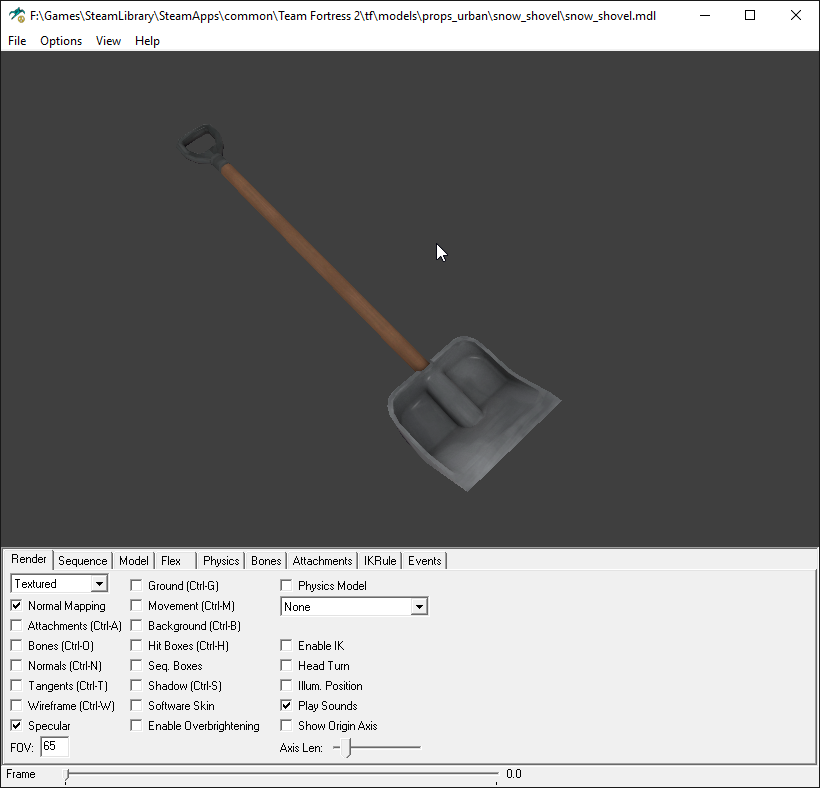
and your model should be compiled. To check, navigate to “tf/models/props_urban/snow_shovel” and open “snow_shovel.mdl” in hlmv. It should look like this:
Our model is now ready for use.
Part 2: Creating an animated prop
To be added at a later date.
Thanks to Wormatty for some help proofreading.
Last edited: