- Aug 2, 2009
- 539
- 334
Building Buildings
other useful tutorial concerning buildings
[Tutorial] Building angled roofs (the Valve way!) - TF2Maps.net
[TUTORIAL]Angled roofs - TF2Maps.net
When we are done, the building will look something like this

Lets create our first room. We are going to start with four walls. I added a info_player_start entity so I ket an eye on the scale.

The walls are 16 units thick, Please try not to go below it or weapons models can stick through walls. I am using nodraw textures, but you are free to use any texture you want.

For those wondering, the “room” is 256x256x256 units big, but in the final version (as seen above), I increased the height (because it looked better).
doors and windows
Now for some doorways. Create a prop_Static and find a nice doorframe model for it. In this case I used models/props_farm/doorframe001a.mdl, but others will do fine aswell. Also I recommend you disable the shadows. Now place the doorframe inside the wall, you can’t see the doorframe anymore, but don’t worry, we are going to fix that. From here on I have my grid side set to 8.

Find the 2d view in wich the doorway-wall faces you, now take the brush and duclicate/move/resize it so that it surrounds the doorframe. You don’t have to do it the way I did, you can also make 2 long vertical pieces and a small bit above the doorframe.

Do the other walls as well. Remember you can also place windows and even a combination of window(s) and doorframe(s). The window model used is models/props_forest/windowframe002.mdl. but again , you are free to use any window model you like.

adding a roof
Create a brush slightly longer that than the wall beneath it, I have it sticking out 8 units. Now open up the vertex edit tool and change it in a half-rook-like structure like below. I keep the height:width ratio to about 1:2

Not how the upper end is vertical and the lower end is horizontal. Now copy this brush and rotate it 180 degrees and put it against the original one. Now we are only left with a triangular hole. Add a brush the width of the wall below it and vertex edit it into a triangle

Now our roof is done

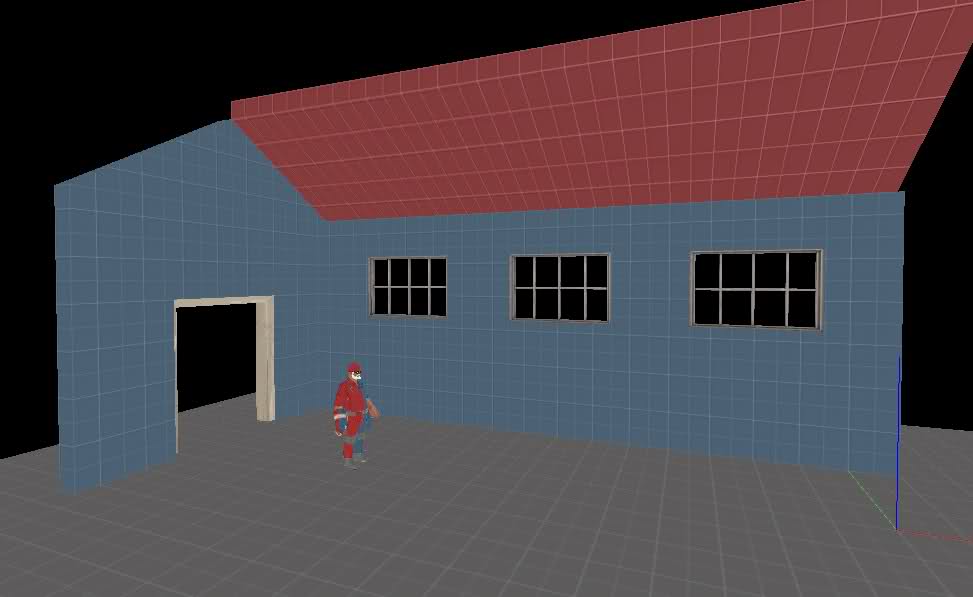
Now we have a simple building.

extending the building
We have a building, but it is a bit boring. We don’t want a simple shape building, we want a irregular shaped building.

It is very simple, just repeat the step done above. You basicaly create a smaller three-walled build right next to it. Make sure the new roofs are parallel to the old roof. If the extension is on the side of the old building, you should use “half-a roof” as seen in the image above. Make sure it the original building and the extension are connected through a doorway frame. If you don’t want the extension to be accessible, make it apparent

Now, to extend to the top, create a platform on top of a ceiling and use that as a floor for a new mini-building. Just create a triangular brush on top of the roof

Now you have your platform to build on

After extending a bit extra, this is what I created

And because I can, here it is with different textures. (textures aren’t aligned and the viemodel is visible, but you get the picture)

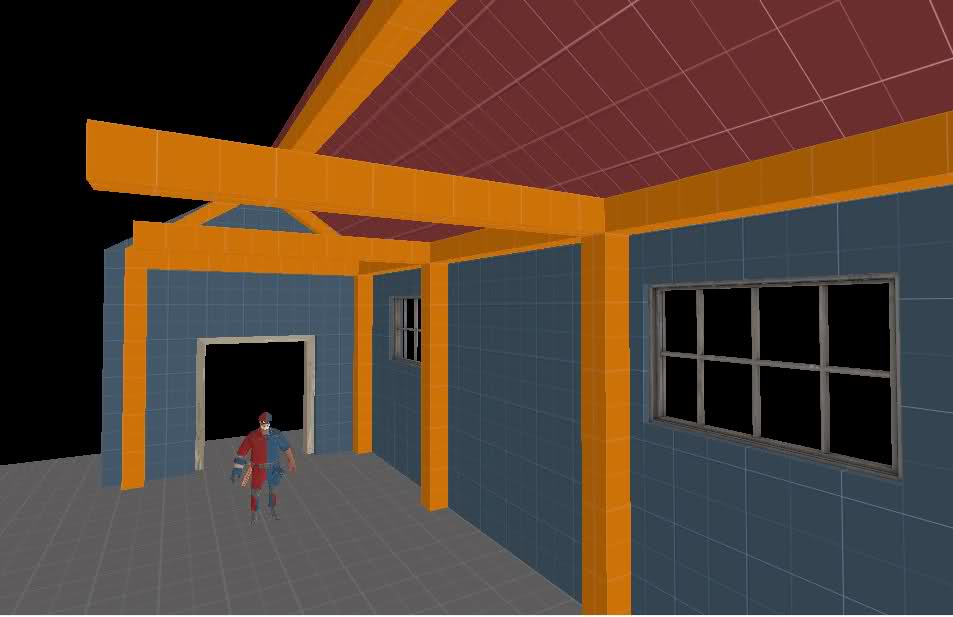
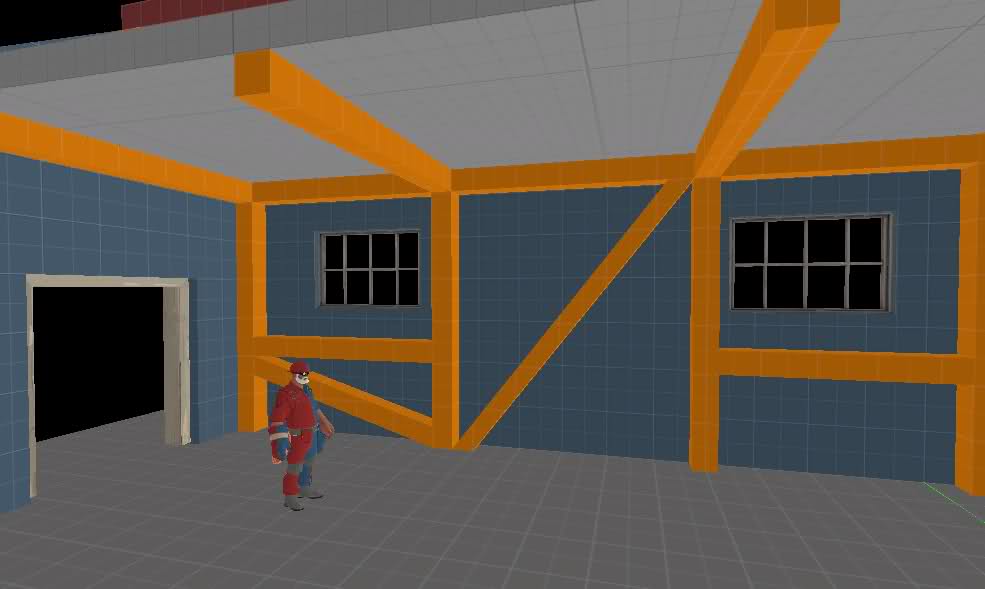
Support
For this part of the tutorial I will use this half-constructed house, so we can easily see the inside. I used dev textures so you can easily see what is what. Blu=walls, red=roof, orange=support.
Support can be placed both on the inside and on the outside, I personnaly prefer only putting it in the inside.
We start by creating an outline inside the original building. I kept the beams 16x16 thick but you can experiment and see what you like most.
if you building is long/wide enough add additional pillars and beams.
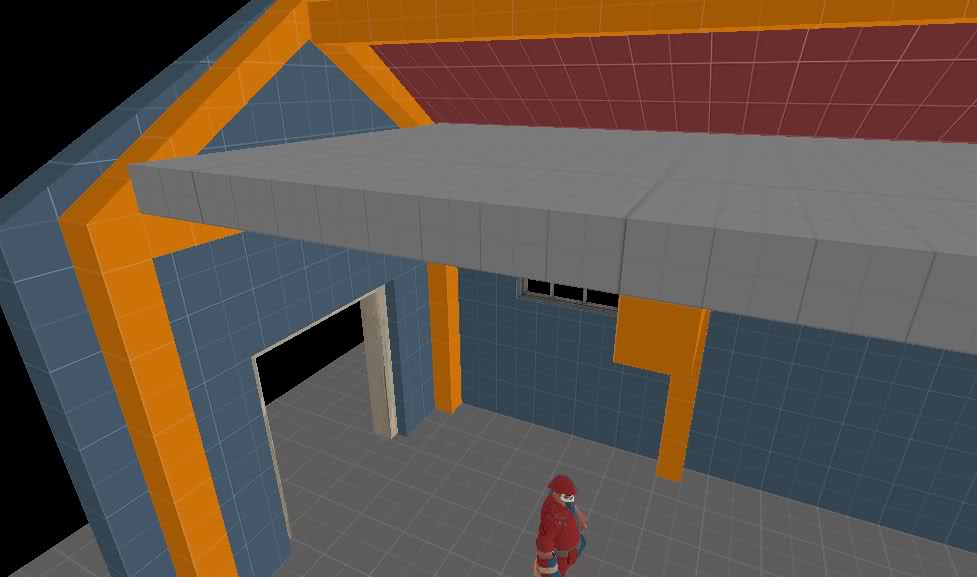
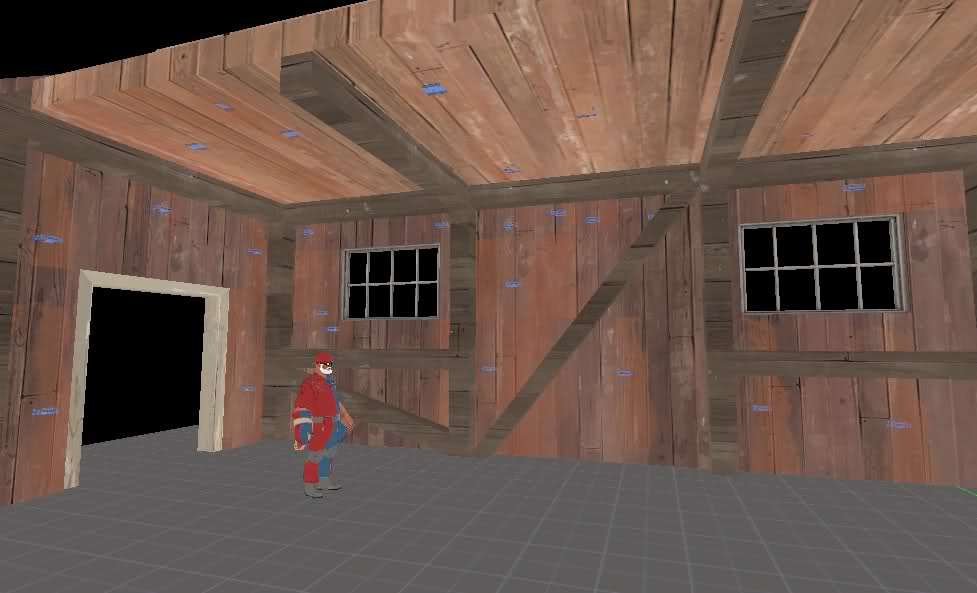
optional, I like to do this. Add something on top of the support. I think it makes it look better, but the building will look smaller from the inside. Adding some cracks to it is a great effect
Now add more beams in the smaller empty areas. (empty = no window or door)
overlays
this one is simple, quickly overseen, but makes everything so much nicer.
to find overlays, simply type overlay in the filter of the material browser and tf in the keywords field.
It is hard to overuse overlays, this actually a bad example the overlays are far from seamless. I used the stain* overlays here.
Also use these overlays on the outside.
On the outside put a nice company name and more overlays. One overlay I found quite a lot in good maps was the patch overlay, feel free to use it. (also use it to mark where ammopack and medkits spawn.)
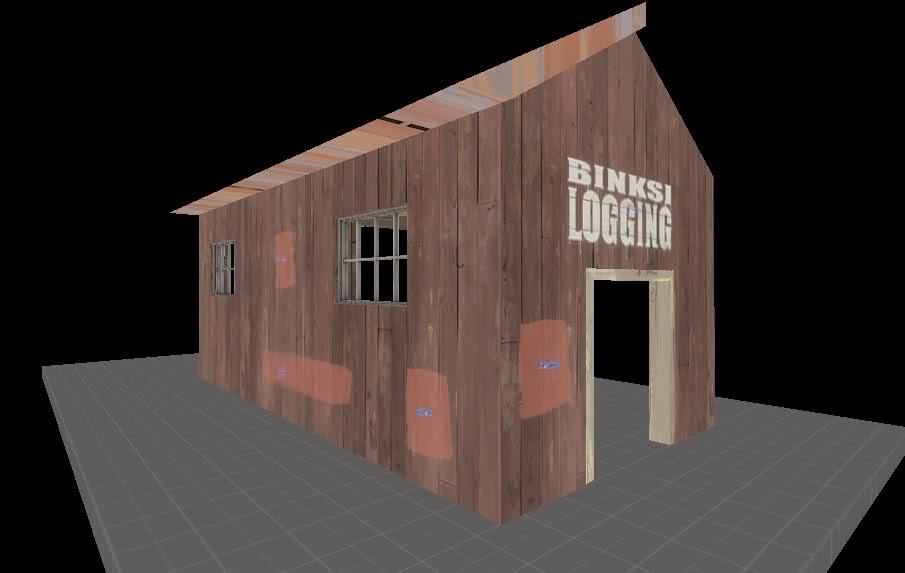
count the overlays.
props
I cant say a lot about this one, find some props you think fit in and place them in corners and leaning against walls.
other useful tutorial concerning buildings
[Tutorial] Building angled roofs (the Valve way!) - TF2Maps.net
[TUTORIAL]Angled roofs - TF2Maps.net
When we are done, the building will look something like this
Lets create our first room. We are going to start with four walls. I added a info_player_start entity so I ket an eye on the scale.
The walls are 16 units thick, Please try not to go below it or weapons models can stick through walls. I am using nodraw textures, but you are free to use any texture you want.
For those wondering, the “room” is 256x256x256 units big, but in the final version (as seen above), I increased the height (because it looked better).
doors and windows
Now for some doorways. Create a prop_Static and find a nice doorframe model for it. In this case I used models/props_farm/doorframe001a.mdl, but others will do fine aswell. Also I recommend you disable the shadows. Now place the doorframe inside the wall, you can’t see the doorframe anymore, but don’t worry, we are going to fix that. From here on I have my grid side set to 8.
Find the 2d view in wich the doorway-wall faces you, now take the brush and duclicate/move/resize it so that it surrounds the doorframe. You don’t have to do it the way I did, you can also make 2 long vertical pieces and a small bit above the doorframe.
Do the other walls as well. Remember you can also place windows and even a combination of window(s) and doorframe(s). The window model used is models/props_forest/windowframe002.mdl. but again , you are free to use any window model you like.
adding a roof
Create a brush slightly longer that than the wall beneath it, I have it sticking out 8 units. Now open up the vertex edit tool and change it in a half-rook-like structure like below. I keep the height:width ratio to about 1:2
Not how the upper end is vertical and the lower end is horizontal. Now copy this brush and rotate it 180 degrees and put it against the original one. Now we are only left with a triangular hole. Add a brush the width of the wall below it and vertex edit it into a triangle
Now our roof is done
Now we have a simple building.
extending the building
We have a building, but it is a bit boring. We don’t want a simple shape building, we want a irregular shaped building.
It is very simple, just repeat the step done above. You basicaly create a smaller three-walled build right next to it. Make sure the new roofs are parallel to the old roof. If the extension is on the side of the old building, you should use “half-a roof” as seen in the image above. Make sure it the original building and the extension are connected through a doorway frame. If you don’t want the extension to be accessible, make it apparent
Now, to extend to the top, create a platform on top of a ceiling and use that as a floor for a new mini-building. Just create a triangular brush on top of the roof
Now you have your platform to build on
After extending a bit extra, this is what I created
And because I can, here it is with different textures. (textures aren’t aligned and the viemodel is visible, but you get the picture)
Support
For this part of the tutorial I will use this half-constructed house, so we can easily see the inside. I used dev textures so you can easily see what is what. Blu=walls, red=roof, orange=support.
Support can be placed both on the inside and on the outside, I personnaly prefer only putting it in the inside.
We start by creating an outline inside the original building. I kept the beams 16x16 thick but you can experiment and see what you like most.
if you building is long/wide enough add additional pillars and beams.
optional, I like to do this. Add something on top of the support. I think it makes it look better, but the building will look smaller from the inside. Adding some cracks to it is a great effect
Now add more beams in the smaller empty areas. (empty = no window or door)
overlays
this one is simple, quickly overseen, but makes everything so much nicer.
to find overlays, simply type overlay in the filter of the material browser and tf in the keywords field.
It is hard to overuse overlays, this actually a bad example the overlays are far from seamless. I used the stain* overlays here.
Also use these overlays on the outside.
On the outside put a nice company name and more overlays. One overlay I found quite a lot in good maps was the patch overlay, feel free to use it. (also use it to mark where ammopack and medkits spawn.)
count the overlays.
props
I cant say a lot about this one, find some props you think fit in and place them in corners and leaning against walls.
Last edited:


")