A short(ish) tutorial on how to apply alpha channels to images and exporting them as textures with transparency. For use as overlays, sprays, etc.
This tutorial assumes you have some knowledge of how to create and export custom textures to .vtf
I'm using Photoshop CS3, but the layout is fundamentally the same for future versions.
First you want to make something. I made this little happy dude for the purpose of this tutorial. For reference, my image size is 512x512, which is rather large for an overlay texture.
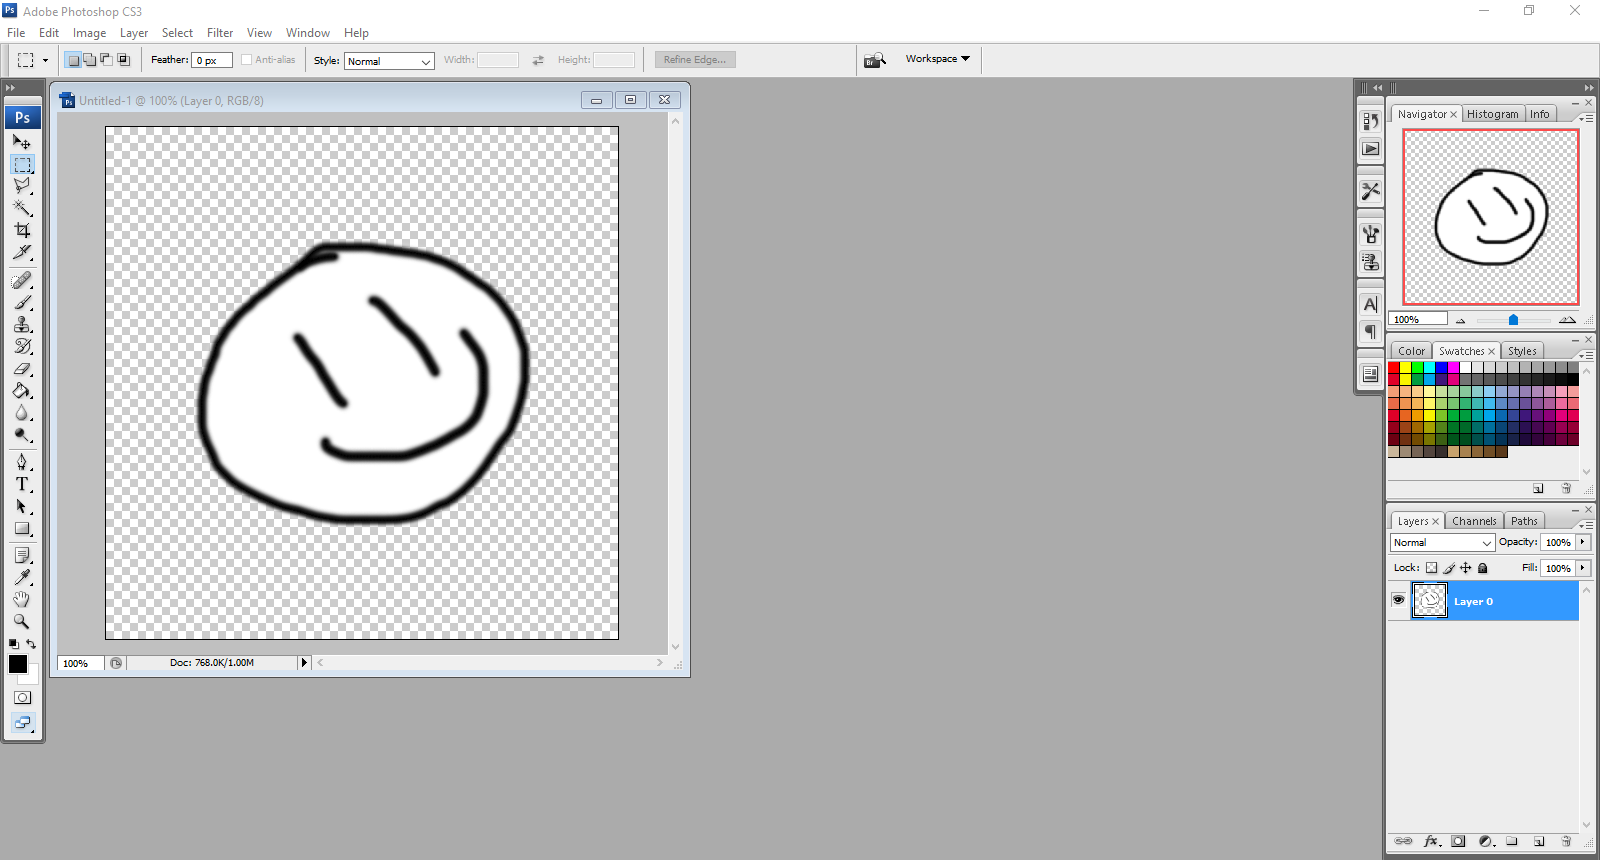
Once you've made your image, you're going to want to navigate down to the "Channels" tab and select it, opening up the list of channels.
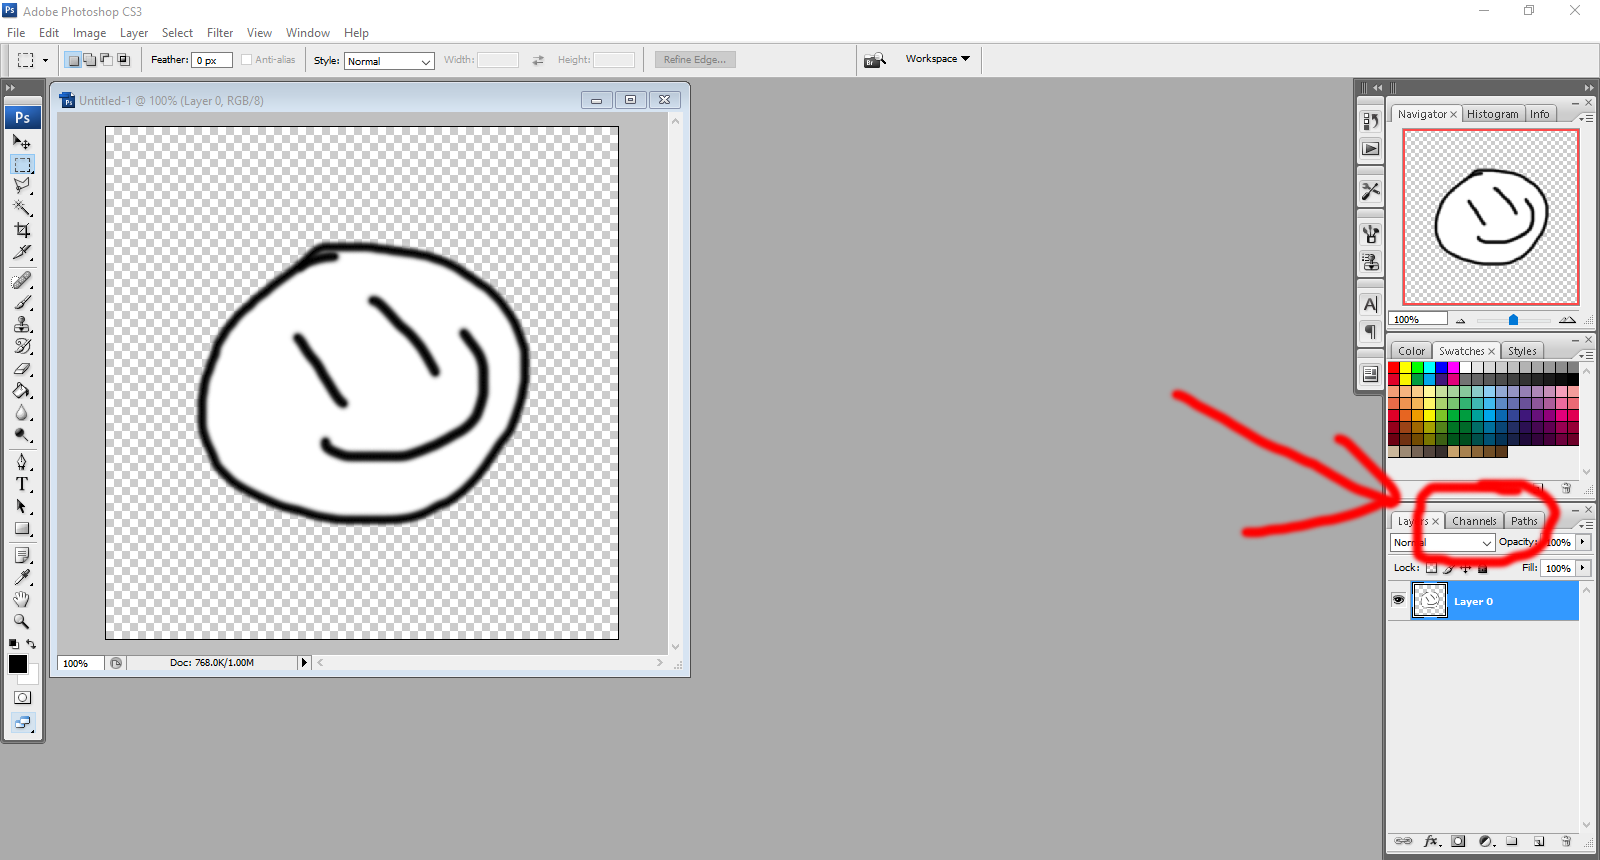
Once you've done that, It should look like this. 4 channels, with the top one named "RGB"

Navigate to your Magic Wand tool. For this tutorial, I've set my tolerance to 50 (though anything inbetween 15 and 50 would work) and contiguous to on. If you've not got your background already cut out like I have, I'd make sure Contiguous is on.
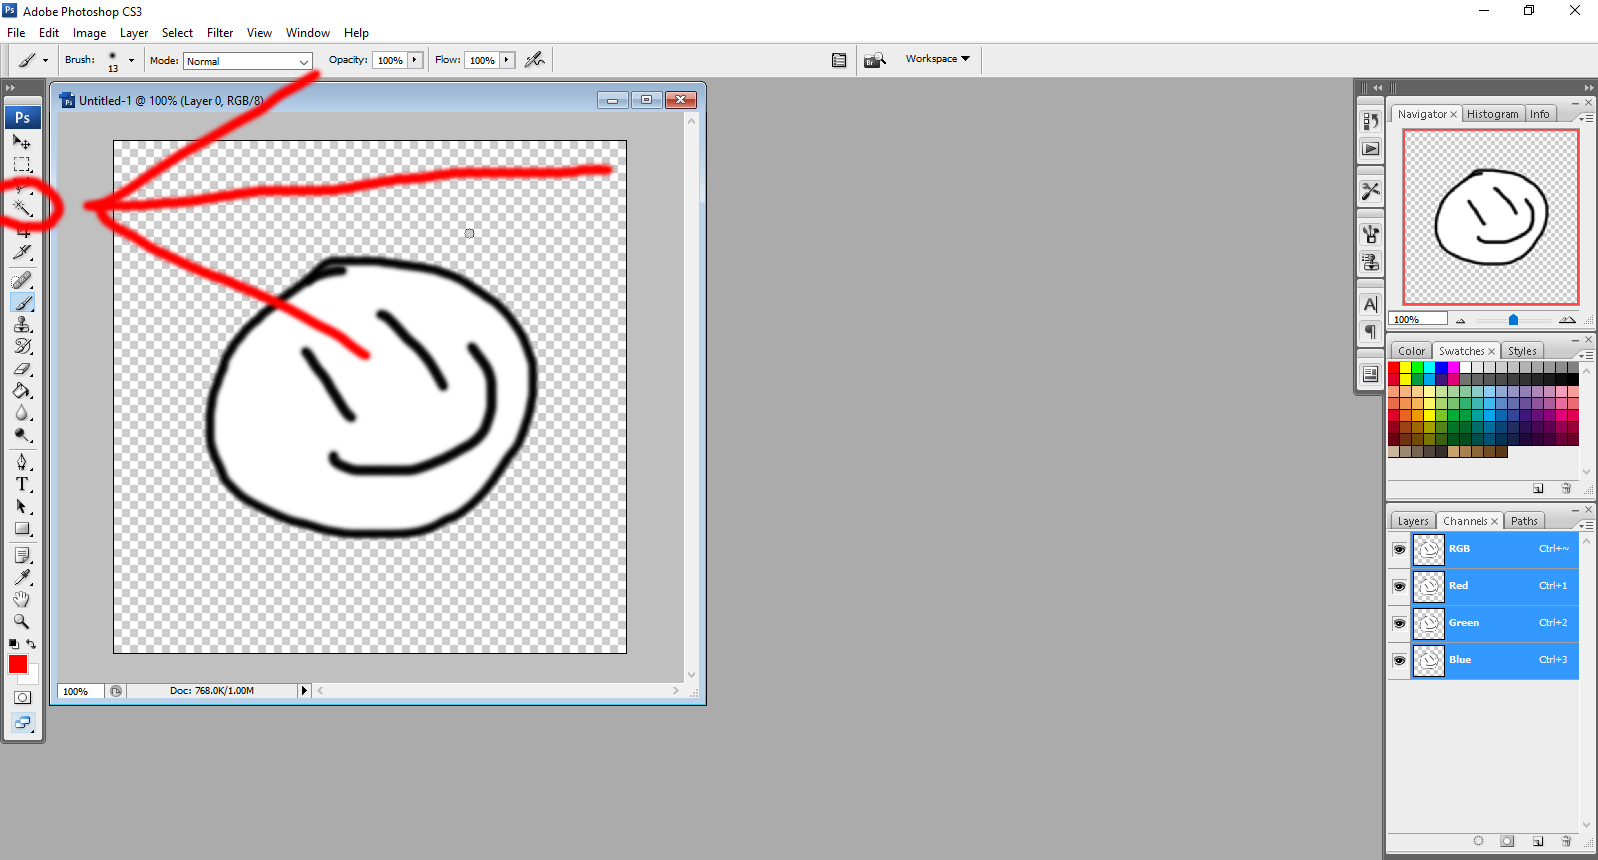
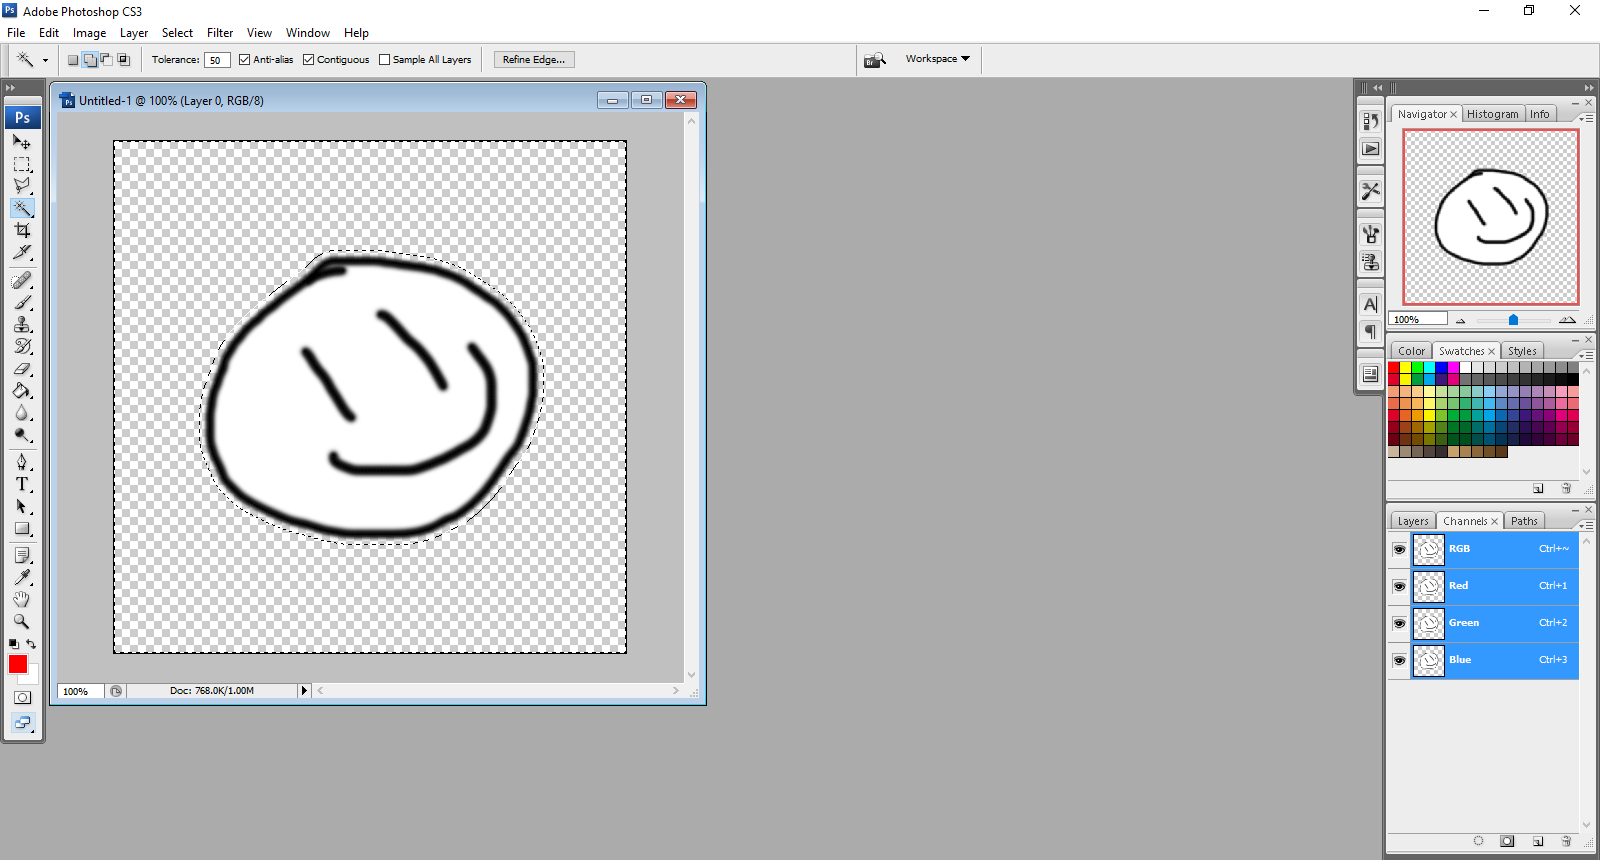
Click in the outer area like I have, the marquee effect should be around the borders of the image and the border of what you want to be opaque.
Right click the selected area with the wand equipped, and click "Select Inverse"
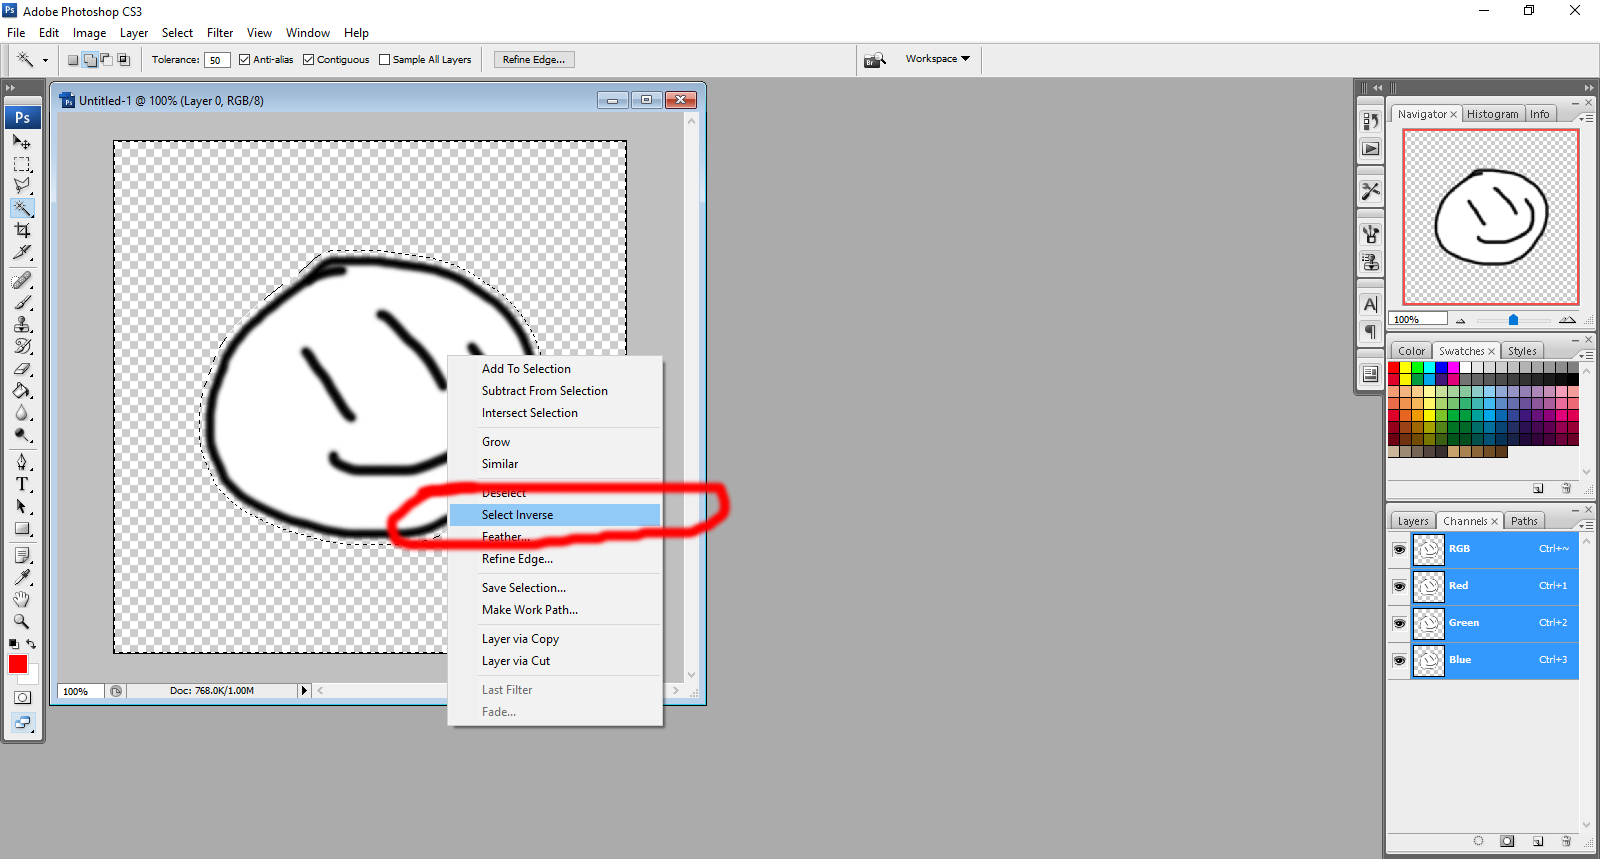
Now you should only have the area you want opaque selected. Navigate back to the Channels tab, and click the button at the bottom named "Save Selection as Channel"
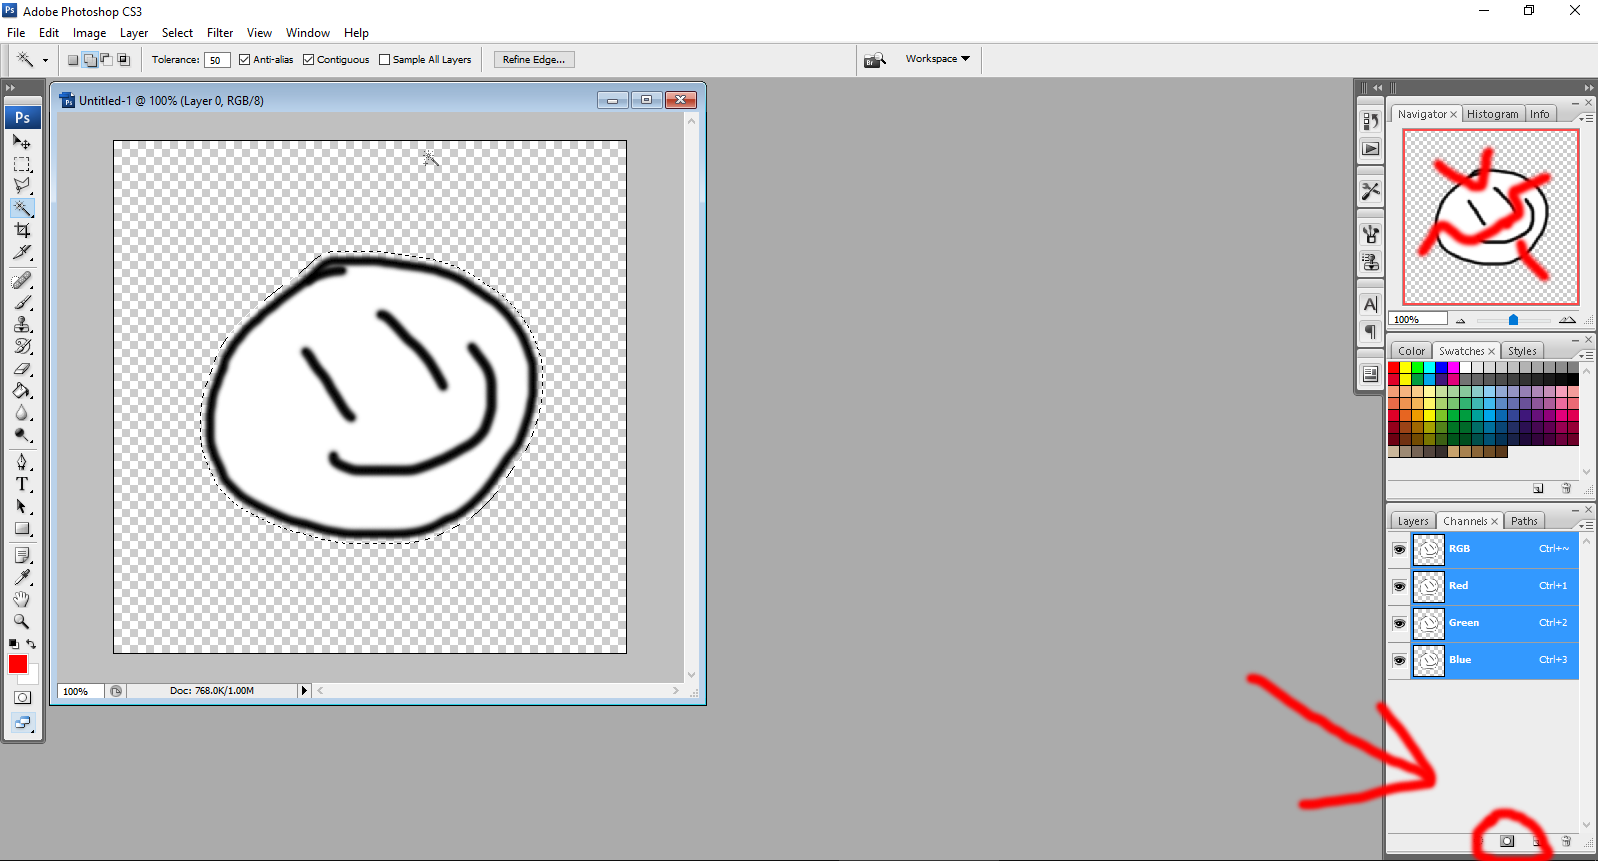
An Alpha Channel has now been created. Congrats, you're nearly done!
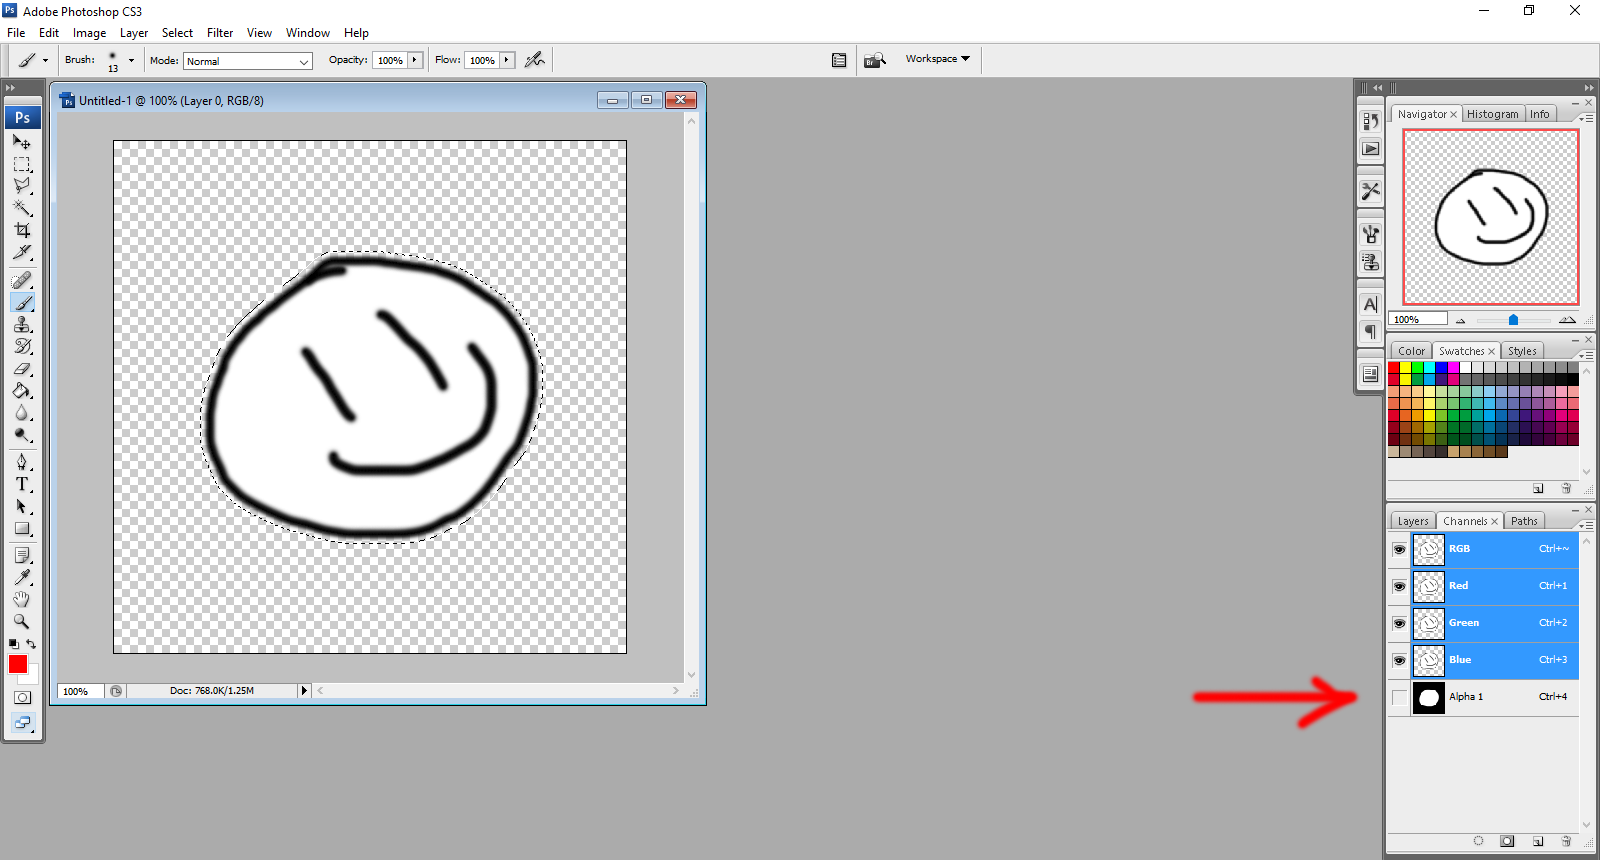
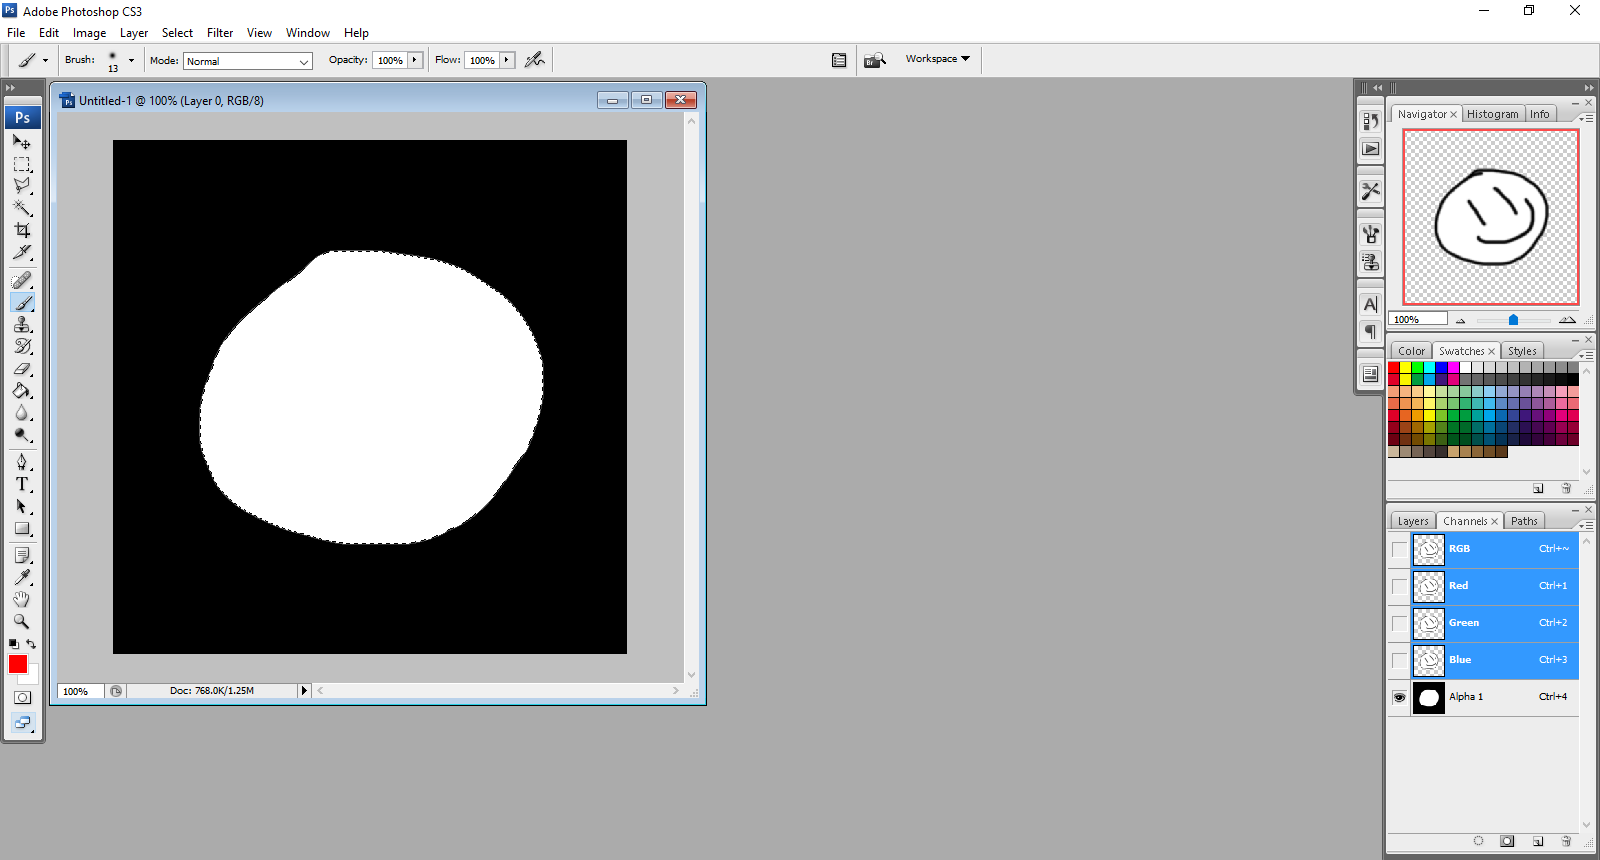
You can view the alpha channel over your image by marking it visible and marking the "RGB" channel as not visible.
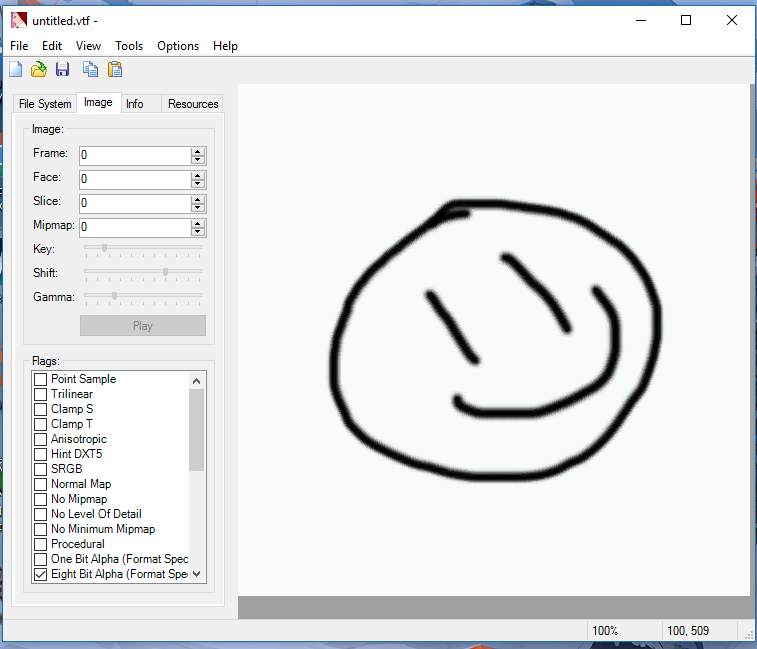
And now we go to VTFedit. Save your image in Photoshop as a targa (.tga) file, and import it to VTFedit and save it as a .vtf file in the game's "Materials" folder.
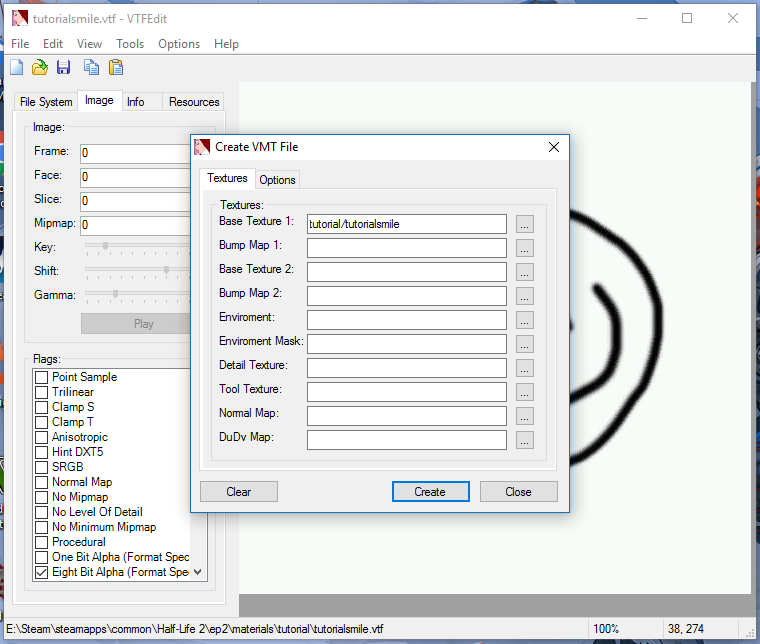
Go to "Tools" at the top of VTFedit and select "create VMT file". A pop-up window should show up as this, ensure that your path is correct.
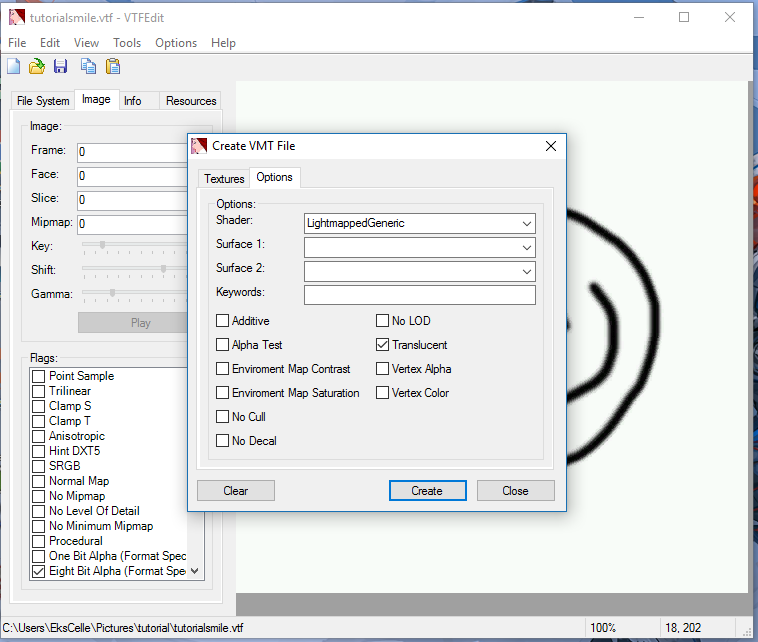
Go to the "Options" tab at the top of the pop-up and ensure that "Translucent" is checked. Create the VMT
Go into Hammer and place it as an overlay.
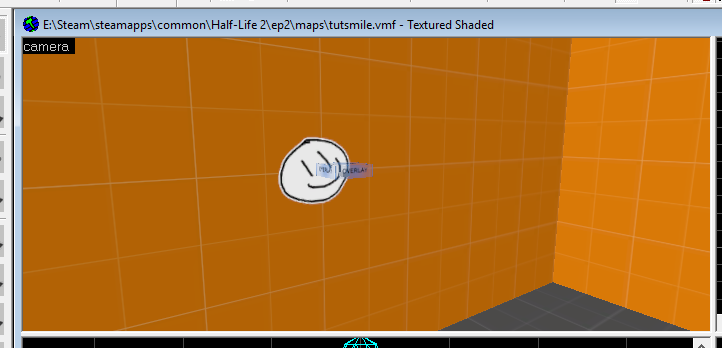
And finally, compile the map. You're done!

If you want the image to be slightly transparent, go back to Photoshop and make the white area in the Alpha Channel a gray instead. Congratulations, you've now made an overlay! This method can also be applied to making transparent sprays.
This tutorial assumes you have some knowledge of how to create and export custom textures to .vtf
I'm using Photoshop CS3, but the layout is fundamentally the same for future versions.
First you want to make something. I made this little happy dude for the purpose of this tutorial. For reference, my image size is 512x512, which is rather large for an overlay texture.

Once you've made your image, you're going to want to navigate down to the "Channels" tab and select it, opening up the list of channels.

Once you've done that, It should look like this. 4 channels, with the top one named "RGB"

Navigate to your Magic Wand tool. For this tutorial, I've set my tolerance to 50 (though anything inbetween 15 and 50 would work) and contiguous to on. If you've not got your background already cut out like I have, I'd make sure Contiguous is on.

Click in the outer area like I have, the marquee effect should be around the borders of the image and the border of what you want to be opaque.

Right click the selected area with the wand equipped, and click "Select Inverse"

Now you should only have the area you want opaque selected. Navigate back to the Channels tab, and click the button at the bottom named "Save Selection as Channel"

An Alpha Channel has now been created. Congrats, you're nearly done!

You can view the alpha channel over your image by marking it visible and marking the "RGB" channel as not visible.

And now we go to VTFedit. Save your image in Photoshop as a targa (.tga) file, and import it to VTFedit and save it as a .vtf file in the game's "Materials" folder.

Go to "Tools" at the top of VTFedit and select "create VMT file". A pop-up window should show up as this, ensure that your path is correct.

Go to the "Options" tab at the top of the pop-up and ensure that "Translucent" is checked. Create the VMT

Go into Hammer and place it as an overlay.

And finally, compile the map. You're done!

If you want the image to be slightly transparent, go back to Photoshop and make the white area in the Alpha Channel a gray instead. Congratulations, you've now made an overlay! This method can also be applied to making transparent sprays.


