The arch prefab is annoying. You just have to learn how to use it and plan ahead.
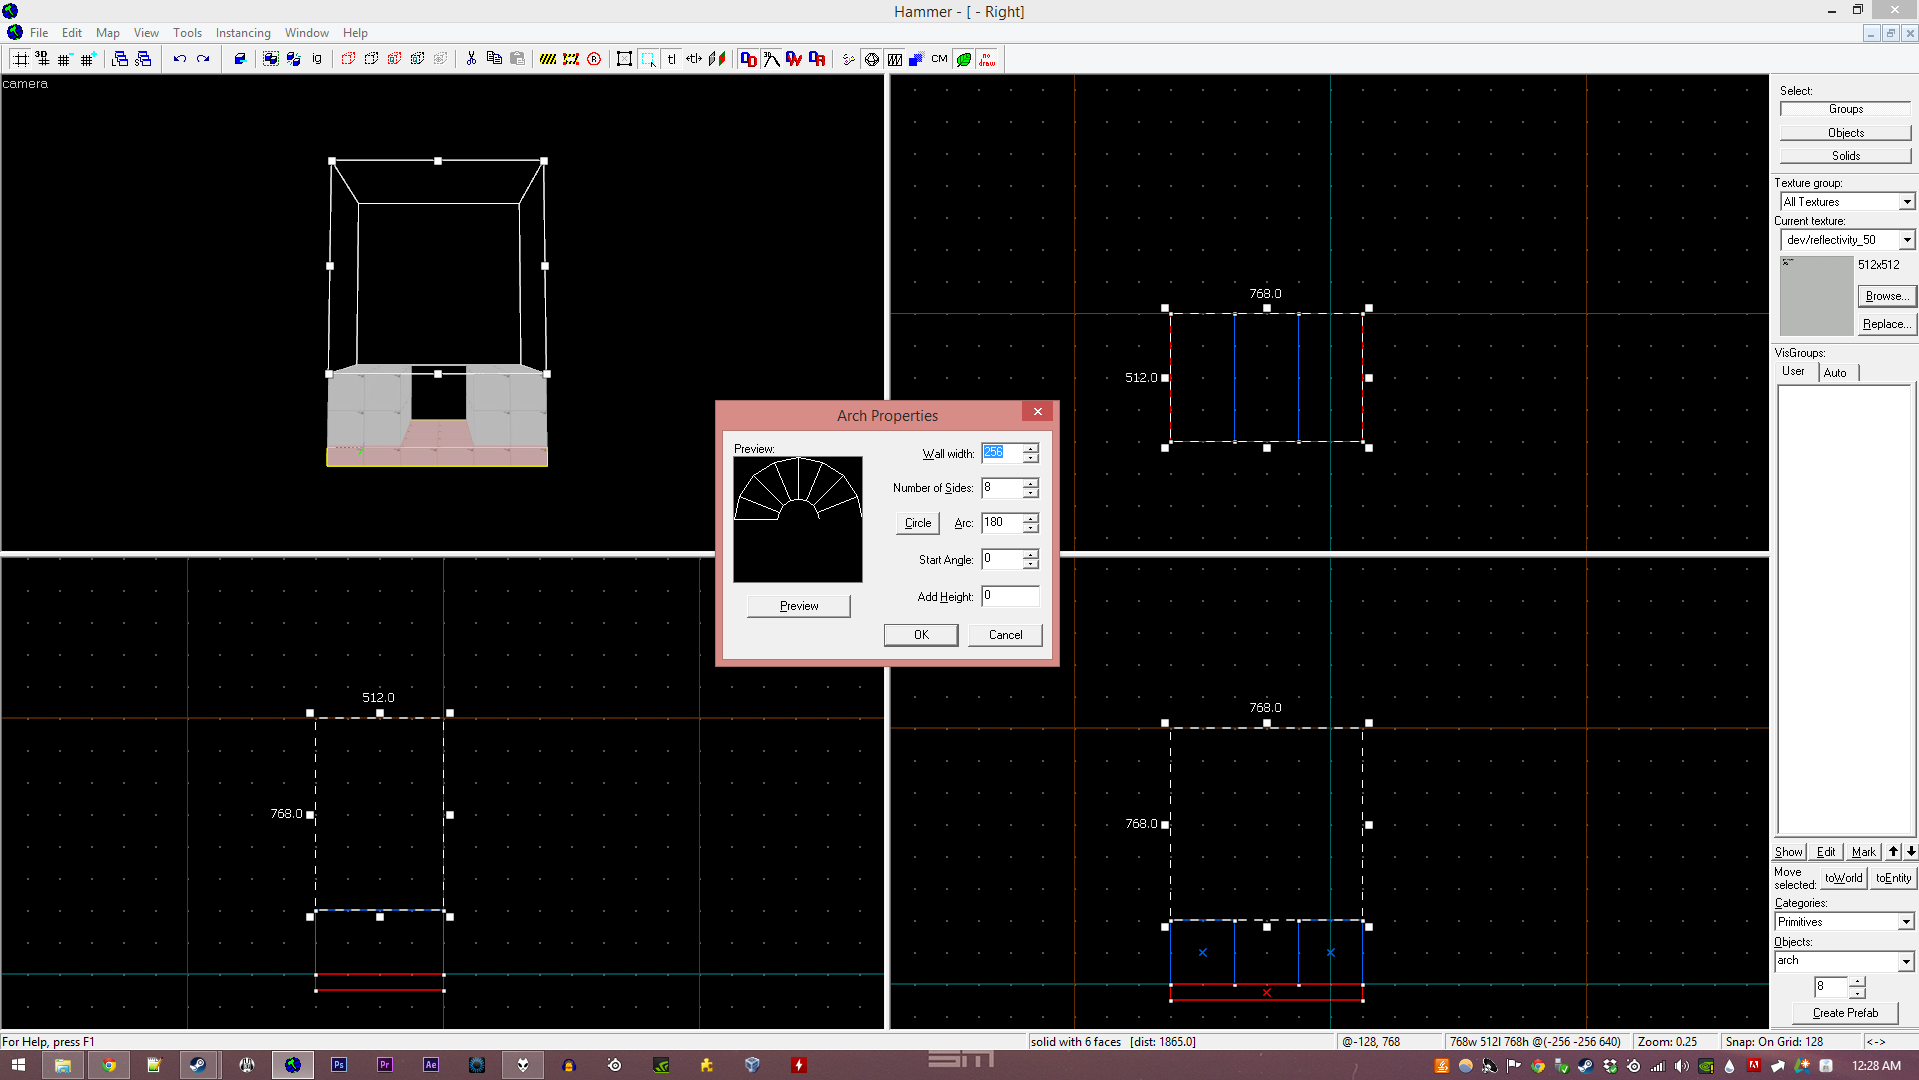
For example, let's say I want a 180 degree arch. I built my map in 128 unit blocks so that corridor is 256 wide. Choose a dev texture, and make sure both Texture Locking and Face Alignment are disabled in the toolbar. This will help your face alignment later on.
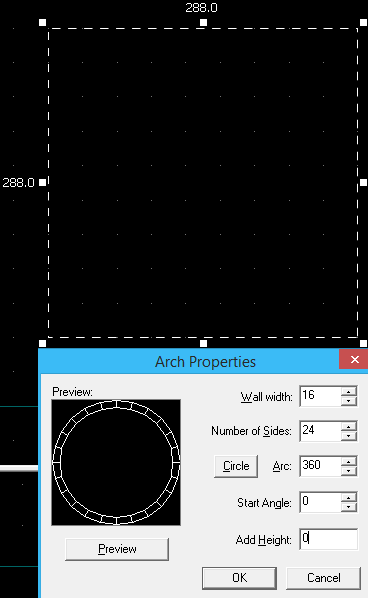
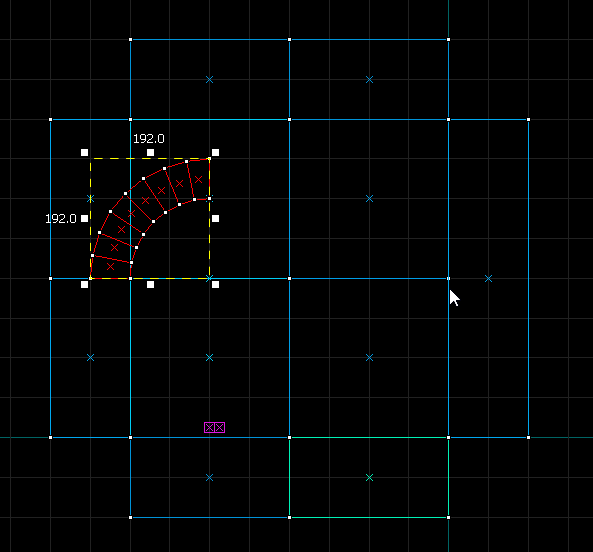
Let's use a nice chunky wall width of 64 units for ease of vertex editing later. Drop the grid down to 64 units, select the brush tool and select arch in the primitives bit. Now drag out a square around the place you want to build the arch but give it a margin of 64 units. Make sure you do this in the 2D grid view you want it to be inserted. If you draw it or adjust it in another, make sure to click it once in the view you want it to appear in. Press Return.
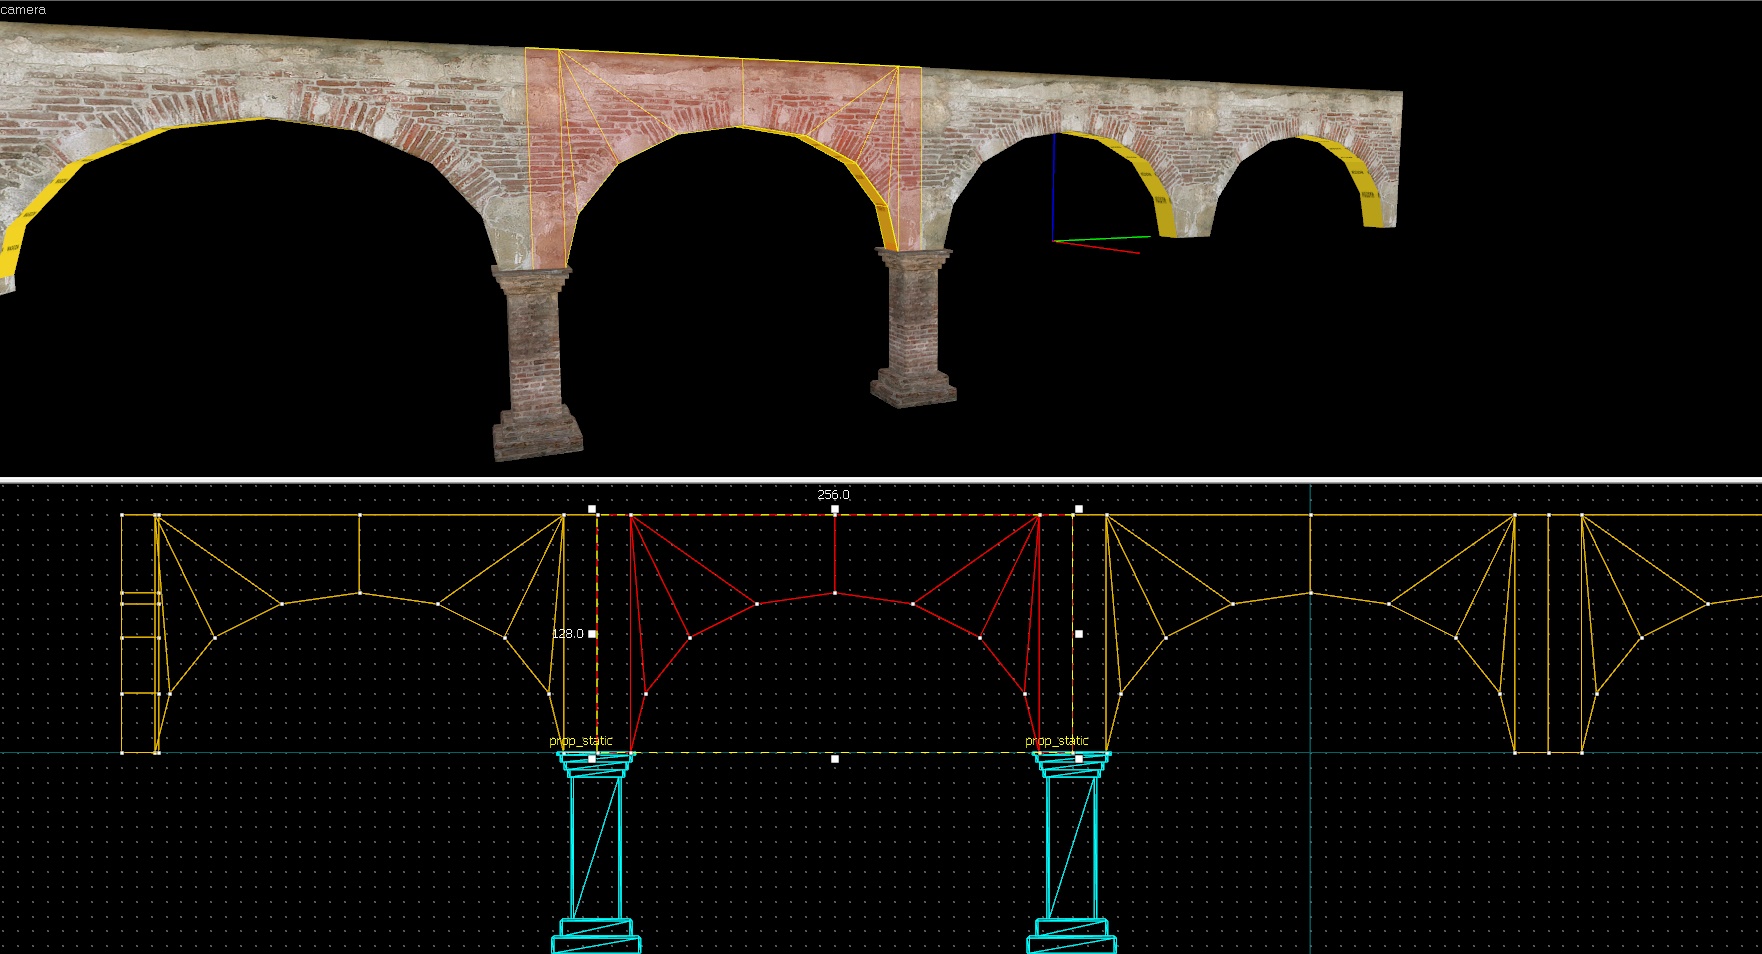
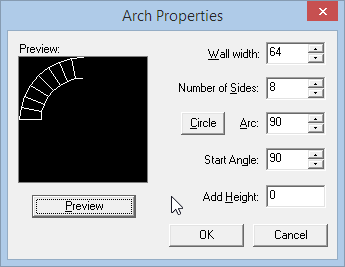
Give the arch a wall width of 64 units. I counted sixteen faces in your example arch. We are going to make one side of the arch then duplicate and mirror it, so set it to 8 sides. Put 90 in the Arc field to make the piece a quarter of a circle (360 would be an 'arch' that forms a complete hollow cylinder). Set the start angle to 90 degrees so it rotates to the correct position in the top left. Hit preview. Click OK when you're happy.
Adjust the resulting shape to the grid in your 2D views.
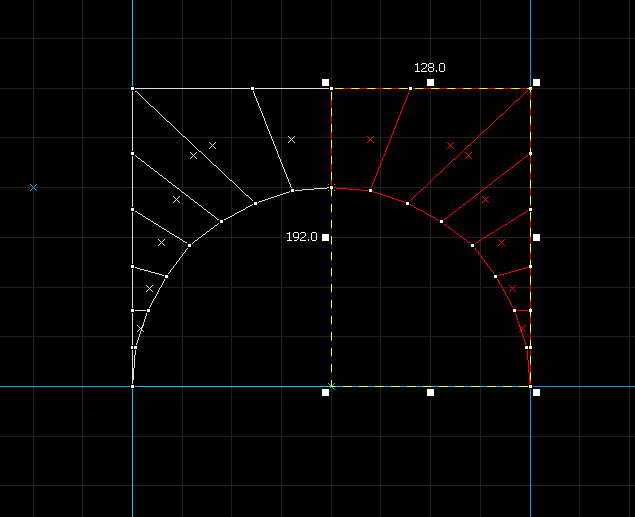
Zoom the grid in to 1 unit. Now enter the vertex editing tool (Shift+V) and select all of the vertices. Press Ctrl+B to make sure they are aligned to the grid. They should be, but this step can help make sure that vertices are merged if you choose to overlap them.
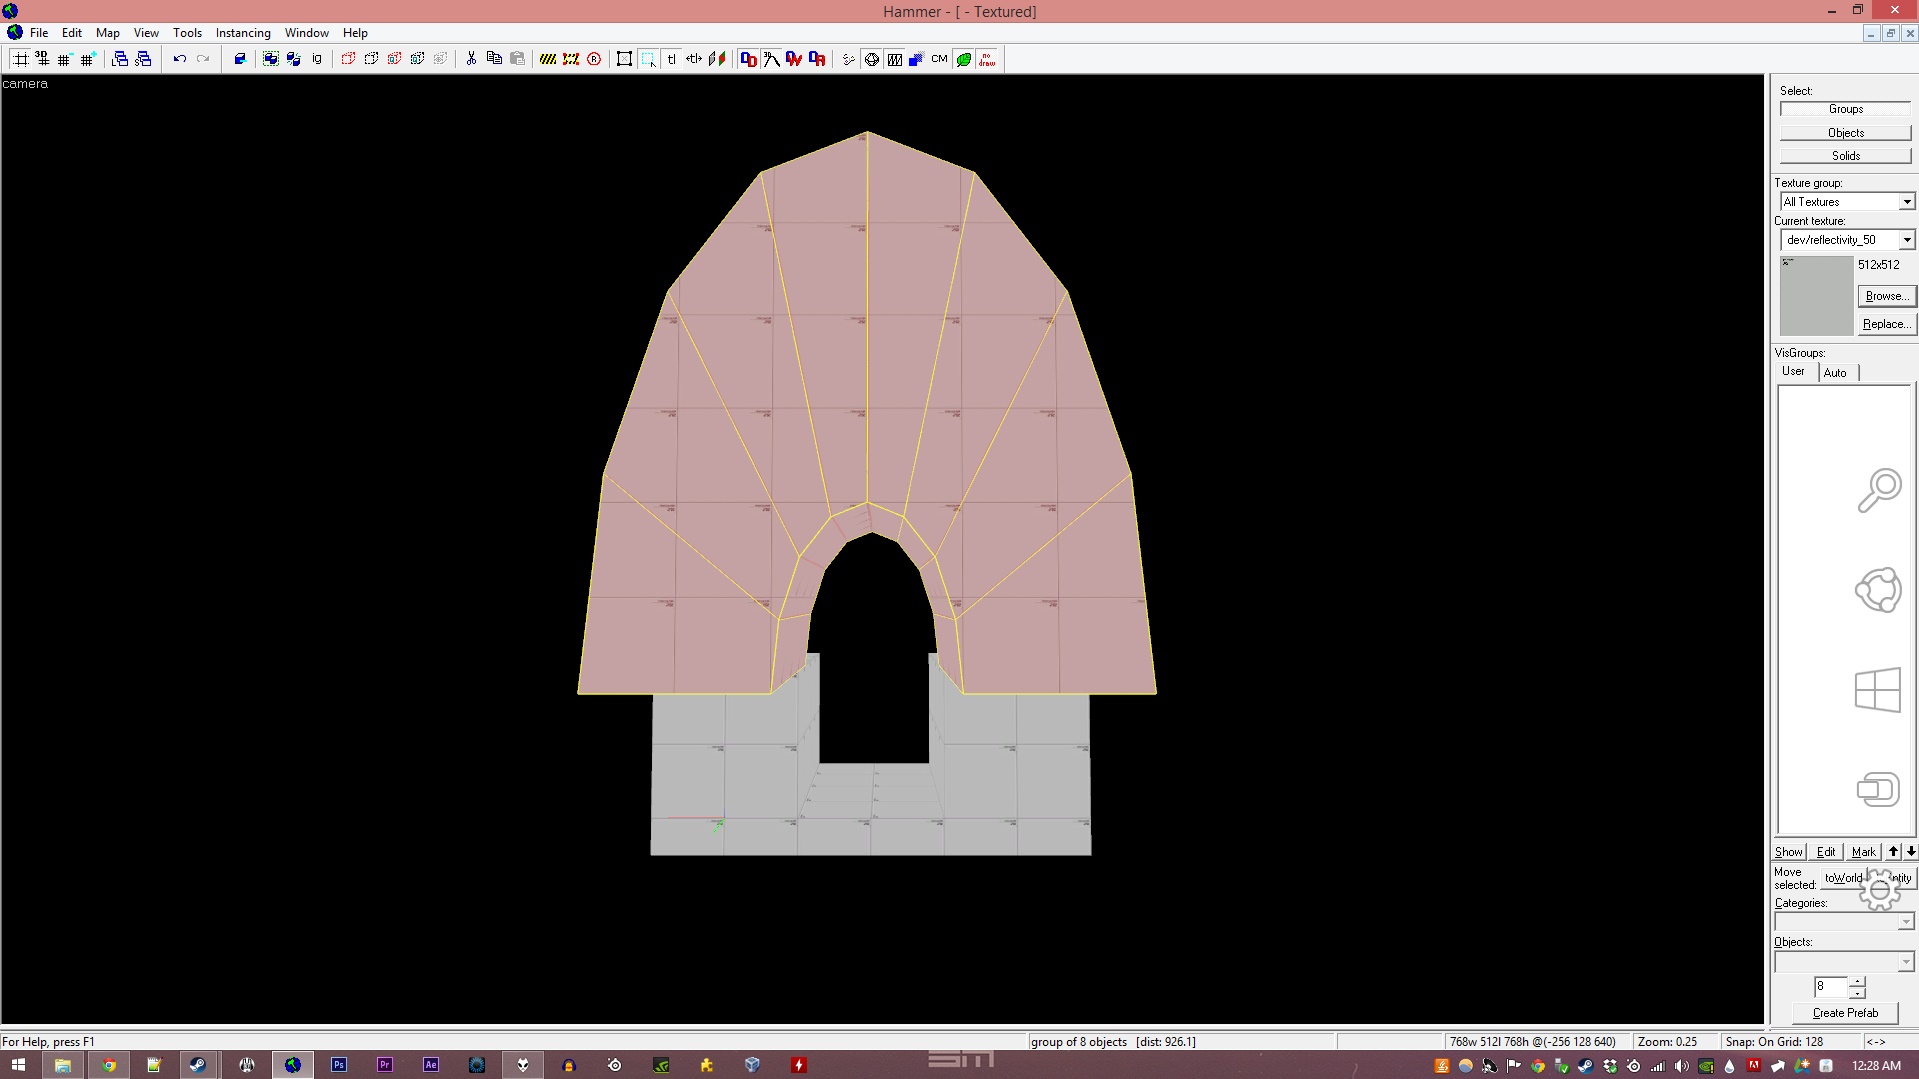
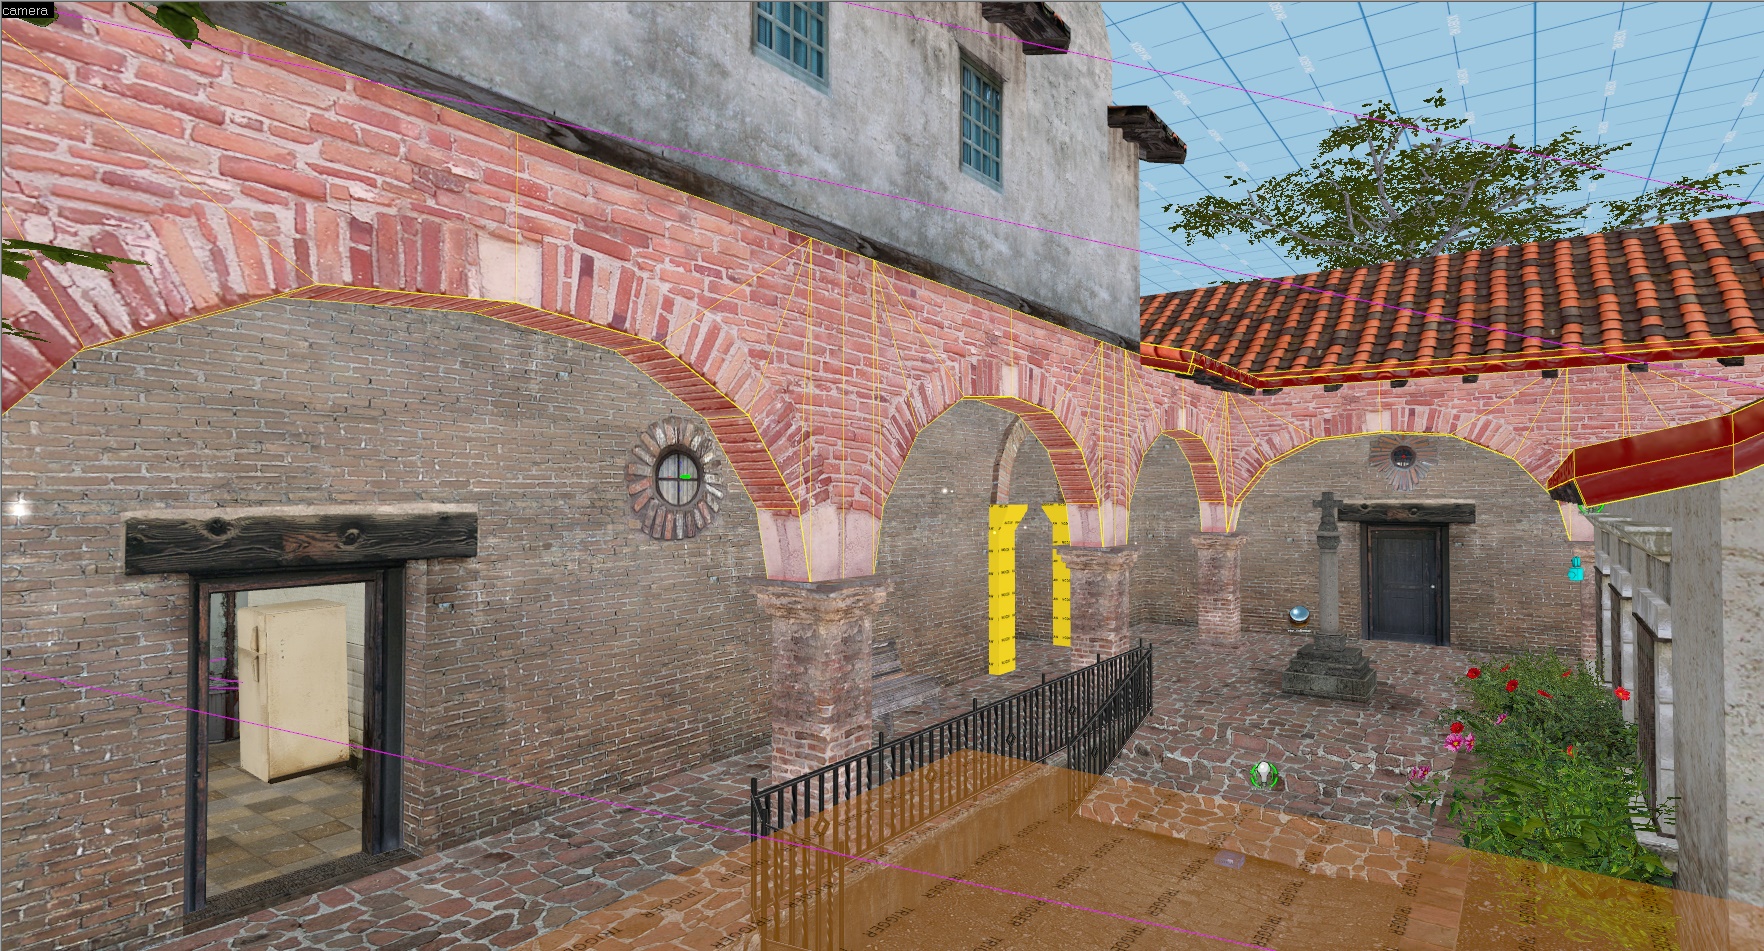
Adjust the vertices of the arch brushes so that the outer curve is transformed to a right-angle. Don't touch the inner curve as this should be perfect. Note that for the bottom brush I merged one vertex in to another. This is done by simply dragging it over the top of the other, and Hammer will ask you if you want to merge them. For safety, you should usually click Yes. If you don't get the prompt, then select the vertices and reposition them on the grid, or perform the Ctrl+B step again.
Hit Escape. Set the grid back to 64 units and shift+drag the brush to the right. Press Ctrl+L to flip it horizontally. Position it correctly.
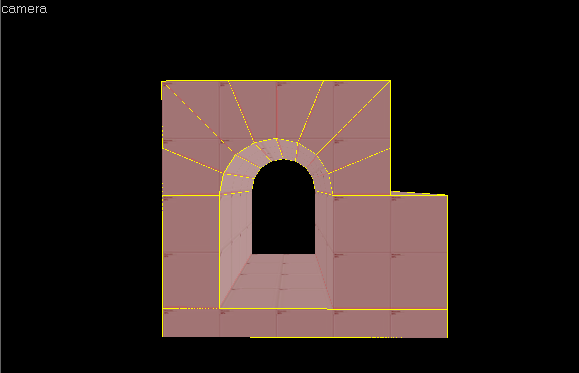
Cap off the arch with a rectangular brush to fill in the gap between its top and the ceiling.
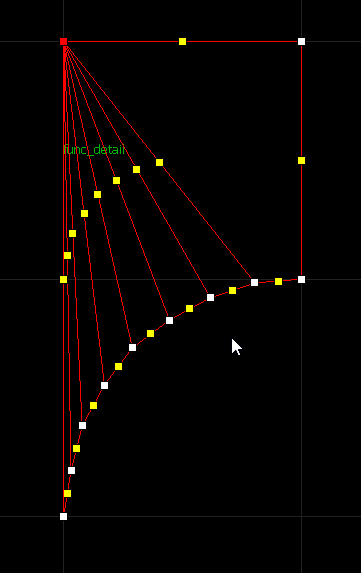
Alternatively, when you are moving vertices around, you could opt to merge one from each of the segment brushes in to the top two corners, turning each brush in to triangle of sorts. The resulting brushwork looks a little strange in Hammer, at first, but the reduced number of vertices and faces will help to keep your map within the limits of the compilation process. Take a look in the compile log at the list of objects for examples. Object limits are one of the reasons why models are used for complex brushwork.
Keep in mind that, with complex brushwork like this, vertices can move off grid when you save, and then later open the VMF. If you are repeatedly seeing this, it may be best to stick to simpler brushwork, like the first example. You can easily realign vertices to the grid using the Ctrl+B function, as used above.
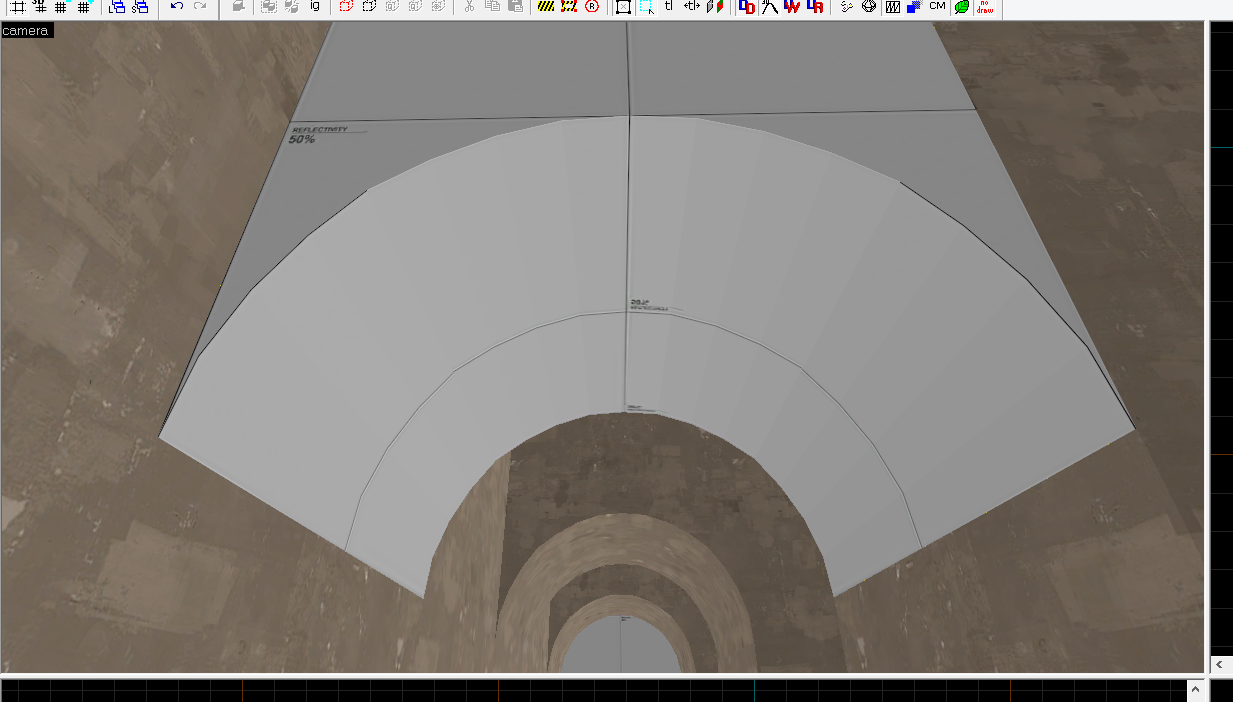
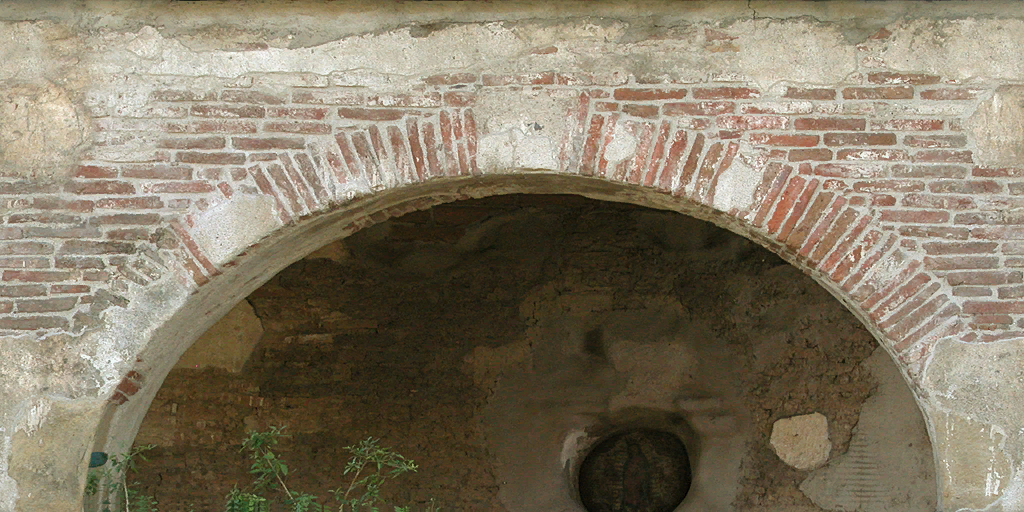
Notice that the underside of the arch is pretty much already nicely-aligned. Because you used a proper grid size and turned off texture locking and face alignment (therefore using world alignment) when you built this room and the arch, the faces of the inner arch and the adjacent walls will line up pretty nicely. If all the faces of a curve have their textures aligned (and therefore their lightmap grids) then their shading should be automatically smoothed. In my experience this seems to work better on concave curves compared with convex ones but it's different in each case. If you're unhappy with the texture alignment you can align a texture on an adjacent face by selecting a source face using the face edit tool (in our case, the wall underneath one side of the arch), and alt+right clicking its adjacent face. Then select this newly-texture face and repeat the process with the next one. Not only will it wrap the texture to that face, it will also spread alignment settings so it's good for things like planks of wood that have been rotated. You can simply 'copy' or 'spread' the texture from the side of a plank to its top and bottom.
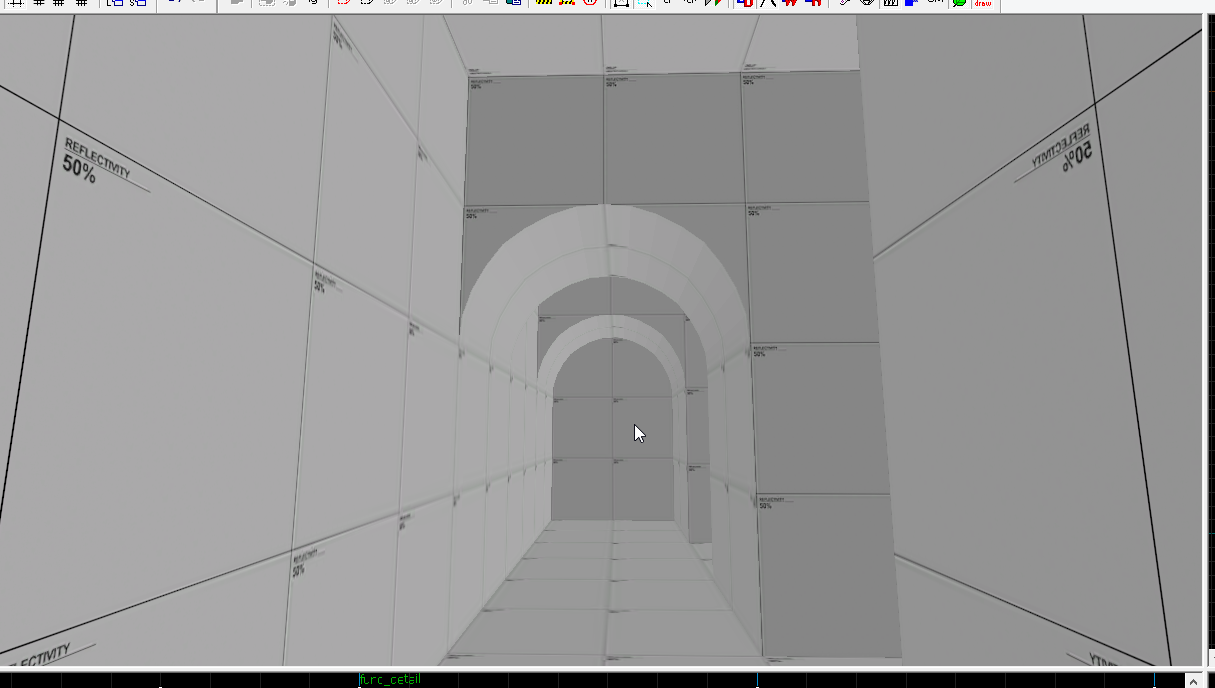
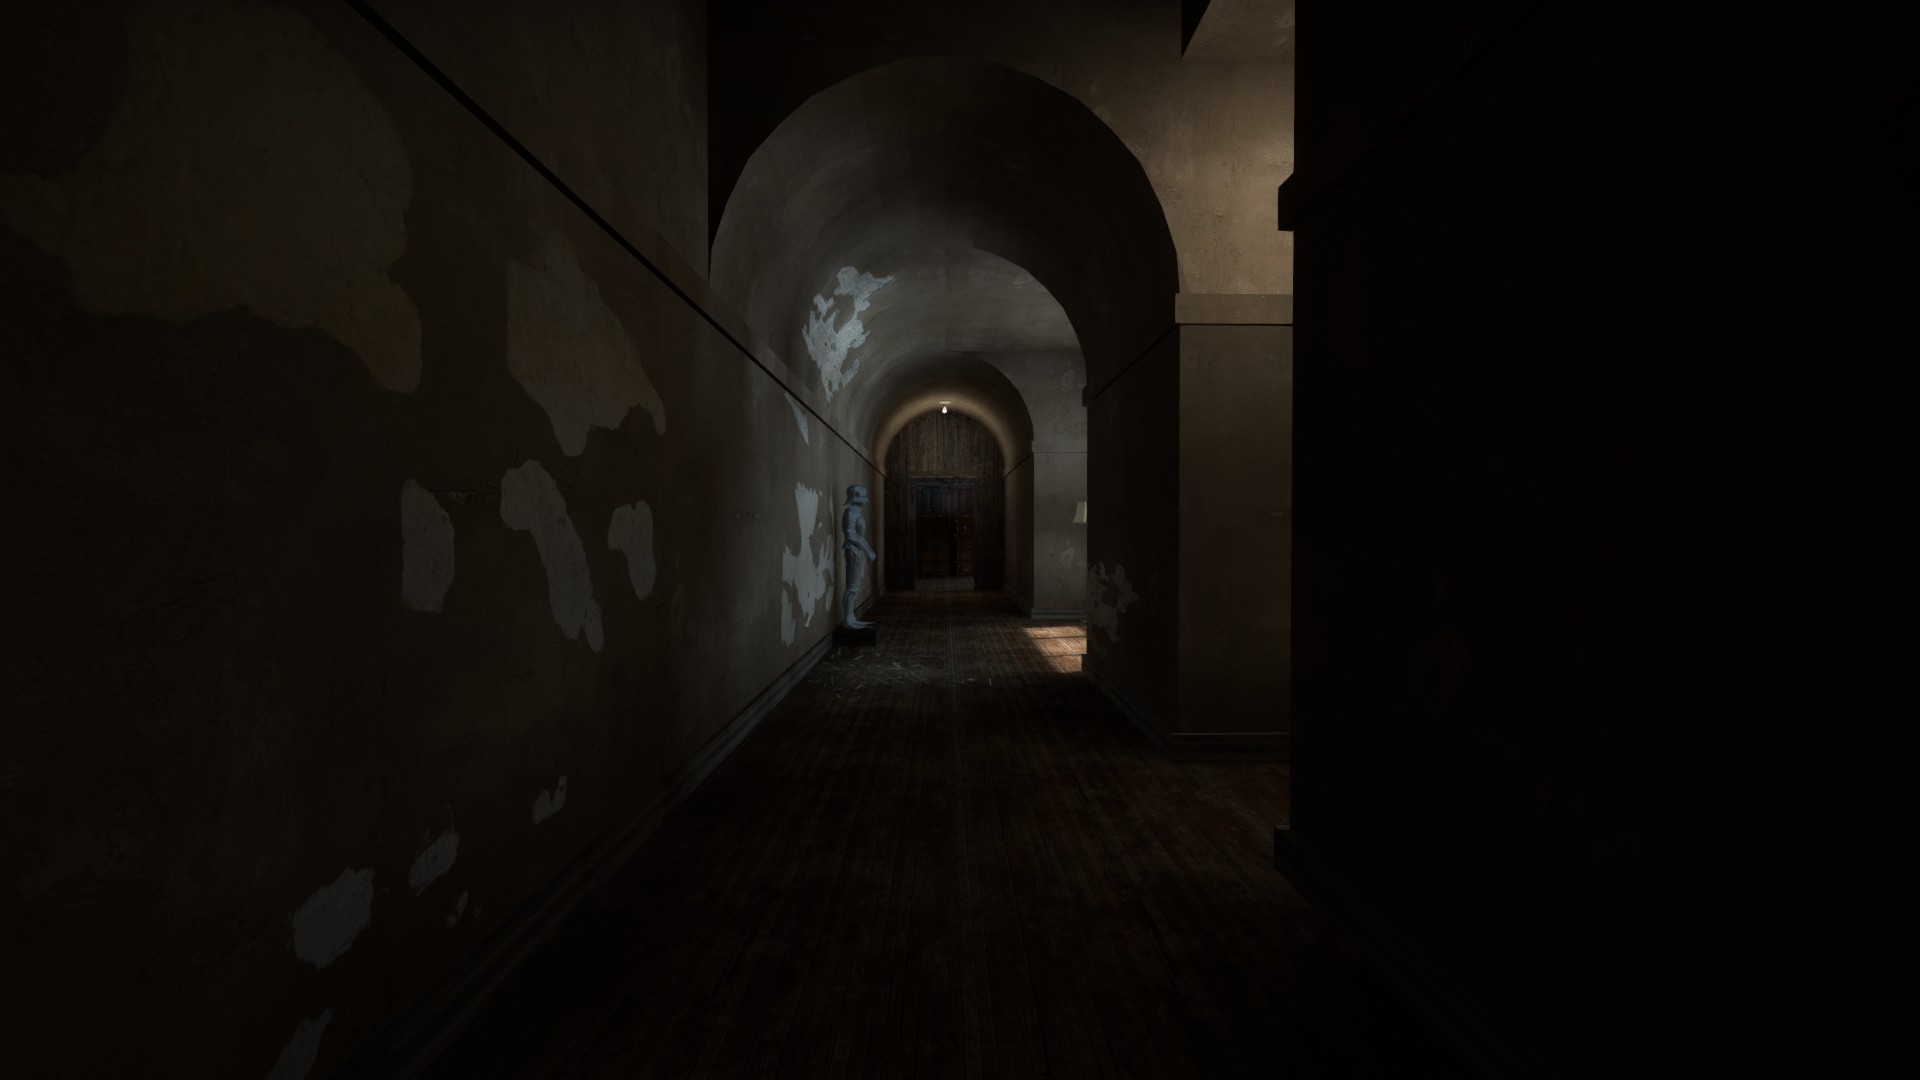
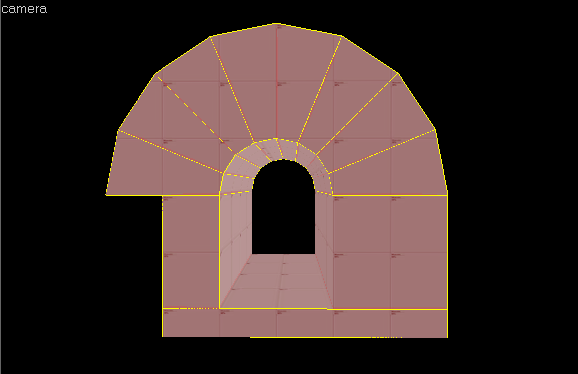
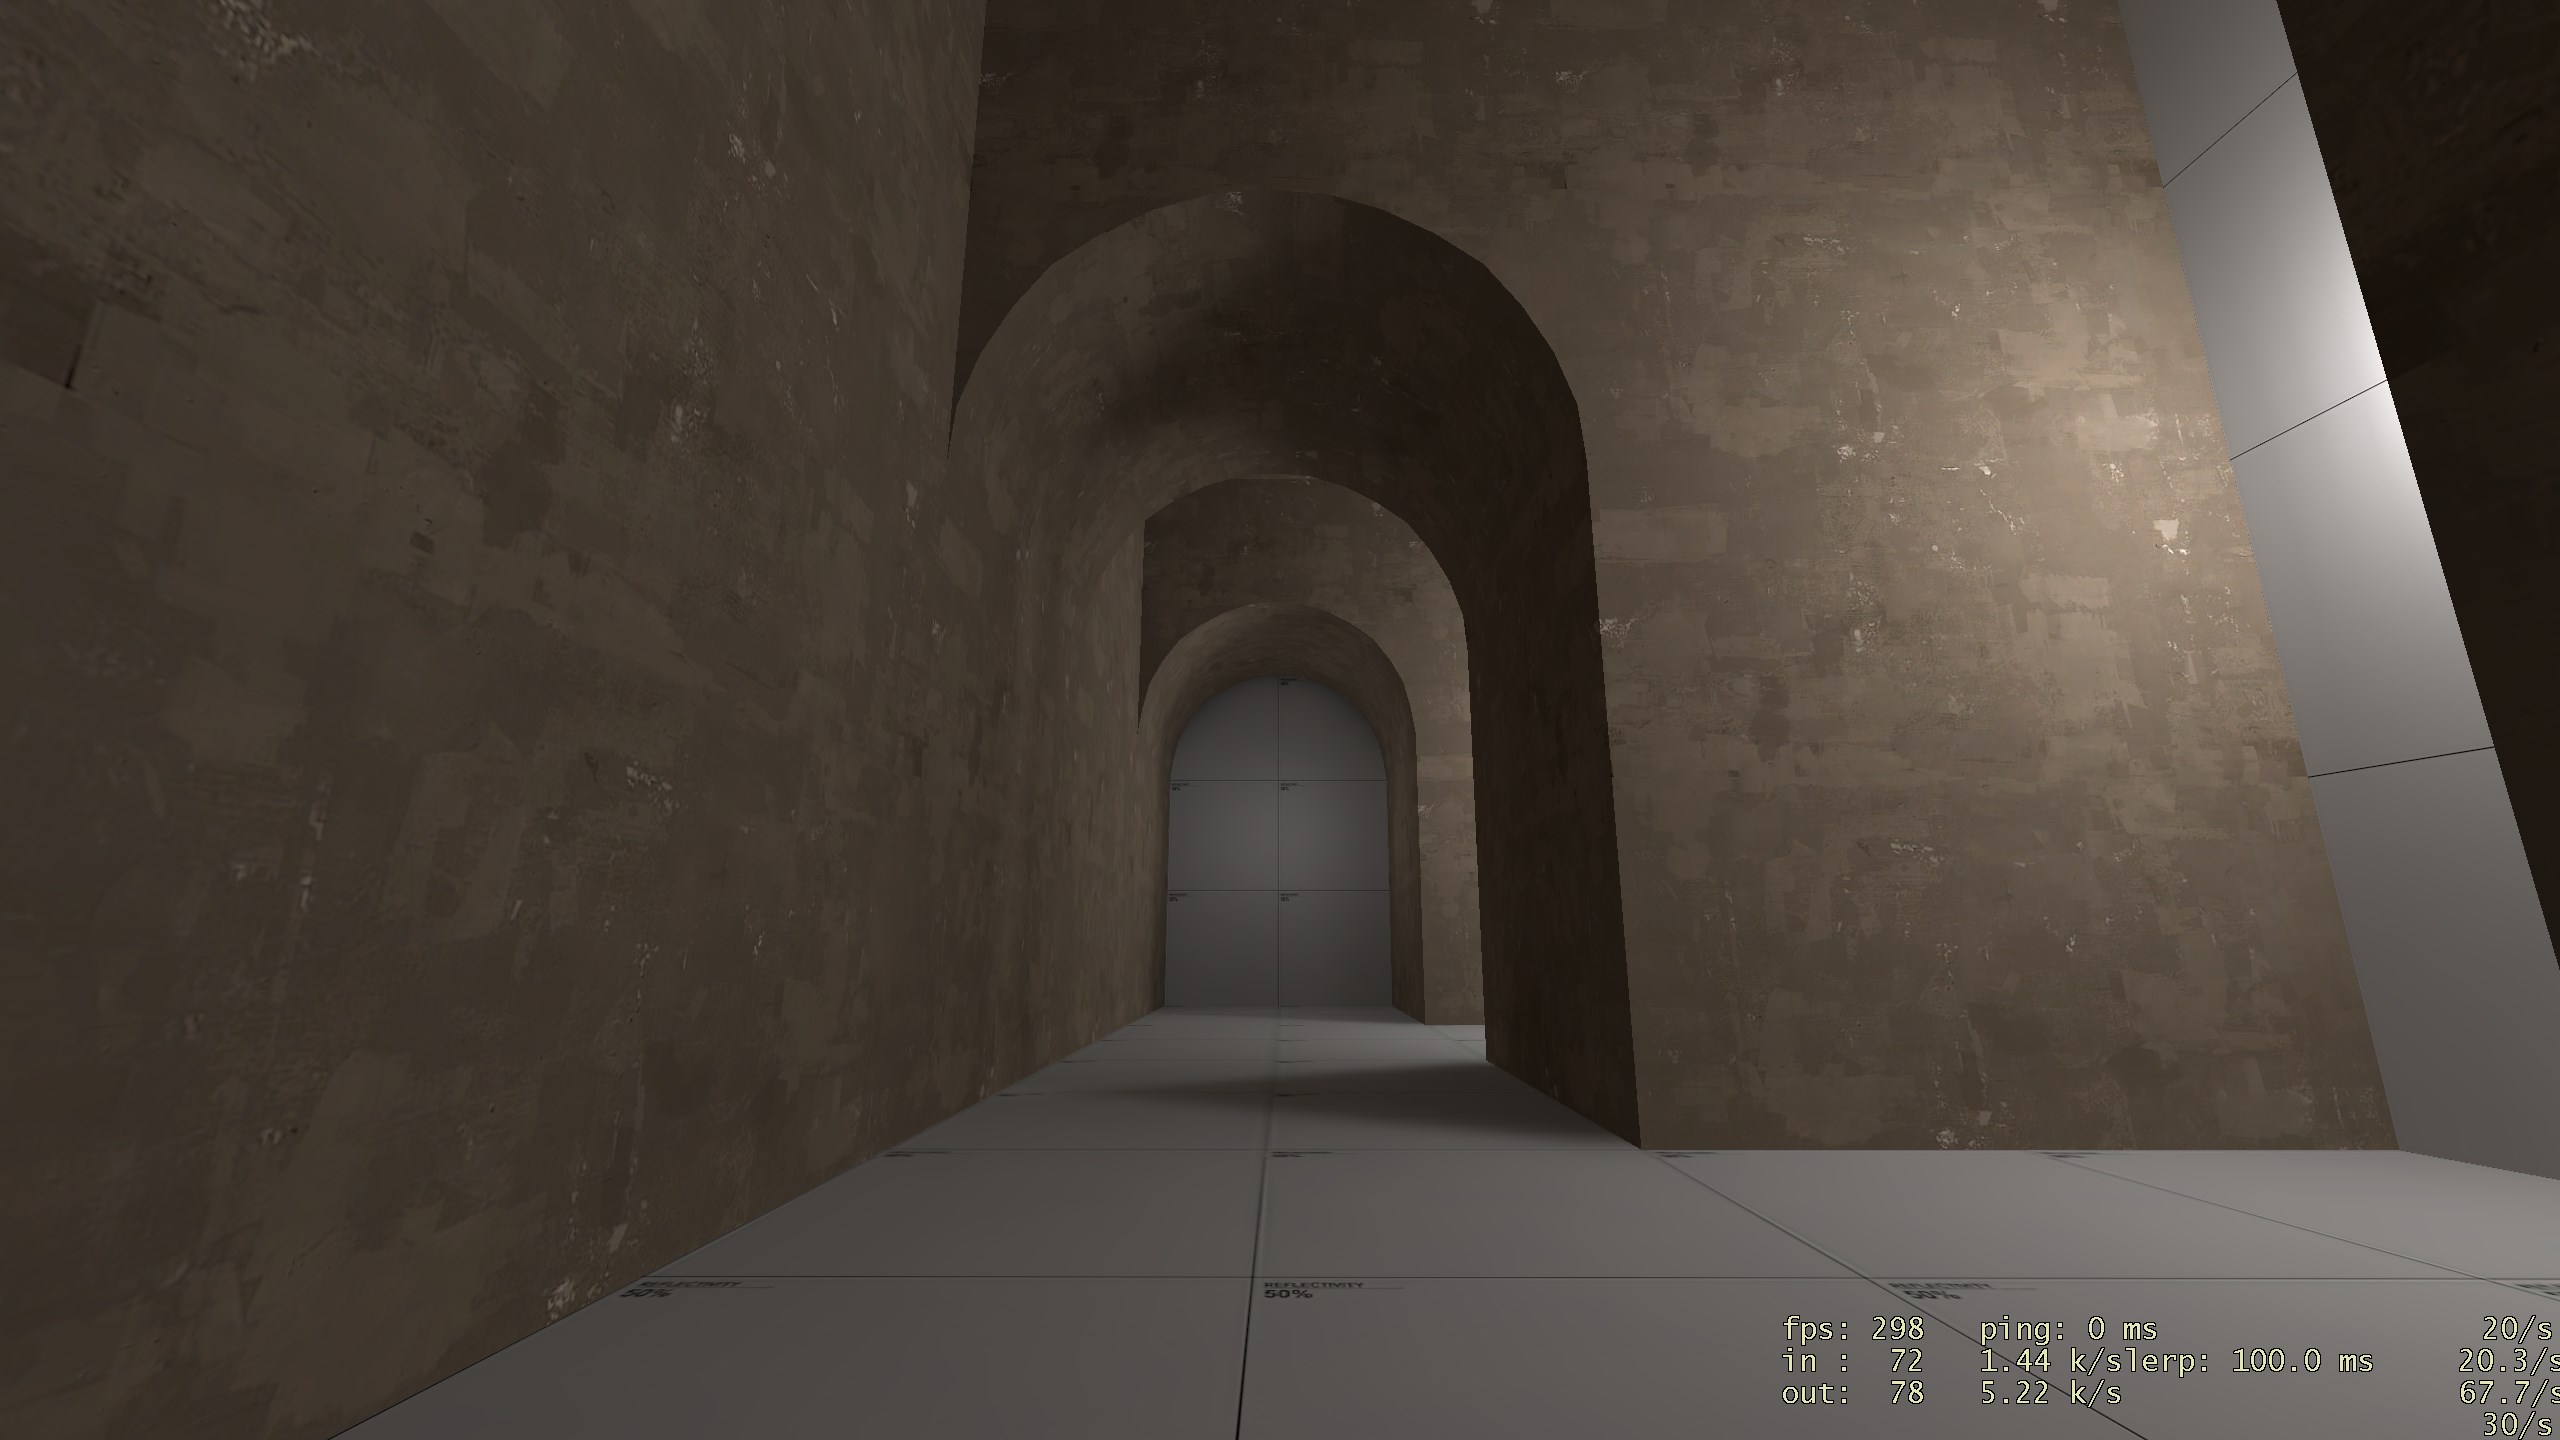
Behold the final result.
You can download the VMF I made
here.
When you make these brushes, you can make them func_detail if you like, but you must make sure that the portions of the walls and ceiling that are hidden by the arch structure are textured with nodraw. If you leave them textured, then Hammer will render them in-game, which is bad because it reduces performance and increases file size because of the extra lighting data.
Alternatively, as pointed out by UKCS-Alias further on in this thread, you could just leave the arch brushes as world brushes (not tying them to func_detail) and group them for convenience (Ctrl+G). VBSP seems to know they are part of a tunnel and doesn't bother cutting visleaves for them. I tested this and it works great. Alias says that sometimes you may need to include a hint brush. There's also a bonus to leaving them as world brushes, because the faces of the walls and ceiling behind the arch brushes are split and culled during compilation automatically. If you compile the VMF and fly outside the map you'll see the difference if you look at the end walls of the hallway. One of them is still a full square with a dark shadow across its top where it's hidden by the arch brush, and the other is neatly trimmed in line with the shape of the arch.
Thanks to: Tumbo, Alias, Killo and Seba. Sorry if I mislead anyone with incomplete information.
VMF has been updated at 18:06 UTC, 30.05.2015


")