- Feb 7, 2010
- 153
- 284
Ok lemme type this all out again and hopefully I don't accidentally close my browser this time. :cursing:
You know those cool materials that you can use on displacements to blend between two different textures? Well, I looked around for a tutorial on how to make them, but found nothing. So I looked at Valve's examples and made a tutorial. This tutorial assumes only basic mapping and VMT knowledge. Enough chatter! Tutorial time.
Custom Blend Materials
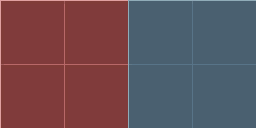
First, you will need two textures to blend. If you extracted them with GCFScape*, they should already be in VTF format, if not, I will show you how to convert them. I will be using the team colored dev textures.
*Thanks to Ravidge for pointing this out: You don't need to extract the VTFs from the GCF if you're not going to edit them at all. Simply point the $basetexture and $basetexture2 paths to the path of the texture in the GCF (relative to "root\tf\materials")
Step 1. Converting to VTF (skip to #2 if you already have)
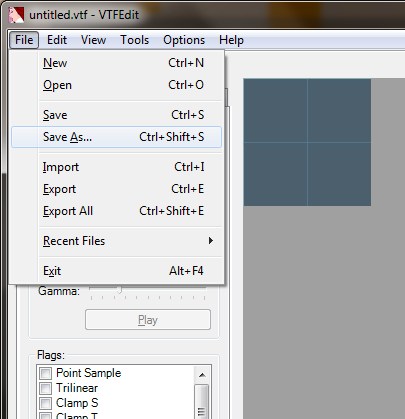
If you haven't already, download VTFEdit. Start by using File->Import to import your texture into VTFEdit. A dialog will open with a lot of settings, leave them at default and hit ok. Then go to File->Save and save your file as a VTF. Repeat this process for the other file.
(I saved mine as blendexample_red.vtf and blendexample_blu.vtf)
Step 2. Creating the VMT
Open up the folder where you saved your VTF files. Create a new text file WITH THE EXTENSION VMT. (Mine is blendexample.vmt)
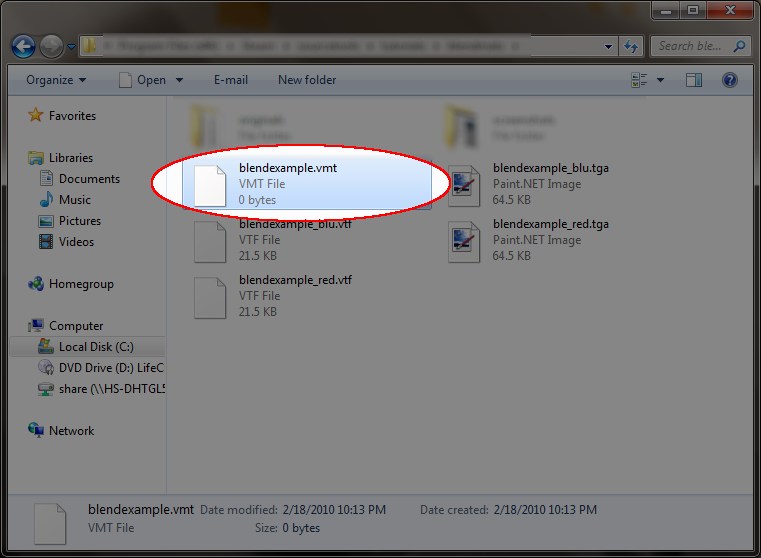
Open this file with a text editor (I used Notepad++, Notepad works too). Now you'll need to specify the properties of the material. Start by entering:
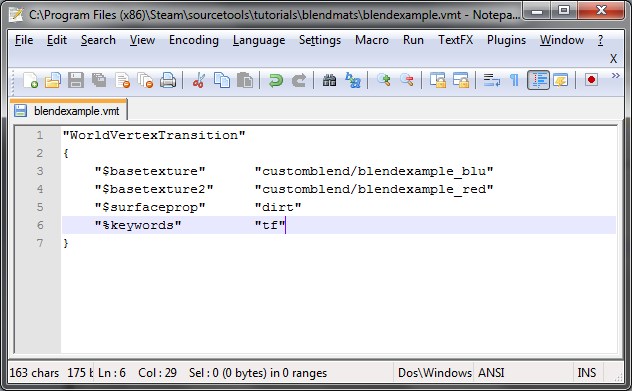
The "WorldVertexTransition" specifies the shader the engine will need to use to correctly blend the materials together. The { tells the engine that you are specifying properties for this material. Now, expand your file with:
These parameters specify where the game can find your VTF files, so replace the text in between the < and > with the path (relative to "tf\materials") that you will copy the VTF files and the VMT to. (this can be anything, but make it descriptive, and remember it) For this example, I used "customblend/blendexample_red" and "customblend/blendexample_blu
DO NOT INCLUDE THE .VTF EXTENSION!
Now, some optional (but recommended) parameters
"$surfaceprop" specifies what sounds the material should make when walked on/shot. It also tells what type of bullet holes the material should show. Other common values are "concrete" "metal" and "wood".
"%keywords" simply specifies tags that one can use in the texture browser, most tf2 textures will use the tag "tf"
Here's my example VMT with all the parameters:
Step 3. Putting the files in the "tf\materials" folder
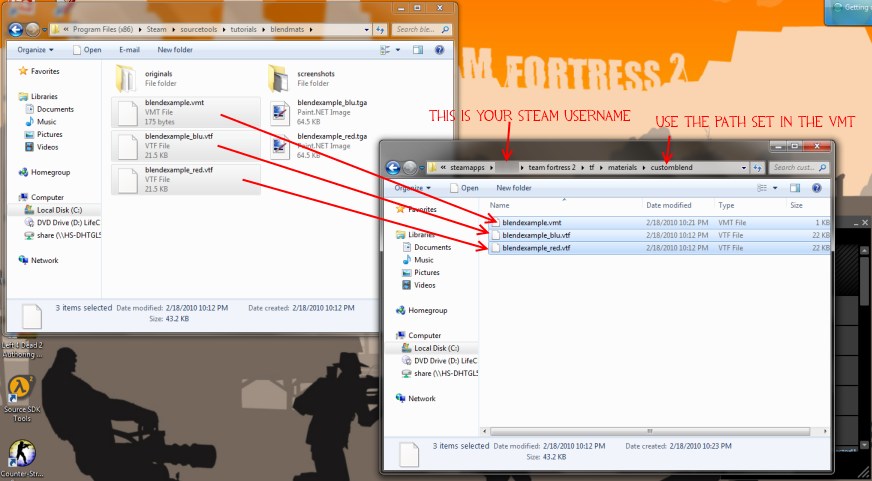
Almost there! Now you will need to copy your two VTF textures and your VMT file into the correct folder (the one you specified for "$basetexture") in your "tf\materials" folder (if any of the folders don't exist, create it). Diagram incoming:
Step 4. Try it out!
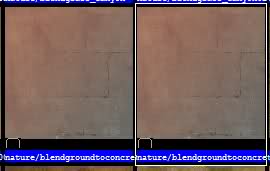
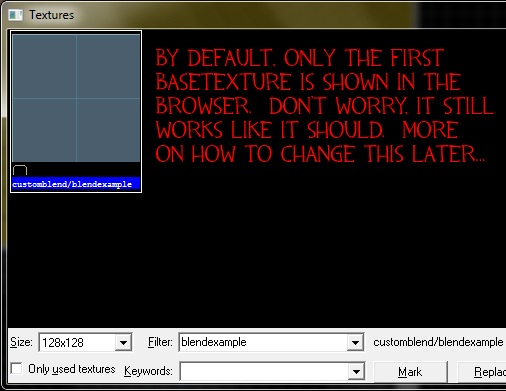
Boot up hammer and search for your material in the texture browser. It will only show one material, but IT STILL WORKS.
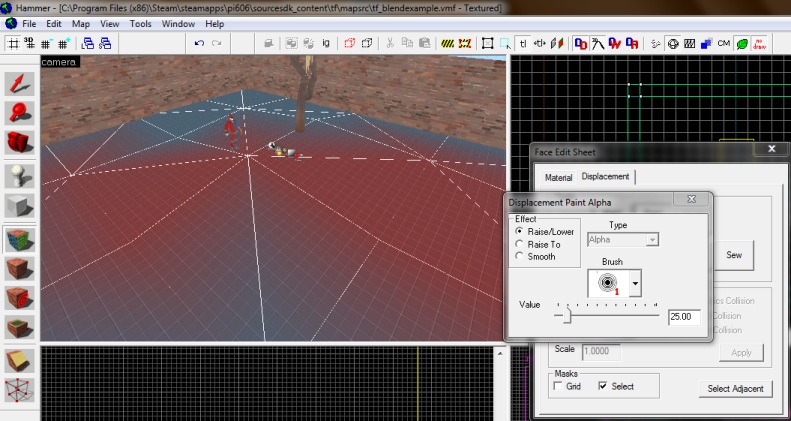
Now try it out on a displacement. Here's my example texture:
Here's the final result:
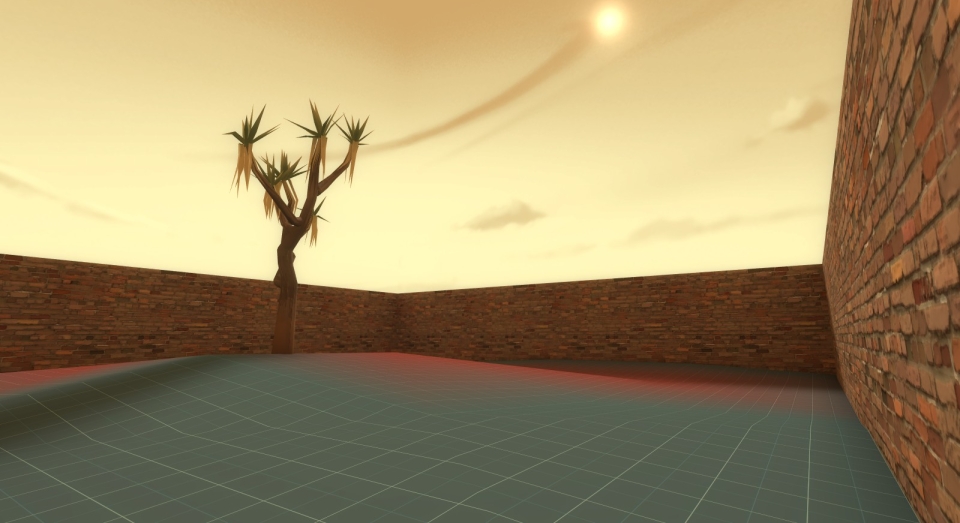
Cool, huh?
Step 5. Blend Modulate Textures
You may have noticed that the game renders the transition to texture 2 as a solid gradient. This works fine for our simple example with dev textures, but what about more natural transitions like grass to concrete? Grass doesn't evenly "fade" over concrete, so a solid transition will not achieve a realistic result. The answer?A gun. And if that don't work, use more gun. Blend Texture Modulates!
Example (Nature/blendconcretetograss001)
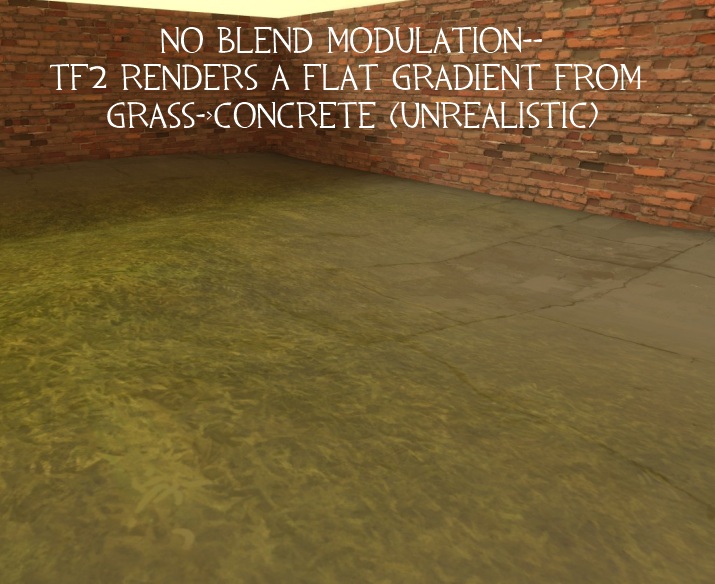
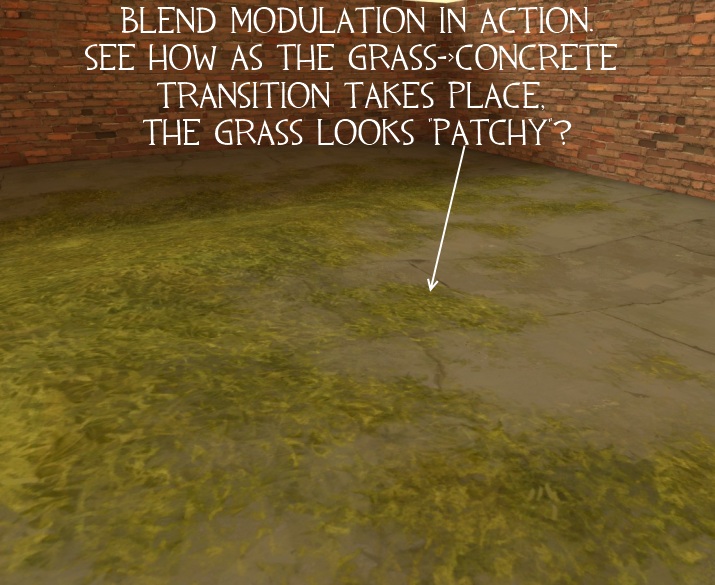
The difference is massive. Here's the BlendTextureModulate texture for the above material:
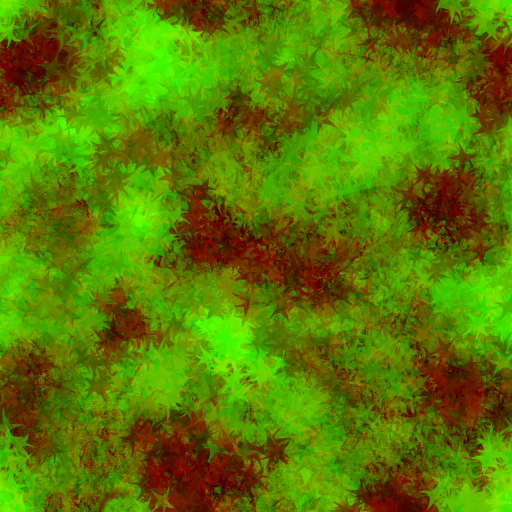
Now adding your own BlendModulateTexture is quite simple. The texture consists of only two color channels, green and red. The green channel controls the transition between the two materials. 255 in the green channel means that texture 2 will be fully visible, 0 means texture 1, and 128 is an even blend. The idea is to paint patterns into this channel to "mask" the edges of the blend. Valve has painted patchy star-like patterns into the green channel in the example. The red channel controls the sharpness of the falloff. The Valve Wiki has a good explanation of the red channel, so I'll use that one.
Another example over at the Valve Wiki
Creating Blend Modulate Textures is pretty easy. I created an *example* blend modulate texture for our dev texture example here.
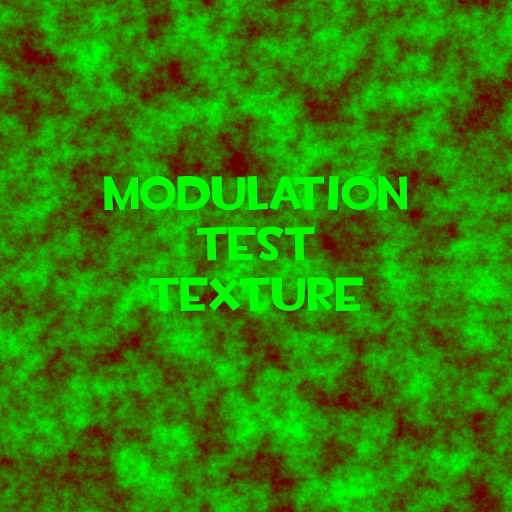
Commence laughing at it's horrible-ness.
Done? Good. I made it in 20 seconds in Paint.NET, IT'S AN EXAMPLE OK? Now that we've cleared that up, save your newly created better than mine texture, and use VTFEdit to convert it to a VTF. Move the VTF to your folder in tf\materials. Almost there! Now we just need to edit the VMT to tell it which texture to use, so add this to your VMT file:
That's all you need to do! This is what your tf\materials\whatever folder should look like now
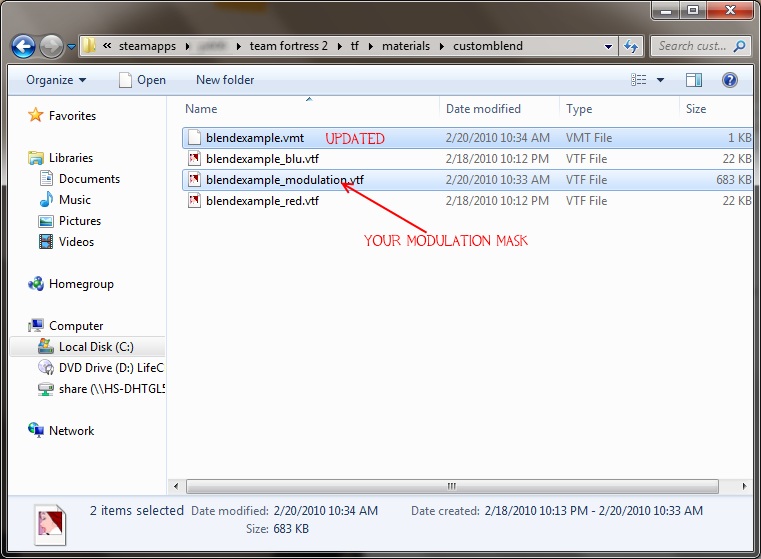
Boot up hammer again to your example map (NOTE: Blend modulate textures DO NOT DISPLAY or have any effect on the displacement in hammer, but the result will show up in-game.). I loaded up TF2 to my example texture and:
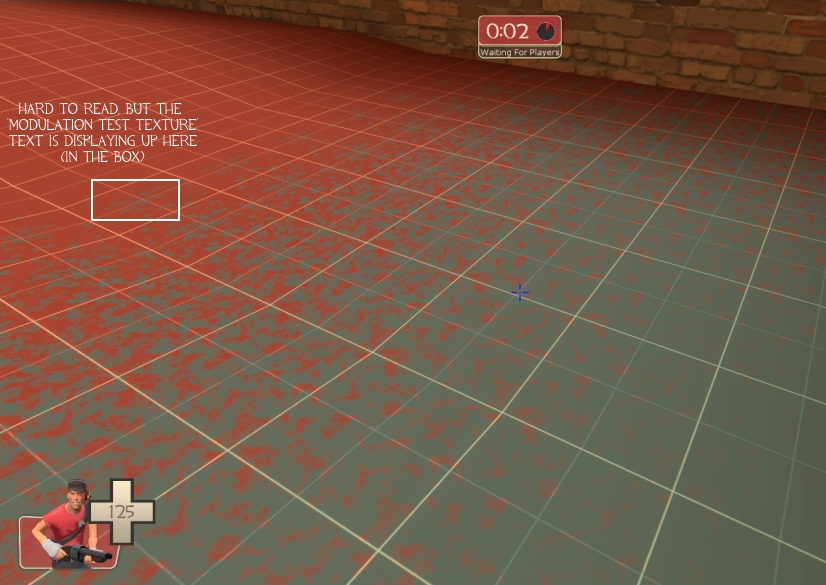
A working blend texture. Apologies for forgetting to turn of the HUD.
More about Blend Modulate Textures
Extra Info
Remember how the texture browser only shows one texture in your transition? If you want it to display both, create a third image (in Photoshop or Paint.NET or GIMP, etc.) that shows both textures, convert to VTF, copy to the folder with your other files in "tf\materials" and add this line to your VMT:
WorldVertexTransition supports many other parameters. You can specify a different surfaceprop for the second texture in the same way as you did the first by adding:
Here's an example Valve one (this utilizes bump mapping as well, which is outside the scope of this tutorial.)
Have fun! If this was helpful, if you have a question, or if you have a critique, post a reply below. Happy mapping. :thumbup1:
You know those cool materials that you can use on displacements to blend between two different textures? Well, I looked around for a tutorial on how to make them, but found nothing. So I looked at Valve's examples and made a tutorial. This tutorial assumes only basic mapping and VMT knowledge. Enough chatter! Tutorial time.
Custom Blend Materials
First, you will need two textures to blend. If you extracted them with GCFScape*, they should already be in VTF format, if not, I will show you how to convert them. I will be using the team colored dev textures.
*Thanks to Ravidge for pointing this out: You don't need to extract the VTFs from the GCF if you're not going to edit them at all. Simply point the $basetexture and $basetexture2 paths to the path of the texture in the GCF (relative to "root\tf\materials")

Step 1. Converting to VTF (skip to #2 if you already have)
If you haven't already, download VTFEdit. Start by using File->Import to import your texture into VTFEdit. A dialog will open with a lot of settings, leave them at default and hit ok. Then go to File->Save and save your file as a VTF. Repeat this process for the other file.
(I saved mine as blendexample_red.vtf and blendexample_blu.vtf)

Step 2. Creating the VMT
Open up the folder where you saved your VTF files. Create a new text file WITH THE EXTENSION VMT. (Mine is blendexample.vmt)

Open this file with a text editor (I used Notepad++, Notepad works too). Now you'll need to specify the properties of the material. Start by entering:
Code:
"WorldVertexTransition"
{
Code:
"$basetexture"    "<texture 1 relative path>"
"$basetexture2" "<texture 2 relative path>"DO NOT INCLUDE THE .VTF EXTENSION!
Now, some optional (but recommended) parameters
Code:
"$surfaceprop"    "dirt"
"%keywords"      "tf"
"$surfaceprop" specifies what sounds the material should make when walked on/shot. It also tells what type of bullet holes the material should show. Other common values are "concrete" "metal" and "wood".
"%keywords" simply specifies tags that one can use in the texture browser, most tf2 textures will use the tag "tf"
Here's my example VMT with all the parameters:

Step 3. Putting the files in the "tf\materials" folder
Almost there! Now you will need to copy your two VTF textures and your VMT file into the correct folder (the one you specified for "$basetexture") in your "tf\materials" folder (if any of the folders don't exist, create it). Diagram incoming:

Step 4. Try it out!
Boot up hammer and search for your material in the texture browser. It will only show one material, but IT STILL WORKS.

Now try it out on a displacement. Here's my example texture:

Here's the final result:

Cool, huh?
Step 5. Blend Modulate Textures
You may have noticed that the game renders the transition to texture 2 as a solid gradient. This works fine for our simple example with dev textures, but what about more natural transitions like grass to concrete? Grass doesn't evenly "fade" over concrete, so a solid transition will not achieve a realistic result. The answer?
Example (Nature/blendconcretetograss001)


The difference is massive. Here's the BlendTextureModulate texture for the above material:

Now adding your own BlendModulateTexture is quite simple. The texture consists of only two color channels, green and red. The green channel controls the transition between the two materials. 255 in the green channel means that texture 2 will be fully visible, 0 means texture 1, and 128 is an even blend. The idea is to paint patterns into this channel to "mask" the edges of the blend. Valve has painted patchy star-like patterns into the green channel in the example. The red channel controls the sharpness of the falloff. The Valve Wiki has a good explanation of the red channel, so I'll use that one.
Valve has painted the same star pattern into the red channel, however it's a much subtler difference between the individual "star" colors. The red value averages about 100, for a fairly sharp falloff.Valve Wiki said:Sharpens [the transition effect]. 0 makes the transition binary, 255 effectively disables modulation.
Another example over at the Valve Wiki
Creating Blend Modulate Textures is pretty easy. I created an *example* blend modulate texture for our dev texture example here.

Commence laughing at it's horrible-ness.
Done? Good. I made it in 20 seconds in Paint.NET, IT'S AN EXAMPLE OK? Now that we've cleared that up, save your newly created better than mine texture, and use VTFEdit to convert it to a VTF. Move the VTF to your folder in tf\materials. Almost there! Now we just need to edit the VMT to tell it which texture to use, so add this to your VMT file:
Code:
"$blendmodulatetexture" "relative_path_to_blendmod_texture"
Boot up hammer again to your example map (NOTE: Blend modulate textures DO NOT DISPLAY or have any effect on the displacement in hammer, but the result will show up in-game.). I loaded up TF2 to my example texture and:

A working blend texture. Apologies for forgetting to turn of the HUD.
More about Blend Modulate Textures
Extra Info
Remember how the texture browser only shows one texture in your transition? If you want it to display both, create a third image (in Photoshop or Paint.NET or GIMP, etc.) that shows both textures, convert to VTF, copy to the folder with your other files in "tf\materials" and add this line to your VMT:
Code:
"%tooltexture" "path_to_preview_texture"WorldVertexTransition supports many other parameters. You can specify a different surfaceprop for the second texture in the same way as you did the first by adding:
Code:
"$surfaceprop2" "rock"Here's an example Valve one (this utilizes bump mapping as well, which is outside the scope of this tutorial.)
Code:
"WorldVertexTransition"
{
	"$basetexture" "Nature/dirtground007"
	"$basetexture2" "Nature/rockground007"
	"%tooltexture" "Nature/grass_02"
	"%detailtype" "tf_granary_grass"
	"%keywords" "tf"
	"$bumpmap" "Nature/dirtground005_height-ssbump"
	"$ssbump" "1"
	"$surfaceprop" "dirt"
}
Have fun! If this was helpful, if you have a question, or if you have a critique, post a reply below. Happy mapping. :thumbup1:
Last edited:

