- Jul 30, 2021
- 953
- 667
Control the Keep is a custom, hybrid Capture the Flag & King of the Hill gamemode created by @Spipper in 2014. The gamemode consists of bringing the singular flag between each team's base, and gaining time.

There are four things that define Control the Keep at its best:
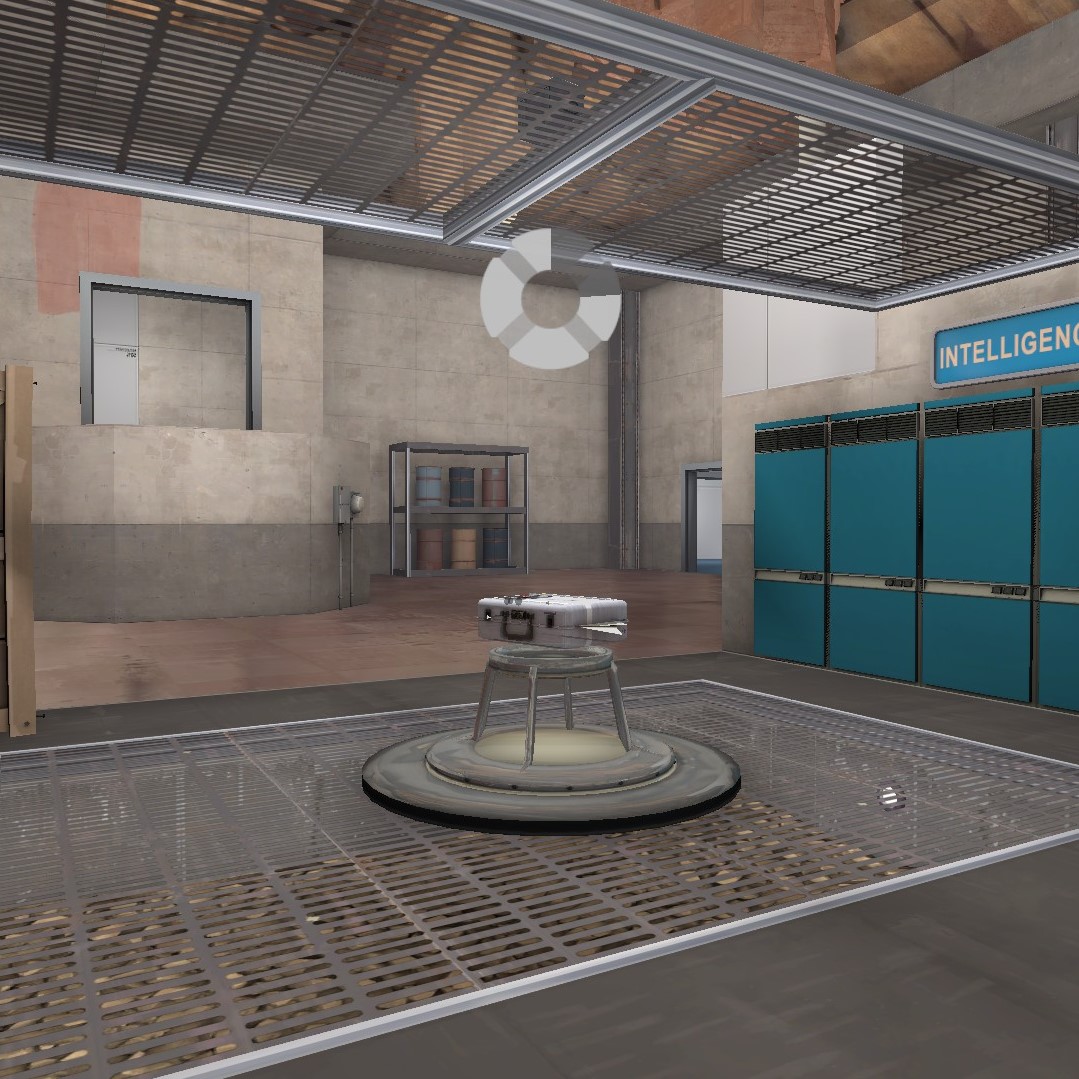
This is the briefcase teams will be fighting over for the round. At the beginning of each round, the flag always starts in a neutral position at the center of the map, usually with a brief window of time until the flag is actually obtainable. This window of times acts as both team's setup and "random DM" time, and should be based on both the length and expected difficulty of each team's ability to reach the other base. As a level designer, you have the choice to allow teams to be aggressive in setup time (no setup gates, free reign over each other's bases) or you can force teams to be passive (putting down setup gates, giving dedicated setup time in the HUD). This does not change the gamemode's functionality, but it does affect how the map will be played, so keep a close eye on your map's variables! Before the flag has been captured, you should not let the flag have a return time. The flag should remain neutral at all times, allowing teams to fight over it and eventually deliver the flag to a side.
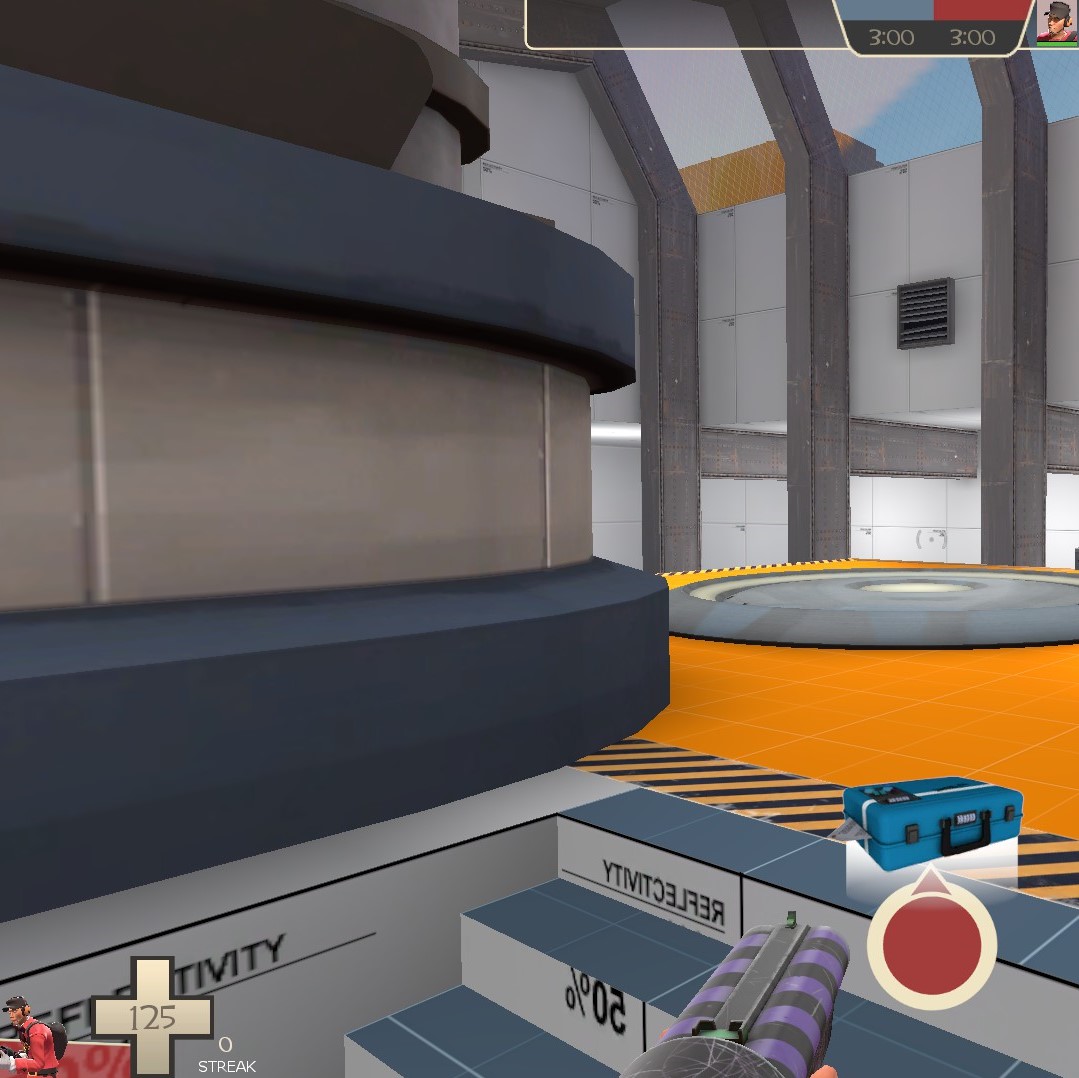 (RED EXAMPLE POV)

Once your team has secured control of the flag, it's time to go and capture it! To do this, your team must run to the BLU base and have your flag carrier run to the capture zone. The Flag captures instantly, so defenders must prepare as fast as possible for your team's assault. When the flag is captured, the RED timer will begin to tick down. RED Team's new task will then become to defend the flag, and BLU will be trying to get the flag out of their base and deliver it to the RED base, where they will then start their own timer and stop the RED timer. Even when the flag is in BLU's grasp, RED's timer will continue to tick down until BLU captures the flag themselves. This is intentional, as it means teams must quickly coordinate to shift the flag between sides of the map. As a level designer, you have a few choices to make here: Depending on your map's length (which, ideally, will be on the shorter side), you may want to give the flag a bit of a small intangibility period so that defenders have a bit of a chance to regroup and properly defend their new objective. However, the tradeoff to this is that if a flag is captured with only a few seconds remaining on the clock, a team can be put in an uncounterable win scenario. This isn't very fun to fight, so this is more of a last-minute resort if your map is either too short or too long to properly support the gamemode for maximum enjoyment. Additionally, you have the choice of how much time you want to give for a flag to return to its base; On shorter CTK maps, you want this time to be shorter, and on longer CTK maps, you want this to be longer. Simple, right? Just keep an eye on how quickly teams exchange the flag.
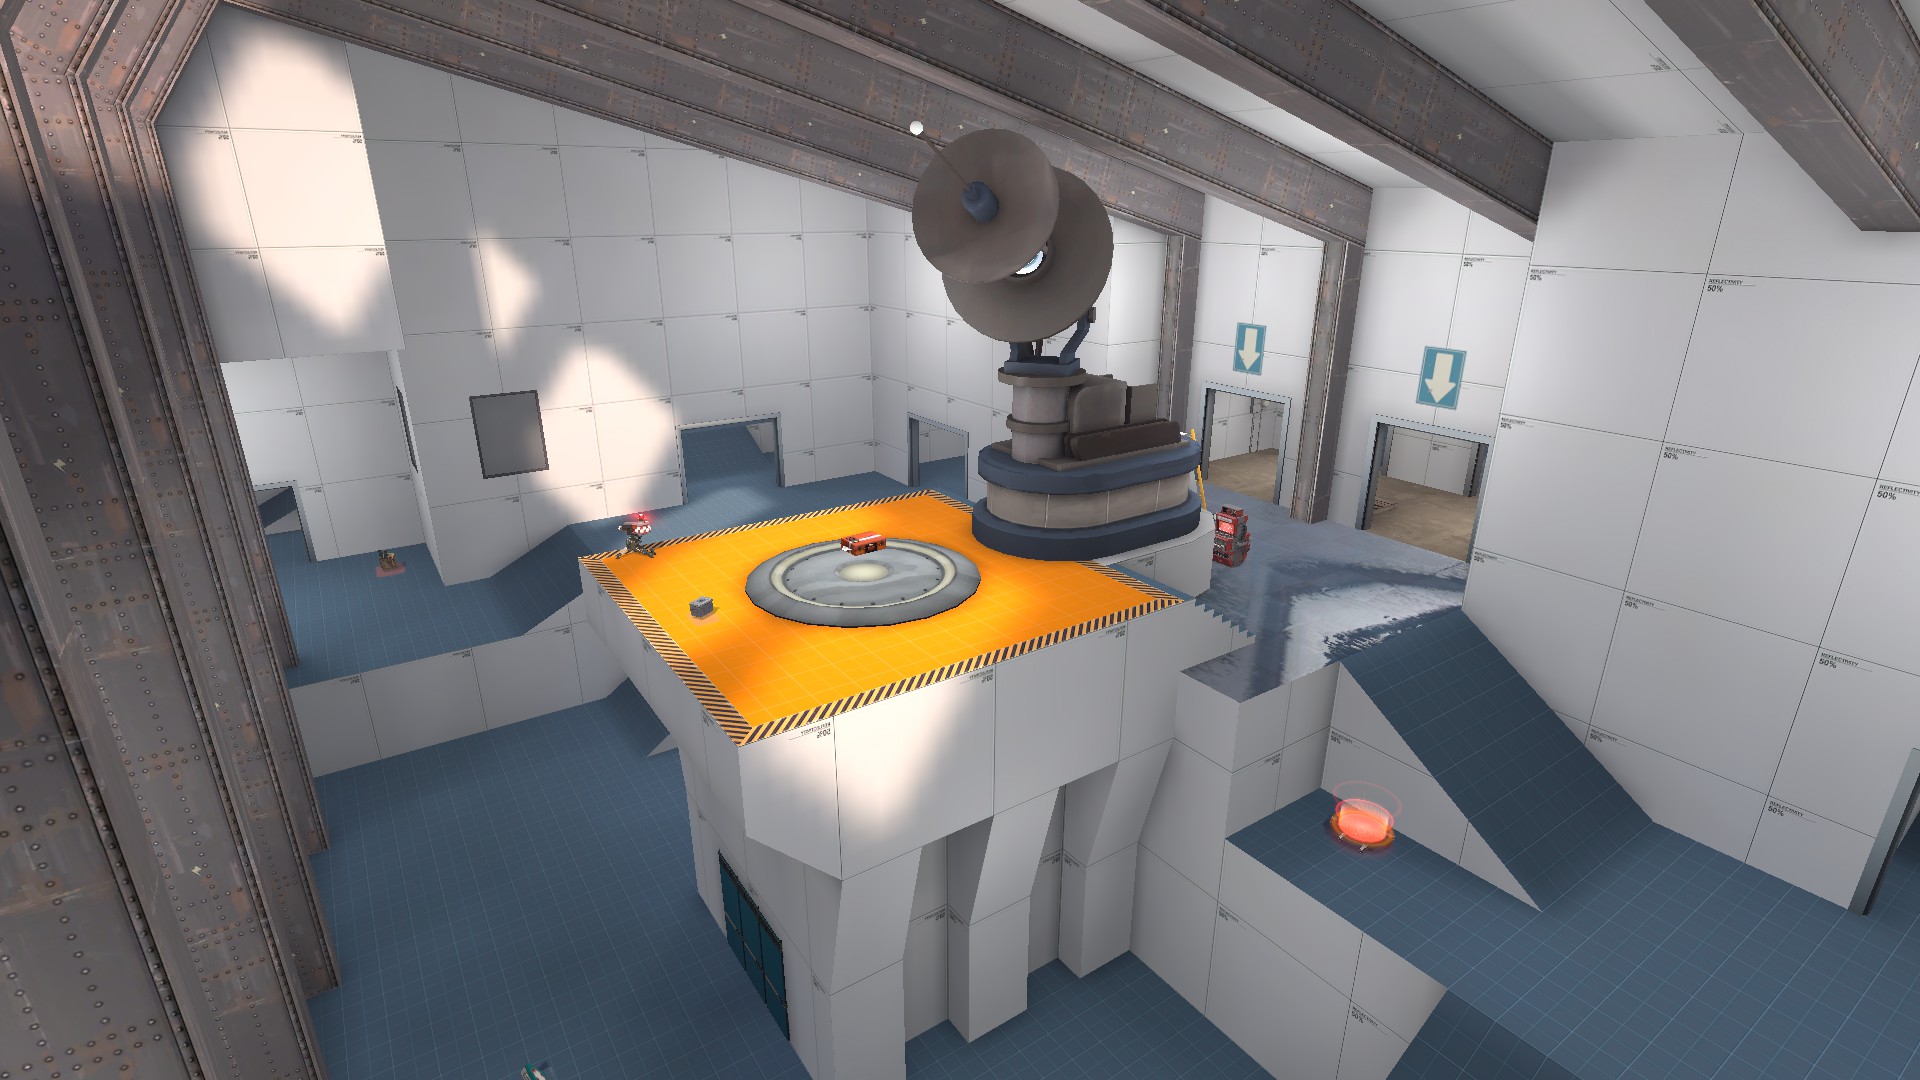
Remember: Keep your team's flag in the enemy team's base to win!
DESIGN TIPS
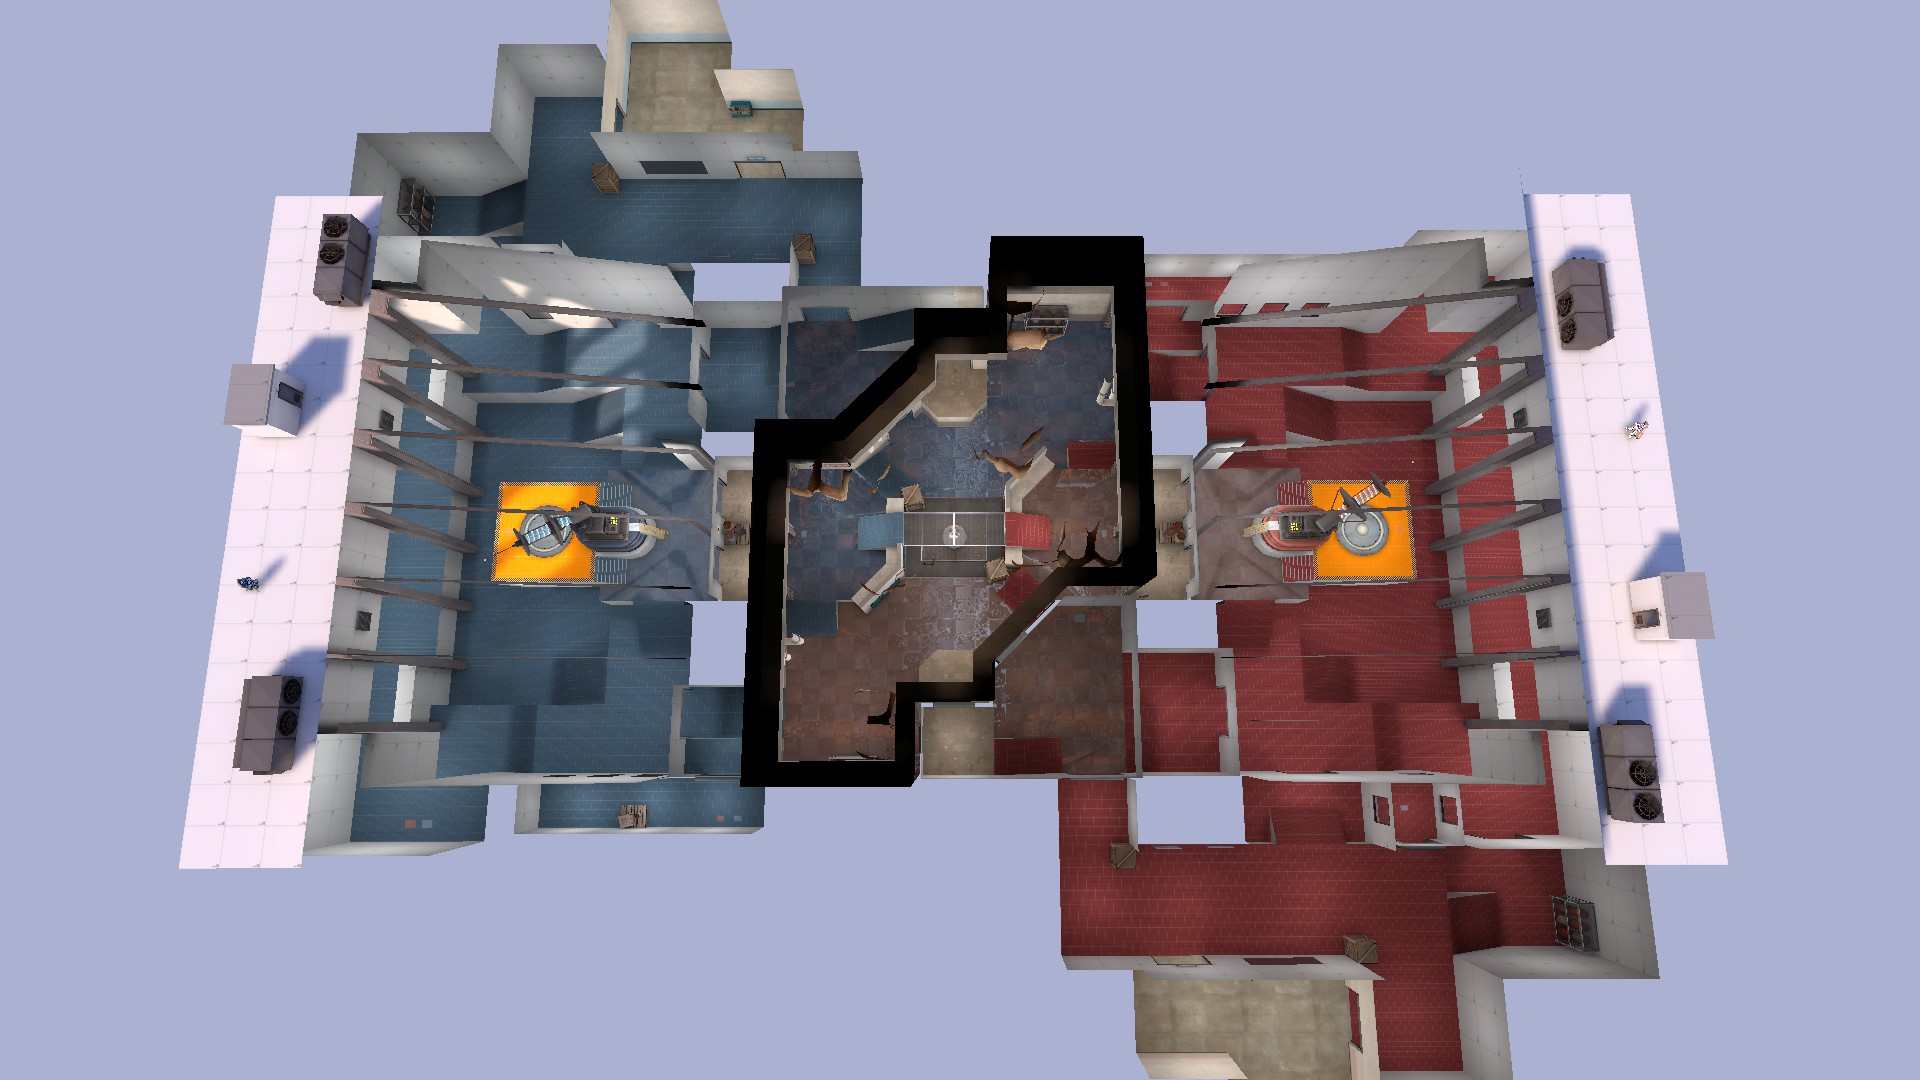
Keep it short! Remember, the longer a flag takes to get out of a base, the less likely it is that the flag will change hands. CTK is often the most in its element when the flag is changing hands often, as it keeps players moving in the map and keeps teams on their toes. What you want to avoid is the chance for a team to perform a lock-out, which is essentially when a team manages to fully block the opposite team from being able to breach the defenders' base altogether. Keeping the map short also means that combat is almost always happening, which is great!
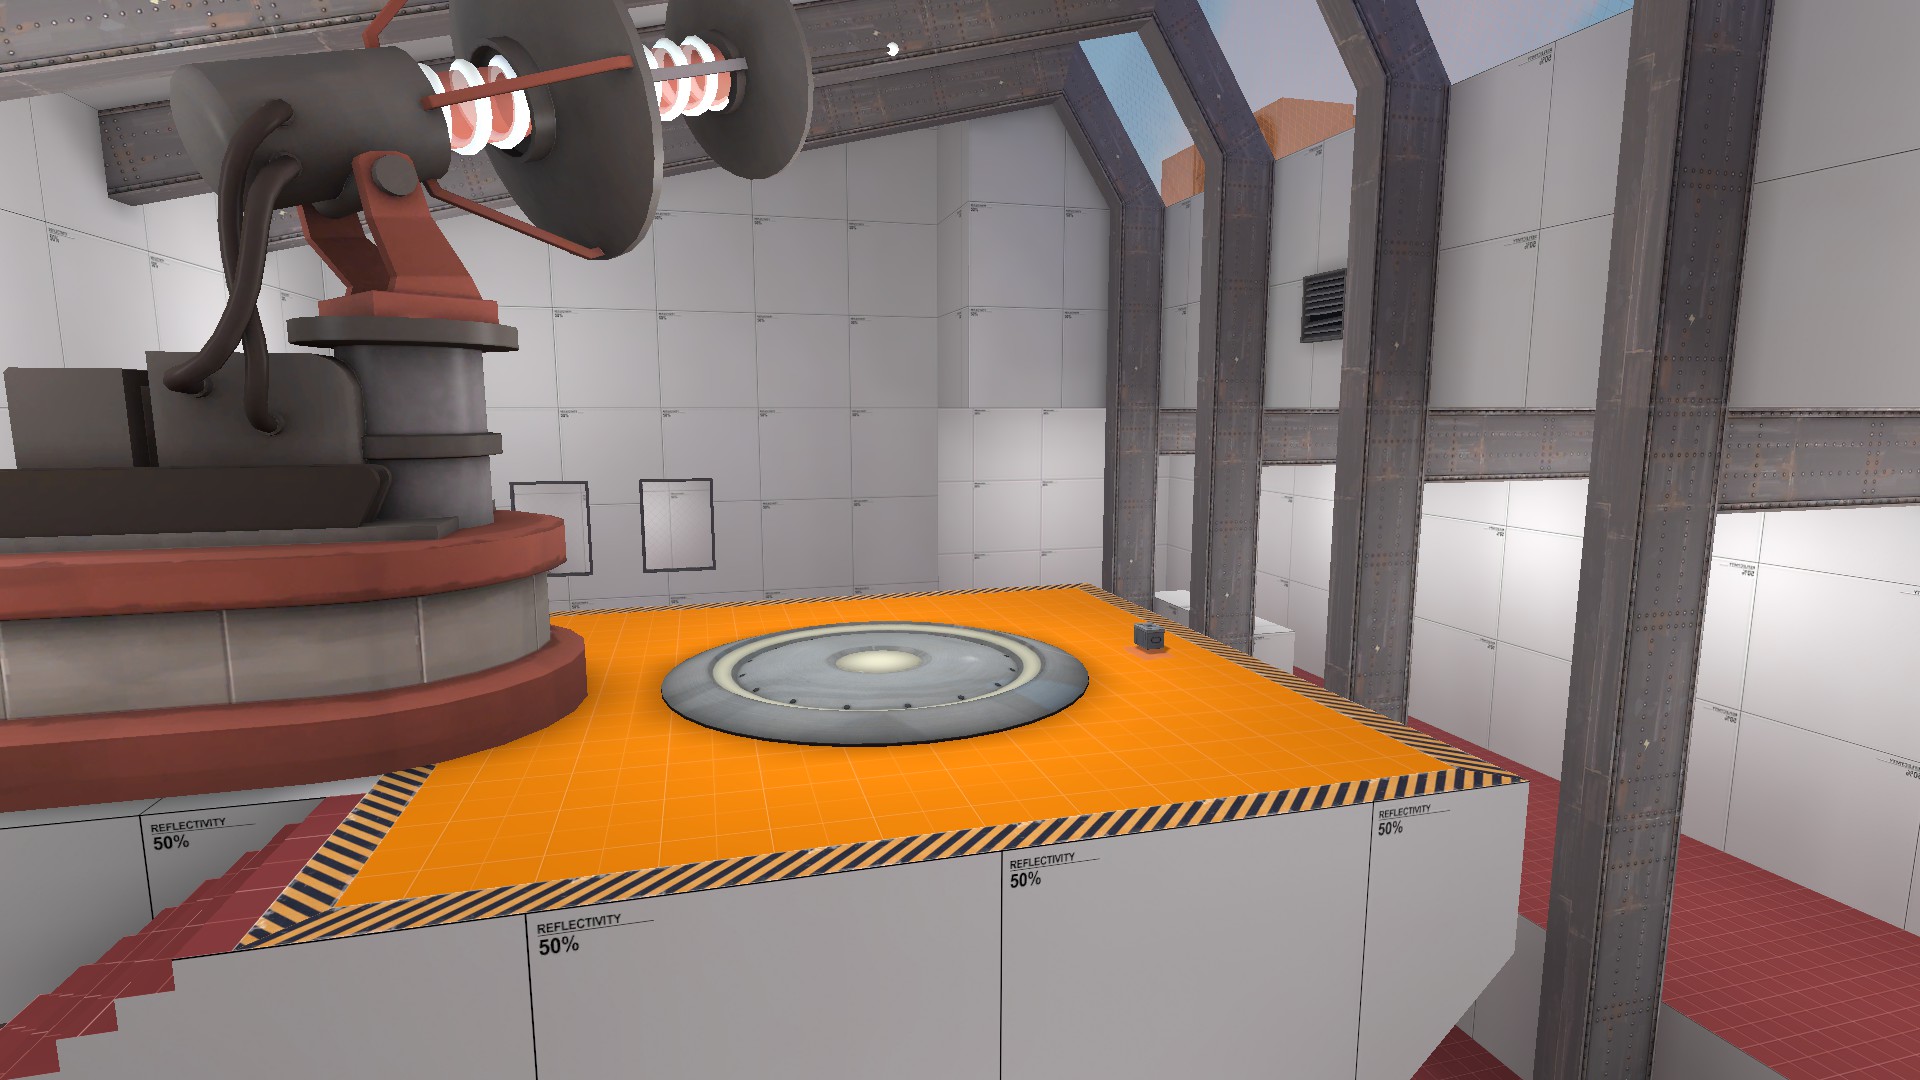
DO NOT give the capture zone a capture time. The reason why CTK actually works is because teams can quickly dart in and capture the flag if absolutely necessary, even if it only grants their own team a few couple of seconds to either stall or force the enemy team into a disadvantageous spot. Giving the capture zone a capture time not only makes this infeasible, but it also slows the game down a lot, which makes it that much less fun. Additionally, make sure to make your capture zone distinct! This can be done in a variety of ways, but usually the best way is to set a control point or flag pedestal down with a hazard tape-marked perimeter around your capture zone.
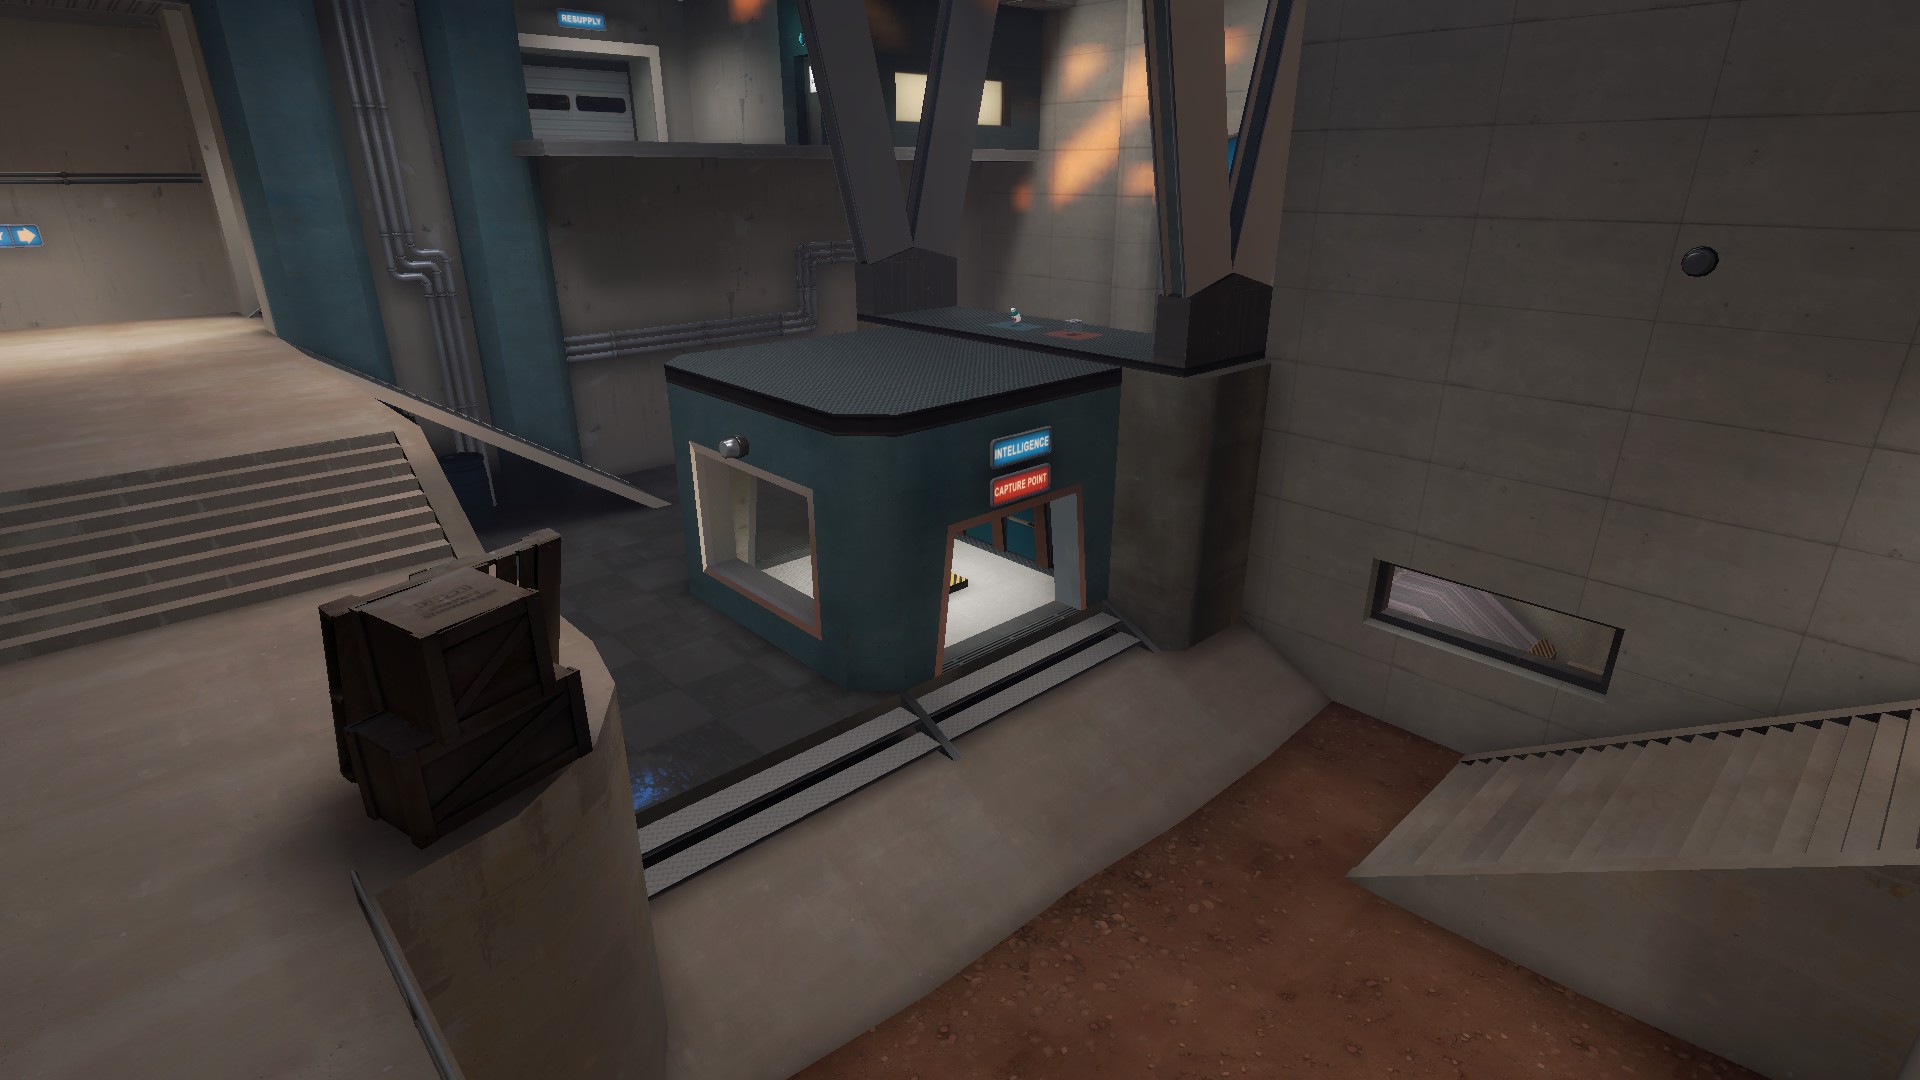
Keep the Flag accessible! Further reiterating from earlier, a key part of CTK that makes the gamemode work is each teams' ability to quickly turn the tides of battle; In order to make this possible, you want to make sure that when the flag is capped, attackers are able to easily grab the flag and at least somewhat get the fuck out of there. A bad flag zone in a CTK map will favour defenders, as favouring the defenders can often lead to a bad lock-out scenario if teams are even a little off.
If you're here, thank you for reading to the end! I hope this inspires you somehow :3
There are four things that define Control the Keep at its best:
- There must be a neutral intelligence briefcase located at the centre of the map.
- The flag must be delivered to the enemy team's base for you to win.
- The flag cannot instantly gain a team a point; Instead, the round is won by the team who delivered the flag keeping the flag in the enemy base long enough for their own KOTH Timer to tick down.
- Each team's timer cannot be interrupted when the flag is being held by the other team, only when the flag is captured can the timer start or switch teams.
This is the briefcase teams will be fighting over for the round. At the beginning of each round, the flag always starts in a neutral position at the center of the map, usually with a brief window of time until the flag is actually obtainable. This window of times acts as both team's setup and "random DM" time, and should be based on both the length and expected difficulty of each team's ability to reach the other base. As a level designer, you have the choice to allow teams to be aggressive in setup time (no setup gates, free reign over each other's bases) or you can force teams to be passive (putting down setup gates, giving dedicated setup time in the HUD). This does not change the gamemode's functionality, but it does affect how the map will be played, so keep a close eye on your map's variables! Before the flag has been captured, you should not let the flag have a return time. The flag should remain neutral at all times, allowing teams to fight over it and eventually deliver the flag to a side.
Once your team has secured control of the flag, it's time to go and capture it! To do this, your team must run to the BLU base and have your flag carrier run to the capture zone. The Flag captures instantly, so defenders must prepare as fast as possible for your team's assault. When the flag is captured, the RED timer will begin to tick down. RED Team's new task will then become to defend the flag, and BLU will be trying to get the flag out of their base and deliver it to the RED base, where they will then start their own timer and stop the RED timer. Even when the flag is in BLU's grasp, RED's timer will continue to tick down until BLU captures the flag themselves. This is intentional, as it means teams must quickly coordinate to shift the flag between sides of the map. As a level designer, you have a few choices to make here: Depending on your map's length (which, ideally, will be on the shorter side), you may want to give the flag a bit of a small intangibility period so that defenders have a bit of a chance to regroup and properly defend their new objective. However, the tradeoff to this is that if a flag is captured with only a few seconds remaining on the clock, a team can be put in an uncounterable win scenario. This isn't very fun to fight, so this is more of a last-minute resort if your map is either too short or too long to properly support the gamemode for maximum enjoyment. Additionally, you have the choice of how much time you want to give for a flag to return to its base; On shorter CTK maps, you want this time to be shorter, and on longer CTK maps, you want this to be longer. Simple, right? Just keep an eye on how quickly teams exchange the flag.
Remember: Keep your team's flag in the enemy team's base to win!
DESIGN TIPS
Keep it short! Remember, the longer a flag takes to get out of a base, the less likely it is that the flag will change hands. CTK is often the most in its element when the flag is changing hands often, as it keeps players moving in the map and keeps teams on their toes. What you want to avoid is the chance for a team to perform a lock-out, which is essentially when a team manages to fully block the opposite team from being able to breach the defenders' base altogether. Keeping the map short also means that combat is almost always happening, which is great!
DO NOT give the capture zone a capture time. The reason why CTK actually works is because teams can quickly dart in and capture the flag if absolutely necessary, even if it only grants their own team a few couple of seconds to either stall or force the enemy team into a disadvantageous spot. Giving the capture zone a capture time not only makes this infeasible, but it also slows the game down a lot, which makes it that much less fun. Additionally, make sure to make your capture zone distinct! This can be done in a variety of ways, but usually the best way is to set a control point or flag pedestal down with a hazard tape-marked perimeter around your capture zone.
Keep the Flag accessible! Further reiterating from earlier, a key part of CTK that makes the gamemode work is each teams' ability to quickly turn the tides of battle; In order to make this possible, you want to make sure that when the flag is capped, attackers are able to easily grab the flag and at least somewhat get the fuck out of there. A bad flag zone in a CTK map will favour defenders, as favouring the defenders can often lead to a bad lock-out scenario if teams are even a little off.
If you're here, thank you for reading to the end! I hope this inspires you somehow :3
