- Jun 8, 2009
- 268
- 66
Hello there and welcome to this tutorial of making hats.. i just create this tutorial for the ppl who want to make models.. or hats so there it is.. in this tutorial i'm gona show you how to create Hats in blender.. but not adding TF2 hats to TF2.. so remind that.. on the 1st part. So i open my blender and just create the first thing:
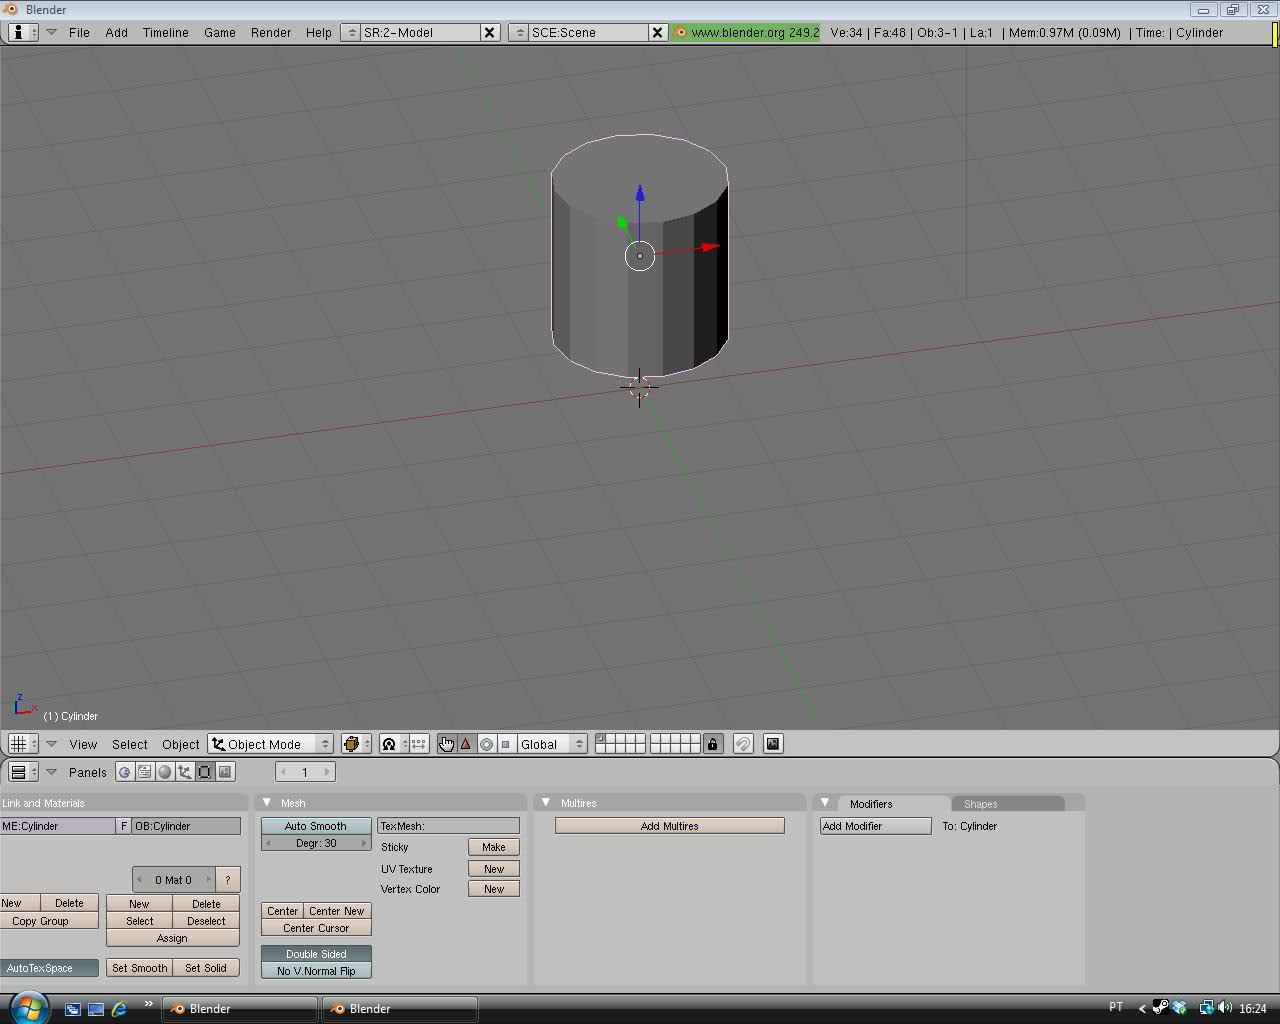
To create hats you need a cylinder.. about 16, 8, 24 vertices.. radius 1.00 depth 2.00 and Caps End. And there it is a perfect cylinder.
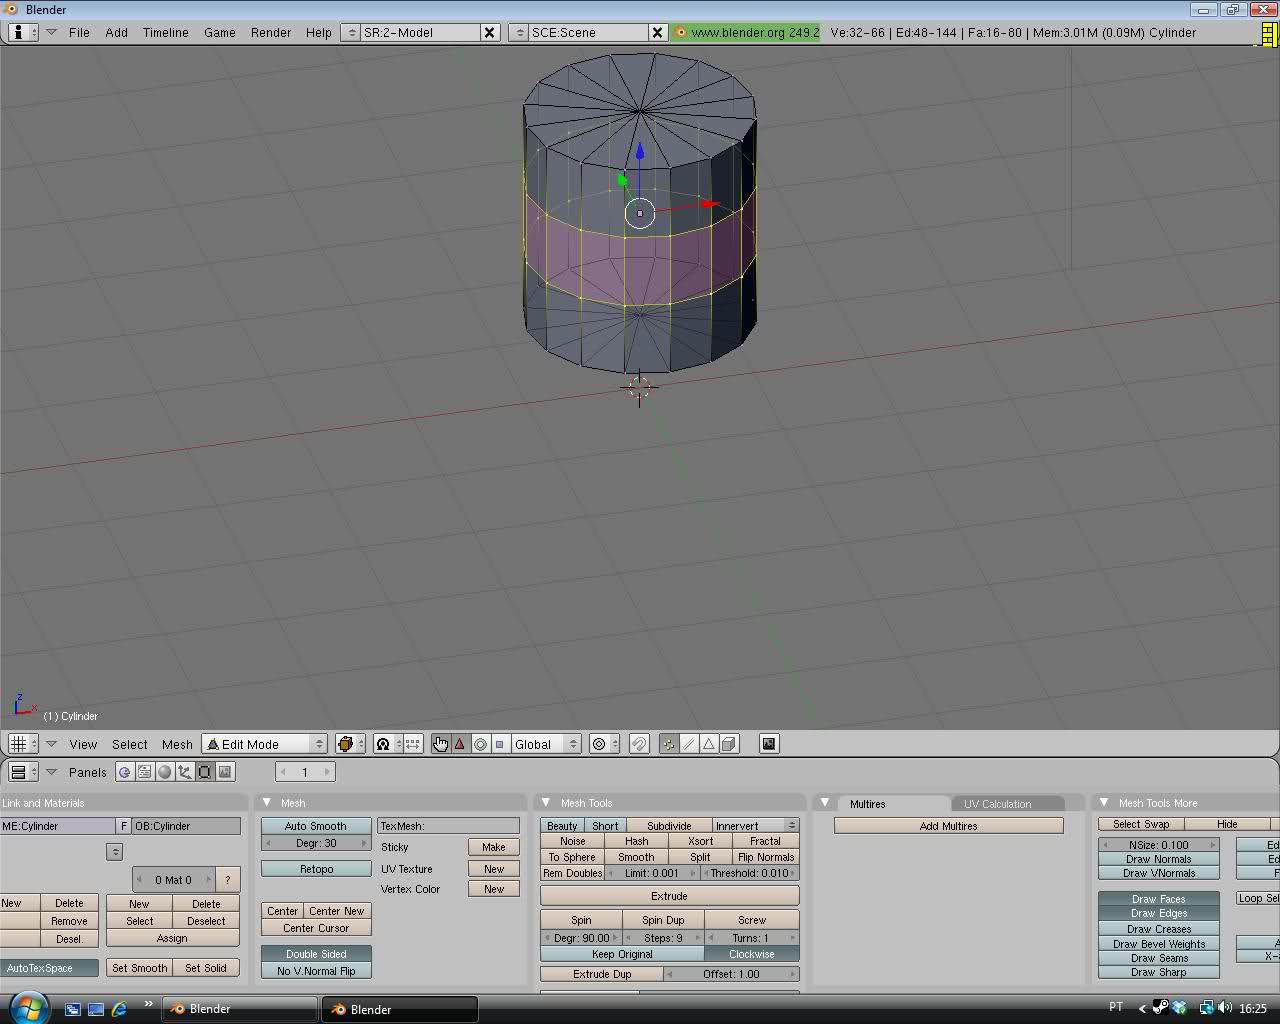
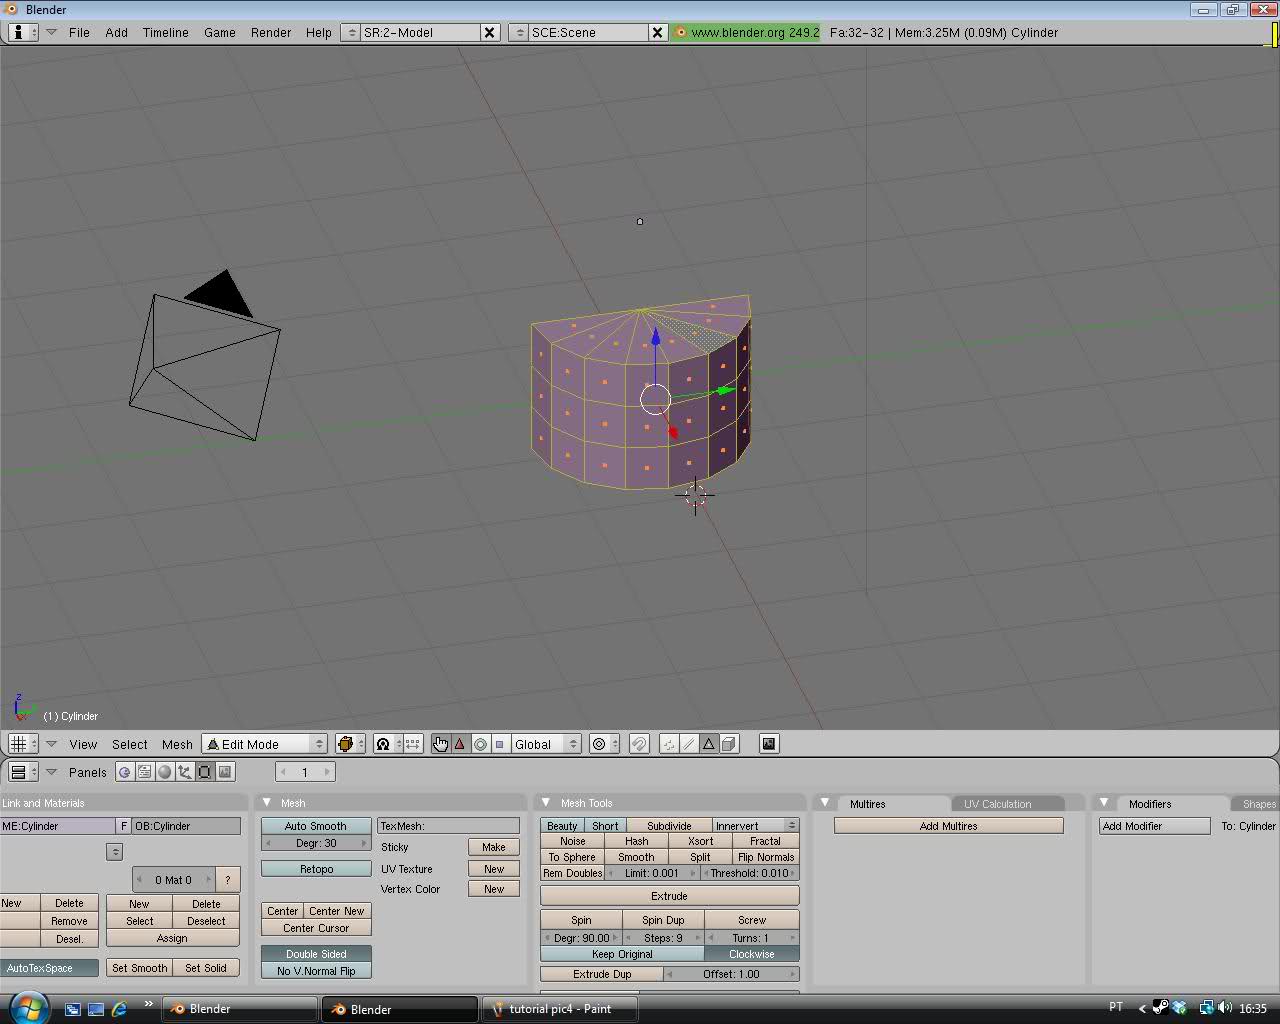
Now press Tab(edit mode) and press Ctrl+r to divide the cylinder in 3 parts.
this will result 3 divides.
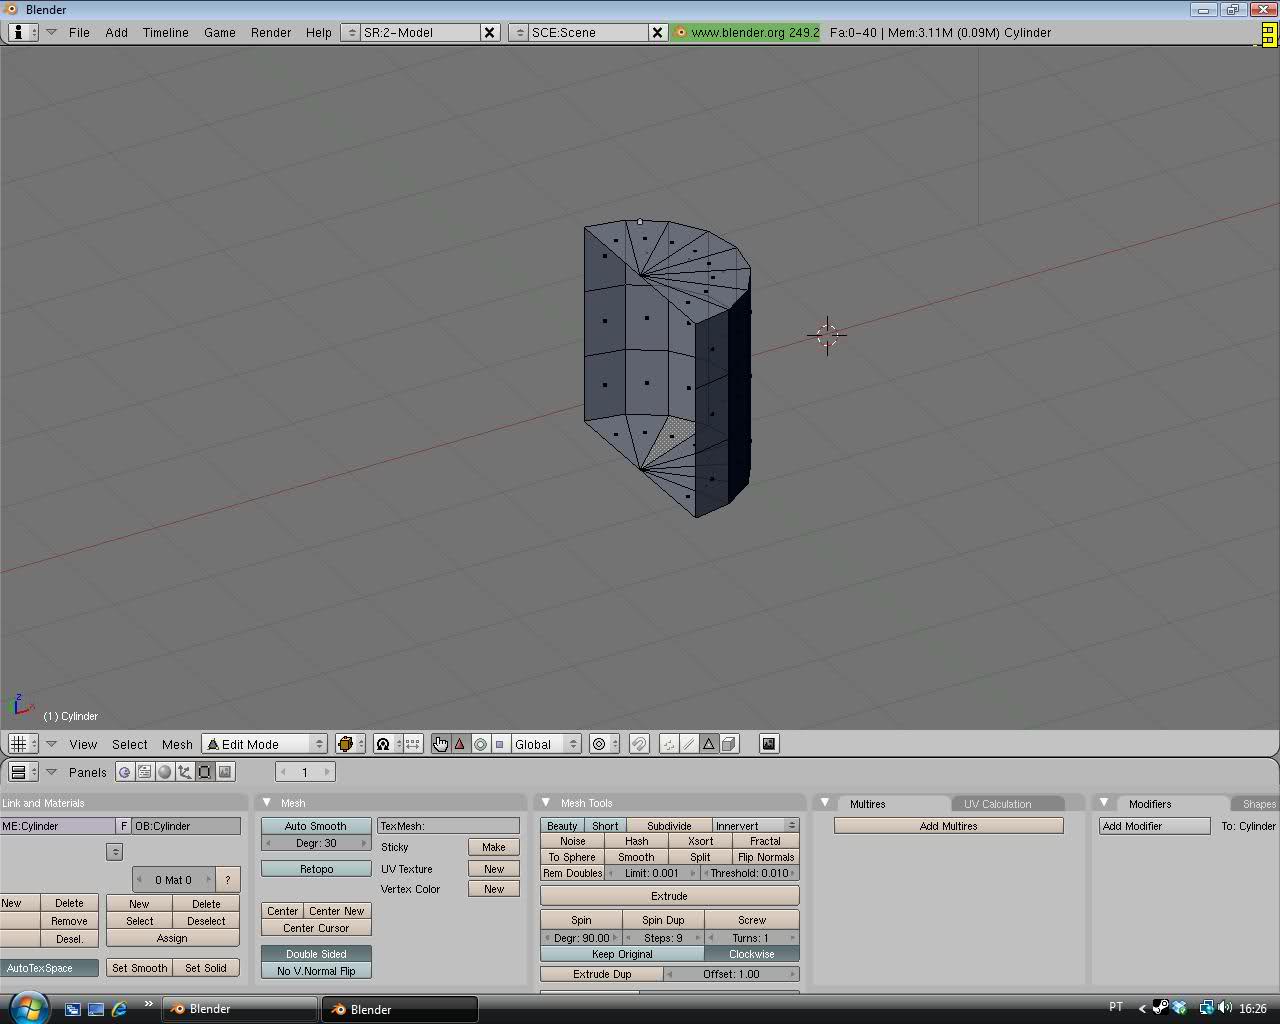
Then press A to deselect all the faces and press B to activate line corridor( is what i call it) and drag it out of the cylinder to an half of it then press X to delete faces that you pressed also use the face tool to delete the bottom of the cylinder
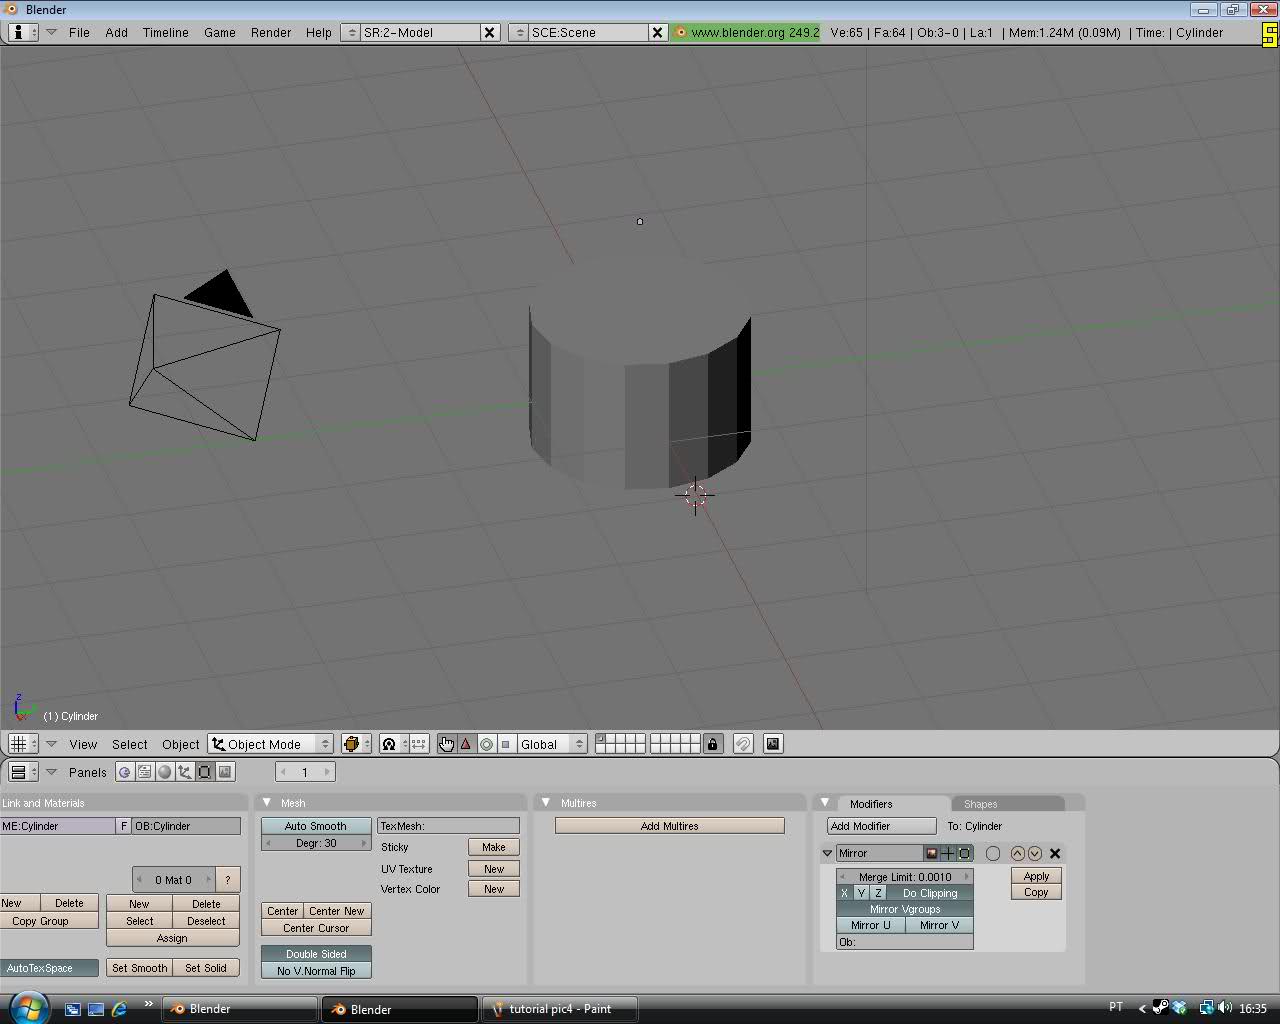
Now turn the the cylinder around to have the other half of it... then.. scale it a little, not to much, and press Z scale it in Z direction(UP and Down) to have a small and tiny cylinder like this:
Now we need to mirror our cylinder .. to do that press tab again(to leave edit mode) and add modifier called "mirror" and press "do clipping".. ifyou have everything until now.. it means.. you are in the right way..
Now select the cylinder:
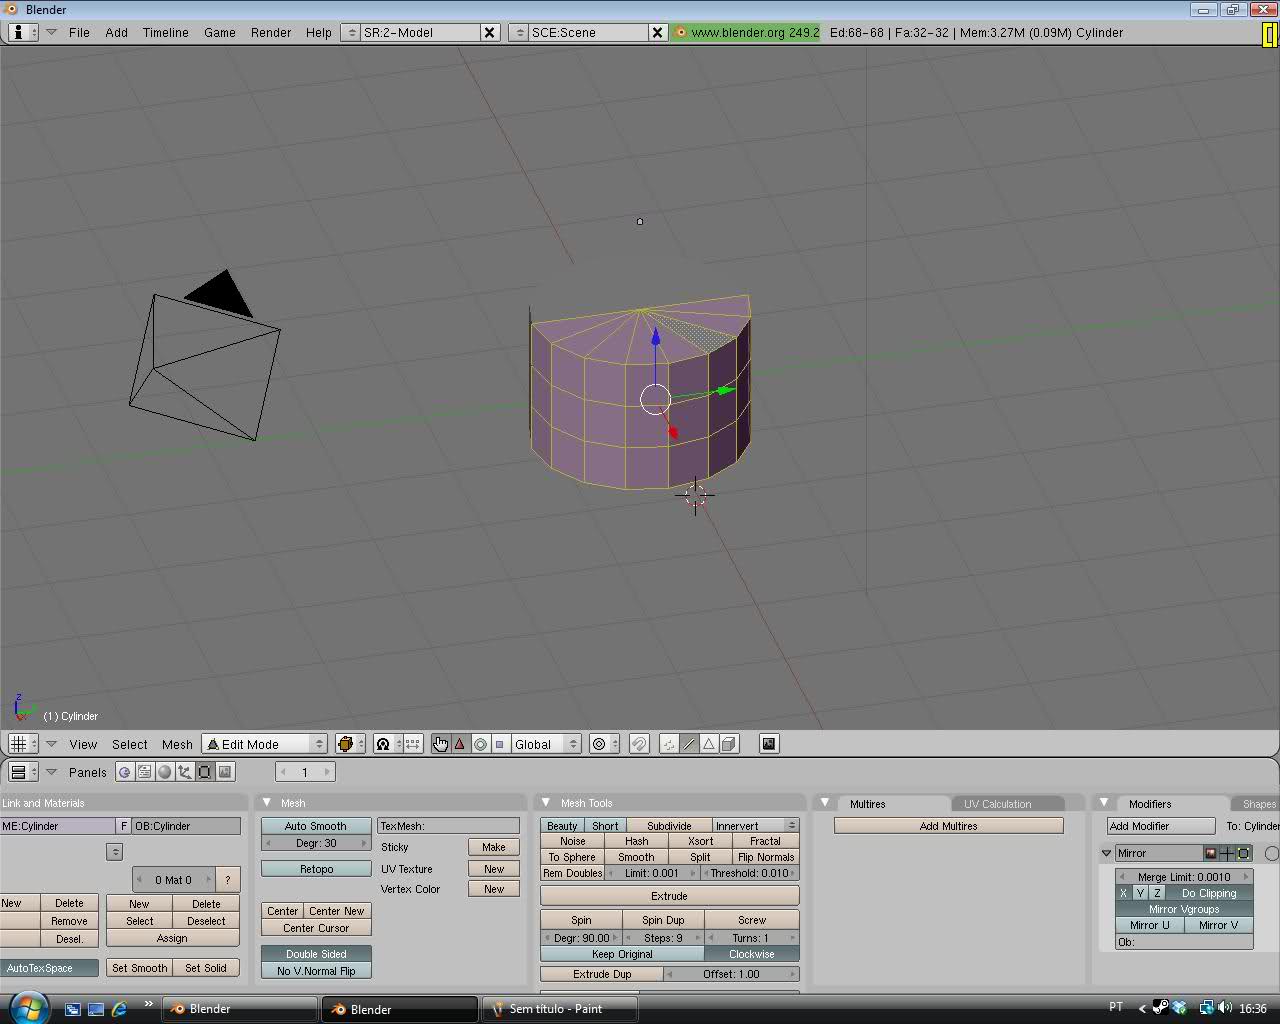
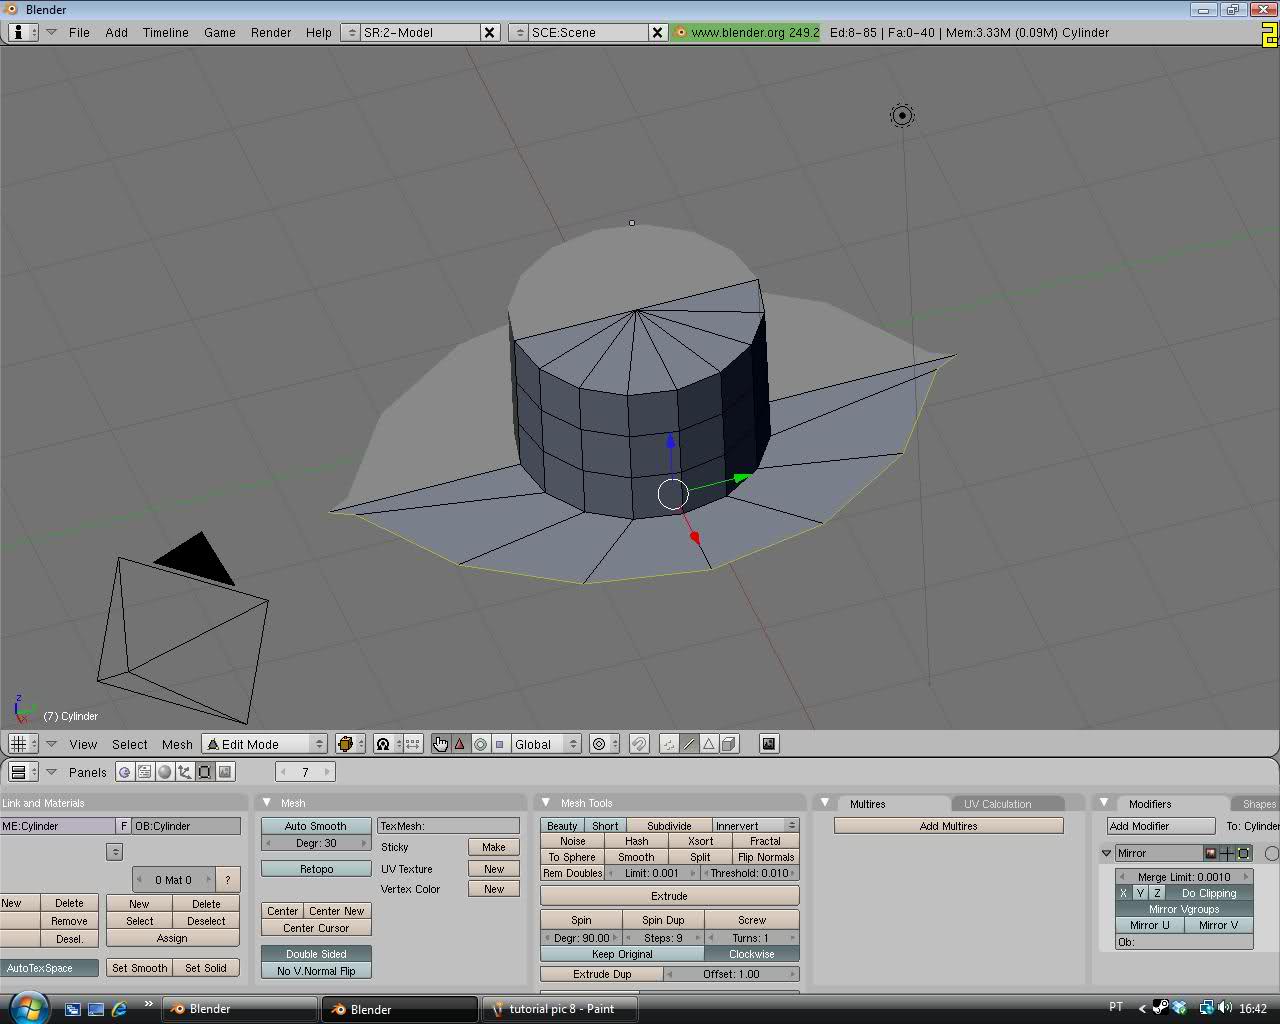
Go to the edge select by pressing Ctrl+Tab and select the all things around that its on the picture that i'm going to show you:
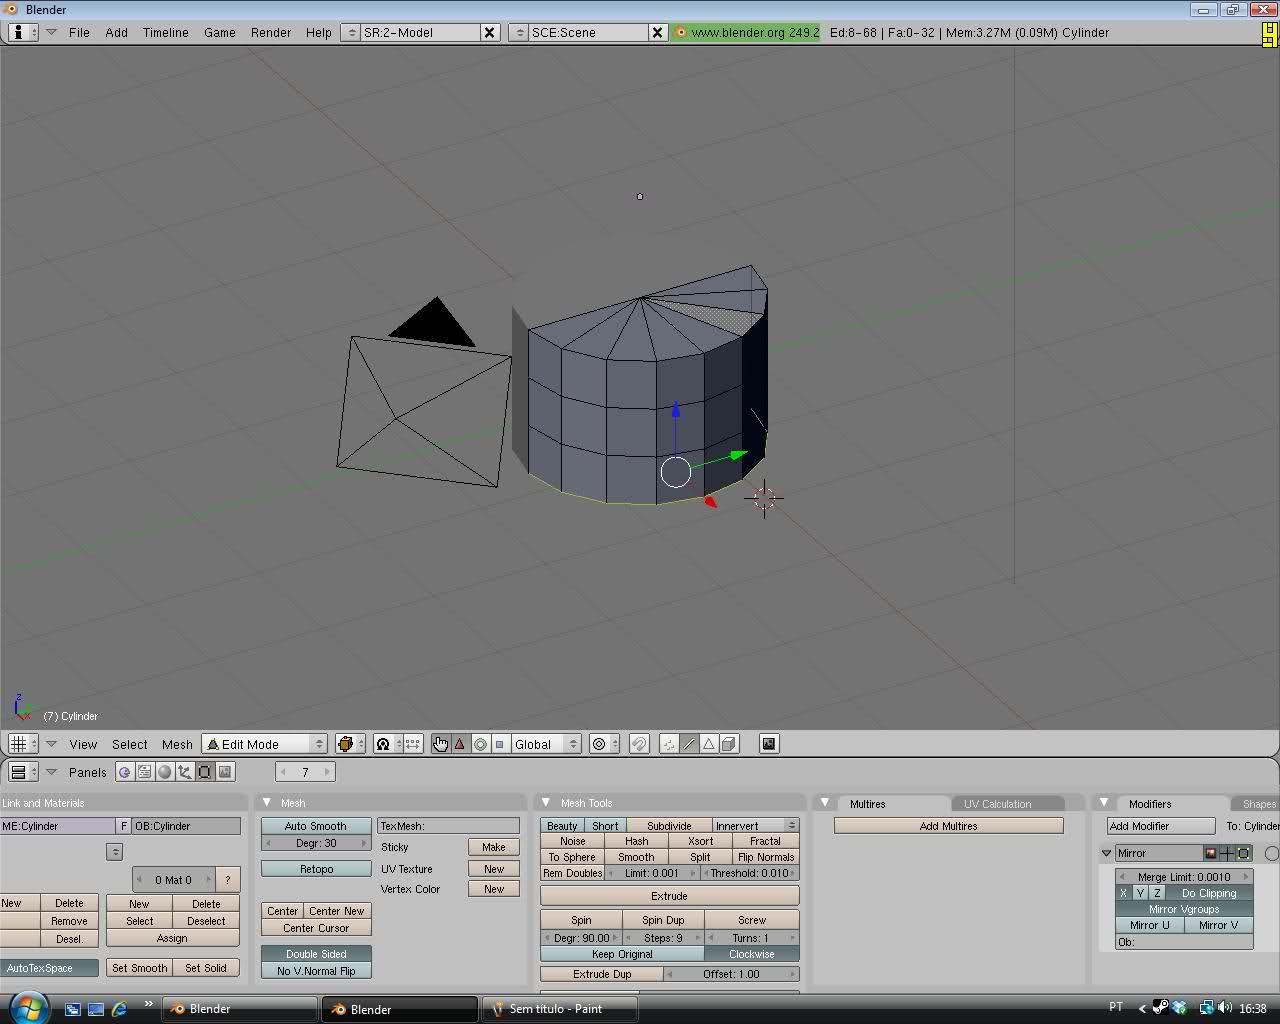
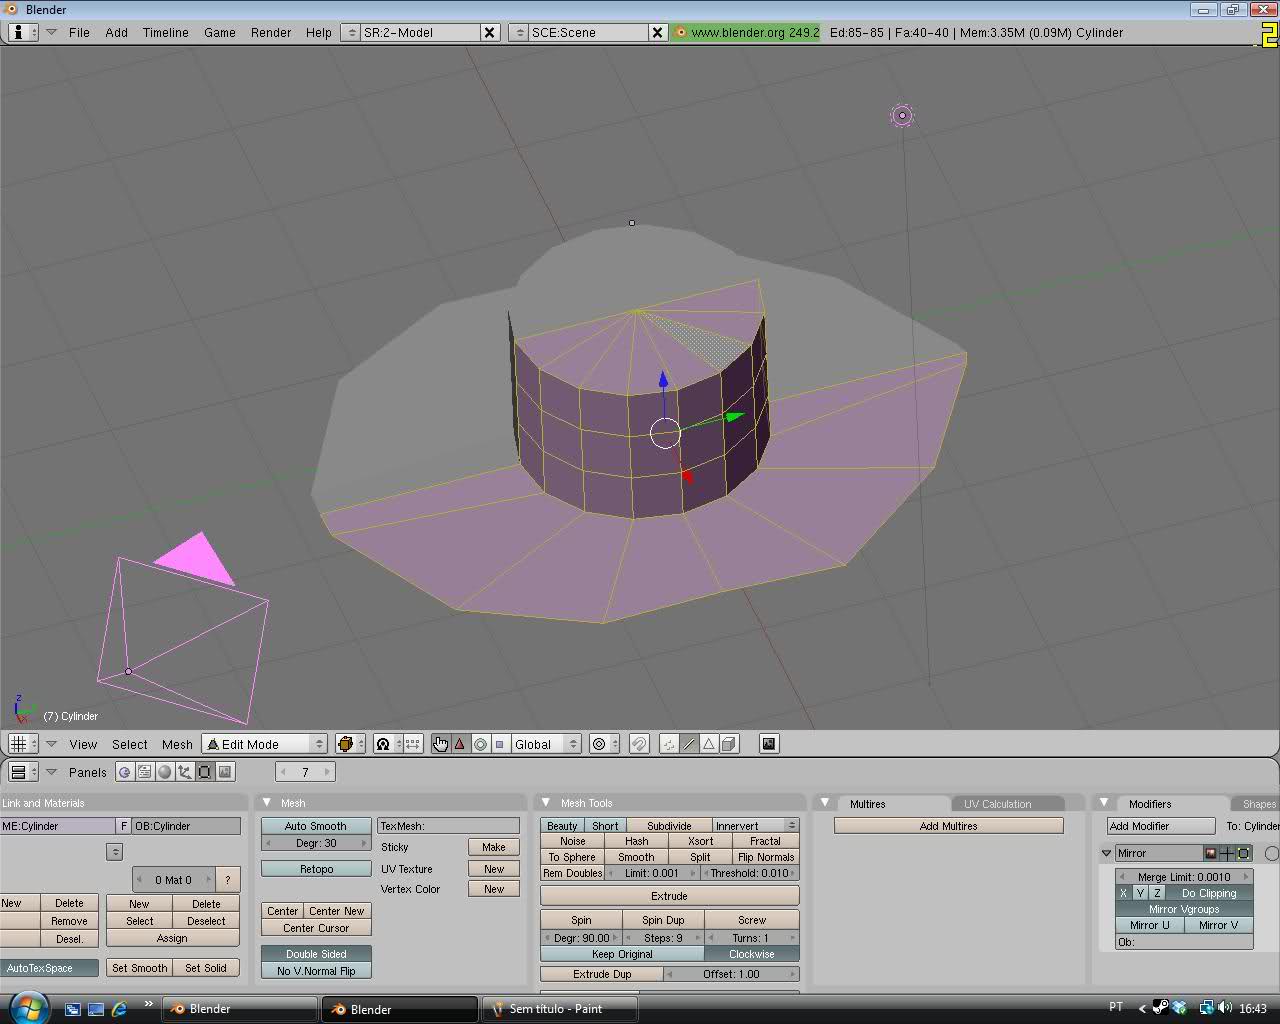
Now we need to extrude our hat.. Select E and press S next... to not exagerate the extrude just.. leave like i have on the pic:
On this part you need to read carefully.. and one mistake... and you need start all over again... so attention..
In this part while having the edge select.. press edges by clicking on the mouse and make them move away by cursor that is displayed, like i have in this picture:
Move some vertices by clicking in the vertice Select:

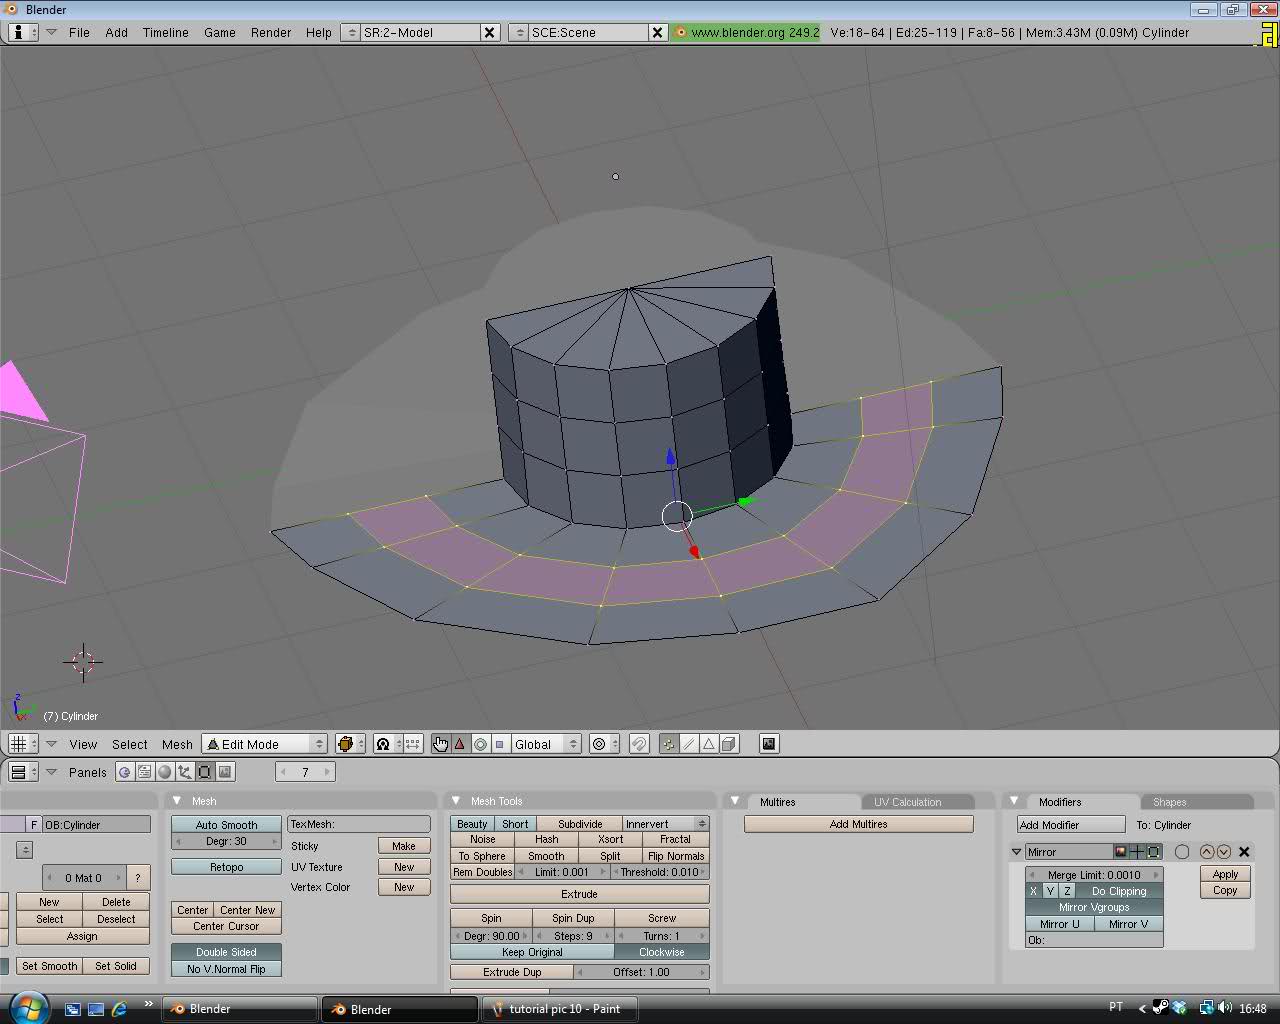
Now we need to cut the hat in 3 parts by pressin ctrl+R and do the same like in have in this picture:
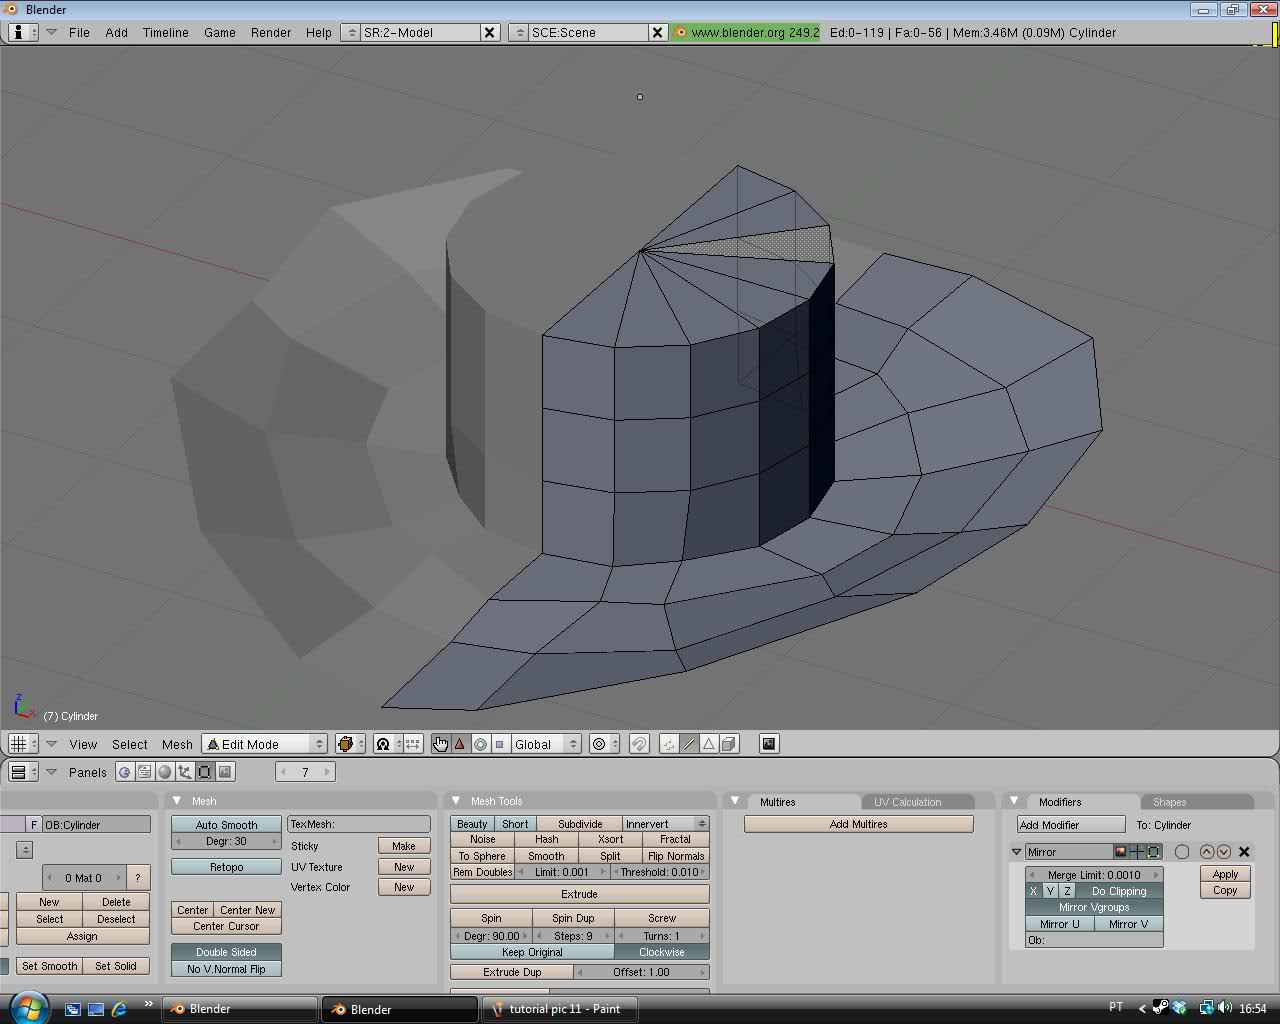
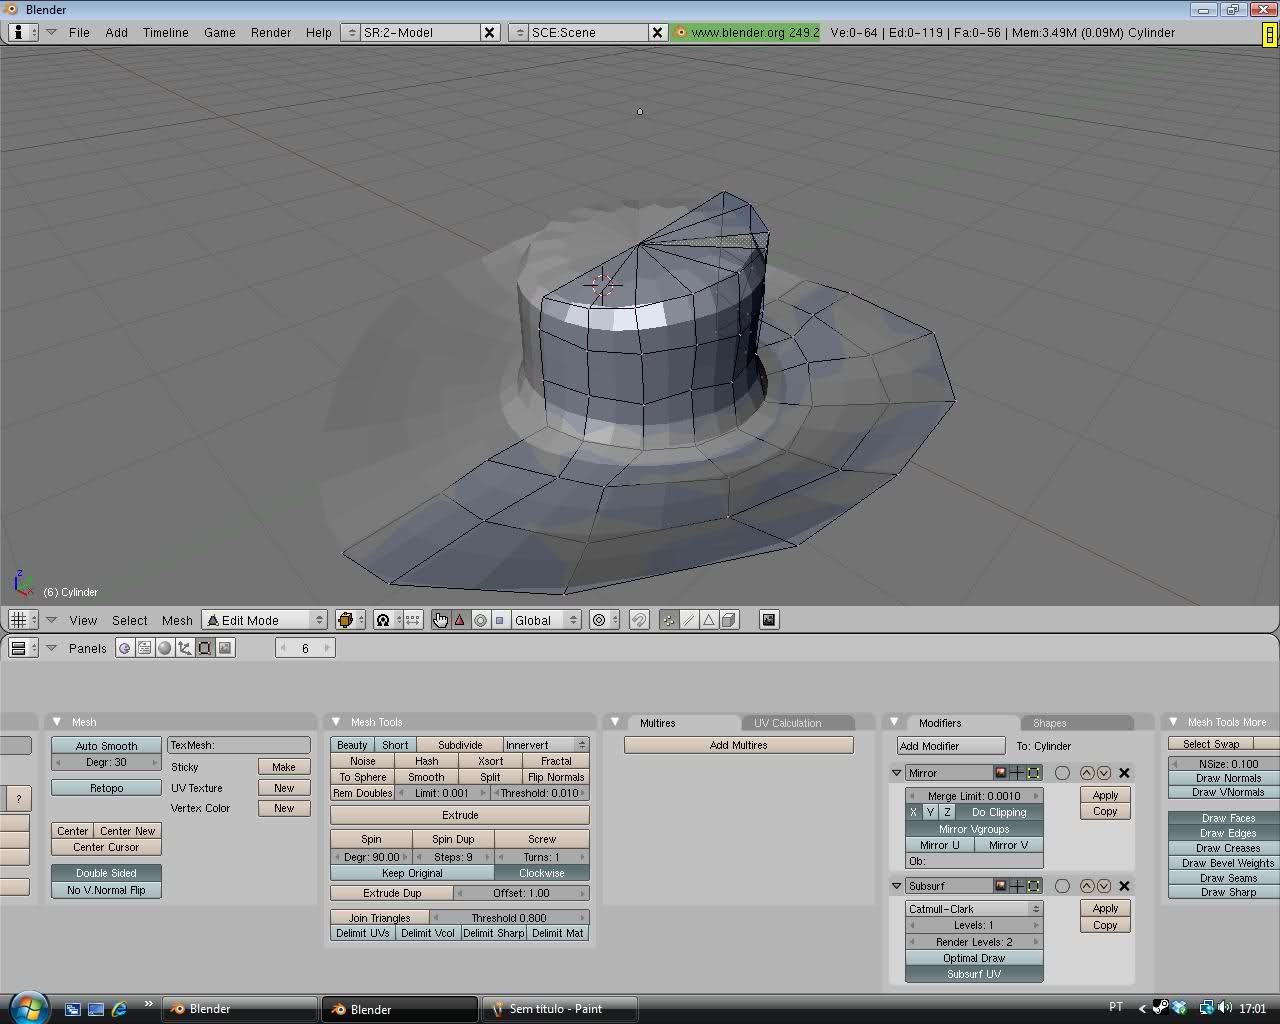
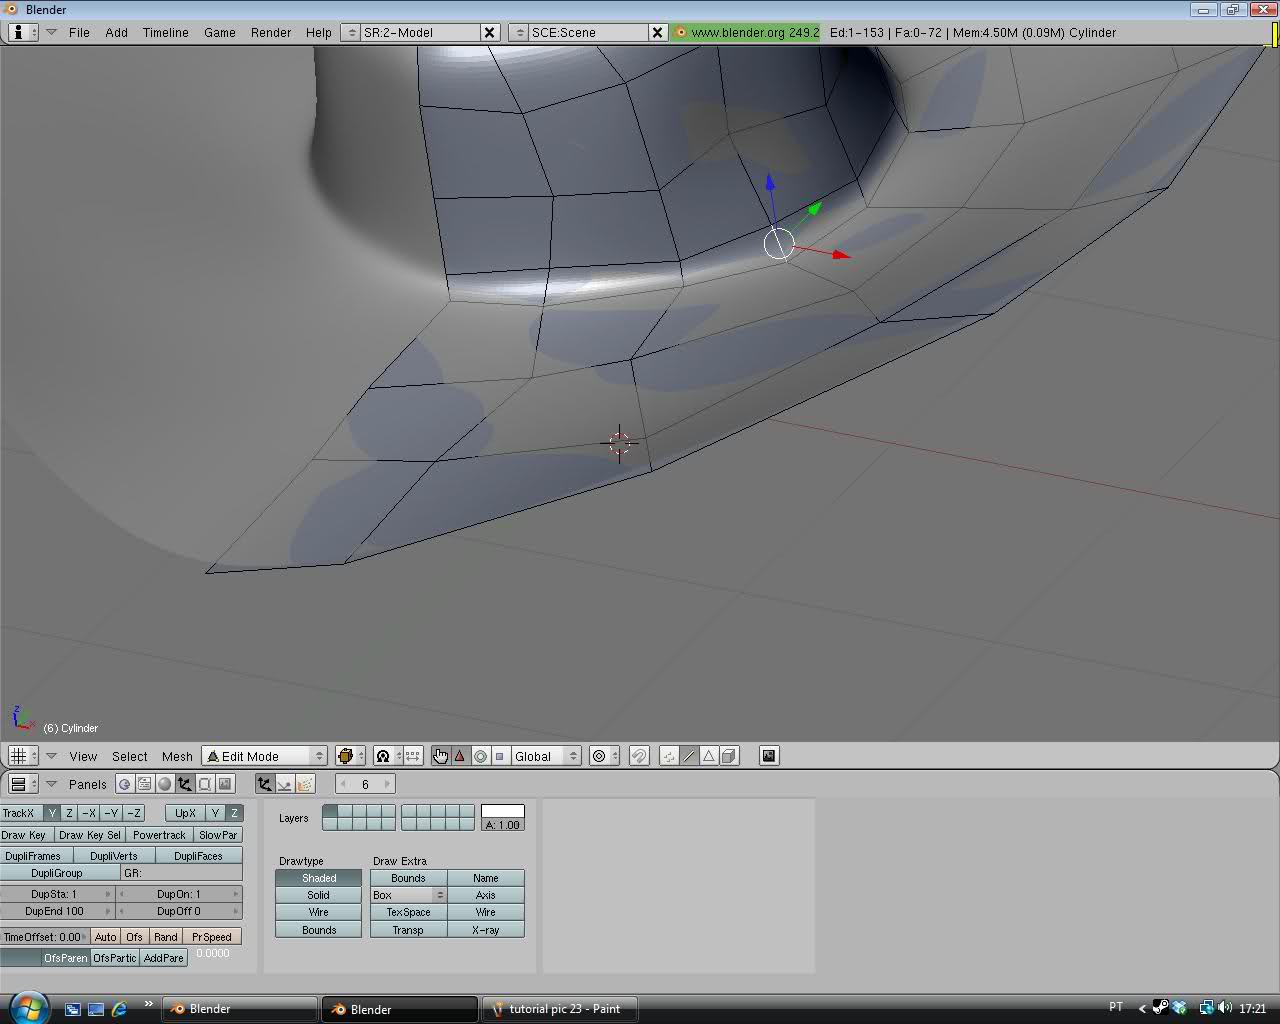
Now on this part you can use Face,vertice,select to make your hat choice.. on this part i won't tell you nothing because this part is about your creativity on your hat by moving the cursor up down left right... all the ways.. in the mean time i will you the picture
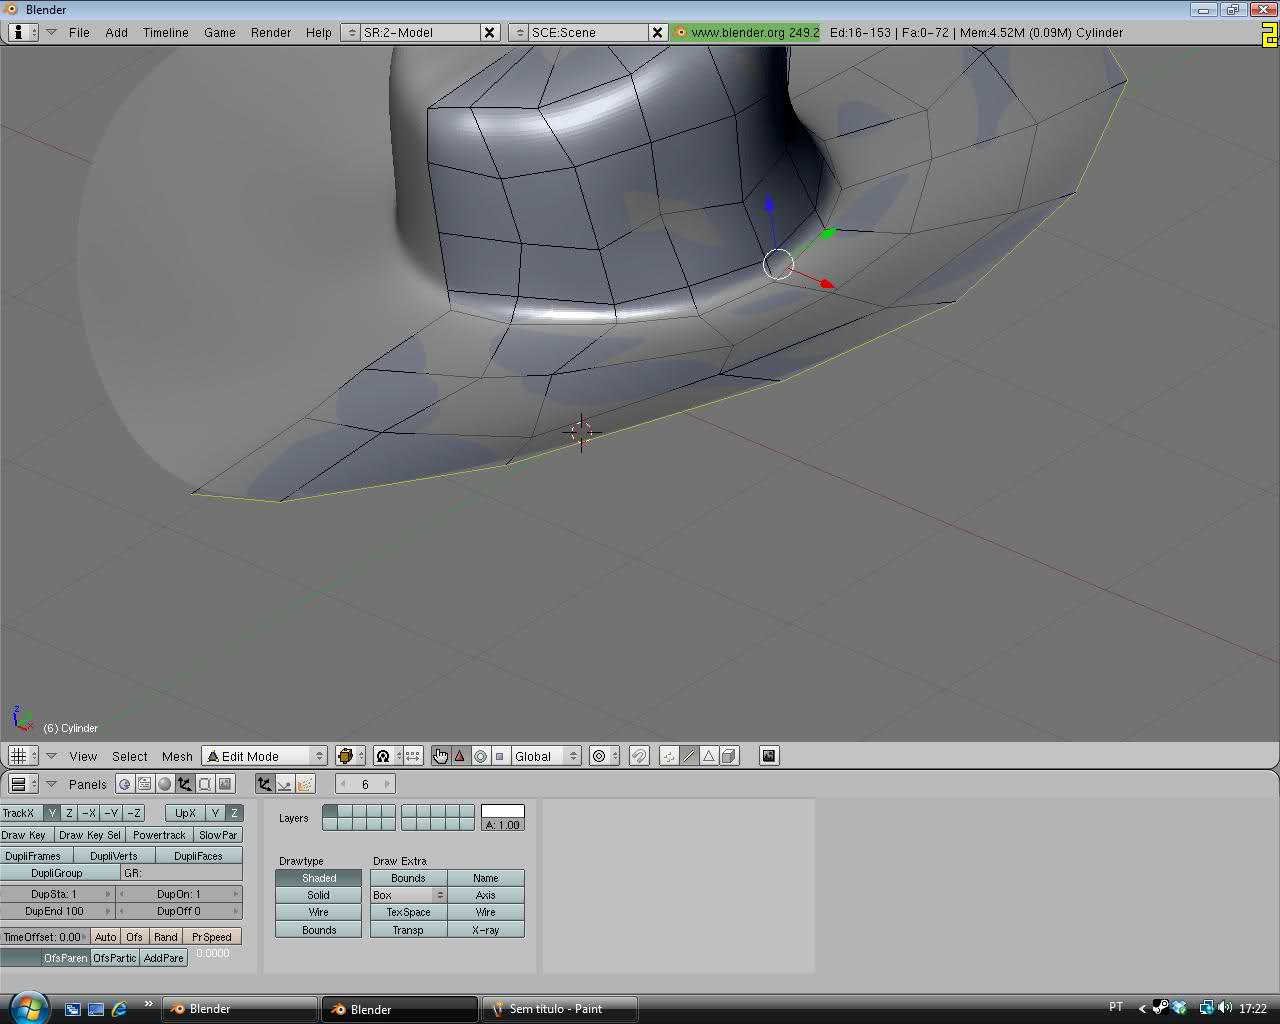
Also you can use your creativity in the cylinder and top of it.. so you can think wut you really want:

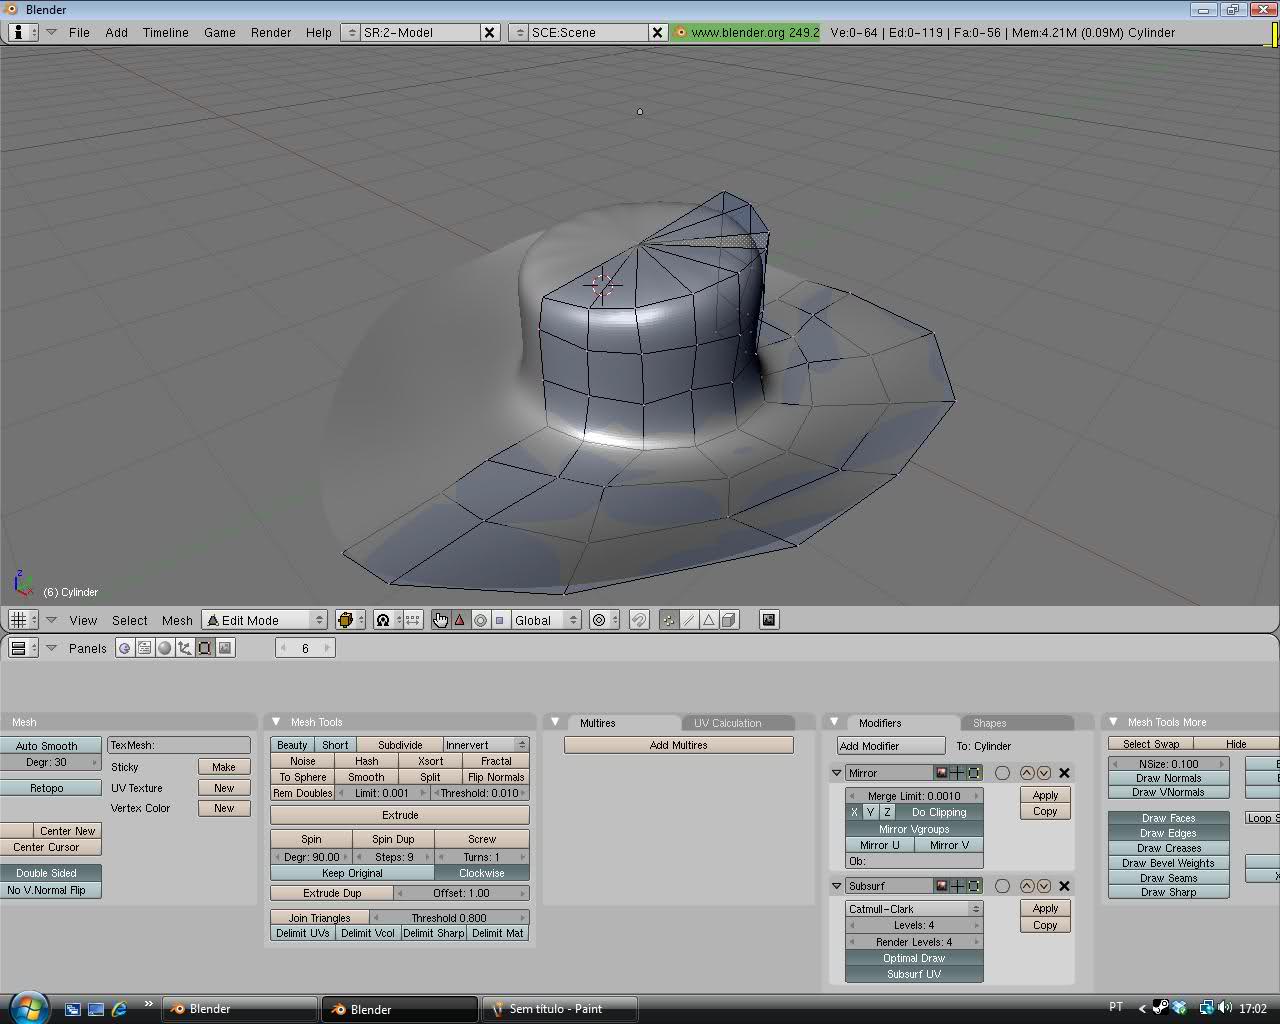
Now while your finish the creativty on your hat.. we gona create another modifier and this time select "subsurf.. this will make the cylinder be more realistic.. and more cool.
this time try to put everything on subsurf to 4 and choose optimitical draw
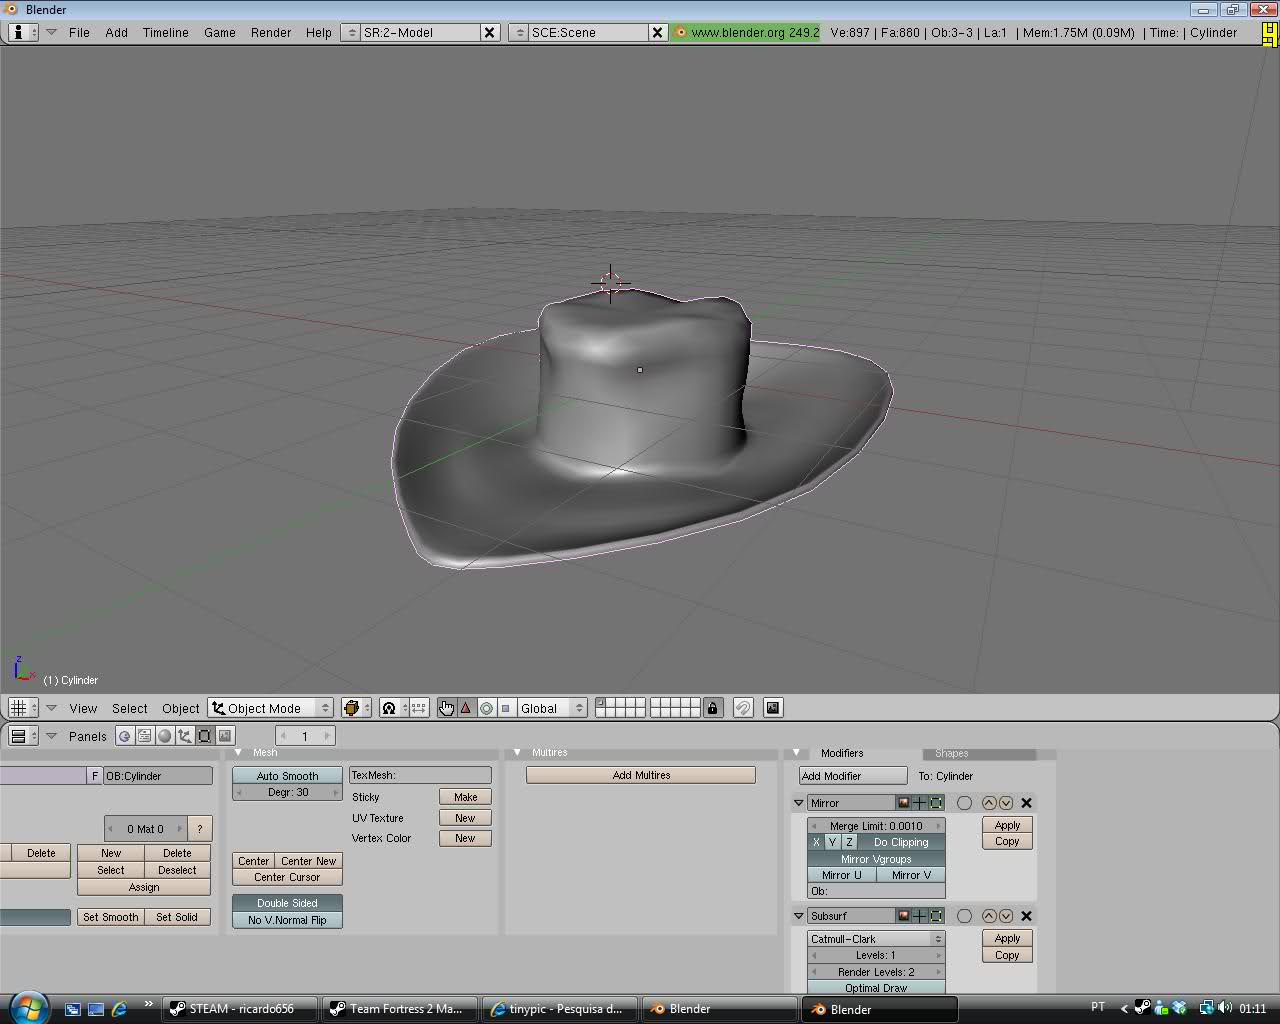
see what it happens... YES it makes the 5\5 REALISTC HAT!!!
Now we have a realistc Hat But still more Job to do if you to put this hat into your TF2 so in the most of this passes you can detail your hat by your own.. so.. be clever now
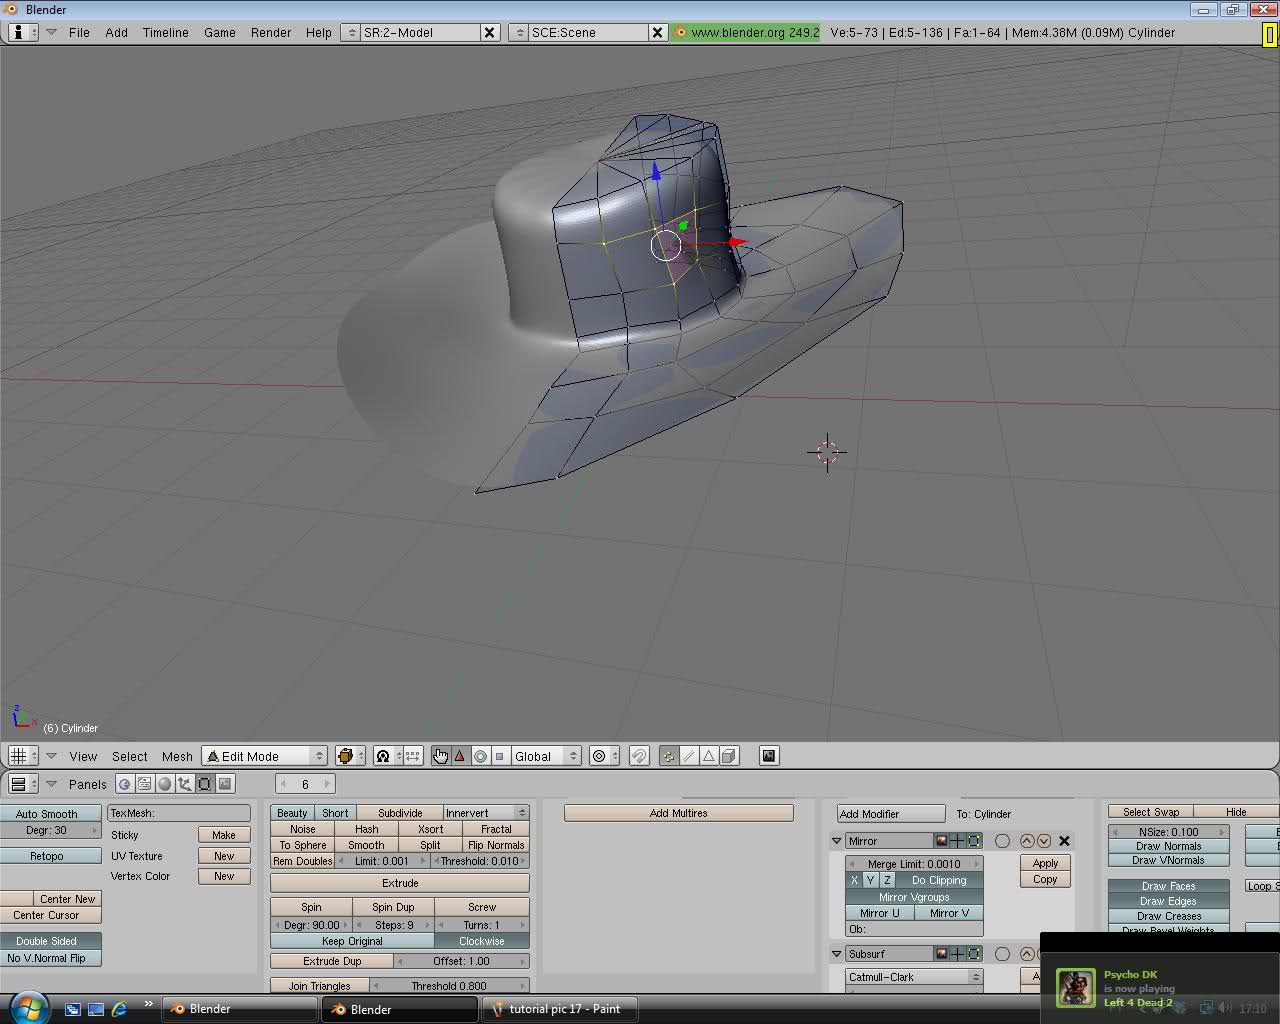
Now we need to create.. real hop ( or whatever you call it) little down.. to do this cut.. and put it a little down.. not much... and voila..now you have a hat hop

Now on this part you can the same thing like you did before but now by pressing B
trying to get 3 or 4 vertices.. and them make them put in to the left and put a bit down and you have your the front part conclued.. still there will be manny things that you can detail
Do the same thing backwards.. and.. make the style you want

And.. do the same thing upon the cylinder.. front middle and back
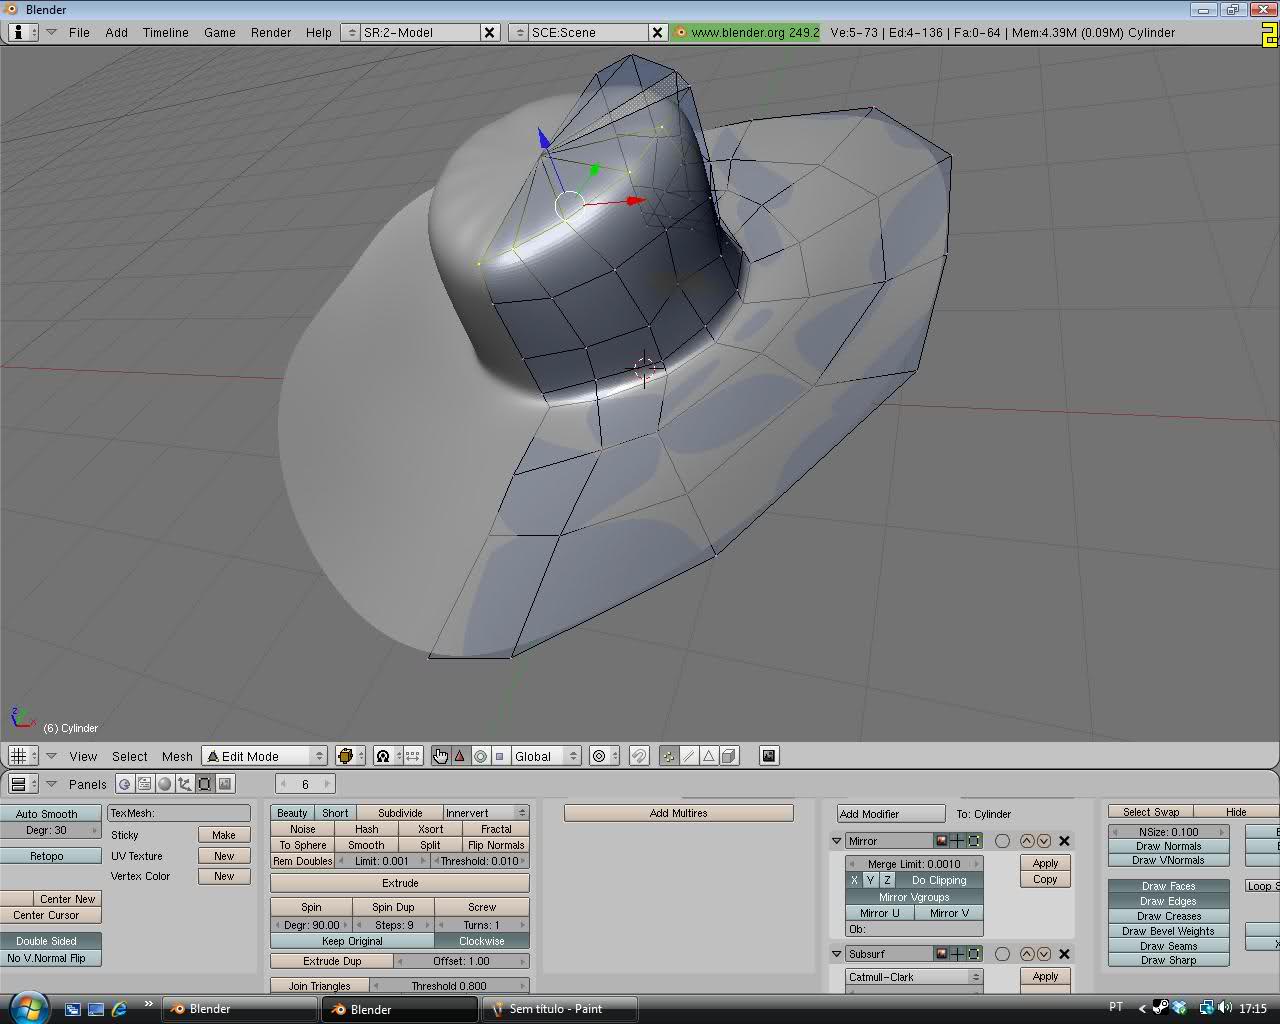
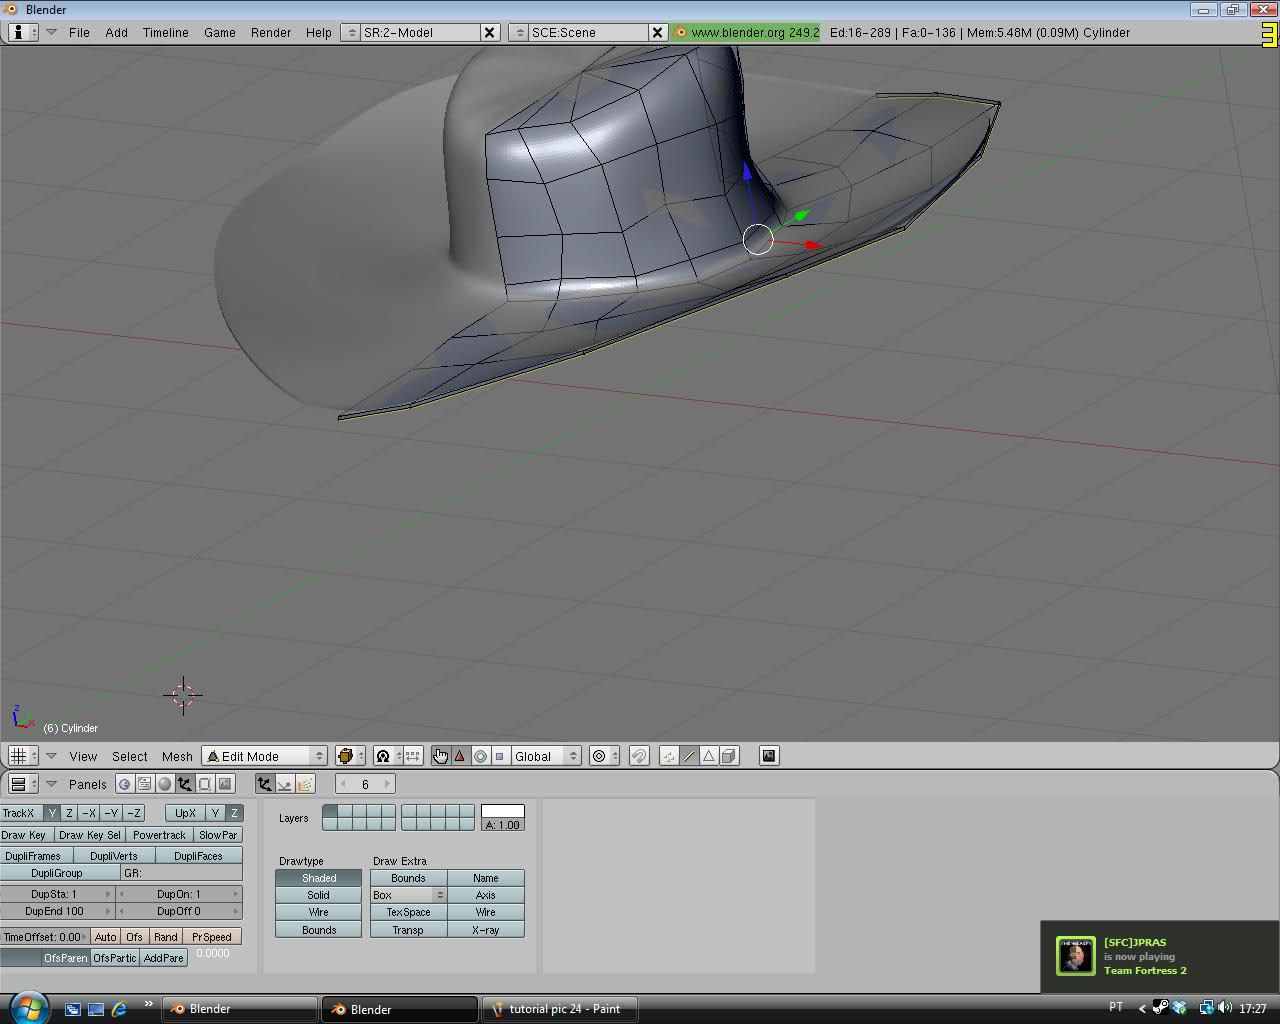
Now you can also edit some parts of the hat for more ideas... btw.. like this picture..
Now we need to make a hop for this part so you need the select the sides and extrude.. and press Z.. and make down.. not much and not little.. like i have in this picture.. Also i don't know why it apear a black thing around it.. i have no clue why that apeared
And there you have your hat and very good job.. to reading until here and your hat is done but still theres more.. you need the .TGA and exporting models.. you need to work.. More
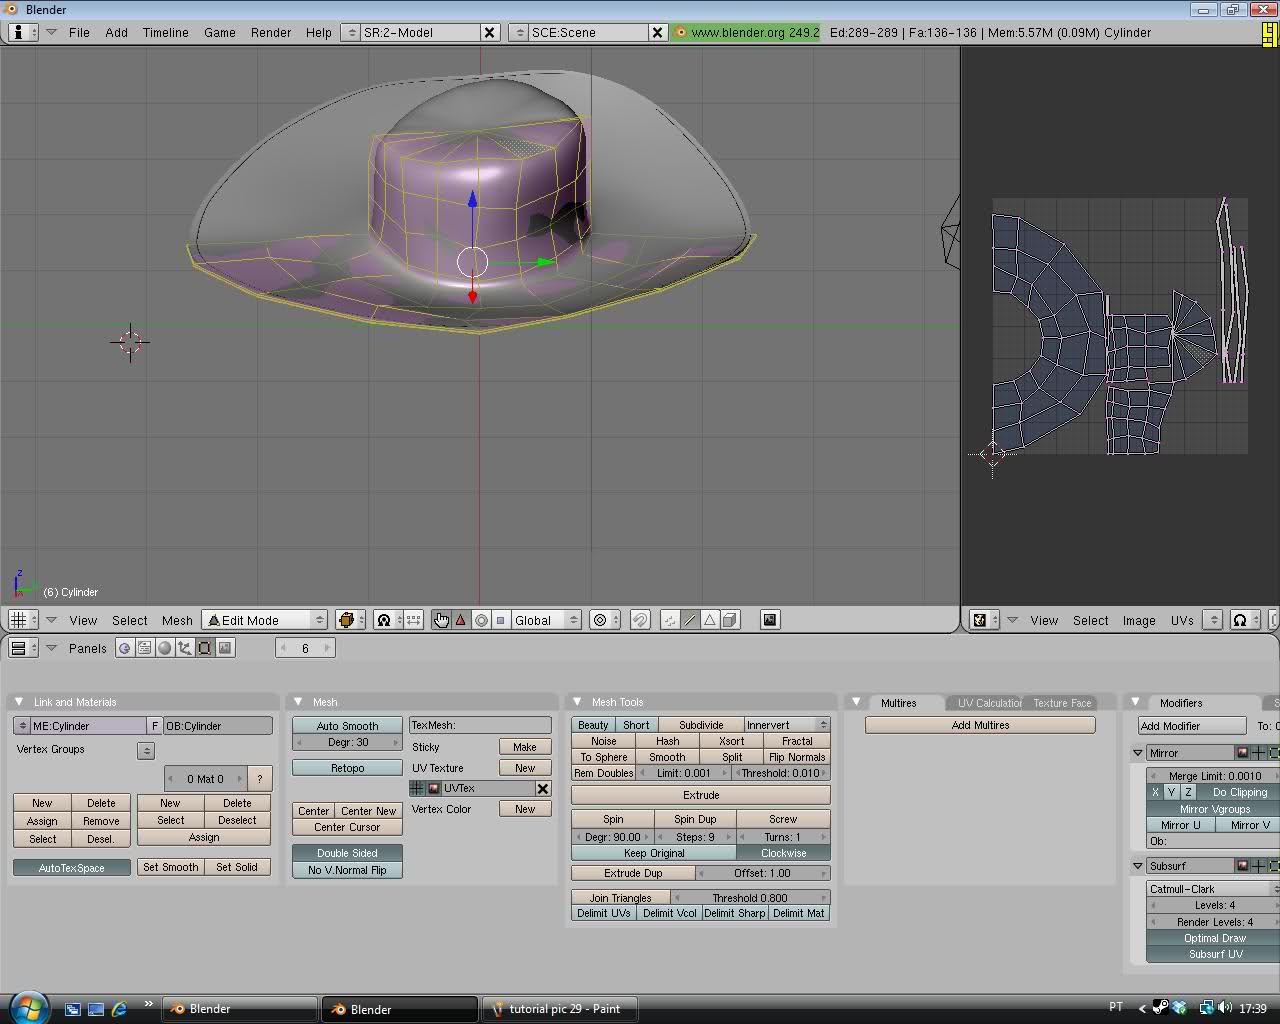
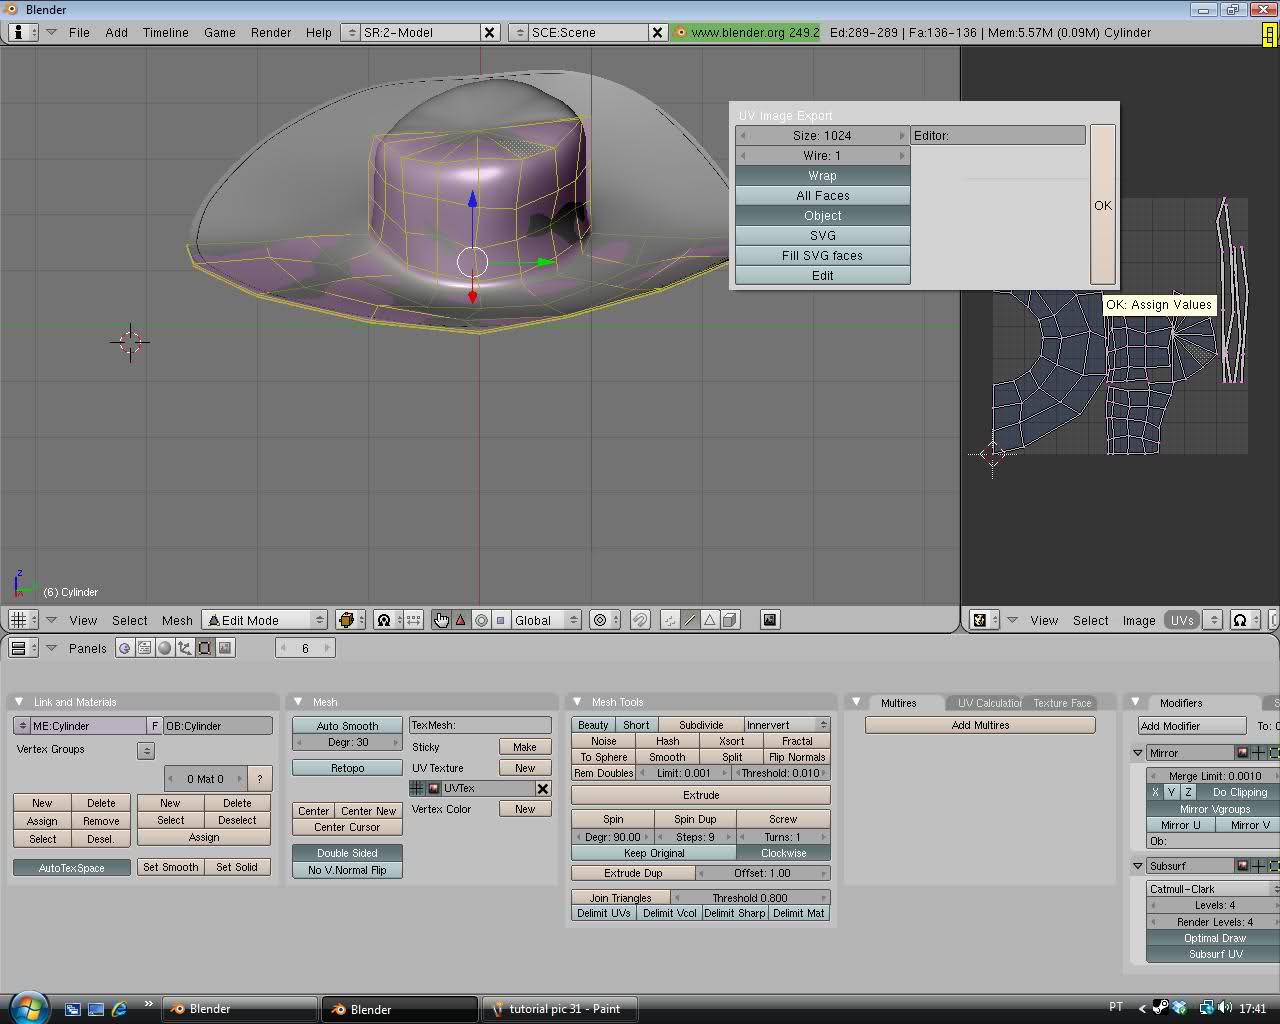
Now we gona select all the faces by pressing Tab again and press Ctrl+N and press U and click "Unwrap (smart projections)" click ok and lets divide the header and buttons panel by clicking on half of the 2 and split the screen up.. and press buttons panel and click UV image/editor and there you have your image .TGA
Now save the file by going UV's go to script and click the first option
Now you need to let go the files that i have and press ok to save in one folder you have your files saved:
Now we Smooth our Hat by going to object tool and Set Smooth.. 3 times it should be ok.. now we need to apply our model in the modifiers "mirror" and "subsurf" first.. apply mirror then apply subsurf.. and there you go.. Your model is fully done.. Now you need to export your model as .SMD or .OBJ, .QL or .MT.
First Part is done Guys.. i hope you liked the tutorial that i have made.. and sorry it had to be HUGE i will see if i have time to finish part 2.. So enjoy the model
Edit: don't put the subsurf to 4.. just put to 1 .. it will eat poly's very faster..
Here's the video, the all steps are here follow those steps same as this video in total gave 678 Polygons
[video]http://www.youtube.com/watch?v=Ab9SjLwzDSY[/video]
To create hats you need a cylinder.. about 16, 8, 24 vertices.. radius 1.00 depth 2.00 and Caps End. And there it is a perfect cylinder.
Now press Tab(edit mode) and press Ctrl+r to divide the cylinder in 3 parts.
this will result 3 divides.
Then press A to deselect all the faces and press B to activate line corridor( is what i call it) and drag it out of the cylinder to an half of it then press X to delete faces that you pressed also use the face tool to delete the bottom of the cylinder
Now turn the the cylinder around to have the other half of it... then.. scale it a little, not to much, and press Z scale it in Z direction(UP and Down) to have a small and tiny cylinder like this:
Now we need to mirror our cylinder .. to do that press tab again(to leave edit mode) and add modifier called "mirror" and press "do clipping".. ifyou have everything until now.. it means.. you are in the right way..
Now select the cylinder:
Go to the edge select by pressing Ctrl+Tab and select the all things around that its on the picture that i'm going to show you:
Now we need to extrude our hat.. Select E and press S next... to not exagerate the extrude just.. leave like i have on the pic:
On this part you need to read carefully.. and one mistake... and you need start all over again... so attention..
In this part while having the edge select.. press edges by clicking on the mouse and make them move away by cursor that is displayed, like i have in this picture:
Move some vertices by clicking in the vertice Select:
Now we need to cut the hat in 3 parts by pressin ctrl+R and do the same like in have in this picture:
Now on this part you can use Face,vertice,select to make your hat choice.. on this part i won't tell you nothing because this part is about your creativity on your hat by moving the cursor up down left right... all the ways.. in the mean time i will you the picture
Also you can use your creativity in the cylinder and top of it.. so you can think wut you really want:
Now while your finish the creativty on your hat.. we gona create another modifier and this time select "subsurf.. this will make the cylinder be more realistic.. and more cool.
this time try to put everything on subsurf to 4 and choose optimitical draw
see what it happens... YES it makes the 5\5 REALISTC HAT!!!
Now we have a realistc Hat But still more Job to do if you to put this hat into your TF2 so in the most of this passes you can detail your hat by your own.. so.. be clever now
Now we need to create.. real hop ( or whatever you call it) little down.. to do this cut.. and put it a little down.. not much... and voila..now you have a hat hop
Now on this part you can the same thing like you did before but now by pressing B
trying to get 3 or 4 vertices.. and them make them put in to the left and put a bit down and you have your the front part conclued.. still there will be manny things that you can detail
Do the same thing backwards.. and.. make the style you want
And.. do the same thing upon the cylinder.. front middle and back
Now you can also edit some parts of the hat for more ideas... btw.. like this picture..
Now we need to make a hop for this part so you need the select the sides and extrude.. and press Z.. and make down.. not much and not little.. like i have in this picture.. Also i don't know why it apear a black thing around it.. i have no clue why that apeared
And there you have your hat and very good job.. to reading until here and your hat is done but still theres more.. you need the .TGA and exporting models.. you need to work.. More
Now we gona select all the faces by pressing Tab again and press Ctrl+N and press U and click "Unwrap (smart projections)" click ok and lets divide the header and buttons panel by clicking on half of the 2 and split the screen up.. and press buttons panel and click UV image/editor and there you have your image .TGA
Now save the file by going UV's go to script and click the first option
Now you need to let go the files that i have and press ok to save in one folder you have your files saved:
Now we Smooth our Hat by going to object tool and Set Smooth.. 3 times it should be ok.. now we need to apply our model in the modifiers "mirror" and "subsurf" first.. apply mirror then apply subsurf.. and there you go.. Your model is fully done.. Now you need to export your model as .SMD or .OBJ, .QL or .MT.
First Part is done Guys.. i hope you liked the tutorial that i have made.. and sorry it had to be HUGE i will see if i have time to finish part 2.. So enjoy
the modelEdit: don't put the subsurf to 4.. just put to 1 .. it will eat poly's very faster..
Here's the video, the all steps are here follow those steps same as this video in total gave 678 Polygons
[video]http://www.youtube.com/watch?v=Ab9SjLwzDSY[/video]
Last edited: