- Feb 14, 2008
- 1,051
- 932
Introduction
People make angled roofs in all kinds of weird ways, and recently the number of, what I'd call “wrong” roofs has fluctuated greatly. Do not fret however, I'm here to tell you the “right” way, which is also the way Valve does them. There are some variants on this, and I've seen some where only the overhang is a func_detail, not the roof, but that's neither here nor there - I prefer this method. Ready? Let's go!
Building the base
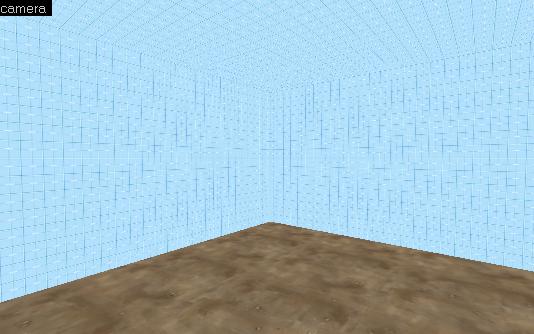
First, let's start with a cube in which to build our building.
Note: I build everything in nodraw, and then texture per-face (for most world brushes), this makes texturing in the latter stages of development easier. I also use 16 as my preferred width for walls.
Next, build a hollow set of walls.

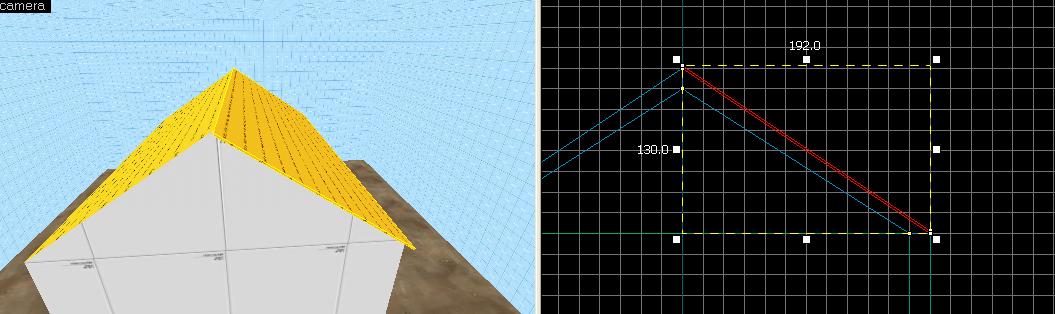
Then, create a triangle on either end of the brush (generally, the pair of shortest walls), this will define the basic shape of your roof. Make sure the triangle is not too high, otherwise the roof will have an unnaturally high gradient.
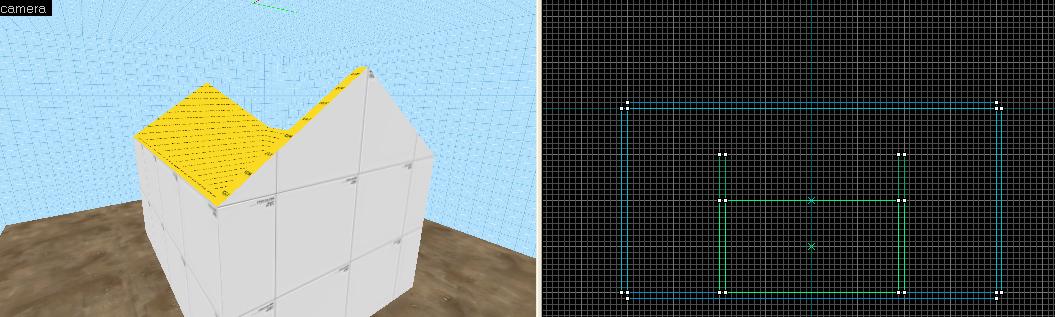
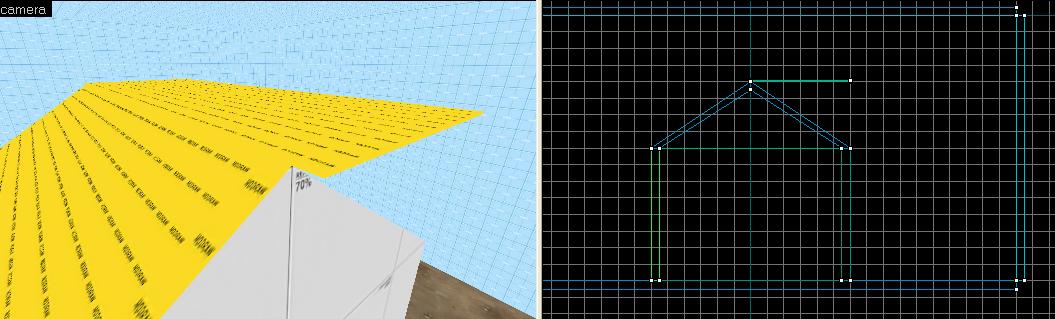
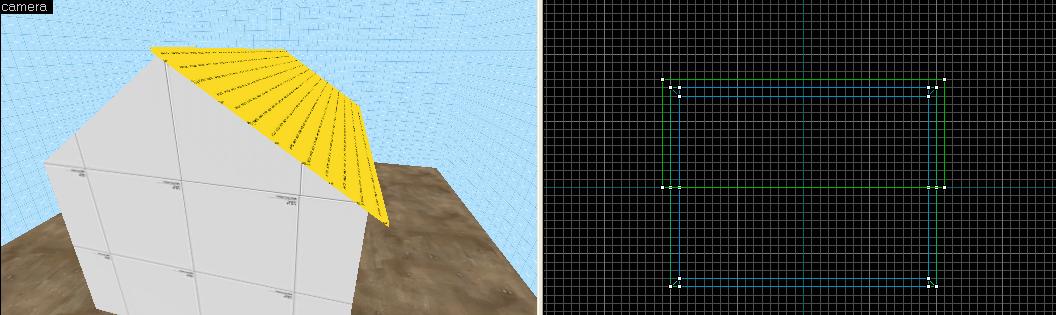
Create a brush for each side of the triangle, using vertex editing, that extends from the peak of the triangle to the wall, with the bottom face matching that of the wall, and the top face vertically downwards from the peak. This is better explained by an image.
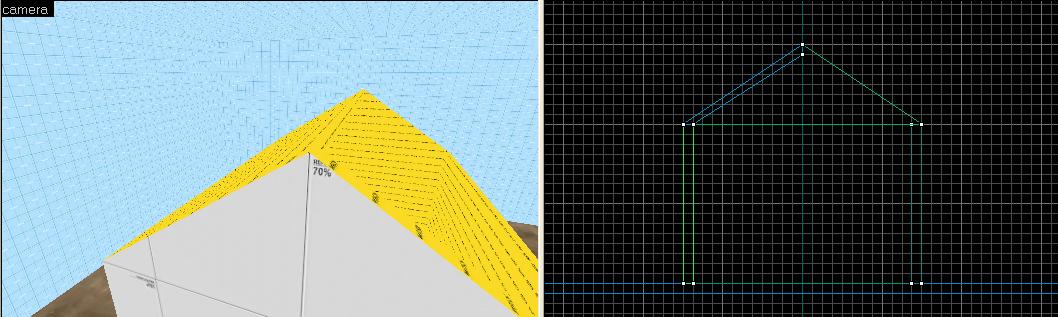
Copy and flip over the brush as below, and you have the basic structure for your roof – you do not need to texture this, as it will be hidden by the actual roof. Note that these are all the world brushes used – the rest is func_detail.
Note: I based my technique on Badwater. It does not, in any meaningful way, make a difference (it hasn't for me), if you leave the angled bits as world brushes (excluding the func_detail added in the following steps of the tutorial). Dustbowl, for example, func_details the brushes. My method is especially good for buildings with interiors, as you can not only give the roof a different texture to the ceiling, but also not have strange ceiling brushes - problems which I both ran into before. If you are worried about vis, you can simply place a flat brush inside the very top of the walls, and func_detail the triangles (you do not need the angled brushes because it is not seen from inside, I still do it like that out of habit though).
Building the roof
Next, we start to build the roof, create a brush whose width is the same as one half of the roof, and whose height overhangs by 16 units either way – make this brush 2 units thick, and put it on top of the peak as thus (and before we forgot, press ctrl+t with the brush selected to make it a func_detail).
Vertex edit the ends of this brush so it is in-line with the angled brush below it, keeping the end edges vertical.
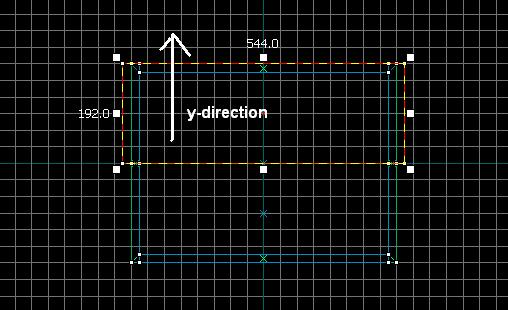
Now here's the clever bit, look at your roof in the top view and determine which direction its gradient is in. In my case, it's in the y direction (vertical), but in your it could be in the x direction (horizontal).
Then press ctrl+m with your roof selected, click the scale radio button and type in the following based on which direction your roof is in.
x-direction
Y: 0
X: 2
Z: 2
y-direction
Y: 2
X: 0
Z: 2
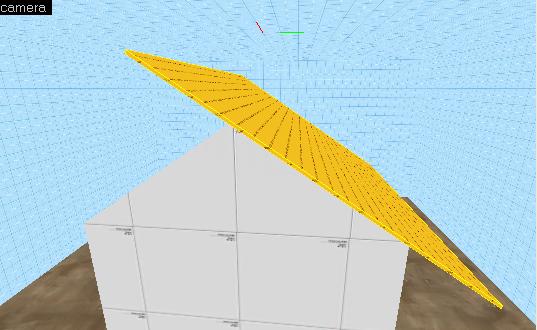
Then press OK and you should have something that looks like this:
Move the left hand side of the brush, so it's aligned with the peak of the triangle. Then, on the other side of the brush, clip off the brush 16 units outwards from the wall, so it overhangs, leaving you with something like this.
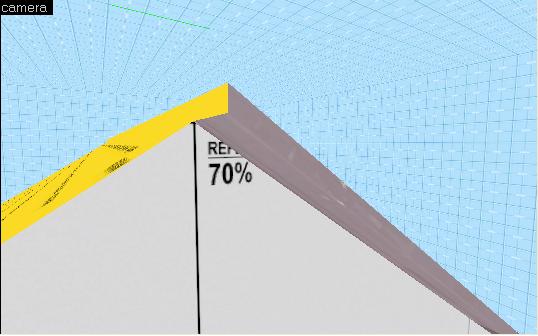
To make things a little easier for ourselves, we're going to texture this little bit now. Apply a texture of your choice to the top face (I used metal/wall011g here), and make sure the “grain” of the texure is in-line with your roof's gradient.
Now, with the top face selected, hold down alt and right-click on every other face on the brush, excluding the one at the peak, this will align every texture in the direction of the roof. You'll get something like this.
Note: some people (including the affable Dario Casali) like to use ibeams on the side of their roofs. I however, do not, I think that doing it “Sawmill-style” looks a lot better, but that's down to personal preference.
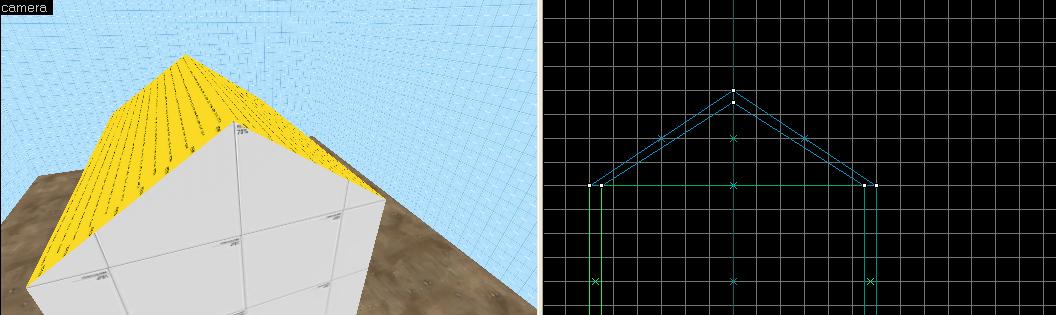
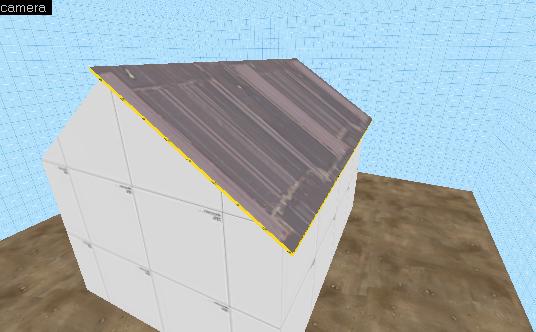
Clone and flip the the roof to the other side, and you have an essentially complete (though undetailed) roof.
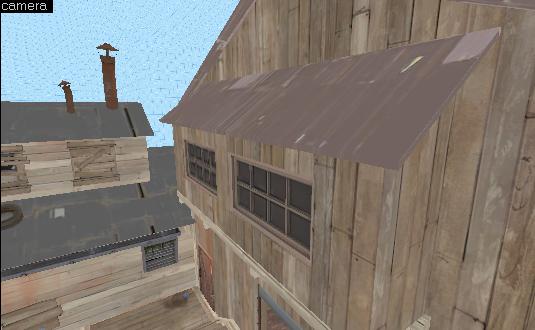
The previous step can be skipped if you're making roofs like the one below.
Concluding remarks
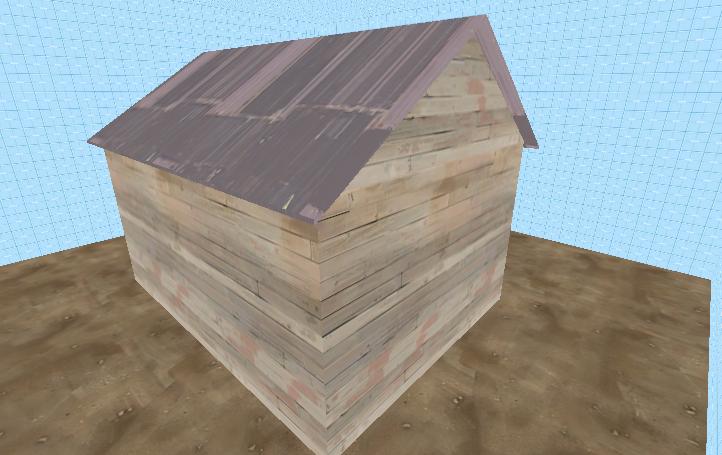
Thanks for reading, and may your roofs be good ever-after.
The VMF of this map can be downloaded here: http://dl.getdropbox.com/u/1085379/rooftutorial.vmf
This is intended to refine or initiate your technique in this realm, if you already have a method that looks good and works, I'm not saying yours is wrong
People make angled roofs in all kinds of weird ways, and recently the number of, what I'd call “wrong” roofs has fluctuated greatly. Do not fret however, I'm here to tell you the “right” way, which is also the way Valve does them. There are some variants on this, and I've seen some where only the overhang is a func_detail, not the roof, but that's neither here nor there - I prefer this method. Ready? Let's go!
Building the base
First, let's start with a cube in which to build our building.
Note: I build everything in nodraw, and then texture per-face (for most world brushes), this makes texturing in the latter stages of development easier. I also use 16 as my preferred width for walls.
Next, build a hollow set of walls.
Then, create a triangle on either end of the brush (generally, the pair of shortest walls), this will define the basic shape of your roof. Make sure the triangle is not too high, otherwise the roof will have an unnaturally high gradient.
Create a brush for each side of the triangle, using vertex editing, that extends from the peak of the triangle to the wall, with the bottom face matching that of the wall, and the top face vertically downwards from the peak. This is better explained by an image.
Copy and flip over the brush as below, and you have the basic structure for your roof – you do not need to texture this, as it will be hidden by the actual roof. Note that these are all the world brushes used – the rest is func_detail.
Note: I based my technique on Badwater. It does not, in any meaningful way, make a difference (it hasn't for me), if you leave the angled bits as world brushes (excluding the func_detail added in the following steps of the tutorial). Dustbowl, for example, func_details the brushes. My method is especially good for buildings with interiors, as you can not only give the roof a different texture to the ceiling, but also not have strange ceiling brushes - problems which I both ran into before. If you are worried about vis, you can simply place a flat brush inside the very top of the walls, and func_detail the triangles (you do not need the angled brushes because it is not seen from inside, I still do it like that out of habit though).
Building the roof
Next, we start to build the roof, create a brush whose width is the same as one half of the roof, and whose height overhangs by 16 units either way – make this brush 2 units thick, and put it on top of the peak as thus (and before we forgot, press ctrl+t with the brush selected to make it a func_detail).
Vertex edit the ends of this brush so it is in-line with the angled brush below it, keeping the end edges vertical.
Now here's the clever bit, look at your roof in the top view and determine which direction its gradient is in. In my case, it's in the y direction (vertical), but in your it could be in the x direction (horizontal).
Then press ctrl+m with your roof selected, click the scale radio button and type in the following based on which direction your roof is in.
x-direction
Y: 0
X: 2
Z: 2
y-direction
Y: 2
X: 0
Z: 2
Then press OK and you should have something that looks like this:
Move the left hand side of the brush, so it's aligned with the peak of the triangle. Then, on the other side of the brush, clip off the brush 16 units outwards from the wall, so it overhangs, leaving you with something like this.
To make things a little easier for ourselves, we're going to texture this little bit now. Apply a texture of your choice to the top face (I used metal/wall011g here), and make sure the “grain” of the texure is in-line with your roof's gradient.
Now, with the top face selected, hold down alt and right-click on every other face on the brush, excluding the one at the peak, this will align every texture in the direction of the roof. You'll get something like this.
Note: some people (including the affable Dario Casali) like to use ibeams on the side of their roofs. I however, do not, I think that doing it “Sawmill-style” looks a lot better, but that's down to personal preference.
Clone and flip the the roof to the other side, and you have an essentially complete (though undetailed) roof.
The previous step can be skipped if you're making roofs like the one below.
Concluding remarks
Thanks for reading, and may your roofs be good ever-after.
The VMF of this map can be downloaded here: http://dl.getdropbox.com/u/1085379/rooftutorial.vmf
This is intended to refine or initiate your technique in this realm, if you already have a method that looks good and works, I'm not saying yours is wrong


