- Jan 4, 2008
- 593
- 88
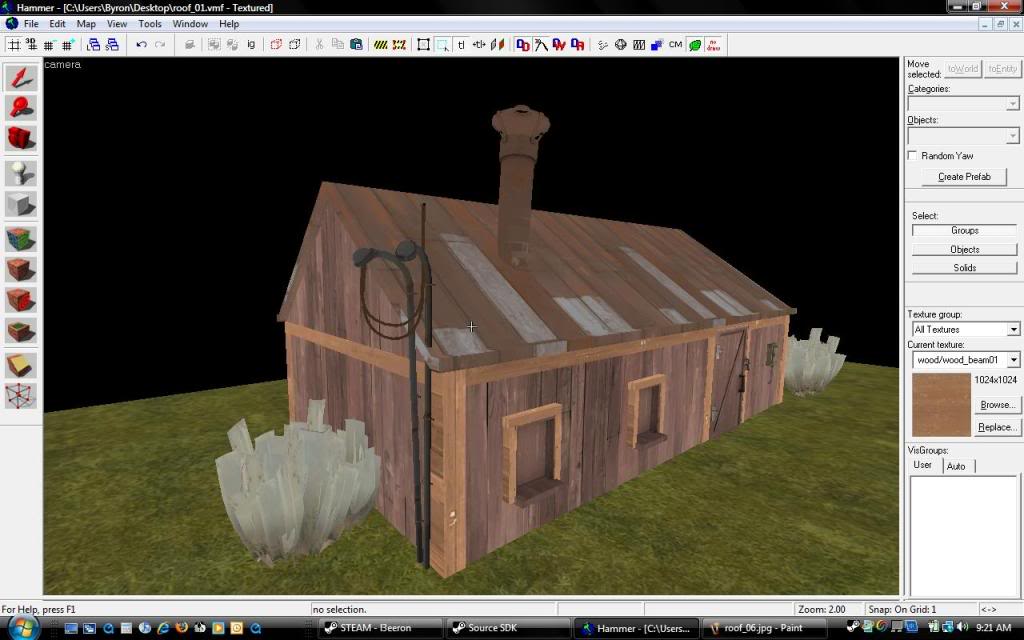
Well, someone was asking, and this is simple enough that I can do. I've been wanting to pitch in, so here it is, a good beginner's tut.
This tutorial assumes you have basic knowledge of Hammer. You need to know what the different tools are called and how they work. This will touch on brush creation and how to manipulate them using the clipping and vertex tools, while keeping things neat and "on grid".
This is in response to the thread here:
http://forums.tf2maps.net/showthread.php?t=4366
Keep in mind, there are any ways of doing this, this is just one way. I like this way because it keeps all the brushes touching (not overlapping) or skewed at some weird angle.
OK, lets get started.
Open your map or start a new one. Set your grid size to 8 (use the "[]" keys to increase/decrease grid size) In the top 2D view create a brush the size that your building will be. Texture it with your choice of texture. I made this one
576x320x256 and textured with wood/wood_wall002
Next, clip the brush in half in either the side or front 2D view to make two 576x320x128 brushes.
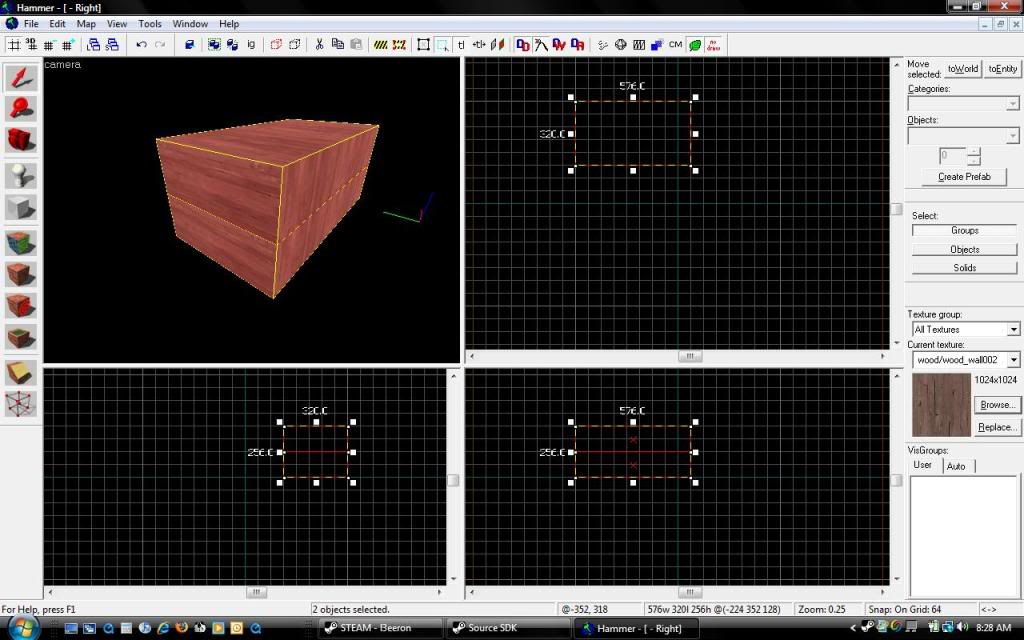
Now to make the actual roof brushes.
- Select the top brush and clip, using side or front 2D view, an 8 unit piece to be textured with your roof texture, I used metal/wall028.
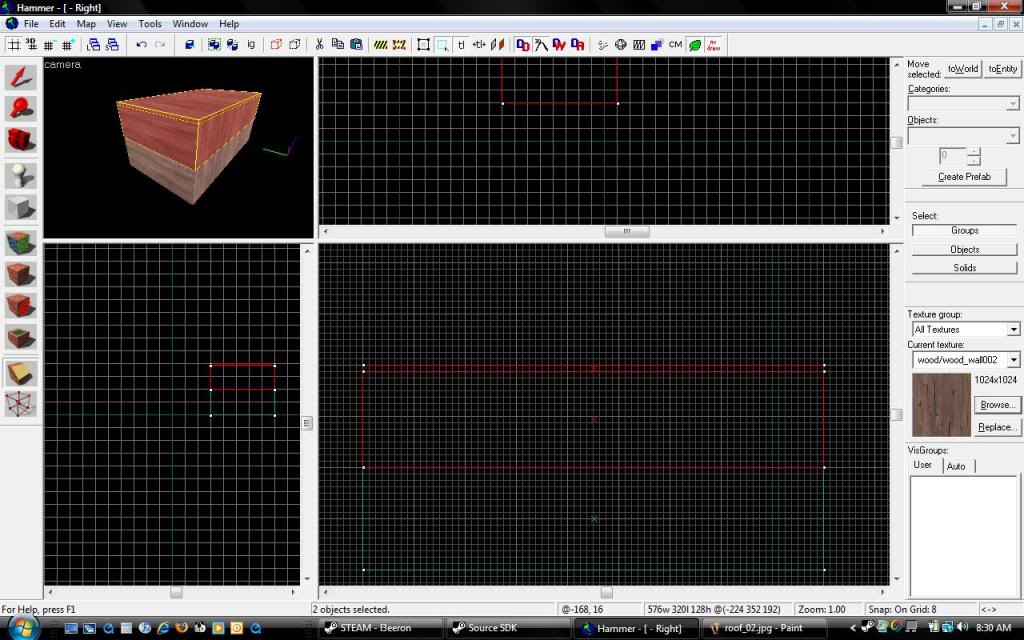
This next part is important, as it will keep your geometry sound and sealed.
- Expand the 8 unit roof brush out past the edges of the rest of the building (this will later create the eves) making the eves to fit your size and intended detail work later on. In this example, I only went 8 units past, the building is pretty small.
- Select the both top brushes and clip them in half using the top 2D view length-wise. Also, clip the roof edges exactly where the over hang meets the wall. Look at the 3D view in the next image:
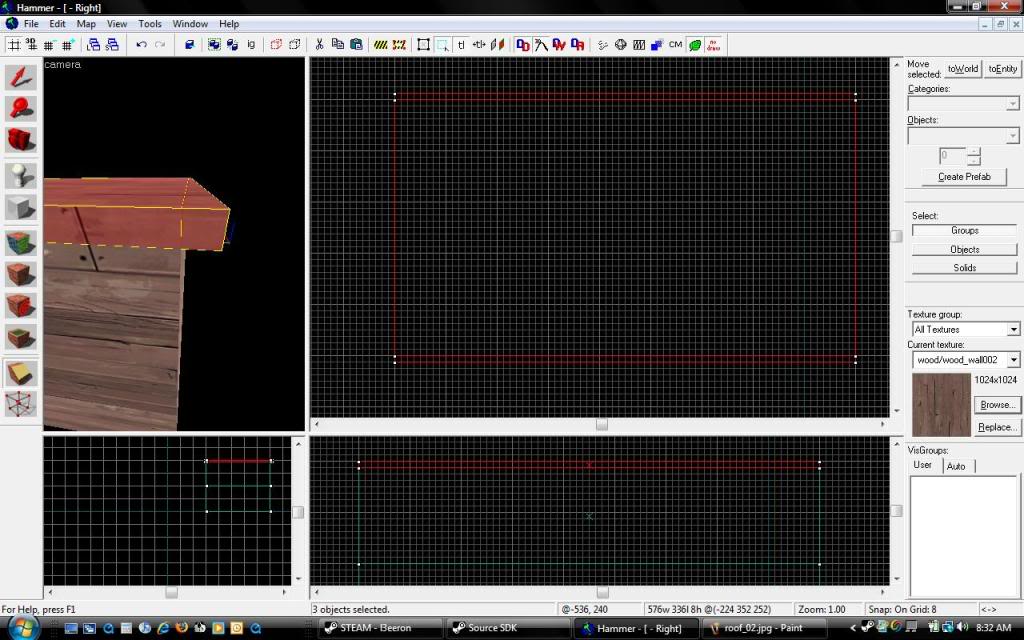
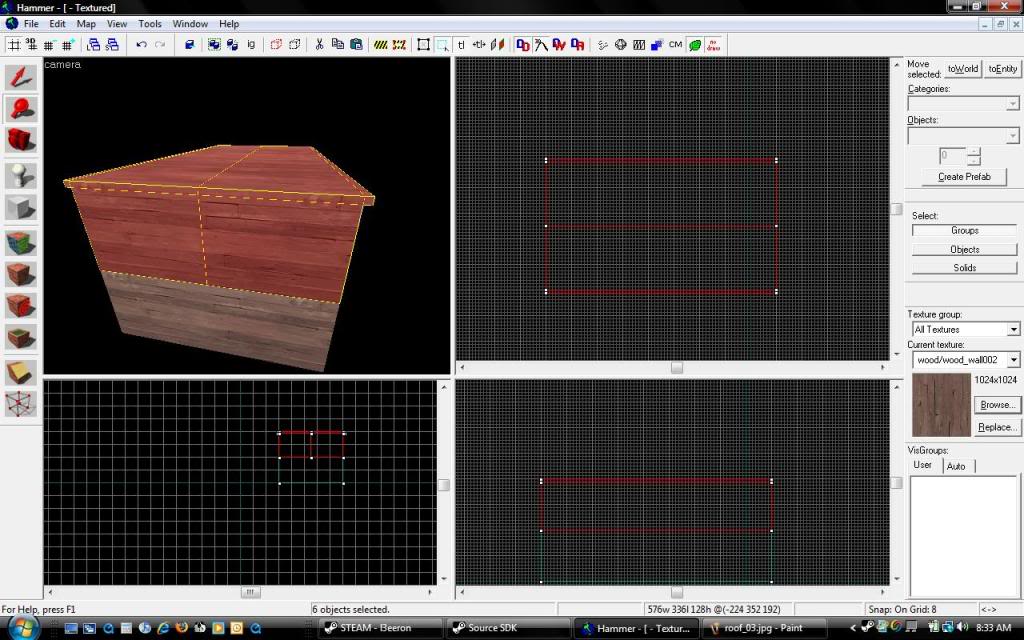
- Now while all the top brushes are selected, including all the roof brushes and over hang pieces, click the vertex tool. While in vertex mode select one side of the roof and it's overhang like seen in the following image:
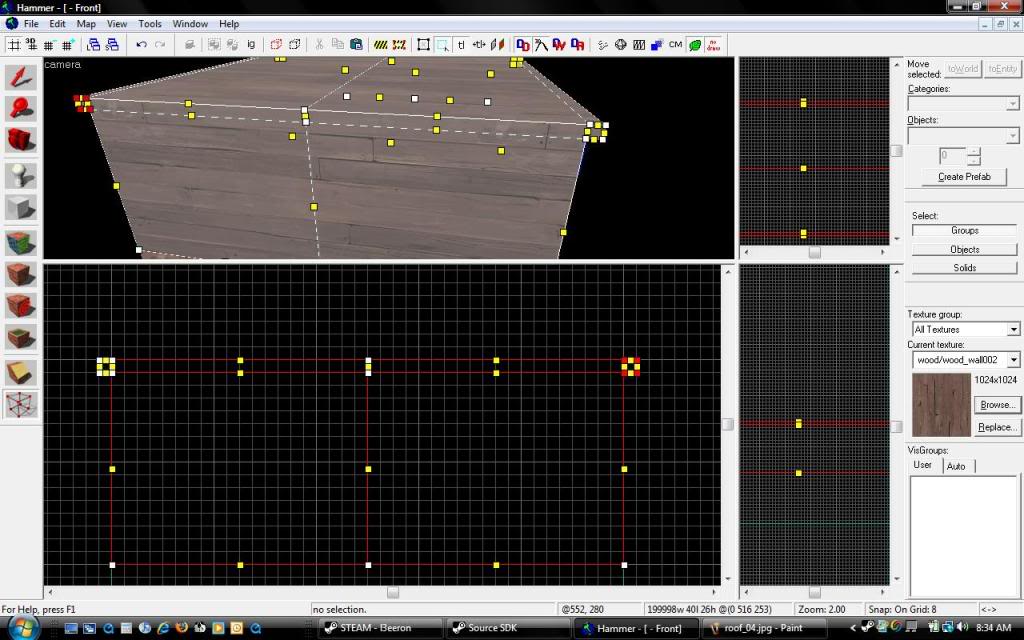
With the overhang, and edge of roof vertices selected, using the DOWN arrow key to angle the roof all the way until the vertices are merged. Repeat for the opposite side.
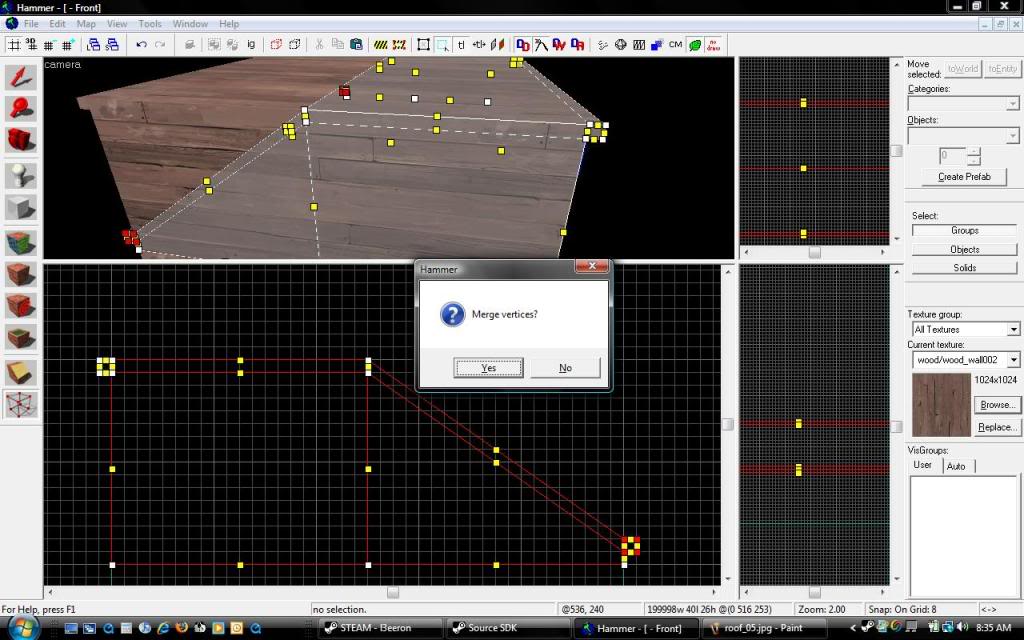
If the angle is too steep, grab the apex of the roof and bring it down until you get the right look.
Add details brushes and props

This tutorial assumes you have basic knowledge of Hammer. You need to know what the different tools are called and how they work. This will touch on brush creation and how to manipulate them using the clipping and vertex tools, while keeping things neat and "on grid".
This is in response to the thread here:
http://forums.tf2maps.net/showthread.php?t=4366
Keep in mind, there are any ways of doing this, this is just one way. I like this way because it keeps all the brushes touching (not overlapping) or skewed at some weird angle.
OK, lets get started.
Open your map or start a new one. Set your grid size to 8 (use the "[]" keys to increase/decrease grid size) In the top 2D view create a brush the size that your building will be. Texture it with your choice of texture. I made this one
576x320x256 and textured with wood/wood_wall002
Next, clip the brush in half in either the side or front 2D view to make two 576x320x128 brushes.

Now to make the actual roof brushes.
- Select the top brush and clip, using side or front 2D view, an 8 unit piece to be textured with your roof texture, I used metal/wall028.

This next part is important, as it will keep your geometry sound and sealed.
- Expand the 8 unit roof brush out past the edges of the rest of the building (this will later create the eves) making the eves to fit your size and intended detail work later on. In this example, I only went 8 units past, the building is pretty small.
- Select the both top brushes and clip them in half using the top 2D view length-wise. Also, clip the roof edges exactly where the over hang meets the wall. Look at the 3D view in the next image:


- Now while all the top brushes are selected, including all the roof brushes and over hang pieces, click the vertex tool. While in vertex mode select one side of the roof and it's overhang like seen in the following image:

With the overhang, and edge of roof vertices selected, using the DOWN arrow key to angle the roof all the way until the vertices are merged. Repeat for the opposite side.

If the angle is too steep, grab the apex of the roof and bring it down until you get the right look.
Add details brushes and props
