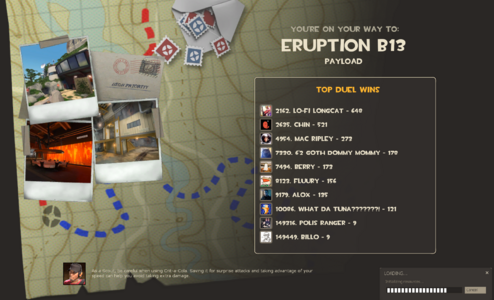
Hi, I am the creator of Eruption and some of you asked me how I implemented the loading screen photos of the map. Instead of explaining that to everyone one by one I thought I could make a small tutorial on how you can make that.
------How to do it-------
1) Go to Team Fortress 2, take the screenshots you like.
2) Go to this link: https://tf2maps.net/threads/every-menu-photo.44873/ And download the package. Pick one menu photo you like.
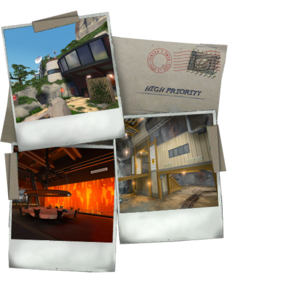
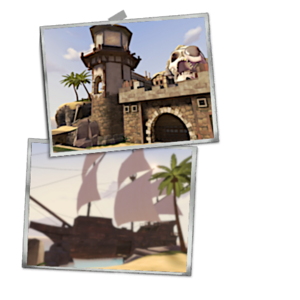
3) Using a picture editing software (Photoshop,Gimp etc) Scale your pictures in order to fit the borders like this:
4) When you're happy with the result download VTFEdit: https://developer.valvesoftware.com/wiki/VTFEdit
Download Link : https://github.com/NeilJed/VTFLib
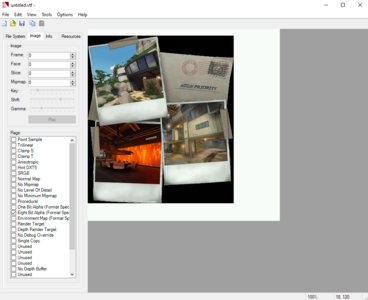
5)Open VTFEdit, Import the image you want, press OK. It shoud look like this now:
6) File --> Save as ---> "menu_photos_[map_name]". Mine is called for instance "menu_photos_pl_eruption_b13"
7) Create a notepad file and name it: "menu_photos_[map_name]" . Mine is called "menu_photos_pl_eruption_b13"
8) Open it up and copy paste this:
"UnlitGeneric"
{
"$basetexture" "vgui\maps\menu_photos_mapname"
"$translucent" 1
"$ignorez" 1
"$vertexcolor" 1
}
Modify it in order to write your map name. Mine reads:
"UnlitGeneric"
{
"$basetexture" "vgui/maps/menu_photos_pl_eruption_b13"
"$translucent" 1
"$ignorez" 1
"$vertexcolor" 1
}
9) Place them here: " \tf\materials\vgui\maps " like this:
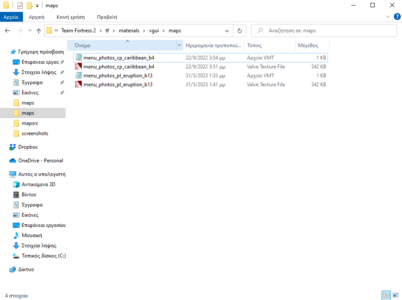
10) That's it! Boot up the game and you should see menu cards when loading your map!
Note:
In order for them to work with other players you need to pack your map as well!
CompilePal can help you do that.
Useful link:
 developer.valvesoftware.com

------How to do it-------
1) Go to Team Fortress 2, take the screenshots you like.
2) Go to this link: https://tf2maps.net/threads/every-menu-photo.44873/ And download the package. Pick one menu photo you like.
3) Using a picture editing software (Photoshop,Gimp etc) Scale your pictures in order to fit the borders like this:


4) When you're happy with the result download VTFEdit: https://developer.valvesoftware.com/wiki/VTFEdit
Download Link : https://github.com/NeilJed/VTFLib
5)Open VTFEdit, Import the image you want, press OK. It shoud look like this now:

6) File --> Save as ---> "menu_photos_[map_name]". Mine is called for instance "menu_photos_pl_eruption_b13"
7) Create a notepad file and name it: "menu_photos_[map_name]" . Mine is called "menu_photos_pl_eruption_b13"
8) Open it up and copy paste this:
"UnlitGeneric"
{
"$basetexture" "vgui\maps\menu_photos_mapname"
"$translucent" 1
"$ignorez" 1
"$vertexcolor" 1
}
Modify it in order to write your map name. Mine reads:
"UnlitGeneric"
{
"$basetexture" "vgui/maps/menu_photos_pl_eruption_b13"
"$translucent" 1
"$ignorez" 1
"$vertexcolor" 1
}
9) Place them here: " \tf\materials\vgui\maps " like this:

10) That's it! Boot up the game and you should see menu cards when loading your map!
Note:
In order for them to work with other players you need to pack your map as well!
CompilePal can help you do that.
Useful link:


