Holy Cliffs

citoria

L1: Registered
Mar 6, 2008
14
0
So I read the cliff tutorial, and some stuff by steam wiki, and I though I had it down. I made 2 intersecting walls, carved a tunnel, game them walls with no draw texture on the back and then selectem them all for displacement and everything was going fine. But then I noticed the nodraw backing was gone, and I get this happening on my cliffs.

Now when I was using the paint geometry all the walls were selected to I thought it would connect them all, but I guess not. Any idea what I am doing wrong?
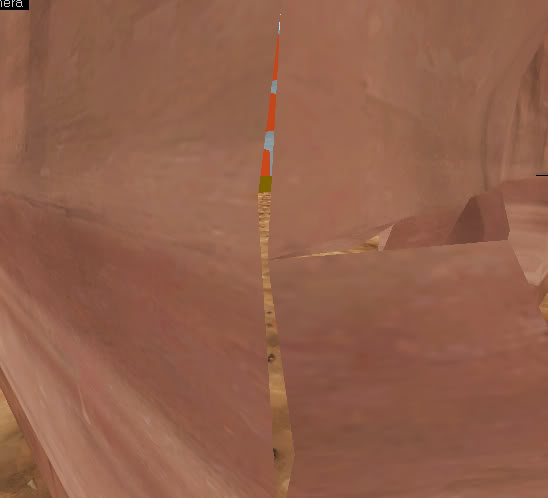
cliff.jpg
 

poopster101

L4: Comfortable Member
Jan 28, 2008
155
5
you gotta select each displacement using the texture selecting tool (shift+A) and then go to the displacement tab and hit "sew" that will bring all your displacement neatly together at the edges

and the nodraw thing is supposed to happen btw
 

poopster101

L4: Comfortable Member
Jan 28, 2008
155
5
you can do it after you do your displacement painting
 

l3eeron

L8: Fancy Shmancy Member
Jan 4, 2008
593
88
As long as each side of the displacements match in size and have touching edges (or half sizes) they will sew. Bring up the face-edit window, select the select option, select the displacements you want to sew (I use the 3d view, hold down the control key to select multiple displacements), then hit the sew button. If they don't sew, the edges don't match . Zoom in on grid 1 and check to make sure your edges match up perfectly in the 2d view (as it shows the origin faces). If you have transformed the dissplacement (stretch/skew/rotate) chances are it didnt land on an even grid and it may need to be resized to snap into a grid. That way, the displacement you are trying to sew to it will now match on grid.
 
Last edited:

Koei

L4: Comfortable Member
Feb 23, 2008
186
4
Tip: if you made a nice displacement already and you know the edges can be sew if they would just connect. Set your painter to Raise to XXX amount and the size of brush to 1. Then paint X, Y and Z along the edges of the 2 displacements. You will ruin some of your work, but they will align.
 

phatal

L6: Sharp Member
Jan 8, 2008
259
21
As long as each side of the displacements match in size and have touching edges (or half sizes) they will sew. Bring up the face-edit window, select the select option, select the displacements you want to sew (I use the 3d view, hold down the control key to select multiple displacements), then hit the sew button. If they don't sew, the edges don't match . Zoom in on grid 1 and check to make sure your edges match up perfectly in the 2d view (as it shows the origin faces). If you have transformed the dissplacement (stretch/skew/rotate) chances are it didnt land on an even grid and it may need to be resized to snap into a grid. That way, the displacement you are trying to sew to it will now match on grid.

You're saying that displacements have to have the same height and width on the edge that touches or they will not sew? I have steered clear of diplacements for this reason. I have been unable to sew any displacements I have created therefore I try to stay away from them. :(
 

Scotland Tom

L6: Sharp Member
Jan 19, 2008
332
64
That's correct, you've got to have your displacement edges match in size. If the edge of one is 1024 units high, the one next to it has to be 1024 (or half of that, or 1/4) in order to sew properly. The verticies on one edge need to match the other, or it won't work.
 

phatal

L6: Sharp Member
Jan 8, 2008
259
21
mine has that in.....

Not to knock your wonderful guide but...

Now I crunch the front displacement into where the tunnel ends and I crunch the second set of points in the tunnel forwards. Once they are close to each other I select the whole lot and hit that handy 'sew' button
 
Last edited by a moderator:

YM

LVL100 YM
aa
Dec 5, 2007
7,158
6,079
You're miss reading it in context ;)

by that point I'd already mentioned about all the displacements having shared edges, what you highlighted is saying is that I don't worry about keeping them aligned whilst working on them because I can hit sew afterwards (because they already line up) and it smooths it out.