- Jul 5, 2009
- 249
- 28
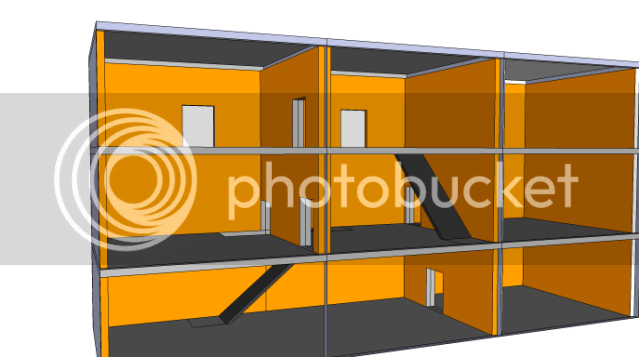
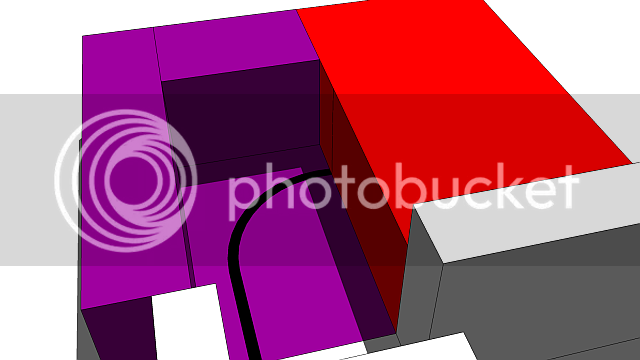
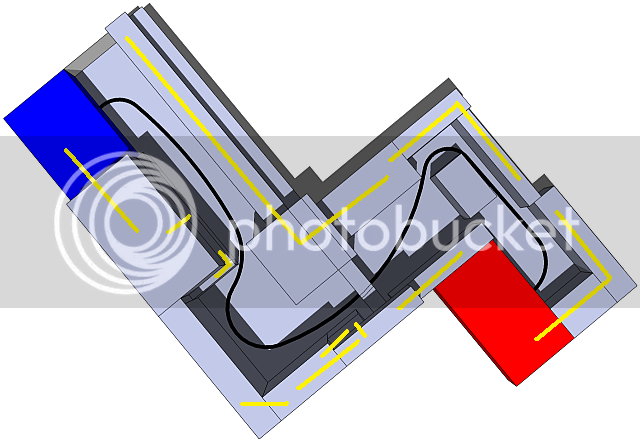
Hey kids, guess what time it is? That's right, Uncle Stormy's got another harebrained idea to make a map. This time he's working on a payload map with the cart path based on part of his daily drive home.

The map's largely divided into five boxes, which I could probably translate into five points without too much hassle.
Box 1
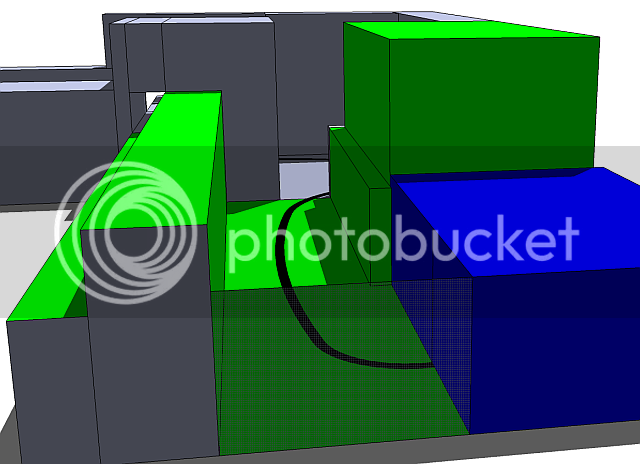 This is designed as a long fairly open area with the cart path being more or less straight for the duration once it's out the door. On one side you have a collection of buildings that separate the open area from train tracks. These tracks offer a very fast way to move down the row of buildings, but it also has a risk: the train. These buildings are going to be heaven for a Sniper, Soldier or anyone else who's happiest standing on a balcony shooting people. For that reason I'm considering an array of trucks and other details in the yard to provide some cover; I'm also hoping to set it up so that a Pyro or Spy can slip across the narrow divide from BLU spawn and clean house as necessary. BLU has a larger building with a narrow walkway opposite, allowing return fire. Hopefully this balances out well. I could use ideas here for how to keep it balanced and interesting.
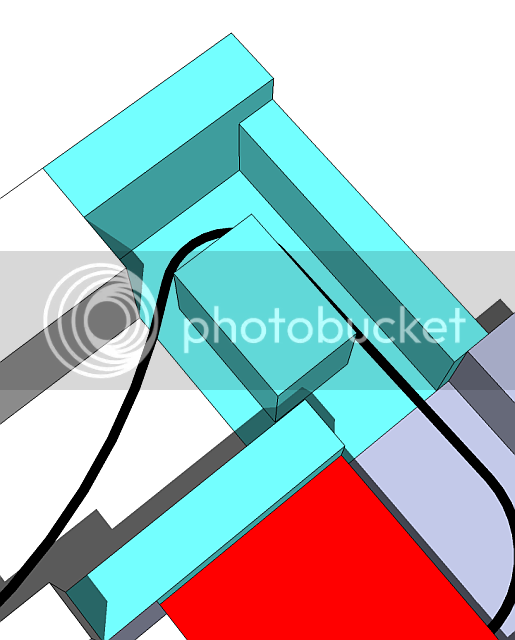
Box 2
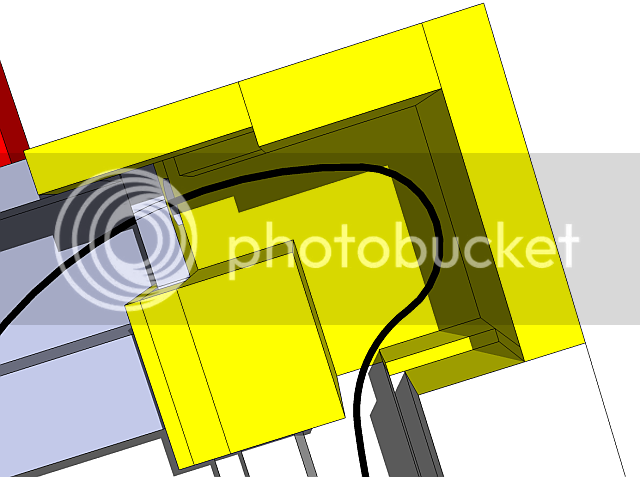 Here the path gets more curvy, as it loops around to prepare to cross under the train tracks. I'm considering some sort of explanation for why exactly it loops away and then back, but I don't have one just yet. Maybe a large rock. Large rocks are always fun.
In any case this is definitely an area where the shorter-range classes work well, and likely where I'd set up a secondary spawn point if I'd put one. RED has the large building enclosing the train tracks, but BLU has reached the point where they can use the buildings that hug the outside curve to get around it. A small area at ground level between the tracks and the buildings provides a decent Engie base area, which may remove the need for a secondary spawn point. I'm thinking this may also be a good area to add in some walkways above the cart path to help diversify the available areas to fight on.
Box 3
 This is where RED really has a good chance of putting pressure on BLU. The layout of the map means that Snipers can get a clear shot at anyone who comes under the elevated tracks, and they have to cross an open area while boxed in on all sides. BLU can access the buildings on two sides via areas under their control, meaning they can reduce their exposure, but that freestanding building is going to be a real headache.
I think this may be another area that's a real pain to try and balance, just because it's going to be difficult to give RED the chance to make a good stand, while at the same time keeping it from being the area where BLU always loses. It should be interesting, to be sure.
Box 4
 This is more of a headache area than any other, really. RED can defend it, but if BLU controls that building, they're going to have trouble. The only real options I can think of are to play around with that building's exits and entrances so that it's not really useful to BLU in terms of offense. That would allow RED to make use of the narrow path to get behind them, as well as use various means to take advantage of that narrow, open path the cart travels down. There's two points where Sentry Guns could cause trouble, but I have a feeling that RED would probably skip out on defending here and instead get ready for the final assault.
Box 5
 The area for the final assault, somewhere between Hoodoo's second stage and Badwater Basin's area, with RED again having access on three sides. BLU has the unenviable job of storming into the teeth of this, but this is the point where RED is supposed to be best able to defend, so that makes sense. BLU should be able to use that freestanding building as a forward base, meaning it shouldn't require a tremendous amount of running to get here, and at the same time if RED eliminates that it's going to push BLU on their back foot as they run and try to get set up again. If BLU can take the buildings farthest from RED spawn, they can probably push RED back into their own base, and thus get the cart moving quickly.
So, that's what I've got so far. I'm hoping for suggestions on how I could improve it, things I should take into consideration, and any other random ideas people have that might make it better.
The map's largely divided into five boxes, which I could probably translate into five points without too much hassle.
Box 1
Box 2
In any case this is definitely an area where the shorter-range classes work well, and likely where I'd set up a secondary spawn point if I'd put one. RED has the large building enclosing the train tracks, but BLU has reached the point where they can use the buildings that hug the outside curve to get around it. A small area at ground level between the tracks and the buildings provides a decent Engie base area, which may remove the need for a secondary spawn point. I'm thinking this may also be a good area to add in some walkways above the cart path to help diversify the available areas to fight on.
Box 3
I think this may be another area that's a real pain to try and balance, just because it's going to be difficult to give RED the chance to make a good stand, while at the same time keeping it from being the area where BLU always loses. It should be interesting, to be sure.
Box 4
Box 5
So, that's what I've got so far. I'm hoping for suggestions on how I could improve it, things I should take into consideration, and any other random ideas people have that might make it better.

")