- Mar 29, 2008
- 13
- 0
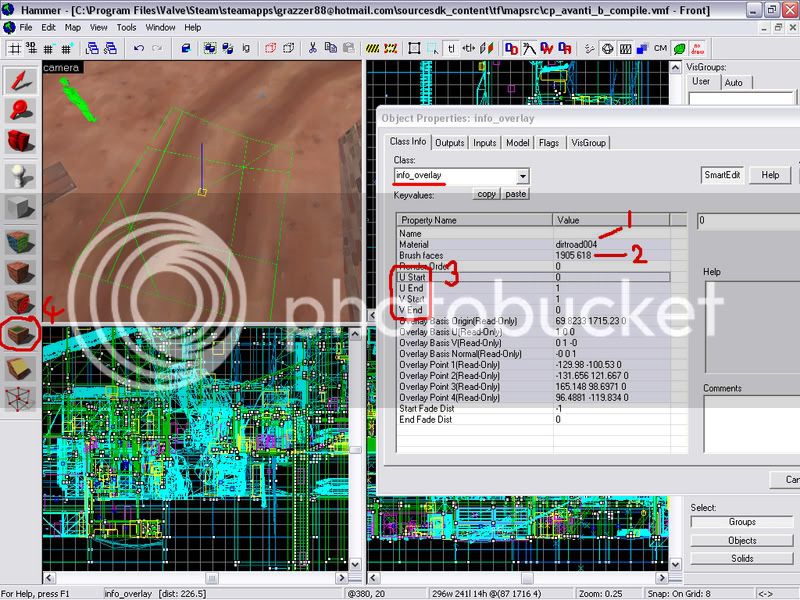
Hey guys there was this weird question that ive always wanted to ask since seeing these things in the TF2 maps. Take a look at this image:

You see that pink smudge under the ammo box? How did they place it on the other texture there? Was it a decal? If so what is the name for that pink smudge thing? Also...

You see what I circled in red? How did they put that rocky texture in with the dirt? If you look at the rocky texture, they made it look like they just "pasted" the rock portion of the texture on top of the dirt.


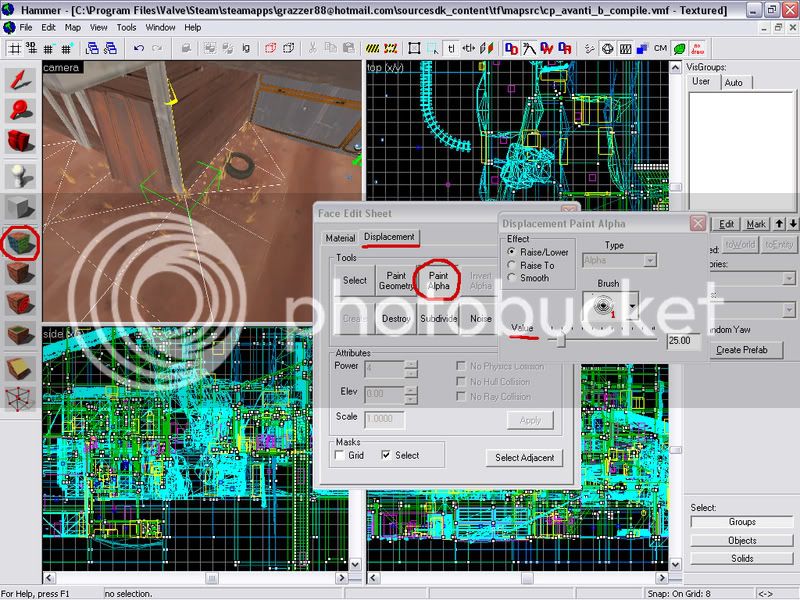
Heres another for more clarification. Now, I know that dirt road texture I think. Did valve just make one long brush for the road texture and then just sized the texture appropriately? I dont get it... I'm sorry if i didnt explain myself well enough.
You see that pink smudge under the ammo box? How did they place it on the other texture there? Was it a decal? If so what is the name for that pink smudge thing? Also...
You see what I circled in red? How did they put that rocky texture in with the dirt? If you look at the rocky texture, they made it look like they just "pasted" the rock portion of the texture on top of the dirt.

Heres another for more clarification. Now, I know that dirt road texture I think. Did valve just make one long brush for the road texture and then just sized the texture appropriately? I dont get it... I'm sorry if i didnt explain myself well enough.