- Jul 15, 2016
- 292
- 196
Okay Making skyboxes for TF2 is overcomplicated.
Unlike other source games with non-cartoony graphics, you can't just render something in Terragen and call it quits. You have to draw the ENTIRE thing.
Personally I have no artistic talent, but I have found a pretty great strategy for skybox creation.
Let's first figure out how skybox textures work.
A skybox texture consists of 6 image of 6 different sides of a inside-out sphere.
If a skybox texture does not have rounded sides, then it will look flat and unbelievable.
We can get around this in TF2 by drawing each side rounded, but this can be extremely difficult when each different side can have a completely different FOV.
So the solution?
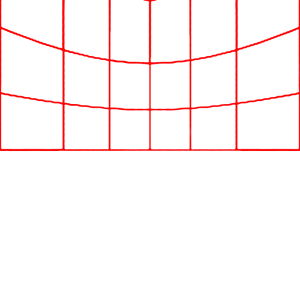
A WONDERFUL (I want to kill myself) guide I made.
Look:

Following this guide will allow to create a 3D looking skybox texture.
Lets begin.
First Open up the included PS file (Or just start a new 4096x2048 image in gimp)
And use it to create your wanted skybox.
There are cloud textures included in the file attached, in the vpks including textures, and ones made by the community. You can also just you know, draw them yourself. You figure it out.
When doing the "up" texture you can flatten the image crop it out and the place it back into photoshop and rotate it each time you need to connect it with the side images. (You figure it out)
When your masterpiece is complete. (keep in mind I have no artistic talent) Crop each photo out and individually save:

Crop
 Set the image to 8-bit formatting
 Save as targa (TGA)
 After you save the first Undo your crop and repeat. Be sure to save each one like the image (with the side on the end)(Get rid of guide I forgot to in this tutorial)

Open it in skypaint (A LEGAL copy is included)
 If done correctly your image should appear 3D and not flat. If the sides are all messed up try swapping rt and lf and rotating the "up" image -90 degrees.
And yes I know I suck at making skybox textures, this is my first full on creation.
I hope this Clears things up!
If I have gotten ANY information wrong please tell me asap so I don't spread misinformation!
Unlike other source games with non-cartoony graphics, you can't just render something in Terragen and call it quits. You have to draw the ENTIRE thing.
Personally I have no artistic talent, but I have found a pretty great strategy for skybox creation.
Let's first figure out how skybox textures work.
A skybox texture consists of 6 image of 6 different sides of a inside-out sphere.
If a skybox texture does not have rounded sides, then it will look flat and unbelievable.
We can get around this in TF2 by drawing each side rounded, but this can be extremely difficult when each different side can have a completely different FOV.
So the solution?
A WONDERFUL (I want to kill myself) guide I made.
Look:

Following this guide will allow to create a 3D looking skybox texture.
Lets begin.
First Open up the included PS file (Or just start a new 4096x2048 image in gimp)
And use it to create your wanted skybox.
There are cloud textures included in the file attached, in the vpks including textures, and ones made by the community. You can also just you know, draw them yourself. You figure it out.
When doing the "up" texture you can flatten the image crop it out and the place it back into photoshop and rotate it each time you need to connect it with the side images. (You figure it out)
When your masterpiece is complete. (keep in mind I have no artistic talent) Crop each photo out and individually save:
Crop
Open it in skypaint (A LEGAL copy is included)
And yes I know I suck at making skybox textures, this is my first full on creation.
I hope this Clears things up!
If I have gotten ANY information wrong please tell me asap so I don't spread misinformation!

