.vtf save as options from photoshop

Apr 14, 2013
663
343
113456_zpsa2jvtizc.png


What are the right formats and options I should fill? (I don't have an alpha channel or other fancy stuff)
 

EArkham

Necromancer
aa
Aug 14, 2009
1,625
2,774
Compressed Texture, or Compressed Texture Alpha, as appropriate.

Sharpen Filter == none.

This will be your setting for just about everything, vertexlit or generic.

Turn mipmaps off if it's for a model and you start seeing seams when you back away from the model in game.

Make sure clamping is on if it's a model or tiling texture (otherwise you get seams).

GOTCHAS -

Sometimes it won't save the alpha channel the first time. This will depend on whether you're using layers or you've flattened everything. I find it preferable to open the vtf after you've saved it and paste in the alpha so you don't have to flatten your psd.

You're going to see a slight green shift when saving a file due to the compression. Most of the time, this isn't that noticeable, but if you're working with blues and greys, sometimes it's better to save as a tga and then use VTF Edit to make the vtf without green shift.

Or you can adjust the Hue/Sat away from green before saving (I think it's in the -8 range?). In either case, if you have to resave a vtf because it was missing the alpha, ALSO paste in a fresh copy of the diffuse so that it doesn't green shift it AGAIN.
 
Last edited:

Tumby

aa
May 12, 2013
1,085
1,194
Corrections on what EArkham said:
Sharpen filter none? Sharpen Soft is the best for everything. And the Mipmap Filter as quadratic looks a little nicer imo.
Turning mipmaps off is a terrible thing to do as it will cancle the texture resolution settings that people use. You are increasing people's computer load for no reason. Black seems on model textures is because of bad texturing. The texture should extend at least 4 more pixels from the UV space.
Do not use clamping on textures meant for worldbrushes. You won't be able to fit it into the right place if it's too far away from the origin of the map. Models and Overlays should use it if the actual texture gets very close to the edge.
Make sure to only have 1 layer when converting to .vtf, otherwise you will end up with the texture having multiple frames. At least in paint.net, not sure about photoshop as I don't see a 'animated texture' option.

And now to the compression formats themselfes:
DXT is compressed, you will want it most of the time.
'DXT 1' means no alphachannel.
'DXT 1 with one bit alpha' means one bit alpha, never works out well for me.
'DXT 3' and 'DXT 5' means full alpha. Usually you will use DXT 5.
Most other formats are uncompressed and use a ton of filesize. Most important ones are:
'RGB888' The R G and B might have a different order.
'RGBA8888' This means the same as above. The A stands for "alpha", so that means this one has alpha.
'I8' and 'IA88' The I stands for "black and white". Rarely used, but I just want to make sure people don't forget about that one as it has the potention to half the filesize of an uncompressed texture.
 
Apr 14, 2013
663
343
Well, I did it all as you said (compressed texture, DXT1, mipmap=box, Sharpen Soft, no flags). Still no luck. The textures show in hammer as the pink checkerboard.
I assume that a vmt can't cause that, which is why I'm focusing on finding the problem in the .vtf.

sometimes it's better to save as a tga and then use VTF Edit to make the vtf without green shift.
How do I do that? I have vtfEDIT but I don't really know much about it.
 

MaccyF

Notoriously Unreliable
aa
Mar 27, 2015
914
1,545
File -> Import allows you to select your TGA, then the options are the same as in the photoshop plugin :)

You can also select the option to auto generate a VMT, but personally i don't use that.

Then just go File -> Save to save your VTF (and possibly VMT)

Also don't forget to check save alpha channel in photoshop if you need one for anything

EDIT: the VMT can definately cause the pink and black checkers, make sure that the directory structures referenced in the VMT are correct
 

EArkham

Necromancer
aa
Aug 14, 2009
1,625
2,774
Well, I did it all as you said (compressed texture, DXT1, mipmap=box, Sharpen Soft, no flags). Still no luck. The textures show in hammer as the pink checkerboard.

Pink checkerboard means a texture path is incorrect or the file is missing. Either it can't find the vtf from the path you provided in the vmt, or the texture name in the model doesn't match the vmt name, or the model was compiled with an incorrect $cdmaterials.

Basically double and triple check your paths, where ever they are.

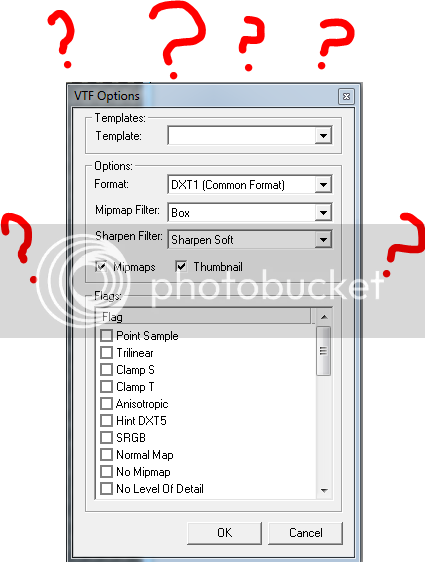
Also, do NOT use sharpen in the photoshop plugin. It creates noticeable artifacts. Use VTF Edit if you want to use any filters.

---

Bottom line is that if you want fast, convenient, and don't care about the quirks, like when you're prototyping a texture, use the photoshop plugin. Or if you rely on photoshop heavily anyway, use the plugin.

If you want fidelity and colour accuracy, take the extra steps and save it out as a tga and use VTF Edit. It's a bit more hassle and slows you down if you're quickly iterating a texture, but for the final result it's going to be better all around.
 

Tumby

aa
May 12, 2013
1,085
1,194
The quickest way to use VTFEdit is to have it on the fastest accessible spot possible. Most likely, your desktop.
  • Save the image as a .tga, with some random name, on the desktop.
  • Drag the .tga onto VTFEdit.
  • Select the options you need.
  • Click the Save button on the top left.
  • Select desktop and specify a proper name. If the original .tga already has the correct name, click on it.
Now you can drag the .vtf to whereever you need it to be.
 

Pocket

Half a Lambert is better than one.
aa
Nov 14, 2009
4,696
2,580
Also I think you have to restart Hammer when you modify your texture/material otherwise you get the checkerboards? I know it can auto-refresh on some changes, but not all; I forget which are which.