What's the secret (angled textures) ???

Open Blade

L420: High Member
Nov 30, 2007
439
34
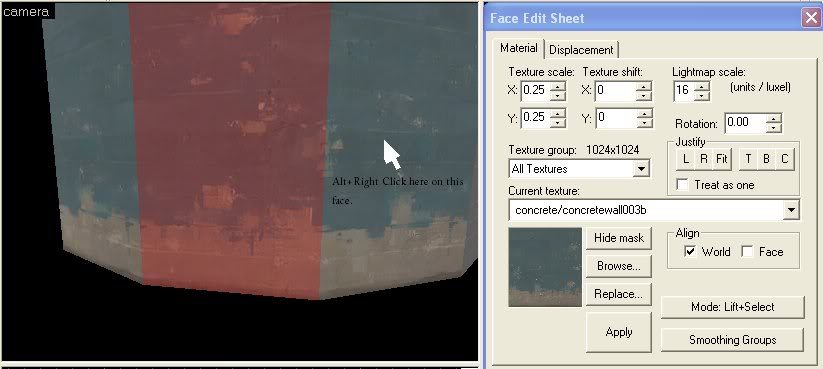
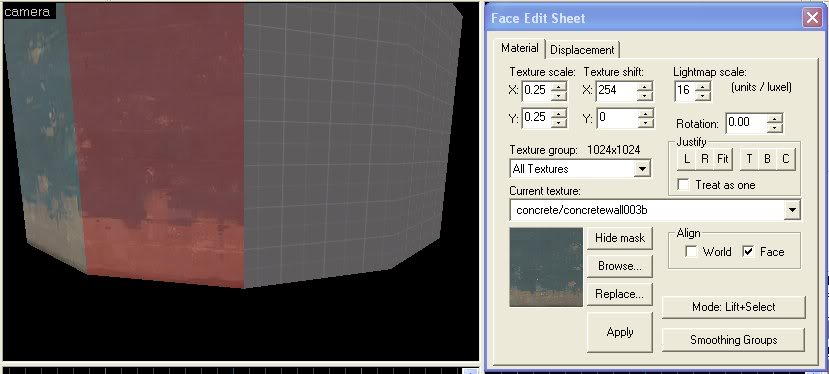
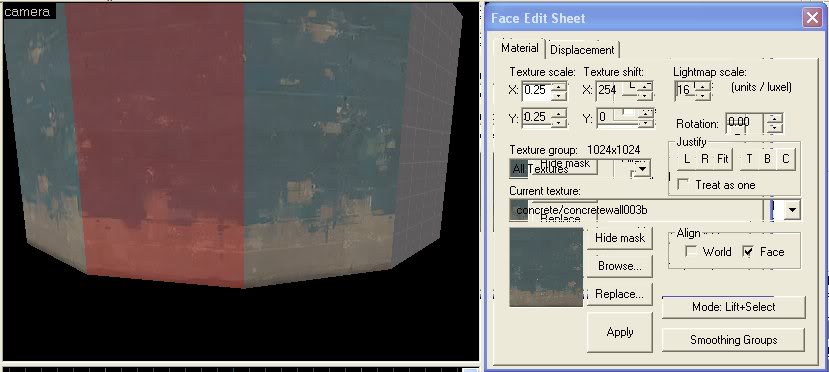
I have spent at least a few hours trying all different ways to get a texture to fit the angle of a beam and I can't do it. It's a wooden beam and the texture won't align with the angle of the beam. I try to rotate it and it just doesn't look right. I have tried everthing. I copied and pasted another beam in from a different map to copy and paste the texture and that doesn't work. How do you do this? Thanks.
 

Sgt Frag

L14: Epic Member
May 20, 2008
1,443
710
several ways.
The rotate function should work fine, I use it alot. Gotta know your angles.

The other option is to make the beam straight, apply tex, use the texture lock button, the rotate the beam. The tex will be locked to it and will rotate with it thus staying straight.
Then you'll have to snap your verts to make sure they are on the grid.
 

grazr

Old Man Mutant Ninja Turtle
aa
Mar 4, 2008
5,441
3,814
You'll also learn to not be so fussy with this, and as long as your angled brush doesn't exceed 256x256 units you should be able to get away with using .5 on the end of your angles if need be.

26.5, 27.5 etc.

If you're using wood this isn't so much of a problem if you learn not to be such a perfectionist about these types of things, but with textures like your metal trims this does become an inconvinience. In which case Stg Frag's suggestion to use texture lock and rotate your brush after having applied your texture vertically/horizontally is probably best. Then fiddle about with any fancy bits using your vertex manipulation tool.
 

YM

LVL100 YM
aa
Dec 5, 2007
7,135
6,056
I know that a ratio of 2:1 (two units across then one unit up) is 63.5 degrees or 153.5 degrees (or negetive those) and of course a 1:1 ratio is 45 degrees
 

DasMatze

L2: Junior Member
May 17, 2008
87
31
Its so much easier: Select a face which is mapped right (a face which goes with the grid), hold down alt and rightclick on the angled face.

Example:
If you have such a beam

Code:
  /  /
 /  /
/  /

select the left or right face and then rightclick with alt on the front face. The texture will be applied and alligned to the selected face.

DasMatze
 
Last edited:

apocguy

L2: Junior Member
Jan 10, 2008
51
2
Here is what I posted on some other forums when my friend was having the same problem:

I know you are early in development but let me give you some texturing tips.
If you notice on round objects like water tower or what ever it is you made, the textures are not aligned.

There is a VERY easy way to fix it!
First open your texture window (this will stay open the whole time).

texturing1.jpg

Take a look at this picture. If you notice, the textures are not perfectly aligned.

texturing2.jpg

First select a face that you want to be the reference.

texturing3.jpg

Now Alt-Right Click the next face.

texturing4.jpg

And Viola, they are perfectly aligned.

texturing5.jpg

You see those grey textures, doing this trick can help you quickly change textures :D.
 

Open Blade

L420: High Member
Nov 30, 2007
439
34
One last question. I did the alt+right click and that works awesome, thanks very much. But in regards to texturing cliffs.........would it look even better by applying all the same faces of your cliff dicplacement to a smoothing group?
 

grazr

Old Man Mutant Ninja Turtle
aa
Mar 4, 2008
5,441
3,814
I also find "align to view" a decent texture mode when dealing with half circles.

Mind you since the advent of displacements the usefulness of this mode is practically negligable. It came in invalueble when using the old triangular rubble technique in DoD 1.3. There's little need to wrap a texture around several faces at the same time when you can wrap the face itself :p Unless you're attempting to reproduce the skybox rubble from gravel pit. Look directly down onto your cone shaped brush and paste away with no misalignments.

I would recommend you atleast check it out and see what results you get, it may even help with your texture angling.