- Feb 7, 2009
- 888
- 177
This is my first tutorial, about displacements in hammer, how they work, and what can be done with them.
This is a large topic, so prepare for a long read.
1. Displacement Tools

1 Select: standard tool to select faces, just as you normally do. To select multiple faces, hold strg while selecting.
2 Create: Turns all selected faces into displacements. When pressing, hammer asks you for the "power". The higher the power, the higher the number of nodes. 3 is standard, but you should try too keep it as low as possible for performance reasons. Displacements with a power of 4 can also cause problems with sticky bombs, so better dont use that (thanks littleedge)
3 Destroy: Turns all selected displacements back into world brushes.
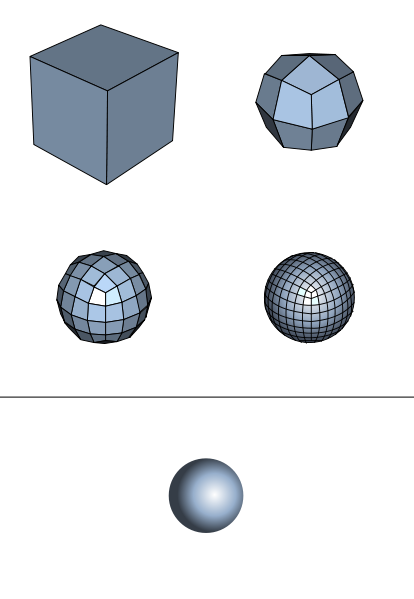
4 Subdivide: Divides each big face into smaller parts, making it smoother and rounder. Further information can be read here (thanks to Nerdboy)
5 Noise: Raises and lowers each vertex of the displacement by a random value between the min and max values.
6 Sew: Connects the selected displacements to prevent gaps. For this to work, the base brushes of both displacements must share an edge. The displacements must either have the same length of that edge, or one must be exactly half the lenghth of the other. Displacements can not only be sewn with each other, but also with world brushes and even brush entities.
7 Paint Geometry:

Effect: Raise/Lower: Move points up or down by the specified value with each click.
Raise to: Rises the current point exactly to the specified height.
Smooth: Removes hard edges of the displacement. you will probably have to set the raduis higher to see a result.
Spatial: If selected, changes apply to all points within the radius, the stronger the nearer they are to the center.
If it is disabled, changes only apply to the currnetly active point.
Brush: to do: While testing, i didnt find any differences between soft-edge and hard-edge, probably doesnt do anything. If you know what it does, let me know.
Distance: The distance a single click changes the height (raise/lower), or the height the displacement is set to (Raise to).
In smooth mode, a lower value seems to mean more change with each click, while a high value lets the height only change by a few units.
Radius: The radius changes should apply to.
Suto sew: sews the selected displacements after each change, useful to avoid gaps.
8 Paint Alpha:

Effect: Same as in paint geometry.
Type: Probably for textures with more than one alpha channel, though i could not test this.
Brush: The site of the area to edit, 1 means only the actual vertex gets edited, 3 would change all vertexes within a range of 3.
Value: Basically the same as in paint geometry.
9 Invert Alpha: Turns the alpha channel around, 0 becomes 255 and 255 becomes 0, same for values in between, so 25 would become 230.
2. Creating Displacement Ground
Imagine we have this area, and want the nodrawed space filled with displacements (dont do it like i did, and place everything off the grid...):

Here are a few examples of possible solutions:

As you can see, theres a really high number of vertexes, because the displacements are small and the power is high. In almost all cases, you will
not need so many vertexes, and this has a really bad effect on performance. You can also see parts of displacements sticking out of the map.

If we have a look on the 2d overview, we can see how the displacements are in a nice raster (and that i forgot one). It might look good from here, but is the worst case you can have. More than half of all displacements are hidden under brushes, but still being rendered.

Here, we have a lower displacement scale, and also bigger displacements, which should work perfectly, if your displacements are rather flat.

As we cen see on the overview, theres still much of the displacements hidden under geometry, thus being rendered, without any benefit.

You will immediately see one difference in this version: the displacements aren't straight on the grid any more, but the corners have been dragged around.

Looking at the 2d image, we see that there is almost no displacement surface hidden under a brush, and thus, useless.
The method used to create this is vertex editing. If you dont know what that is, here' a tut:
http://developer.valvesoftware.com/wiki/Hammer_Vertex_Tool
The idea is, that the corners of the displacements are at the same positions as the corners of your walls, so no part of a displacement is hidden underneath walls.
We start with a single brush where we want our ground. Turn the top site into a displacement, power of 2 should be okay. Give it a ground texture, and go into vertex editing mode.
It should now look somewhat like this:

Now we try to move the corners of this displacement so, that they are at the same position as the corners of what is surrounding your displacements, for example buildings, or rock walls.

The displacements dont always perfectly fit when only aligning them by the corners, thats where we can divide one edge up into 2:

You only have to make sure, that the corners are exactly at the middle at the middle of the other displacements edge, or they wont sew.
Sometimes, you cant do it that way without getting really small displacements:

But you should try to keep the hidden part of the displacement as small as possible, to not give away anything, and to prevent possible shadow errors.
Now we just put displacements over your whole area, starting from the outside, going towards the center. The easiest way to work with them is to group all displacements in an area, that should sew together, and just edit them with all being selected.
3. Caves
For caves, you want to place the displacements, just like you would place normal brushes: Make a displacement for every wall, floor and ceiling. Be sure that they always share an edge, so you can sew them properly. To avoid leaks, you have to place another set of brushes directly behind the displacements, all world brushes, and textured in tools/toolsnodraw.
You can then just select just the walls and the ceiling (not the floor, picture is wrong here), subdivide it, and you already have round edges. Then drag them around until you have what you want, and dont forget to sew everything at the end.


4. Other utilizations of displacements
Displacements can not only be used to create rocks and ground. For example, you want a smooth round corner. With brushes, you need at least 8 of them to make it look good. Using displacements, you only need 2. Heres how:
Take a brush, make two sides of it displacements, and select both. Now put a copy of both brushes above them, and one underneath (we need the copies, because hammer would not subdivide them regularly without them). Select all displacements, subdivide them, and delete the copies above and below the original brush.

The steps, from left to right.
Another way for making round corners is shown http://www.snarkpit.net/snarkpower/articles/game/cat/pn/tp/146/Texture_alignment_through_arches_using_displacement_maps, applying it vertically (thanks to grazr). This will give you a cleaner result, but will also take more time to be created. Its your decision, what you want to use.
Another example would be wooden structures, making them look more interesting. Heres an example, how valve did it in 2fort:

If you have brush fences in your map, displacements can be used to make them look more interesting, like here:

You can also use displacements for roofs, making them less flat, and providing another advantage: You can put tools/toolsskybox brushes directly above your buildings, while the displacement roofs are still being rendered. Valve uses this in badlands, where it doesnt have much room to place brushes for vis-blocking.

If that roof was a world brush, it would not be rendered where the skybox textured brush is, leaving an ugly gap where you could see the sky through.
5. Useful shortcuts
shift + a opens the face edit sheet.
You can change the radius in the paint geometry tool by holding alt + mouse1, and moving your mouse forward or back.
While holding shift + mouse1, you can move displacement points up or down according to how far you move your mouse back or forward.
With alt + mouse2, you can change the angle to that of the currently active point.
6. Additional Information
http://forums.tf2maps.net/showthread.php?t=111
http://forums.tf2maps.net/showthread.php?t=798
http://developer.valvesoftware.com/wiki/Displacement
http://developer.valvesoftware.com/wiki/Hammer_Face_Edit_Disps
Download of the example map
This is a large topic, so prepare for a long read.
1. Displacement Tools
1 Select: standard tool to select faces, just as you normally do. To select multiple faces, hold strg while selecting.
2 Create: Turns all selected faces into displacements. When pressing, hammer asks you for the "power". The higher the power, the higher the number of nodes. 3 is standard, but you should try too keep it as low as possible for performance reasons. Displacements with a power of 4 can also cause problems with sticky bombs, so better dont use that (thanks littleedge)
3 Destroy: Turns all selected displacements back into world brushes.
4 Subdivide: Divides each big face into smaller parts, making it smoother and rounder. Further information can be read here (thanks to Nerdboy)
5 Noise: Raises and lowers each vertex of the displacement by a random value between the min and max values.
6 Sew: Connects the selected displacements to prevent gaps. For this to work, the base brushes of both displacements must share an edge. The displacements must either have the same length of that edge, or one must be exactly half the lenghth of the other. Displacements can not only be sewn with each other, but also with world brushes and even brush entities.
7 Paint Geometry:
Effect: Raise/Lower: Move points up or down by the specified value with each click.
Raise to: Rises the current point exactly to the specified height.
Smooth: Removes hard edges of the displacement. you will probably have to set the raduis higher to see a result.
Spatial: If selected, changes apply to all points within the radius, the stronger the nearer they are to the center.
If it is disabled, changes only apply to the currnetly active point.
Brush: to do: While testing, i didnt find any differences between soft-edge and hard-edge, probably doesnt do anything. If you know what it does, let me know.
Distance: The distance a single click changes the height (raise/lower), or the height the displacement is set to (Raise to).
In smooth mode, a lower value seems to mean more change with each click, while a high value lets the height only change by a few units.
Radius: The radius changes should apply to.
Suto sew: sews the selected displacements after each change, useful to avoid gaps.
8 Paint Alpha:
Effect: Same as in paint geometry.
Type: Probably for textures with more than one alpha channel, though i could not test this.
Brush: The site of the area to edit, 1 means only the actual vertex gets edited, 3 would change all vertexes within a range of 3.
Value: Basically the same as in paint geometry.
9 Invert Alpha: Turns the alpha channel around, 0 becomes 255 and 255 becomes 0, same for values in between, so 25 would become 230.
2. Creating Displacement Ground
Imagine we have this area, and want the nodrawed space filled with displacements (dont do it like i did, and place everything off the grid...):
Here are a few examples of possible solutions:
As you can see, theres a really high number of vertexes, because the displacements are small and the power is high. In almost all cases, you will
not need so many vertexes, and this has a really bad effect on performance. You can also see parts of displacements sticking out of the map.
If we have a look on the 2d overview, we can see how the displacements are in a nice raster (and that i forgot one). It might look good from here, but is the worst case you can have. More than half of all displacements are hidden under brushes, but still being rendered.
Here, we have a lower displacement scale, and also bigger displacements, which should work perfectly, if your displacements are rather flat.
As we cen see on the overview, theres still much of the displacements hidden under geometry, thus being rendered, without any benefit.
You will immediately see one difference in this version: the displacements aren't straight on the grid any more, but the corners have been dragged around.
Looking at the 2d image, we see that there is almost no displacement surface hidden under a brush, and thus, useless.
The method used to create this is vertex editing. If you dont know what that is, here' a tut:
http://developer.valvesoftware.com/wiki/Hammer_Vertex_Tool
The idea is, that the corners of the displacements are at the same positions as the corners of your walls, so no part of a displacement is hidden underneath walls.
We start with a single brush where we want our ground. Turn the top site into a displacement, power of 2 should be okay. Give it a ground texture, and go into vertex editing mode.
It should now look somewhat like this:
Now we try to move the corners of this displacement so, that they are at the same position as the corners of what is surrounding your displacements, for example buildings, or rock walls.
The displacements dont always perfectly fit when only aligning them by the corners, thats where we can divide one edge up into 2:
You only have to make sure, that the corners are exactly at the middle at the middle of the other displacements edge, or they wont sew.
Sometimes, you cant do it that way without getting really small displacements:
But you should try to keep the hidden part of the displacement as small as possible, to not give away anything, and to prevent possible shadow errors.
Now we just put displacements over your whole area, starting from the outside, going towards the center. The easiest way to work with them is to group all displacements in an area, that should sew together, and just edit them with all being selected.
3. Caves
For caves, you want to place the displacements, just like you would place normal brushes: Make a displacement for every wall, floor and ceiling. Be sure that they always share an edge, so you can sew them properly. To avoid leaks, you have to place another set of brushes directly behind the displacements, all world brushes, and textured in tools/toolsnodraw.
You can then just select just the walls and the ceiling (not the floor, picture is wrong here), subdivide it, and you already have round edges. Then drag them around until you have what you want, and dont forget to sew everything at the end.
4. Other utilizations of displacements
Displacements can not only be used to create rocks and ground. For example, you want a smooth round corner. With brushes, you need at least 8 of them to make it look good. Using displacements, you only need 2. Heres how:
Take a brush, make two sides of it displacements, and select both. Now put a copy of both brushes above them, and one underneath (we need the copies, because hammer would not subdivide them regularly without them). Select all displacements, subdivide them, and delete the copies above and below the original brush.
The steps, from left to right.
Another way for making round corners is shown http://www.snarkpit.net/snarkpower/articles/game/cat/pn/tp/146/Texture_alignment_through_arches_using_displacement_maps, applying it vertically (thanks to grazr). This will give you a cleaner result, but will also take more time to be created. Its your decision, what you want to use.
Another example would be wooden structures, making them look more interesting. Heres an example, how valve did it in 2fort:
If you have brush fences in your map, displacements can be used to make them look more interesting, like here:
You can also use displacements for roofs, making them less flat, and providing another advantage: You can put tools/toolsskybox brushes directly above your buildings, while the displacement roofs are still being rendered. Valve uses this in badlands, where it doesnt have much room to place brushes for vis-blocking.
If that roof was a world brush, it would not be rendered where the skybox textured brush is, leaving an ugly gap where you could see the sky through.
5. Useful shortcuts
shift + a opens the face edit sheet.
You can change the radius in the paint geometry tool by holding alt + mouse1, and moving your mouse forward or back.
While holding shift + mouse1, you can move displacement points up or down according to how far you move your mouse back or forward.
With alt + mouse2, you can change the angle to that of the currently active point.
6. Additional Information
http://forums.tf2maps.net/showthread.php?t=111
http://forums.tf2maps.net/showthread.php?t=798
http://developer.valvesoftware.com/wiki/Displacement
http://developer.valvesoftware.com/wiki/Hammer_Face_Edit_Disps
Download of the example map
Last edited:
")