Working beep boy * 2017-08-05
a modeled and 3d printed beeb boy case for a rasberry pi
* the beep boy isnt working yet
This jam has turned into a comedy of errors due to user error.
Day 1
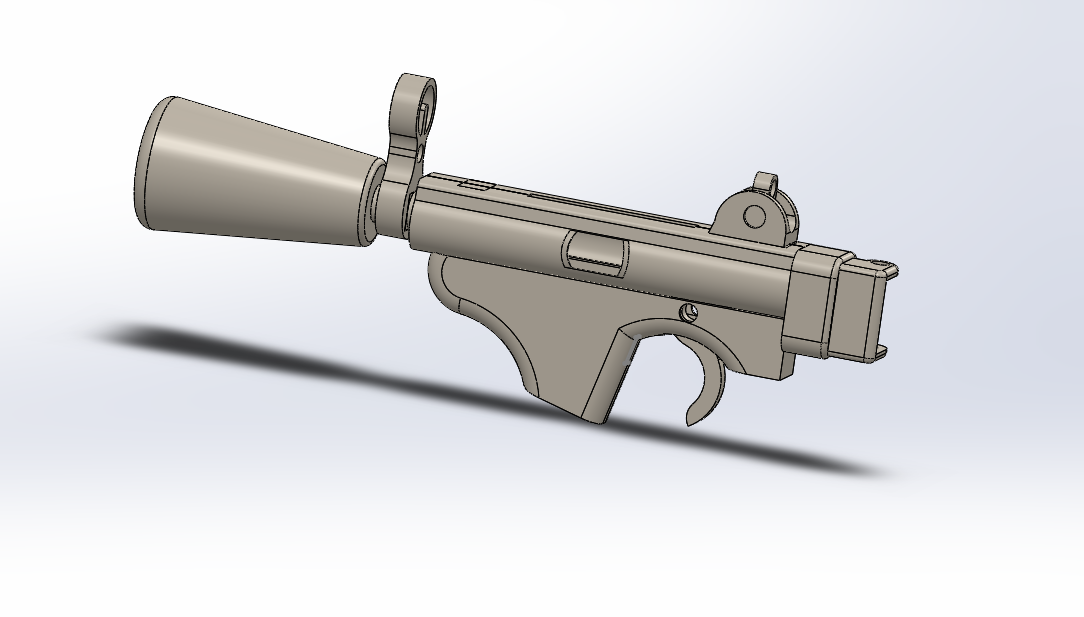
My original plan for the jam was to model, print and paint a cleaners carbine. This idea was highly ambitious, but I was optimistic that I could do it. What I did not take into account was the fact that I would not have enough time to print all the parts with the filament that I had. This project would also have taken more than 72 hours of working time to complete correctly and modeling the carbine was taking much longer than I anticipated. After almost 6 hours of working on the project, I got ready to print the first piece only to realize I was experiencing a filament shortage and didn’t have enough material to print the weapon.
Because of the lack of materials I had to change my project for the jam. I saw online people who made a raspberry pi act as a steam link and decided to make a case for a raspberry pi allowing me to play tf2 on a beep boy.
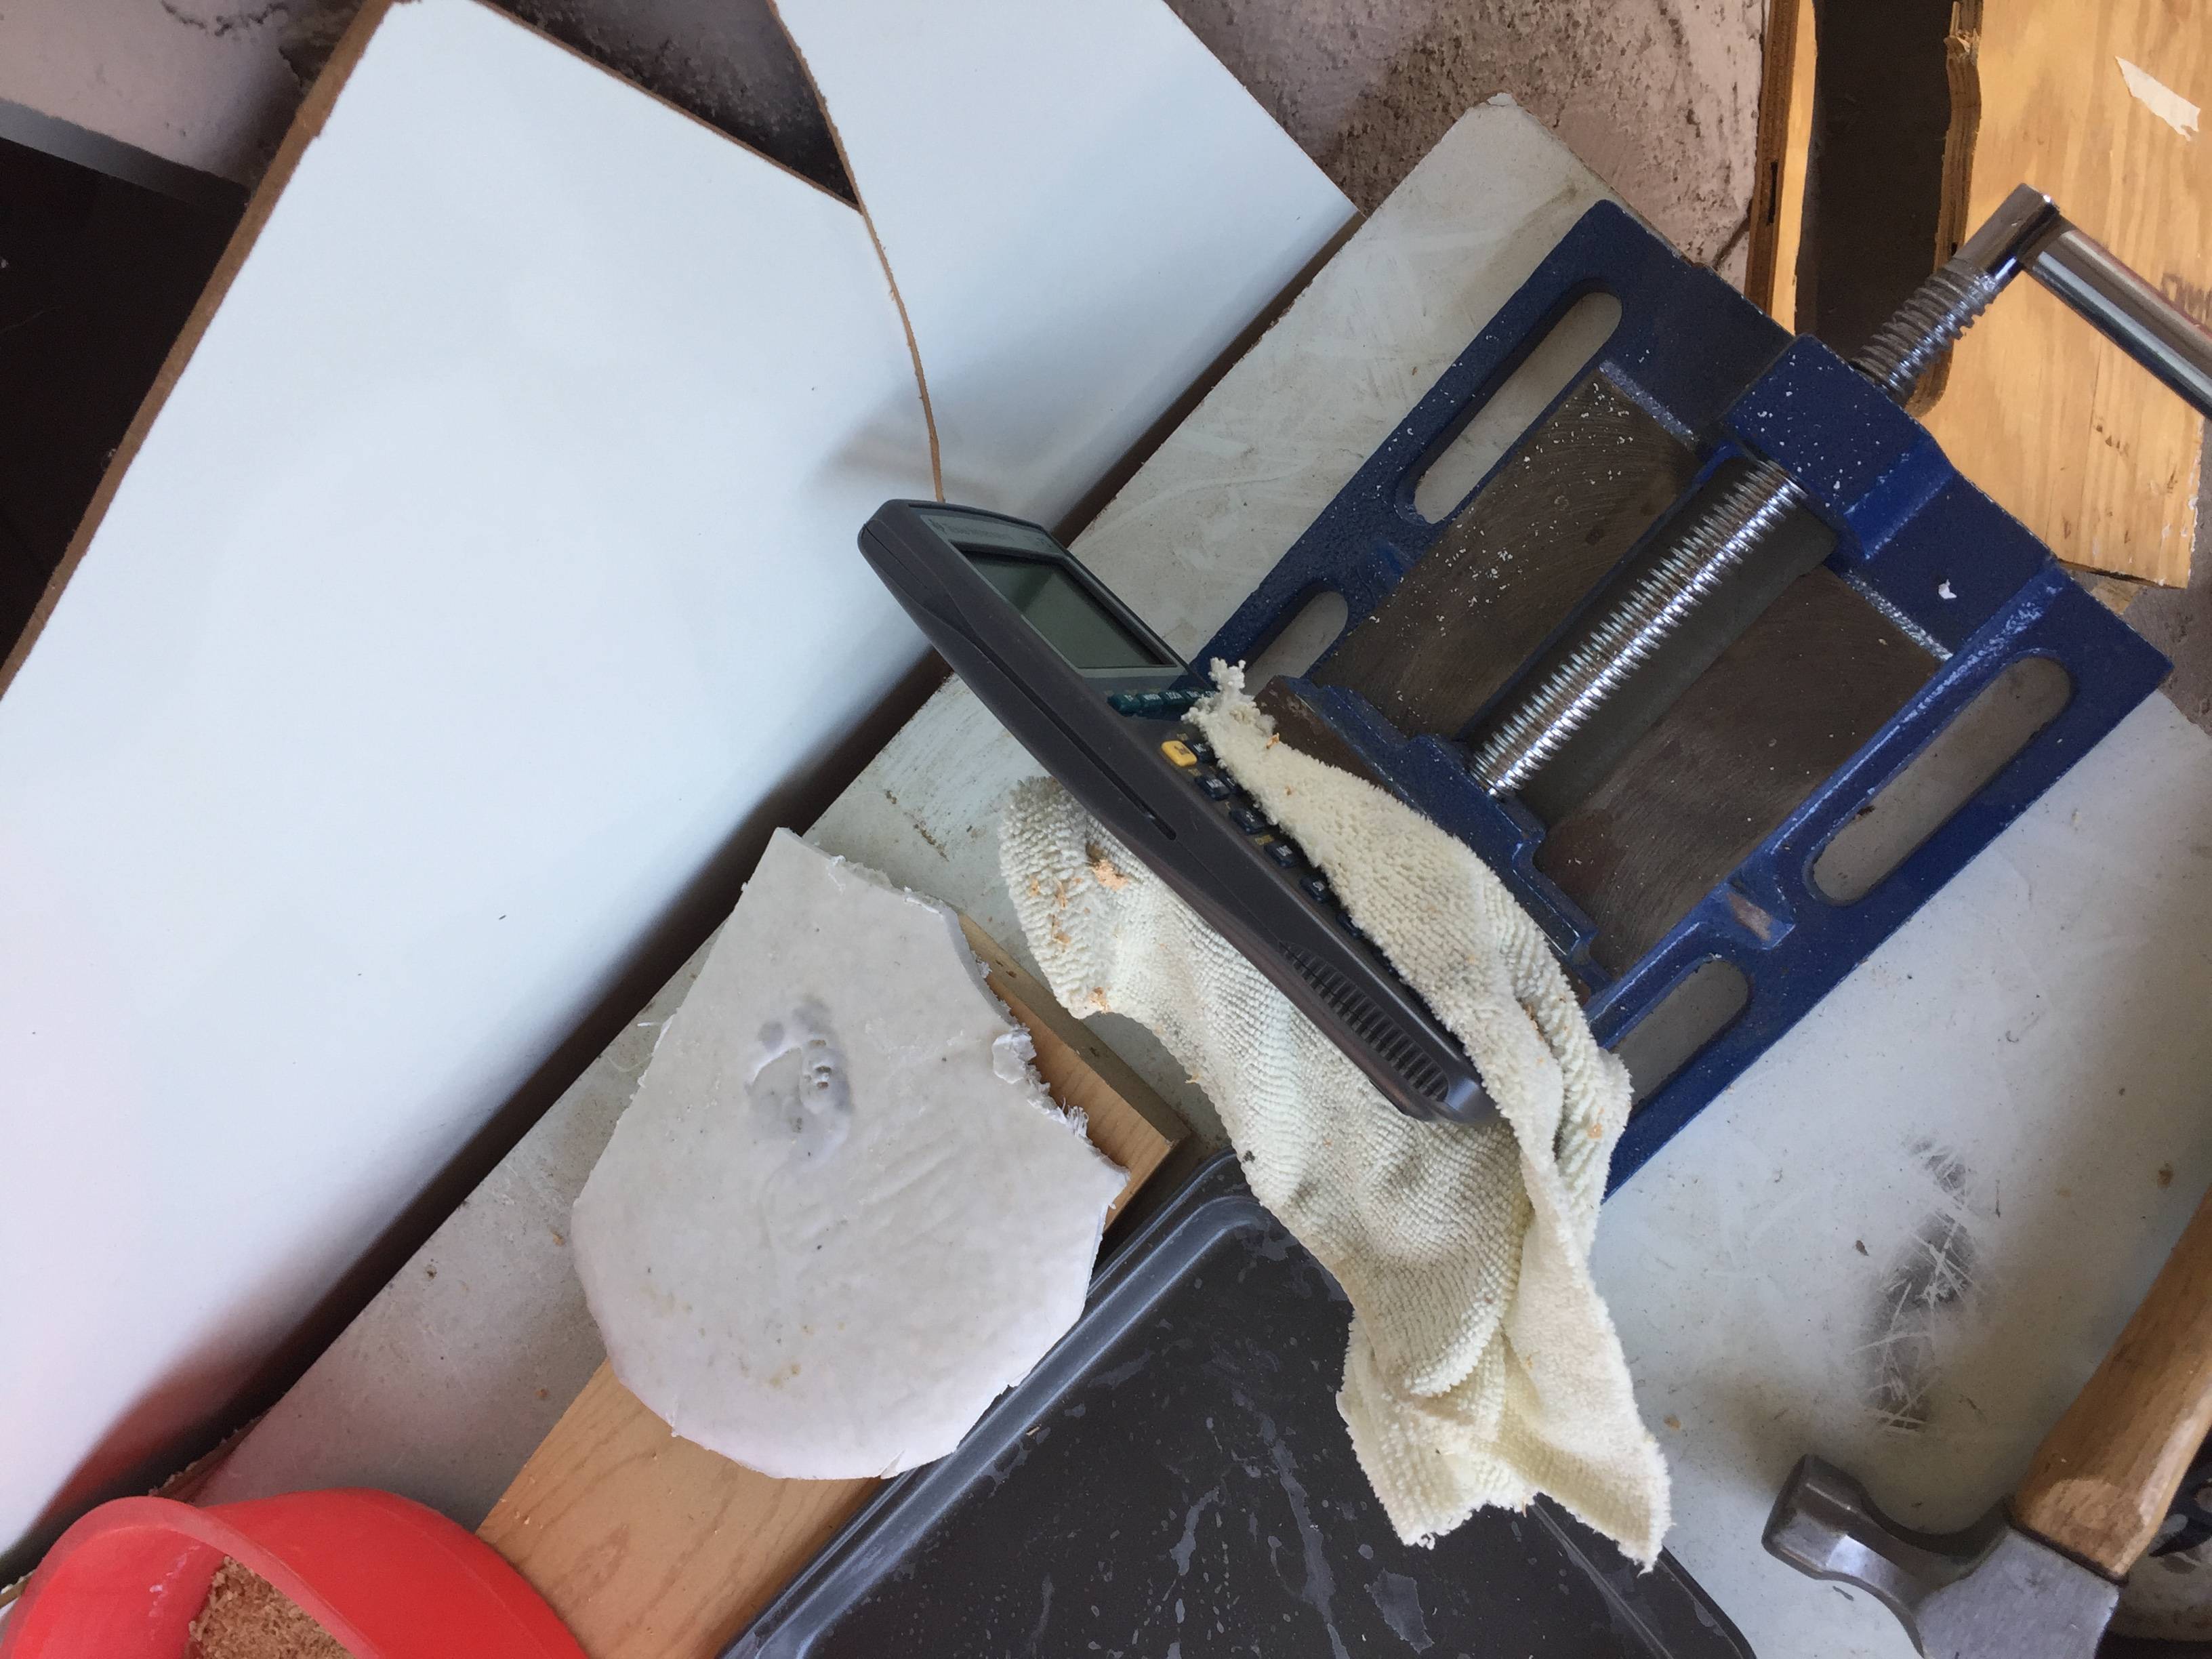
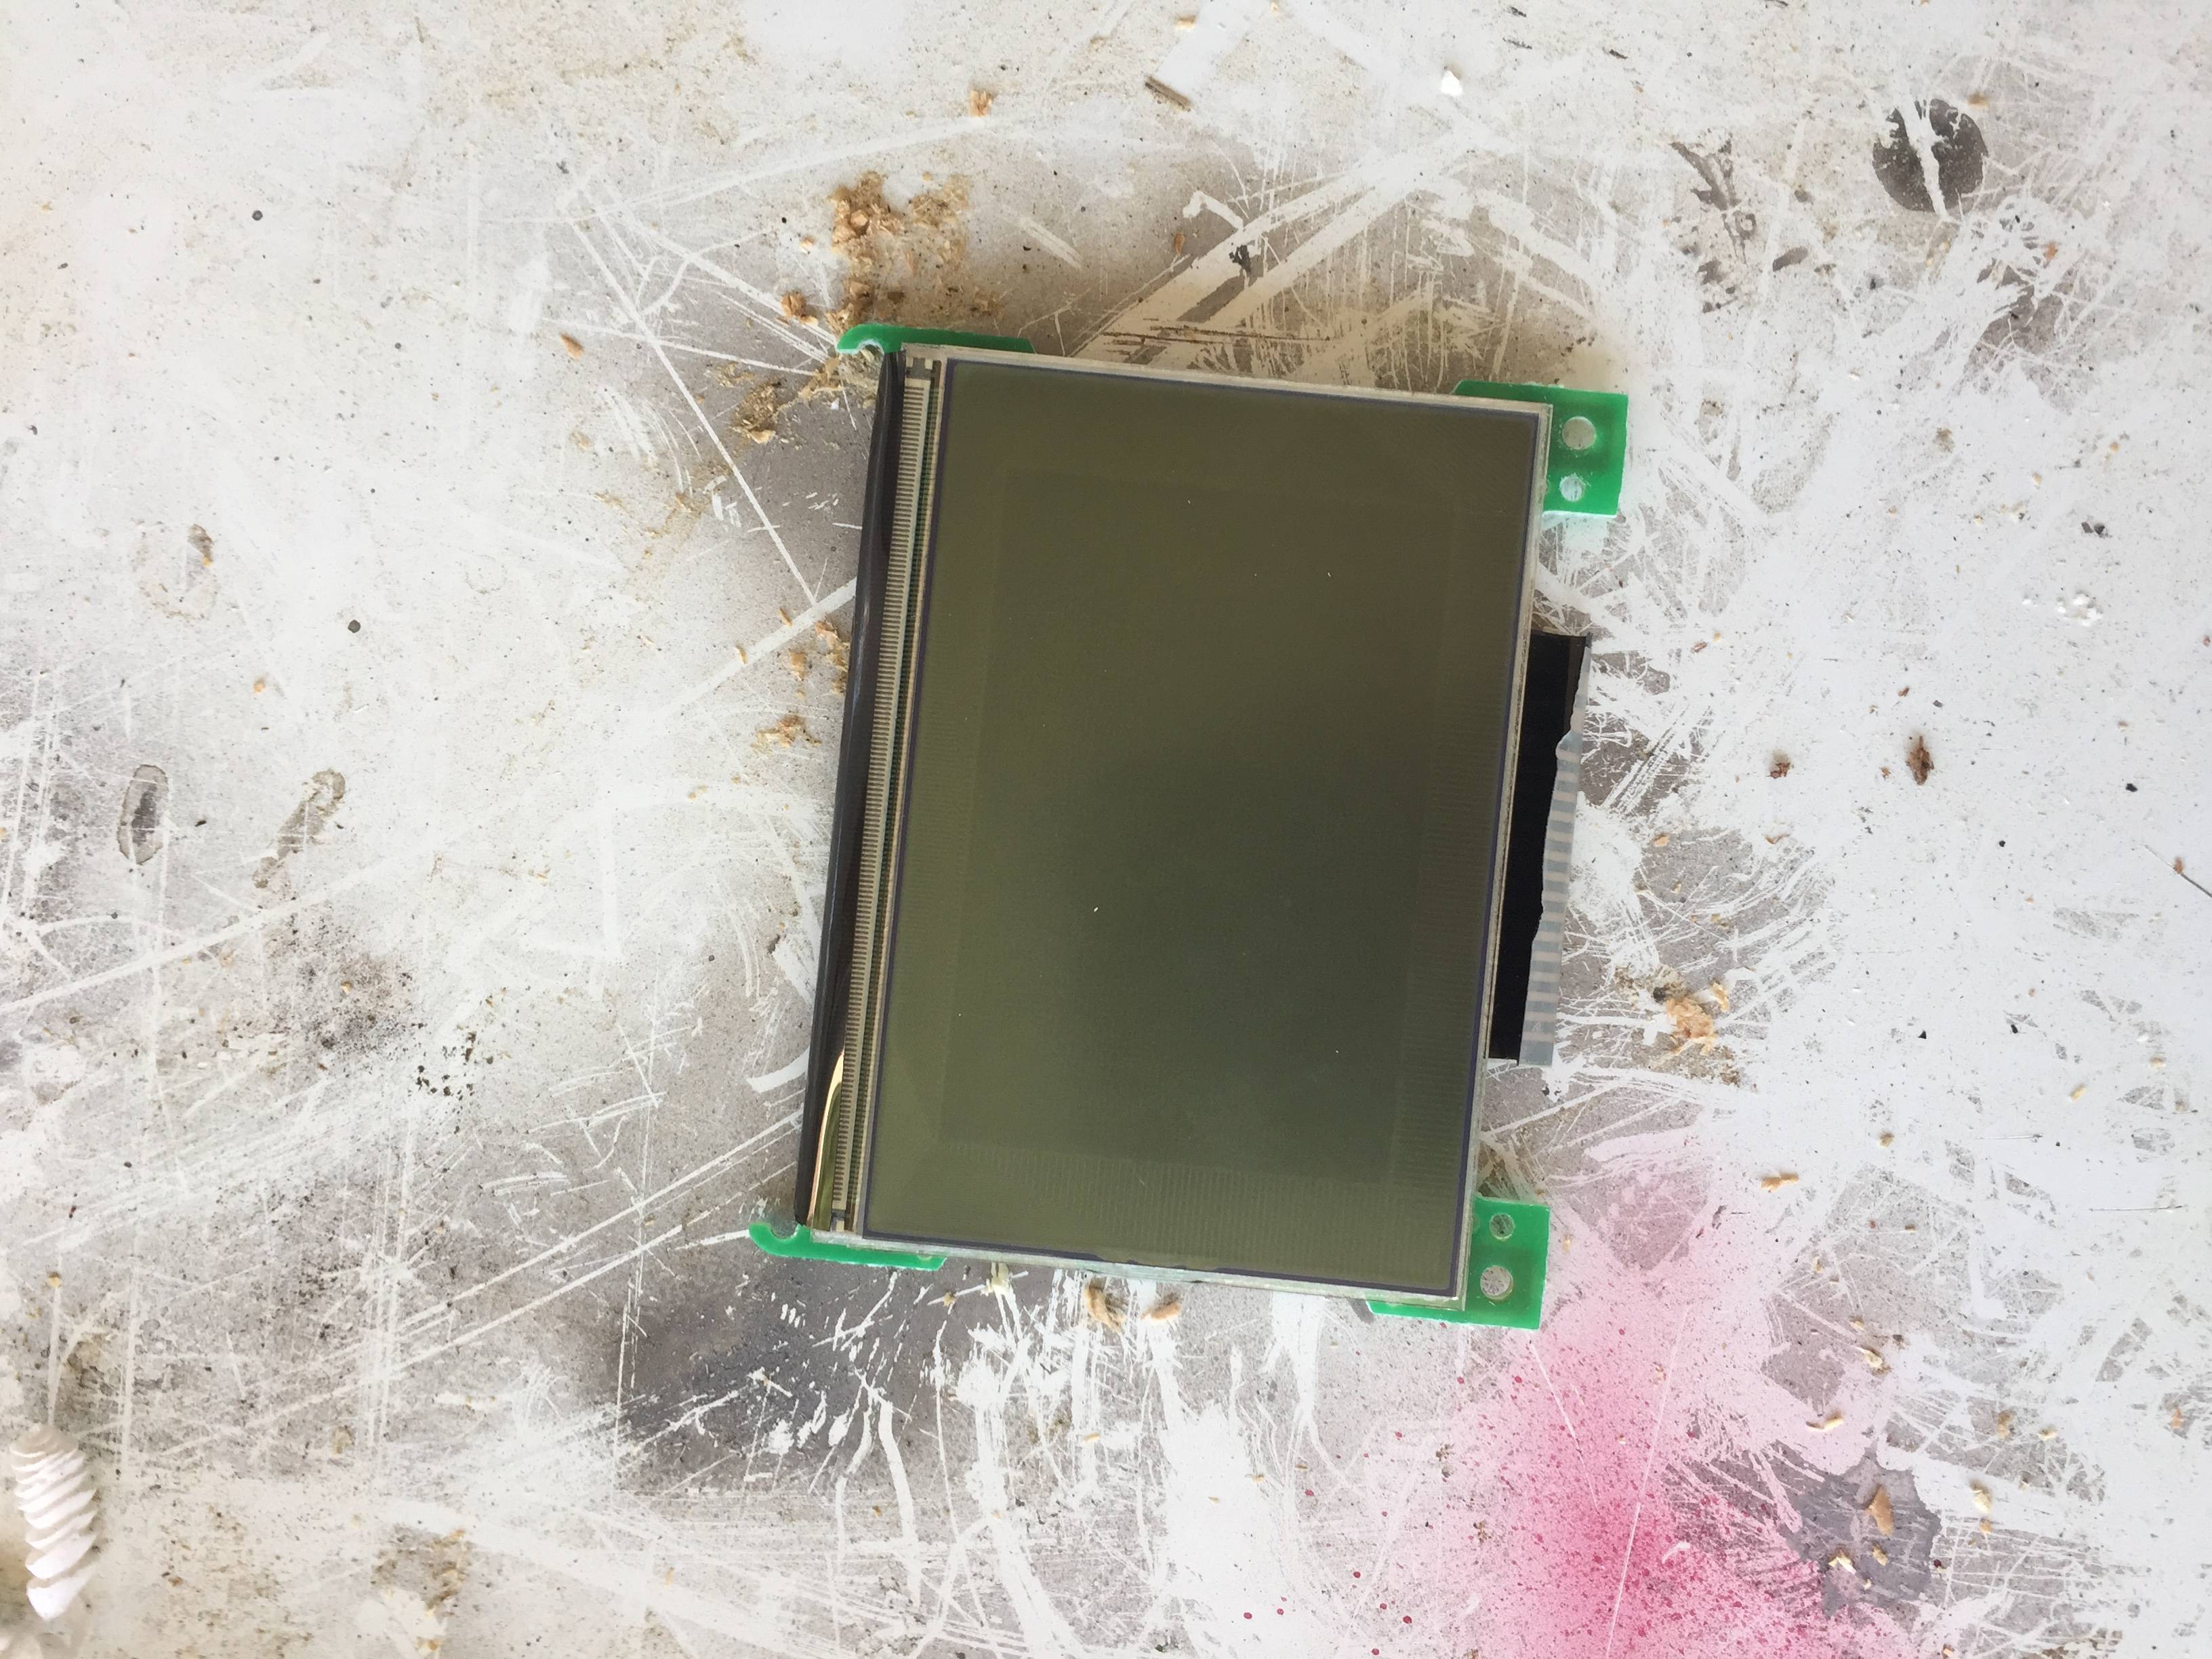
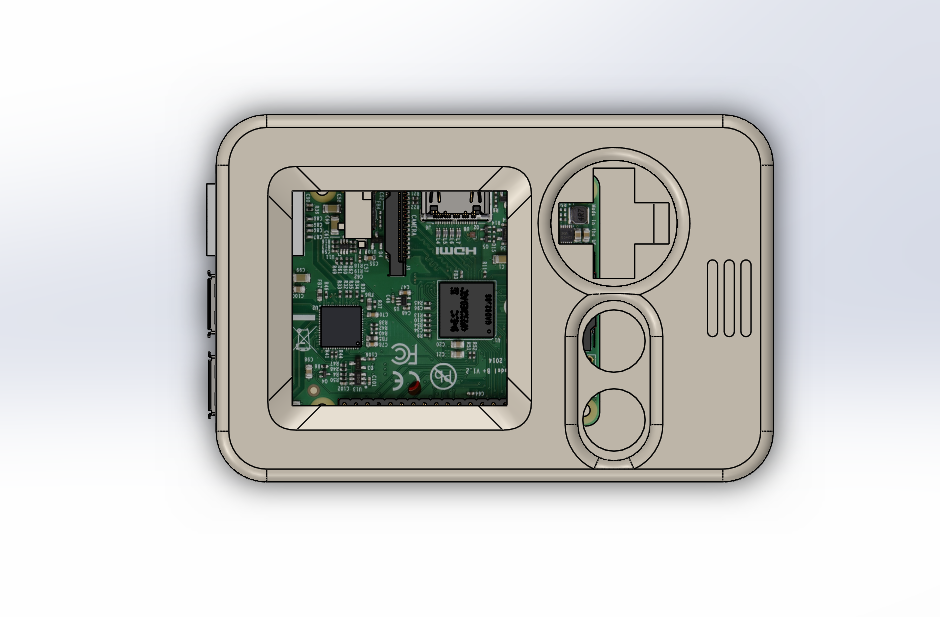
I got a hold of an old calculator and after ripping off its screen, I was able to get the dimensions of the beep boy. After getting it scaled correctly I modeled the case to allow access to all the ports that I use while hiding the ports as best as I could.

At this point it was way later then I was planning on working so I called it a night.
Day 2
After some sleep I printed the faceplate to the beep boy. I had the printer on the wrong settings and used the setting for a different filament so the first attempt to print was a failure.

The second attempt to print the beep boy was a success. It took slightly over 3 hours to print and immediately away the print finished, I began sanding it smooth. After spending about an hour sanding it. I went to test fit the screen and I then realized that I forgot to take into account the wall thickness making all my work more or less useless.
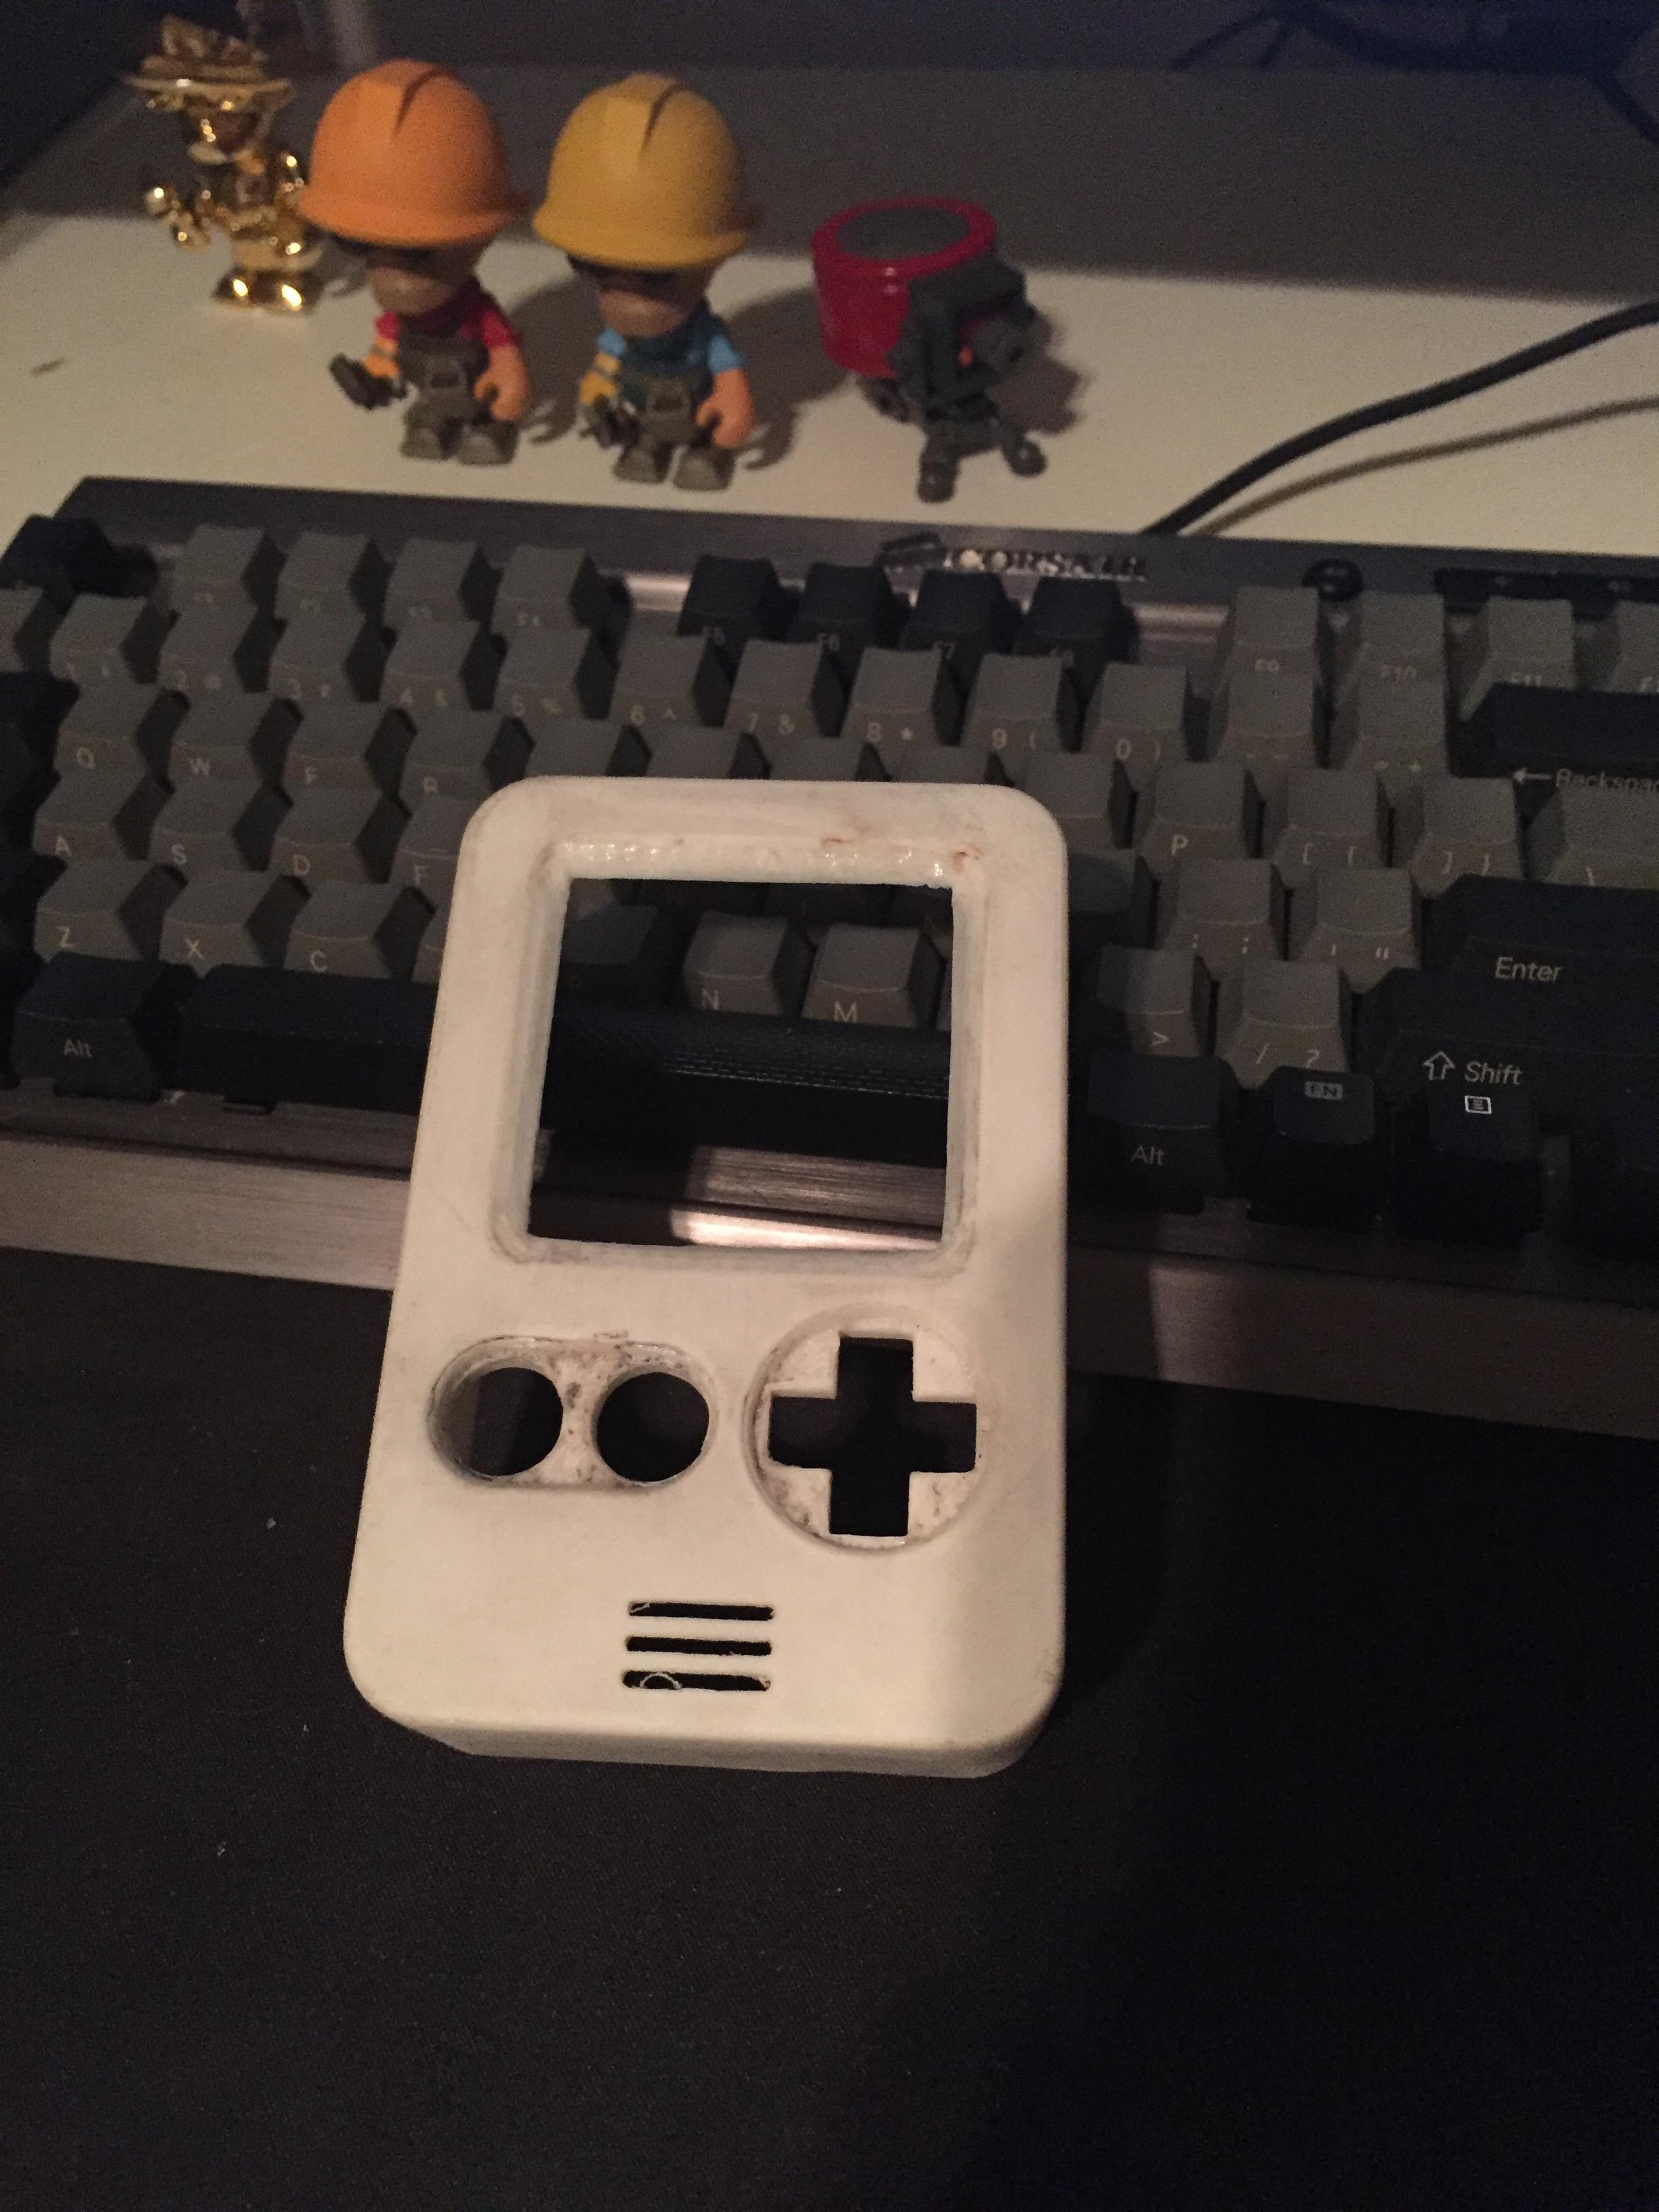
The only way to correct this problem was to scale the entire beep boy larger, however the screen was the limiting factor. What I ended up doing was scaling the entire beeb boy by 10% to fit in the screen but keeping the screen the unscaled size. This made the beep boy’s screen 10% too small so I increased the chamfer around the edges of the screen to make the empty space feel less empty. I am now printing the third attempt for the front cover of the beep boy.
Day 3
I spent the majority of this day trying to make all the pieces fit together correctly. The final product is not as nice as I would have liked, but I think it is a good starting point to make a v2 from it.
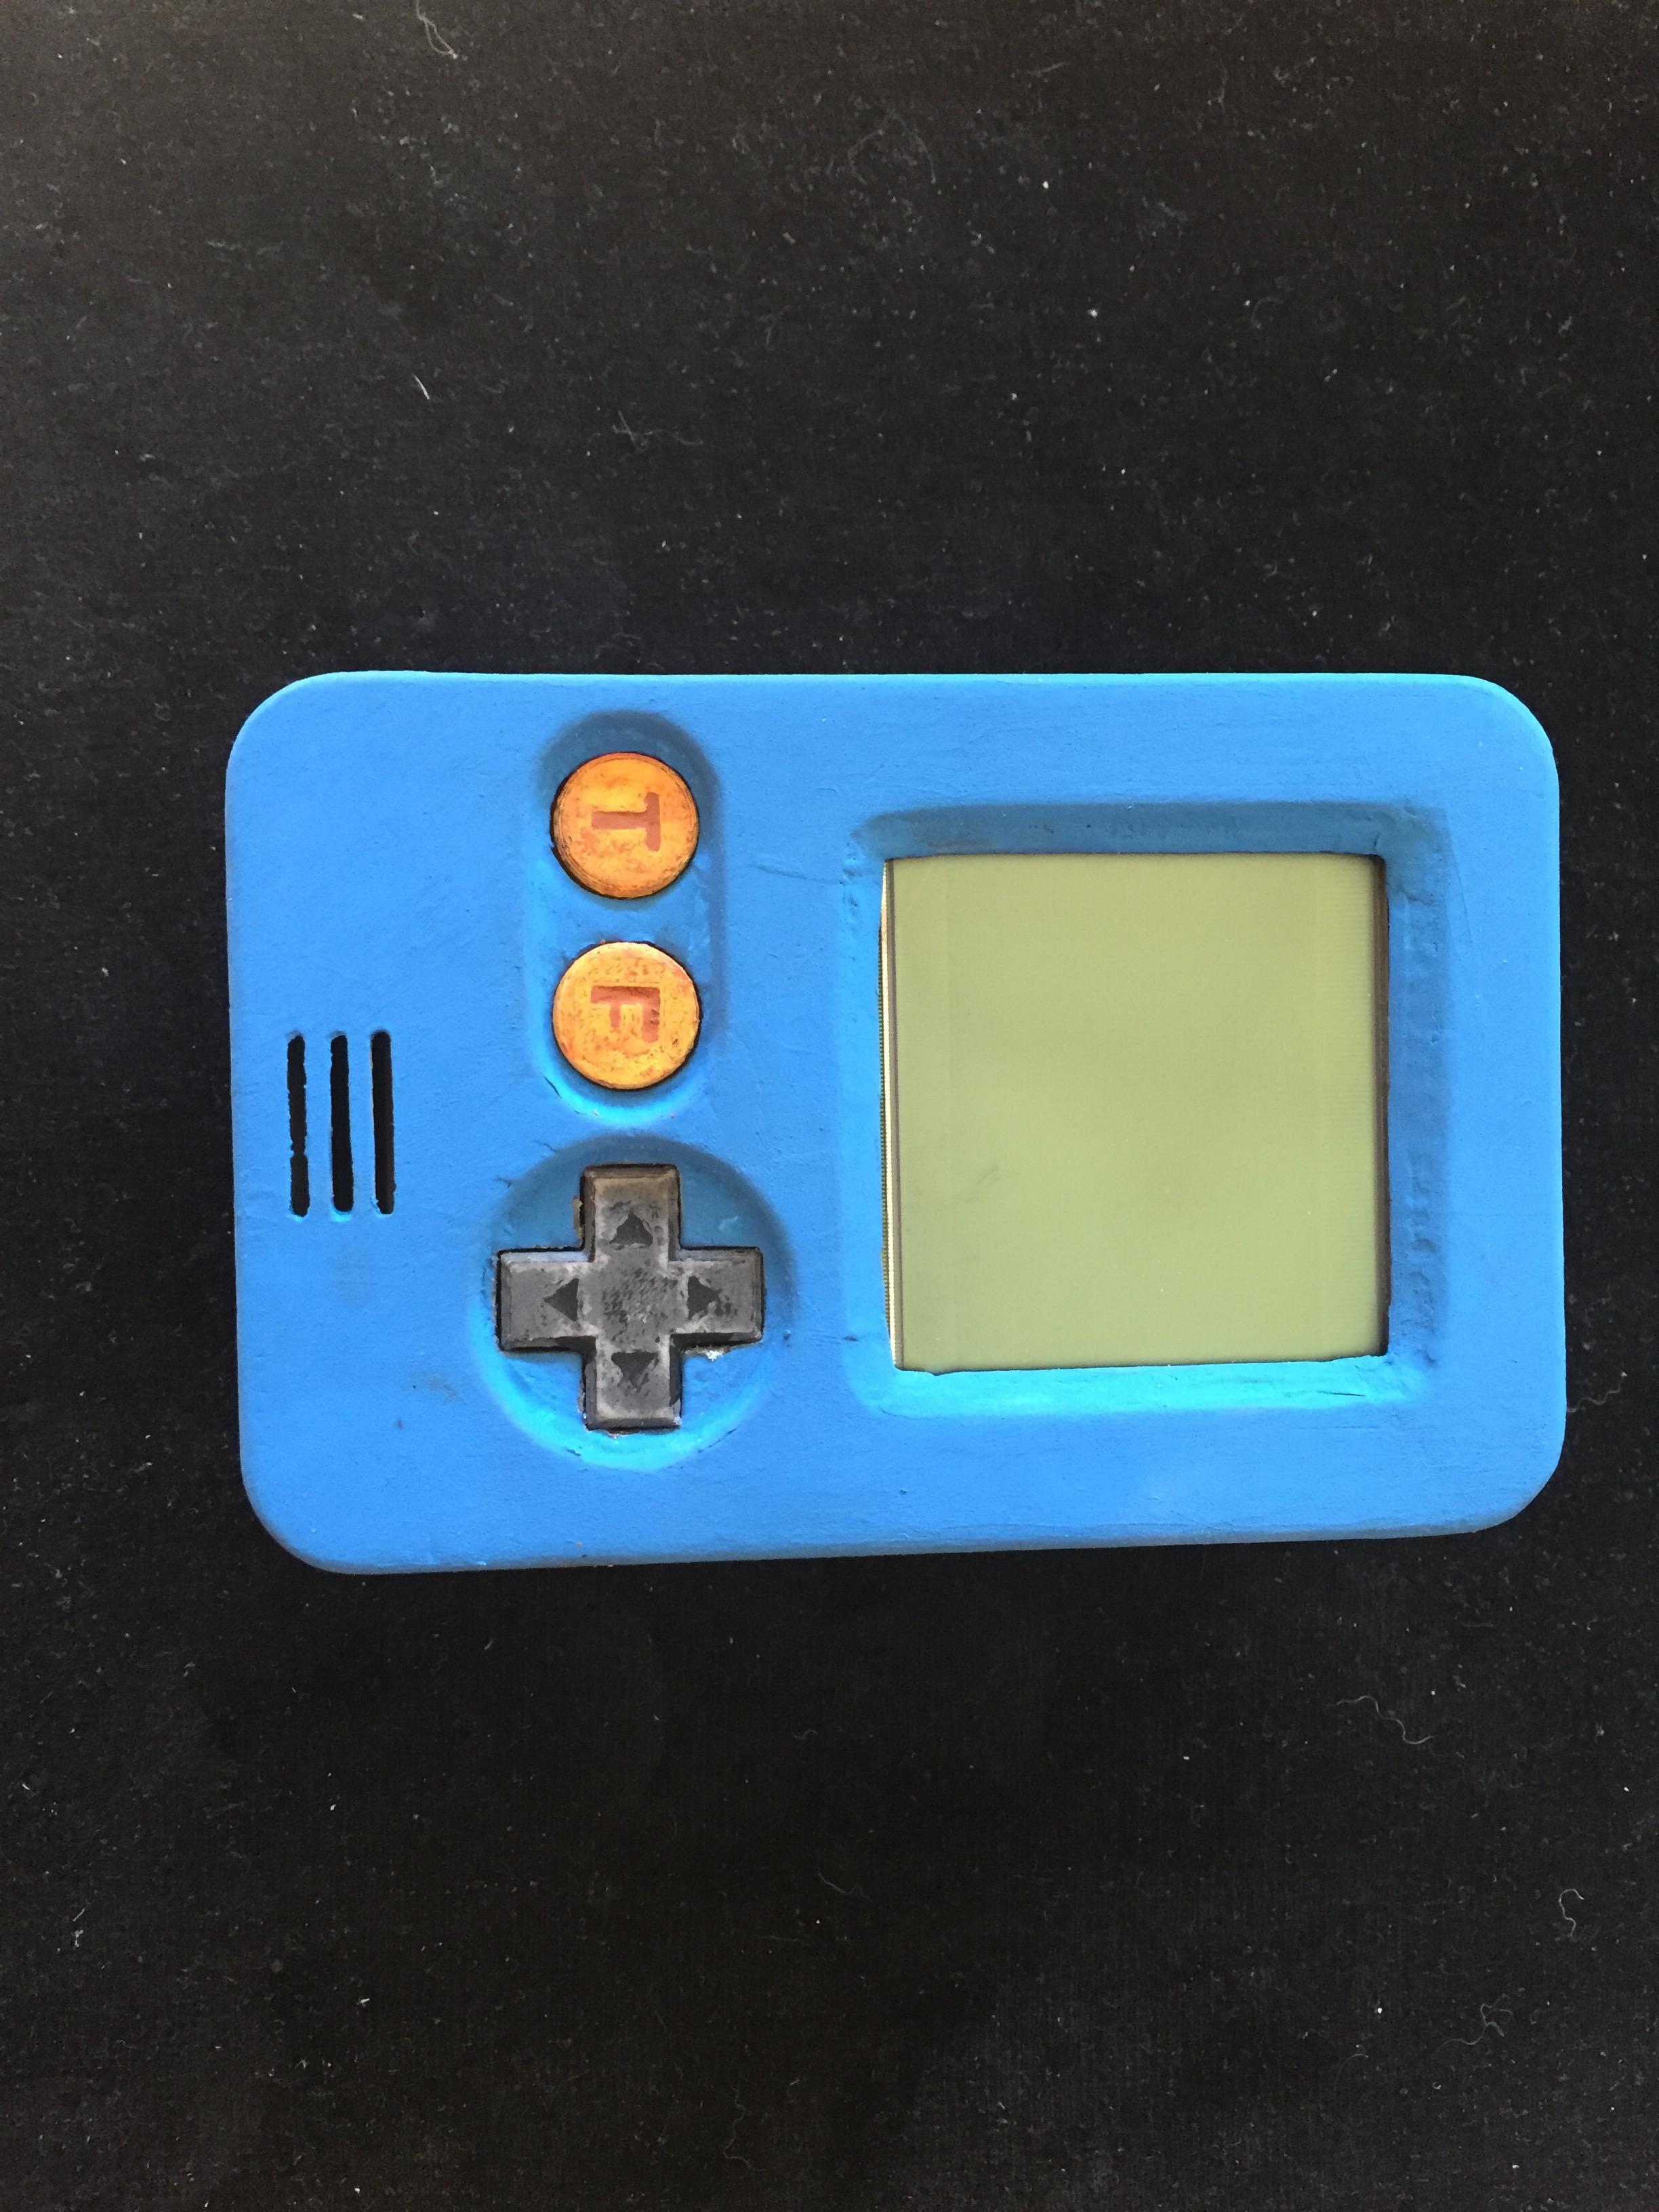
The beeb boy is definitely not as good as It could have been. I normally use a resin to fill in the gaps however that takes 24 hours + to cure. If I had time to use that the chamfer around the screen and the indentations where the buttons go would have been much smoother.
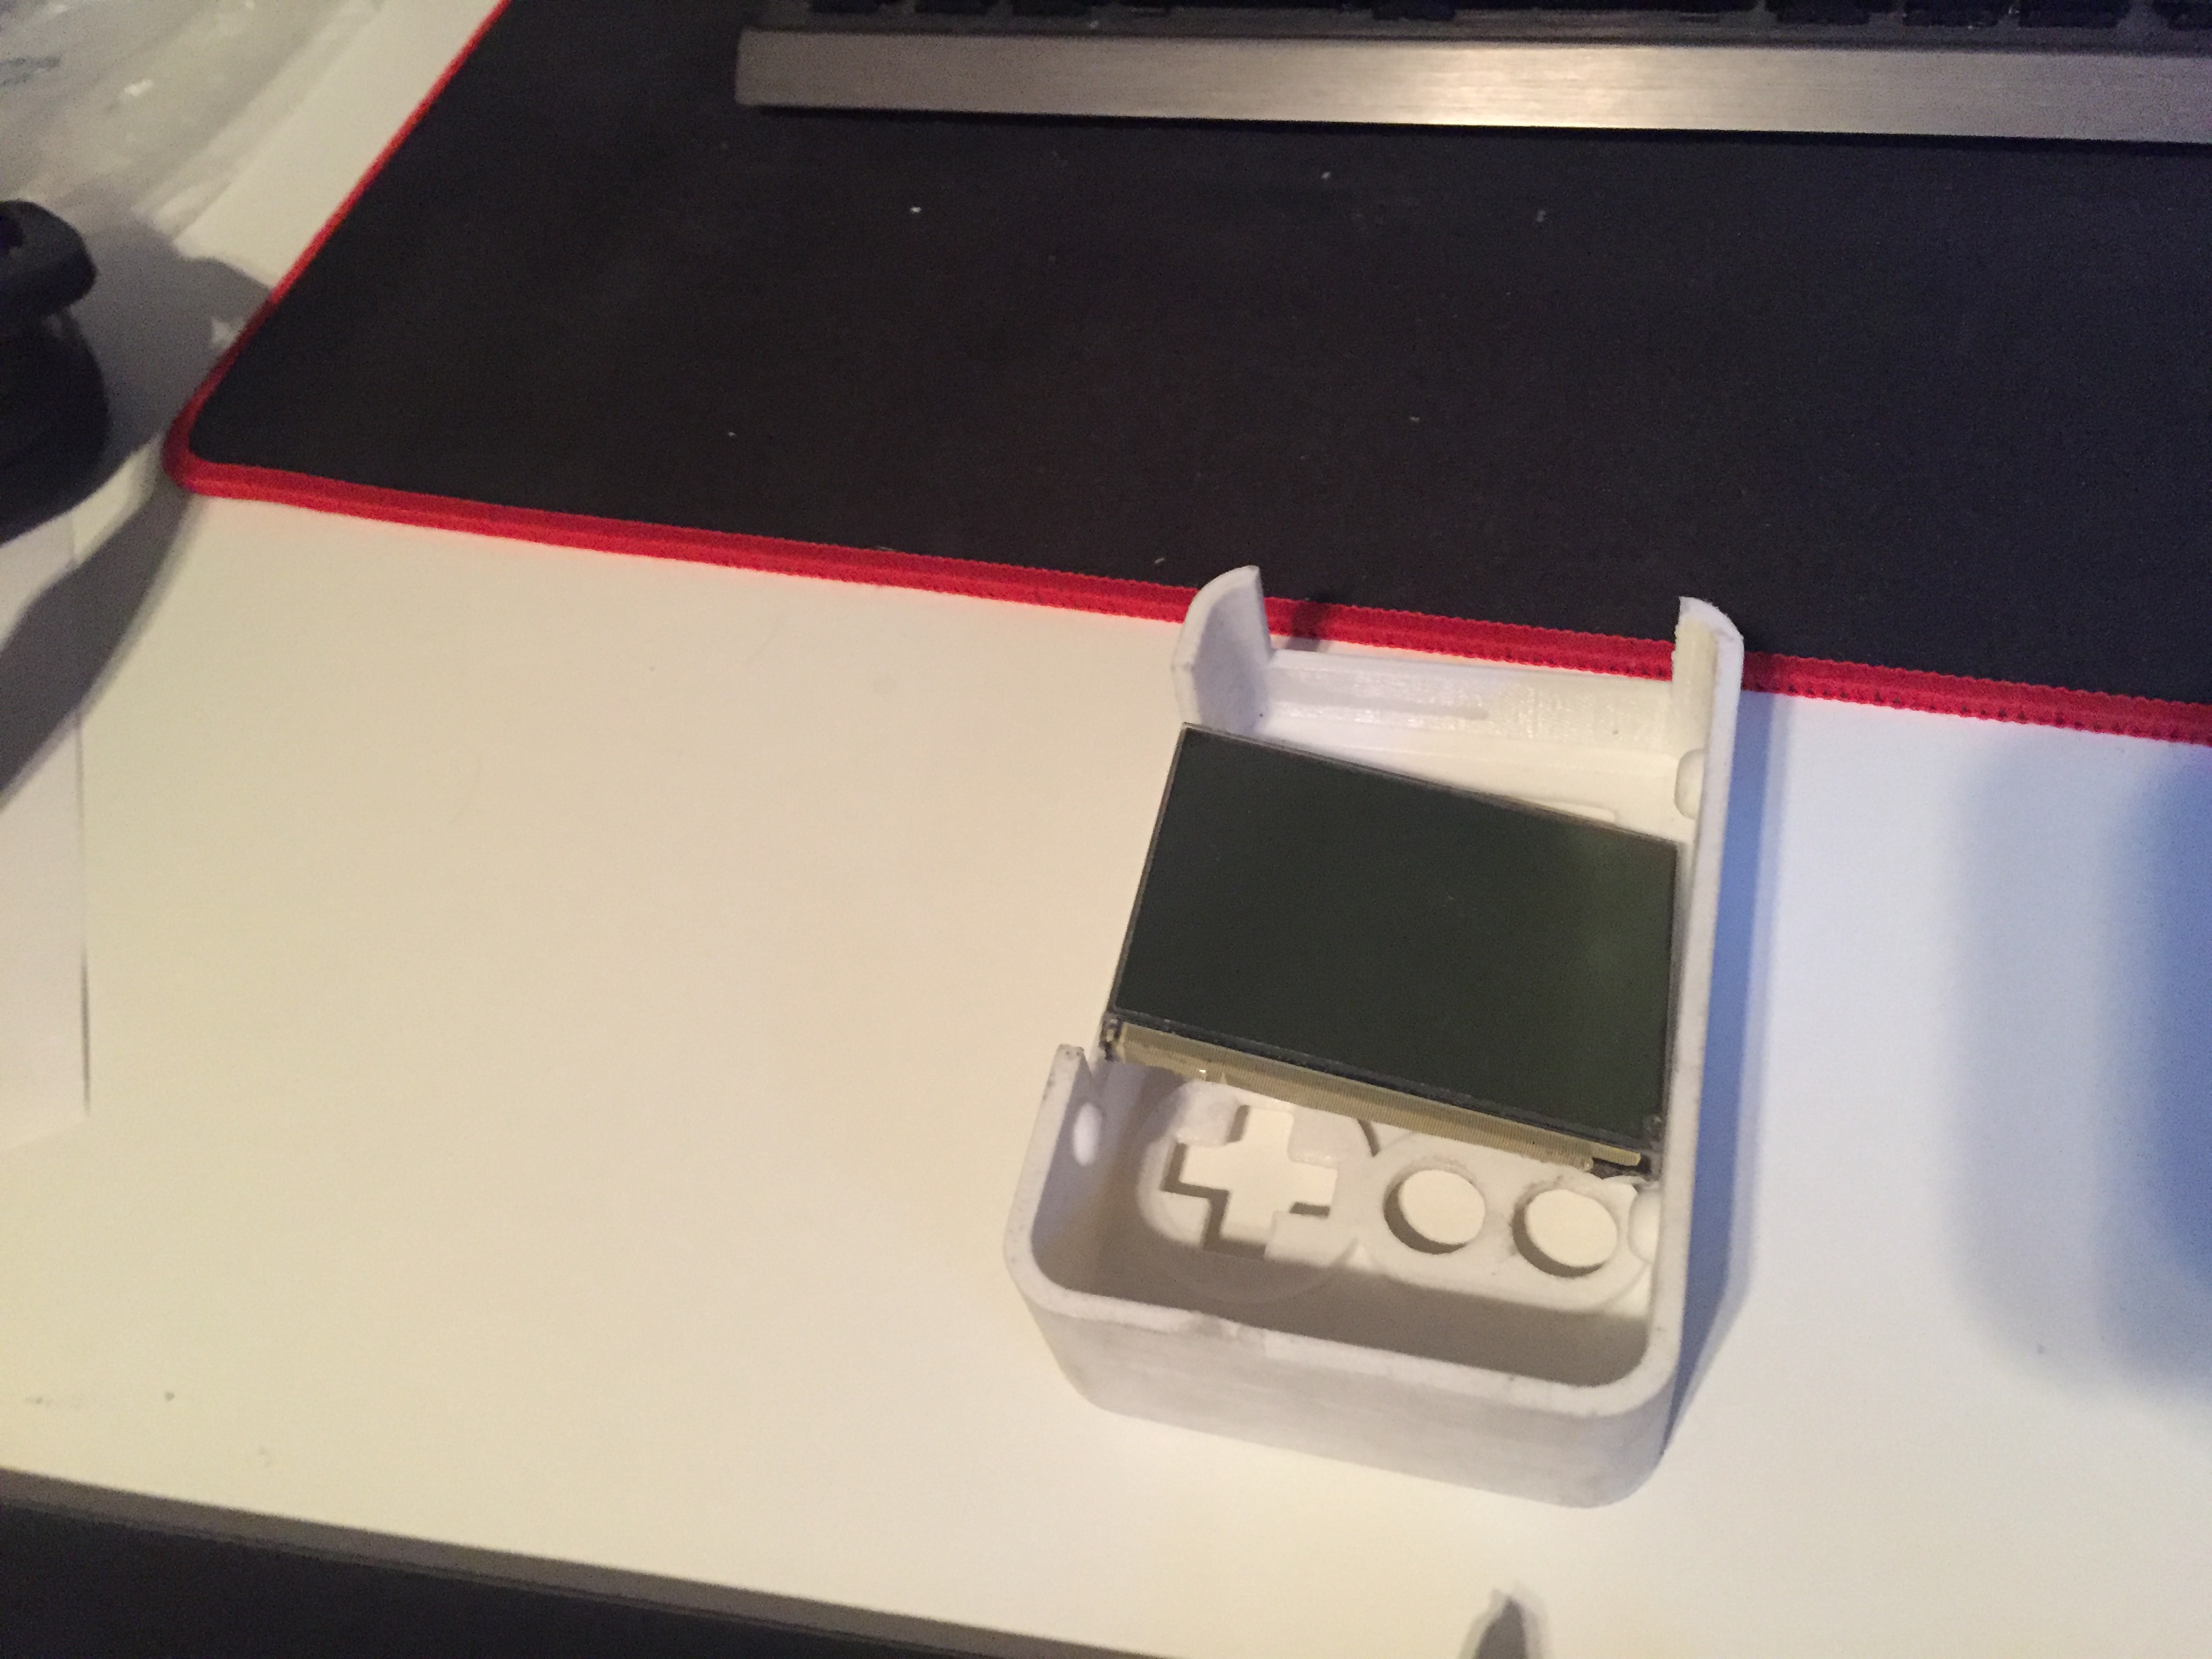
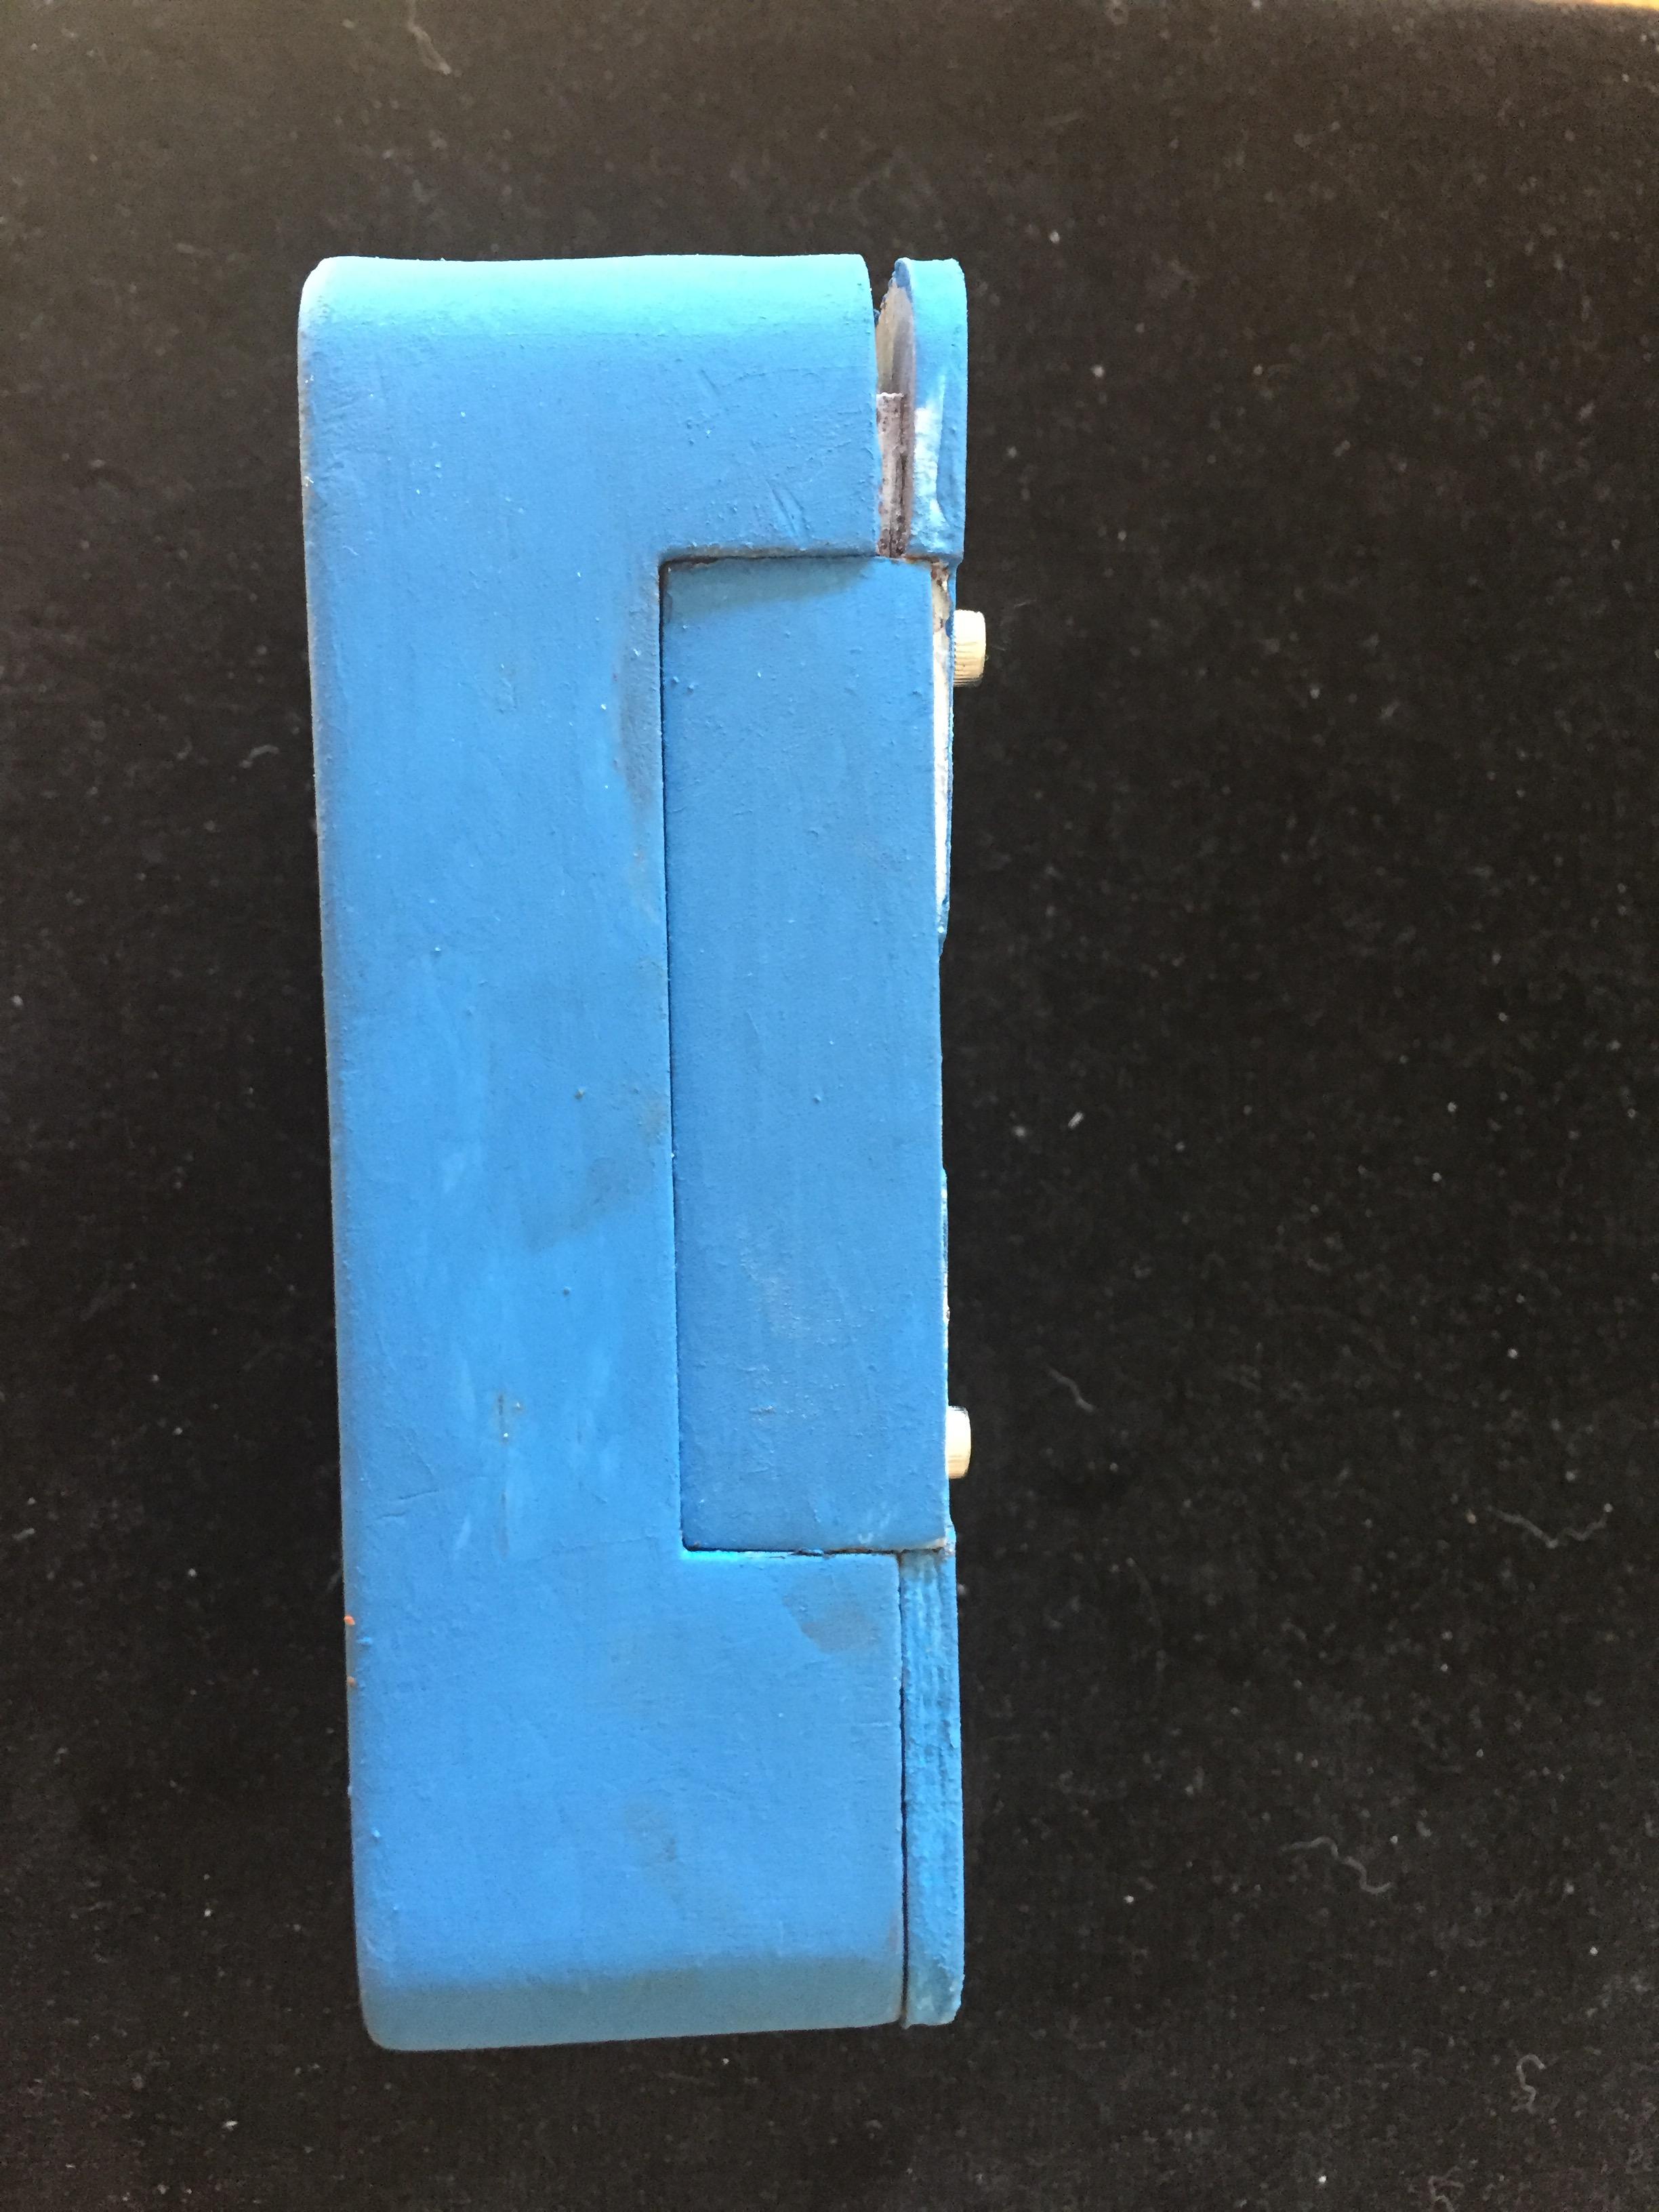
The top of the beep boy is warped due to how far the solder points extended below to the pi. In a v2 there would be space the accommodate the pins.
The side view also shows how the top of the back side is warped due to the pins.
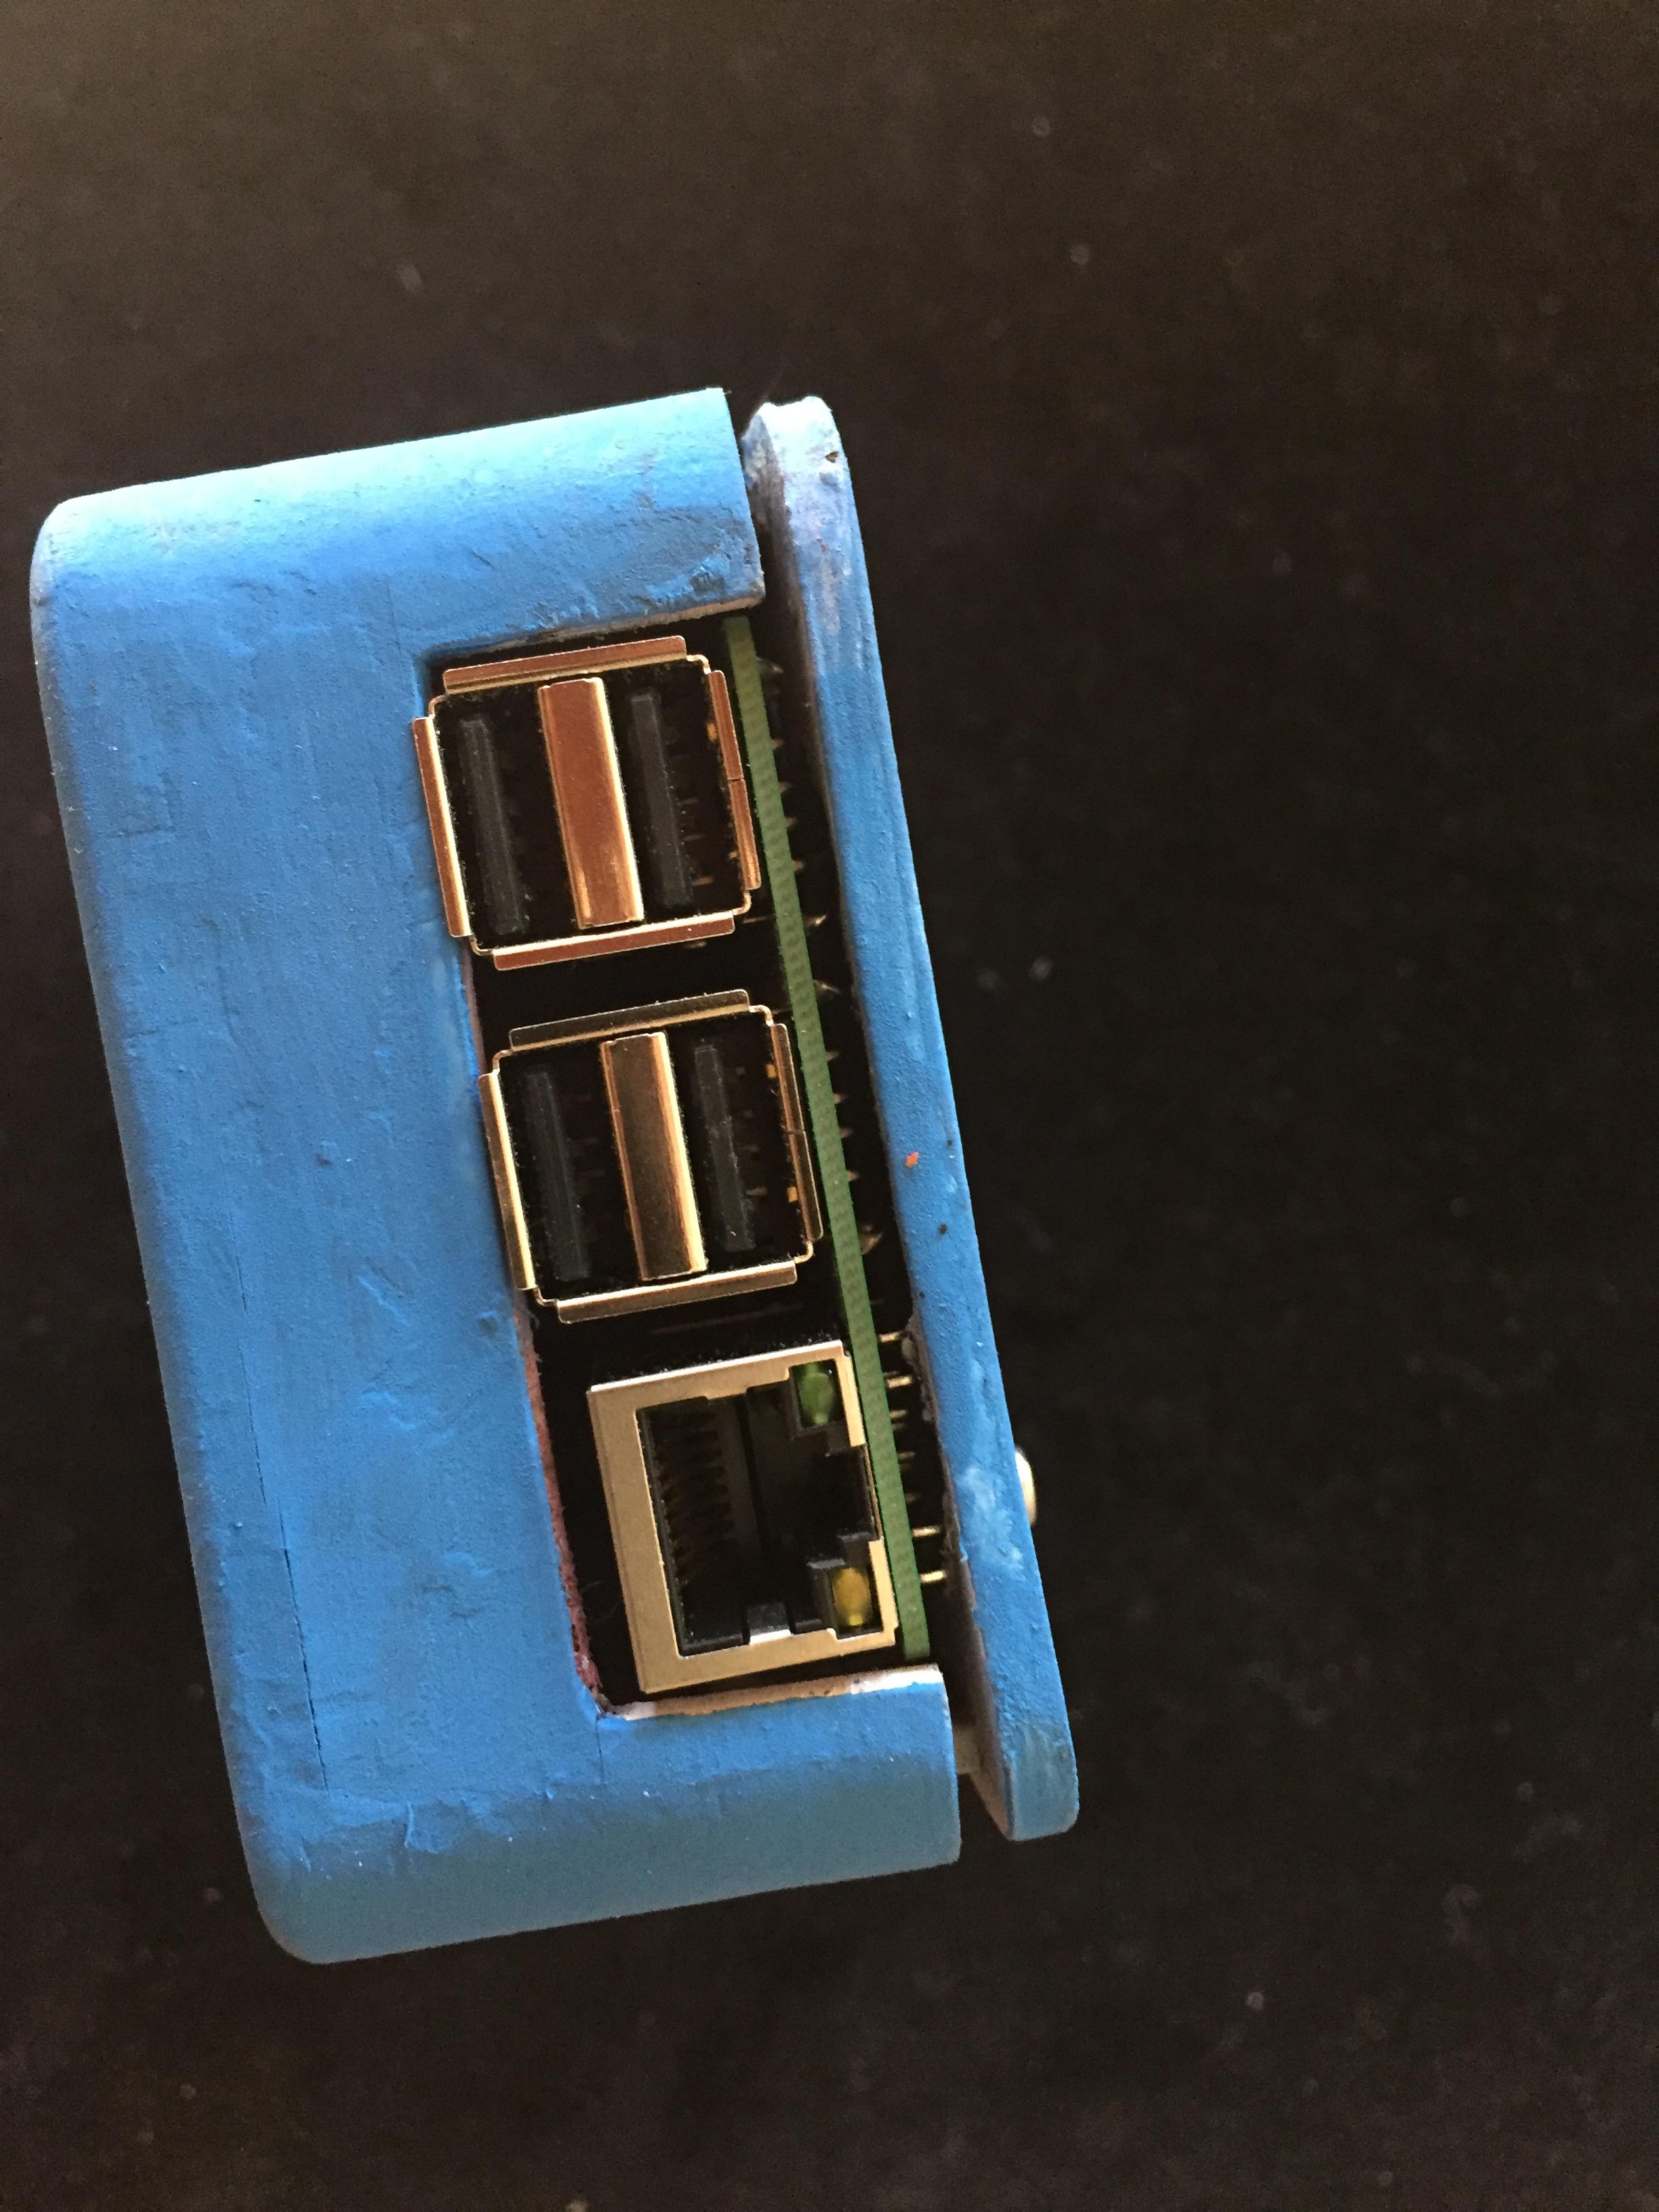
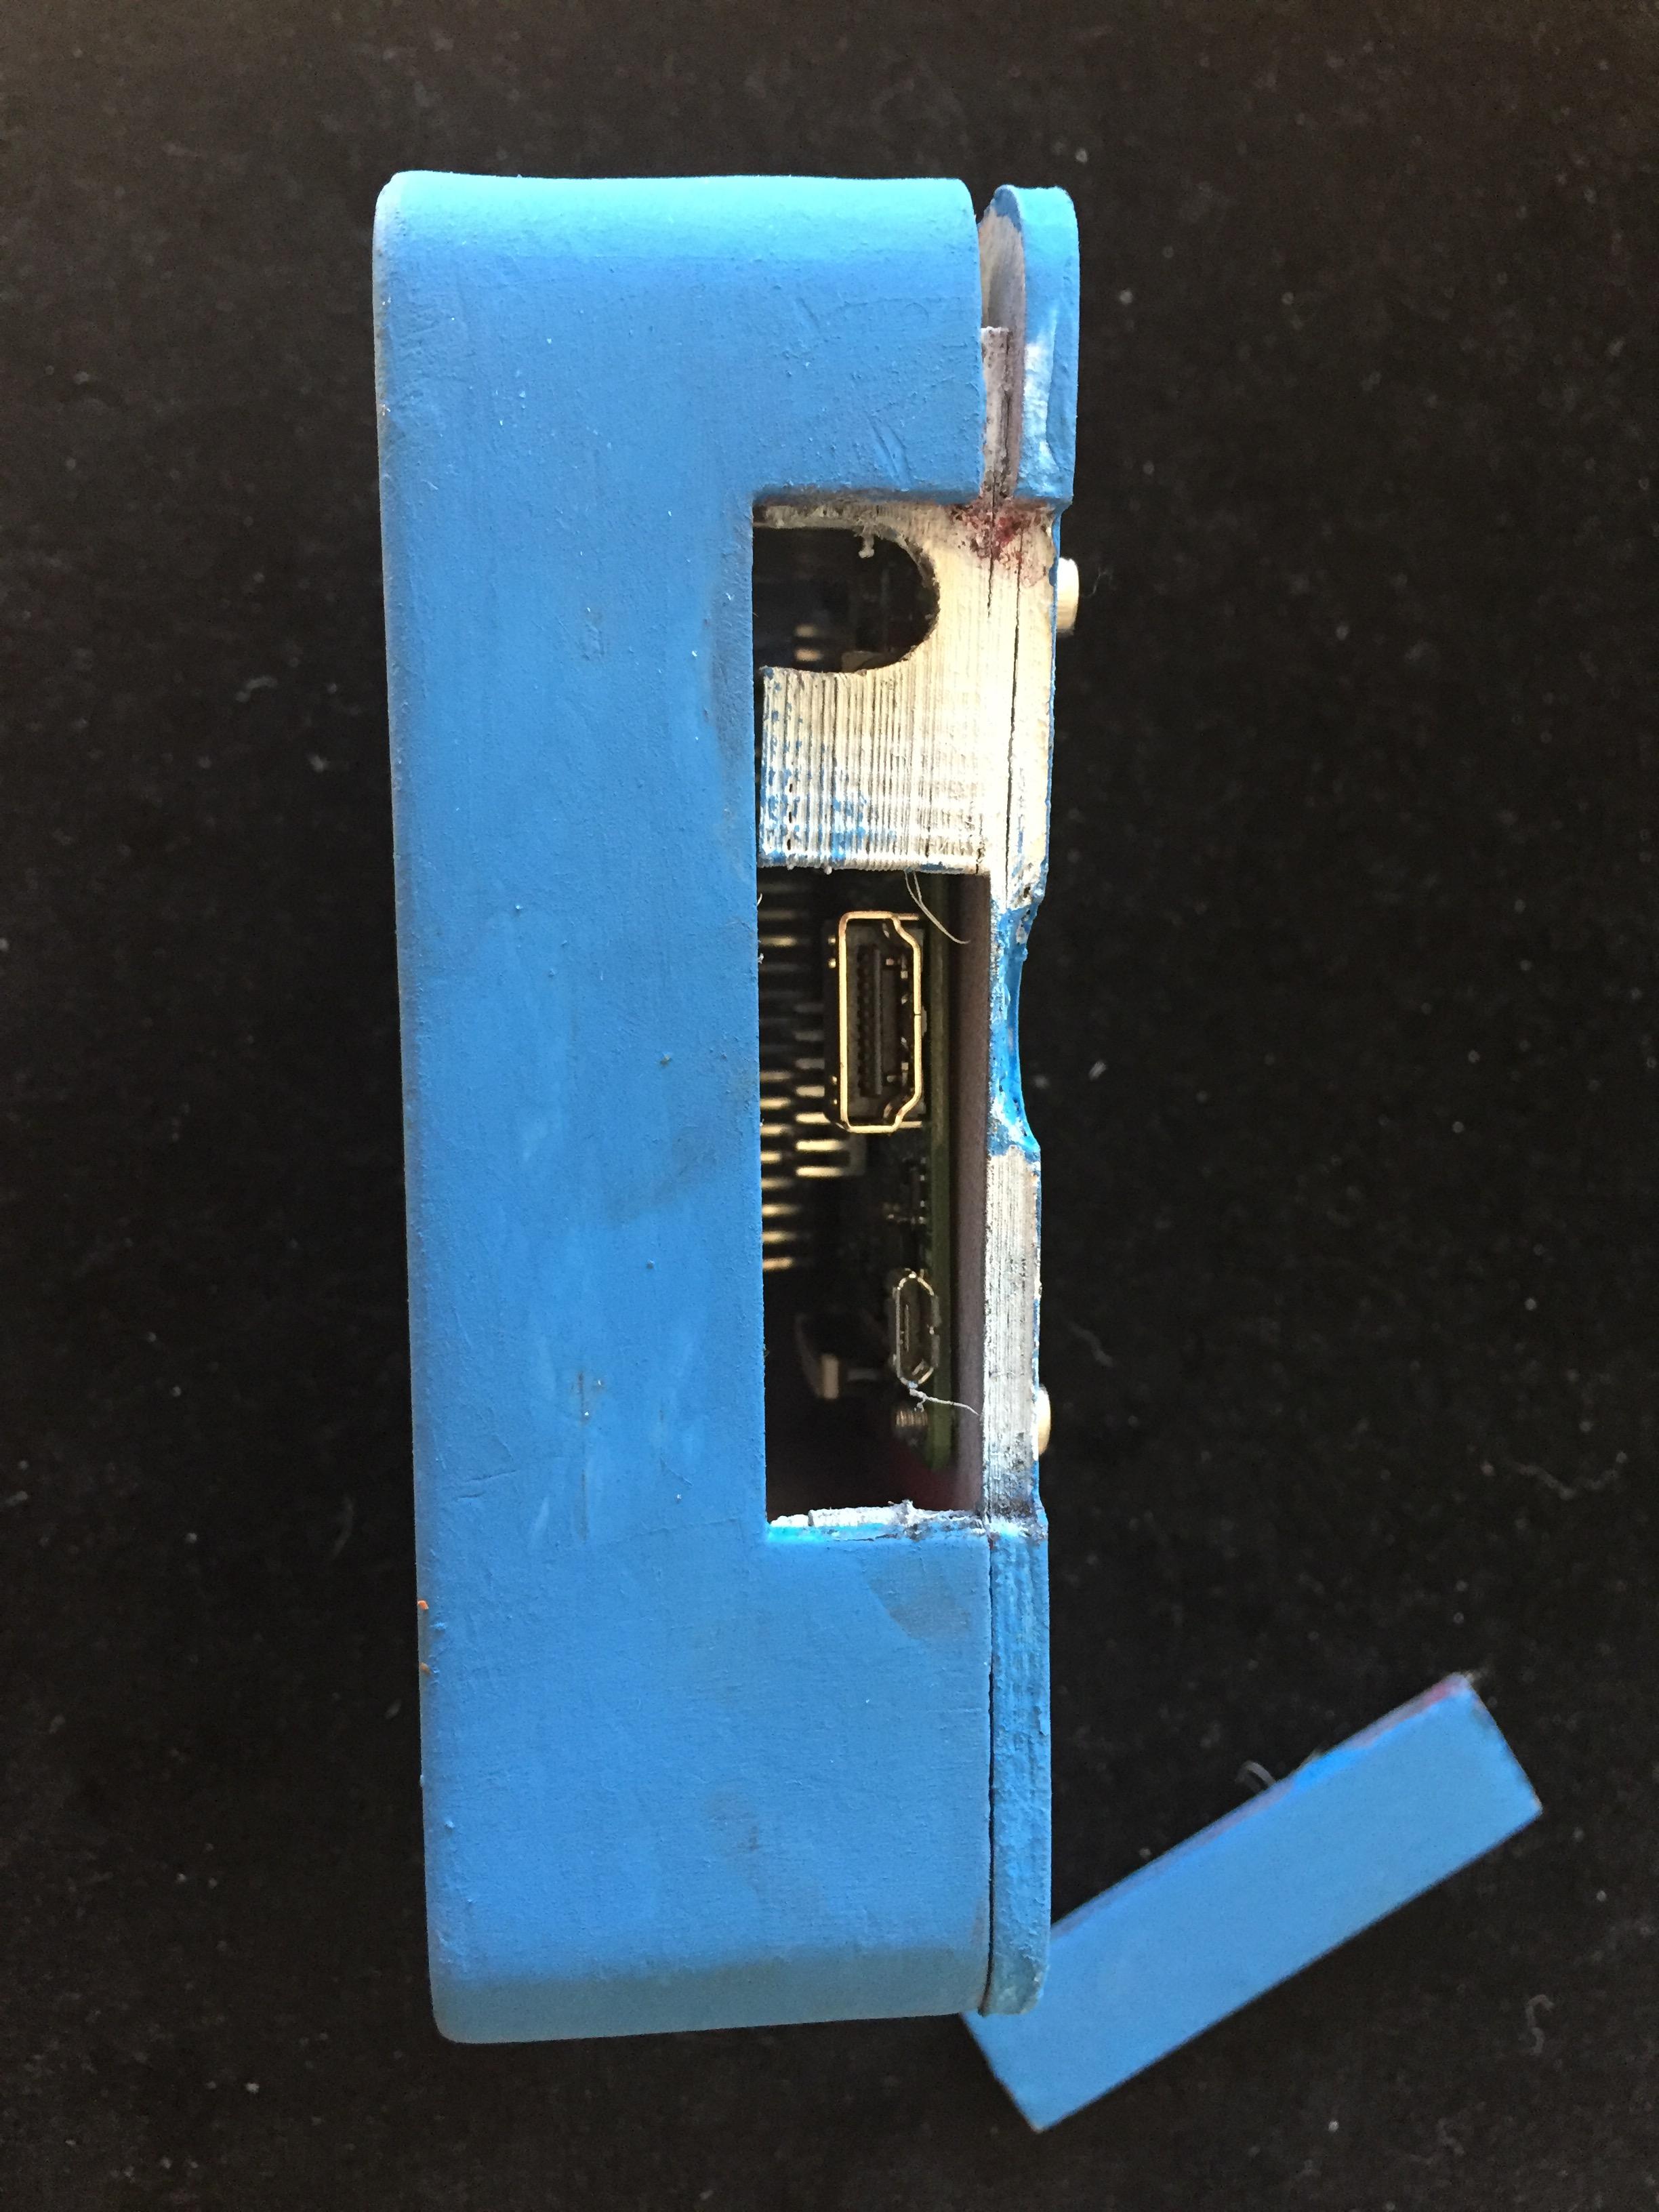
When the side panel is removed you get access to the hdmi out and power in.
This jam has turned into a comedy of errors due to user error.
Day 1
My original plan for the jam was to model, print and paint a cleaners carbine. This idea was highly ambitious, but I was optimistic that I could do it. What I did not take into account was the fact that I would not have enough time to print all the parts with the filament that I had. This project would also have taken more than 72 hours of working time to complete correctly and modeling the carbine was taking much longer than I anticipated. After almost 6 hours of working on the project, I got ready to print the first piece only to realize I was experiencing a filament shortage and didn’t have enough material to print the weapon.
Because of the lack of materials I had to change my project for the jam. I saw online people who made a raspberry pi act as a steam link and decided to make a case for a raspberry pi allowing me to play tf2 on a beep boy.
I got a hold of an old calculator and after ripping off its screen, I was able to get the dimensions of the beep boy. After getting it scaled correctly I modeled the case to allow access to all the ports that I use while hiding the ports as best as I could.
At this point it was way later then I was planning on working so I called it a night.
Day 2
After some sleep I printed the faceplate to the beep boy. I had the printer on the wrong settings and used the setting for a different filament so the first attempt to print was a failure.
The second attempt to print the beep boy was a success. It took slightly over 3 hours to print and immediately away the print finished, I began sanding it smooth. After spending about an hour sanding it. I went to test fit the screen and I then realized that I forgot to take into account the wall thickness making all my work more or less useless.
The only way to correct this problem was to scale the entire beep boy larger, however the screen was the limiting factor. What I ended up doing was scaling the entire beeb boy by 10% to fit in the screen but keeping the screen the unscaled size. This made the beep boy’s screen 10% too small so I increased the chamfer around the edges of the screen to make the empty space feel less empty. I am now printing the third attempt for the front cover of the beep boy.
Day 3
I spent the majority of this day trying to make all the pieces fit together correctly. The final product is not as nice as I would have liked, but I think it is a good starting point to make a v2 from it.
The beeb boy is definitely not as good as It could have been. I normally use a resin to fill in the gaps however that takes 24 hours + to cure. If I had time to use that the chamfer around the screen and the indentations where the buttons go would have been much smoother.
The top of the beep boy is warped due to how far the solder points extended below to the pi. In a v2 there would be space the accommodate the pins.
The side view also shows how the top of the back side is warped due to the pins.
When the side panel is removed you get access to the hdmi out and power in.