Dockyard a5
Made by English Mobster
http://archive.tf2maps.net/showthread.php?t=17480
Hello!
This is my first TF2 map, pl_Dockyard.
It's still in the early stages, but the idea is to have a train-themed Payload map.
First, a little history of the layout:
I made maps for Halo: Custom Edition for close to 5 years. My latest map, "Gridlock", had just entered alpha when it came across a few bumps in the road (phantom geometry being the worst). By that time, the community was dying as the game approached its 9th birthday and I decided it simply wasn't worth the effort. I took the model and shelved it.
I had experimented with TF2 and Hammer a while before, but I couldn't stand the Hammer controls (coming from 3DS Max) and so I never truly got into it.
About 3 days ago, the mapping bug bit me again, so I dusted off my old concept for Gridlock and reworked it with TF2's gameplay in mind. The result was this:
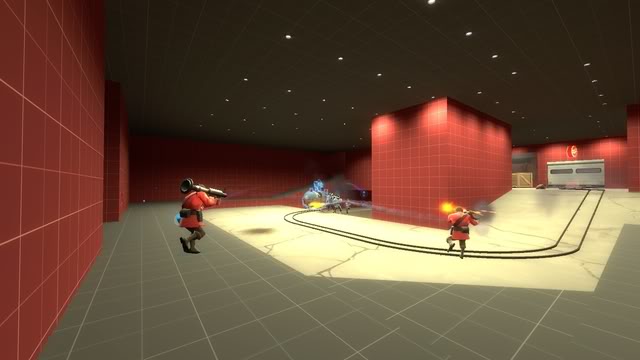
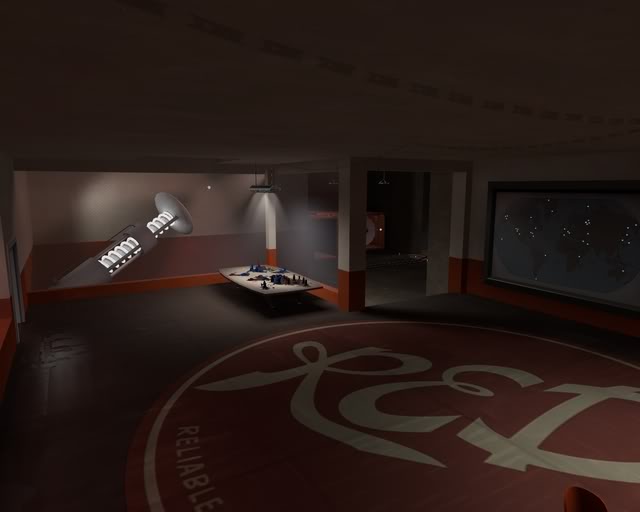
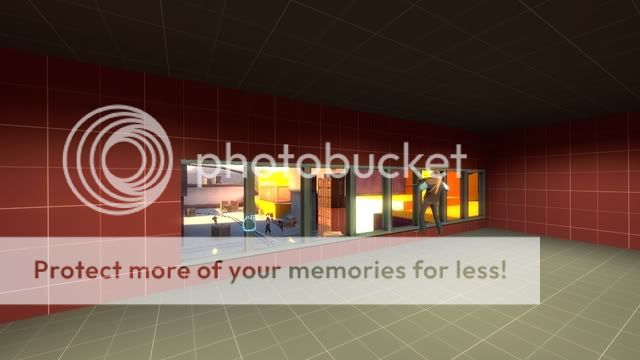
Blu Spawn:
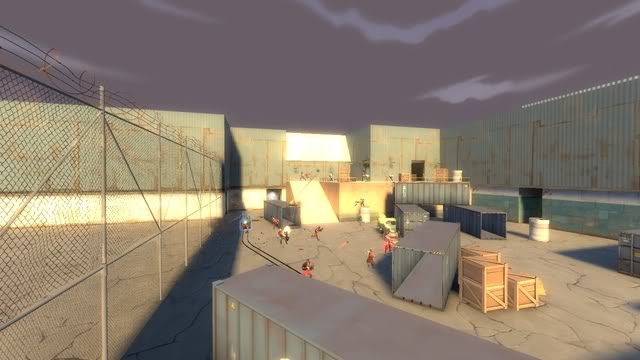
BLU Spawn (7/18/11).
Pushing the cart around the first corner (7/18/11).
Why does the cart have to take a roundabout route when the goal is literally only a few hundred meters across from it? Because there was a fence in the way.
The fence has an invisible wall around it that prevents rockets, sniper shots, and the like from passing through, thus eliminating the possibility of snipers spawn camping from either base.
On the far right, you can see a train passing by; there are 2 tracks here, guarded by 2 trains. The bomb must go across both these tracks to make it to the first CP, and again to get to the final CP.
CP 1:
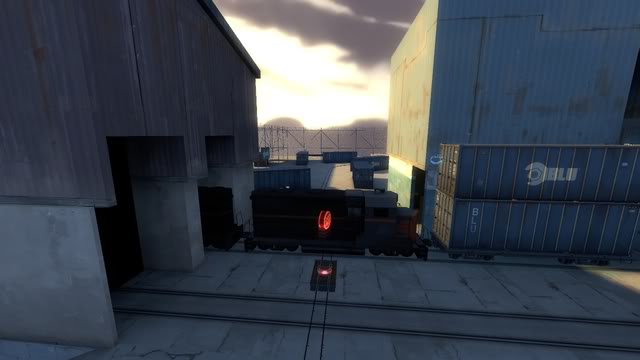
A train guards the path to the first CP.
The first CP is straightforward. It's where multiple paths break off in multiple directions, marked by a train every 45-90 seconds or so.
The bomb tracks cross the train tracks, but the bomb "plays nice" with the train:
1. As the bomb approaches the tracks, the train's path is temporarily disabled.
2. If the train is currently crossing the bomb's tracks, the bomb's path is temporarily disabled until the train passes.
3. After the bomb clears the tracks, the train's path is enabled again.
This is cheating a LITTLE by completely disabling the train during the bomb's passing, but all the other alternatives weren't quite as reliable, and as funny as watching a train hit a live, armed bomb at twice Scout's running speed, it's not good for gameplay to have the bomb bug out.

The CP itself can be guarded through a well-placed Sentry, but the Sentries can be outranged with a little effort.
As this is where one main path breaks into two, Pyros, Spies, and the like can use the alternate path to ambush the attacking team the moment they think they're safe.
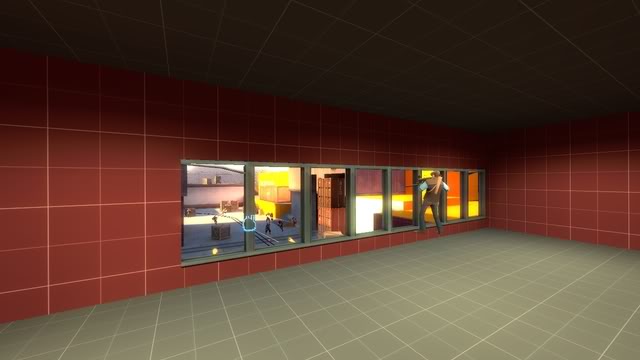
CP 2:
This image has been resized. Click to view the full image.
Going down to the CP (7/18/11).
The focal point of the second CP is a bridge. Defenders have a height advantage going into the second CP, but the bomb has two rollforward zones which aid Blu slightly in capping the point.
Red also has several sniping locations that can impede Blu's progress, but the snipers are vulnerable to Scouts, Pyros, Spies, or anyone using the alternate route.
This area has many indents, nooks, and crannies where defenders can lurk, but with perseverance, Blu can power through and onto the point.
Once Blu captures this second CP, the spawn rooms switch; Blu gains access to a forward spawn near the second CP, while Red begins spawning in their main base.
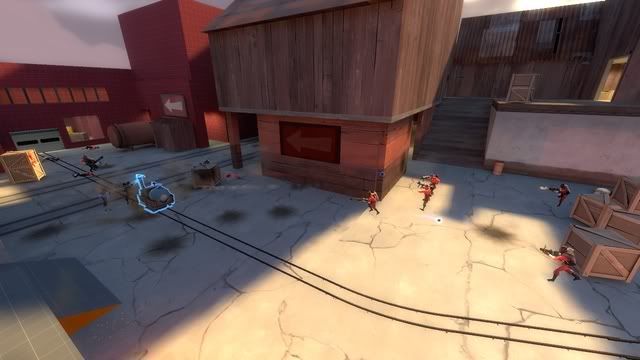
CP 3:
Up the first hill! (7/18/11)
Up the second hill! (7/18/11)
CP 3 is going to be a tough nut to crack. It is the primary converging point for the alternate route at CP 1 (there is a secondary converging point at the bridge on CP 2, and Blu can also gain access to the alternate route directly from their forward spawn), but features 2 rollback zones coupled with a close(ish) proximity to the Red base and the primary destination for Red's alternate route.
It winds in a spiral-staircase (if instead of a staircase, there's a track with a bomb on it) fashion up to the third CP, creating further headache from the corners and ambush points galore.
This CP gives Blu a nice forward base with locations for teleporters and dispensers, as well as 2 alternate routes into Red base and a Sniper Battlements to supress enemy sniper attacks.
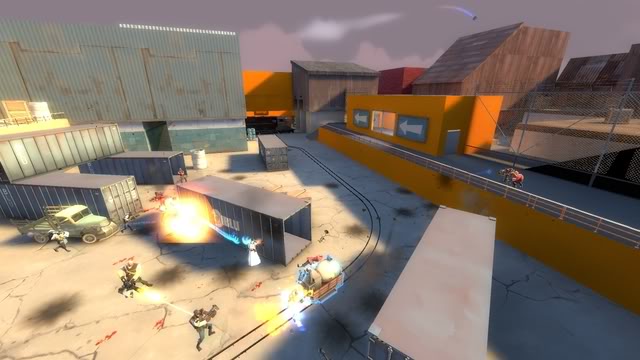
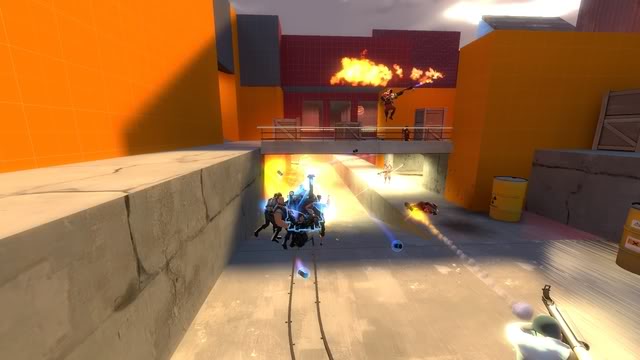
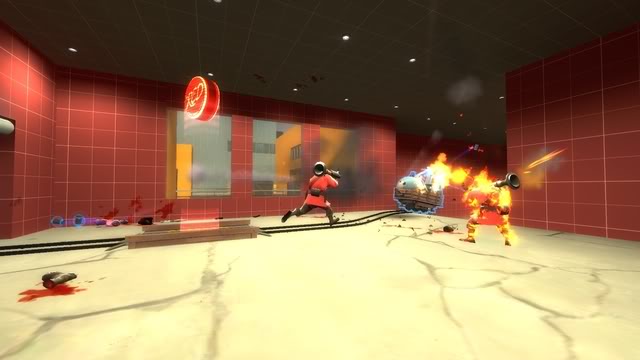
CP 4:
This image has been resized. Click to view the full image.
Assaulting the RED base (7/18/11).
A BLU Sniper picks off some defenders (7/18/11).
The final CP.
The final CP is going to be very hard to assault. Red team has access to an open area with a height advantage, while Blu team must stick to a predictable path. Engineers can hide their Sentries within open containers or give them high vantage points that can look down upon the bomb's path, thus requiring Blu team to push that much harder to get through. Snipers on both teams are given a Battlements to snipe from, but they are vulnerable to a Spy or Pyro that sneaks up through an alternate route to take care of them.
The bomb is forced to go into a tiny choke point into Red's container storage room, where it tumbles into a pit and explodes, thus granting Blu the win.
I'm still working on the design of the final CP; I don't like how it looks currently, but it's extraordinarily difficult to tweak sizes and such due to the CP being located under the very floor of Red base and bordered by hallways abound.
With this map, the goal was to have the gameplay near the end come reasonably close to the style of the last point of Dustbowl, requiring Blu to use some semblance of teamwork to win the round.
I also wanted to provide sections for all combat styles; the large, open areas leading up to the first and last caps are perfect for those preferring long-range, while the short hallways characterizing the second and third caps lend themselves to medium-to-short range combat.
Trains, of course, are a major part of the map (it does take place on an Intermodal dock, after all), and I figured they would make for a great addition of danger. I've never seen a Payload map with trains before (someone shall correct me with a link to their map in 3... 2... 1...), so I figured having an extra thing to worry about while escorting a cart with a bomb on it would be fun.
I've never mapped for TF2 before, but I've mapped for Halo 1 (also called Halo: Custom Edition), Star Wars: Empire at War (an RTS game, but still), and Jedi Knight: Jedi Academy. While I still prefer 3DS Max to Hammer, I'm finally beginning to get a feel for how Hammer works and the various controls, and I think I'm starting to get the hang of it.
This map has entered its first alpha, and suggestions are appreciated!
I know I'm a bit talkative, so thanks for reading, and let me know what you think! <3
Here's a Youtube video of the map in pre-alpha for your troubles:
Hello!
This is my first TF2 map, pl_Dockyard.
It's still in the early stages, but the idea is to have a train-themed Payload map.
First, a little history of the layout:
I made maps for Halo: Custom Edition for close to 5 years. My latest map, "Gridlock", had just entered alpha when it came across a few bumps in the road (phantom geometry being the worst). By that time, the community was dying as the game approached its 9th birthday and I decided it simply wasn't worth the effort. I took the model and shelved it.
I had experimented with TF2 and Hammer a while before, but I couldn't stand the Hammer controls (coming from 3DS Max) and so I never truly got into it.
About 3 days ago, the mapping bug bit me again, so I dusted off my old concept for Gridlock and reworked it with TF2's gameplay in mind. The result was this:
Blu Spawn:
BLU Spawn (7/18/11).

Pushing the cart around the first corner (7/18/11).
Why does the cart have to take a roundabout route when the goal is literally only a few hundred meters across from it? Because there was a fence in the way.
The fence has an invisible wall around it that prevents rockets, sniper shots, and the like from passing through, thus eliminating the possibility of snipers spawn camping from either base.
On the far right, you can see a train passing by; there are 2 tracks here, guarded by 2 trains. The bomb must go across both these tracks to make it to the first CP, and again to get to the final CP.
CP 1:

A train guards the path to the first CP.
The first CP is straightforward. It's where multiple paths break off in multiple directions, marked by a train every 45-90 seconds or so.
The bomb tracks cross the train tracks, but the bomb "plays nice" with the train:
1. As the bomb approaches the tracks, the train's path is temporarily disabled.
2. If the train is currently crossing the bomb's tracks, the bomb's path is temporarily disabled until the train passes.
3. After the bomb clears the tracks, the train's path is enabled again.
This is cheating a LITTLE by completely disabling the train during the bomb's passing, but all the other alternatives weren't quite as reliable, and as funny as watching a train hit a live, armed bomb at twice Scout's running speed, it's not good for gameplay to have the bomb bug out.
The CP itself can be guarded through a well-placed Sentry, but the Sentries can be outranged with a little effort.
As this is where one main path breaks into two, Pyros, Spies, and the like can use the alternate path to ambush the attacking team the moment they think they're safe.
CP 2:
This image has been resized. Click to view the full image.

Going down to the CP (7/18/11).
The focal point of the second CP is a bridge. Defenders have a height advantage going into the second CP, but the bomb has two rollforward zones which aid Blu slightly in capping the point.
Red also has several sniping locations that can impede Blu's progress, but the snipers are vulnerable to Scouts, Pyros, Spies, or anyone using the alternate route.
This area has many indents, nooks, and crannies where defenders can lurk, but with perseverance, Blu can power through and onto the point.
Once Blu captures this second CP, the spawn rooms switch; Blu gains access to a forward spawn near the second CP, while Red begins spawning in their main base.
CP 3:
Up the first hill! (7/18/11)
Up the second hill! (7/18/11)
CP 3 is going to be a tough nut to crack. It is the primary converging point for the alternate route at CP 1 (there is a secondary converging point at the bridge on CP 2, and Blu can also gain access to the alternate route directly from their forward spawn), but features 2 rollback zones coupled with a close(ish) proximity to the Red base and the primary destination for Red's alternate route.
It winds in a spiral-staircase (if instead of a staircase, there's a track with a bomb on it) fashion up to the third CP, creating further headache from the corners and ambush points galore.
This CP gives Blu a nice forward base with locations for teleporters and dispensers, as well as 2 alternate routes into Red base and a Sniper Battlements to supress enemy sniper attacks.
CP 4:
This image has been resized. Click to view the full image.

Assaulting the RED base (7/18/11).
A BLU Sniper picks off some defenders (7/18/11).

The final CP.
The final CP is going to be very hard to assault. Red team has access to an open area with a height advantage, while Blu team must stick to a predictable path. Engineers can hide their Sentries within open containers or give them high vantage points that can look down upon the bomb's path, thus requiring Blu team to push that much harder to get through. Snipers on both teams are given a Battlements to snipe from, but they are vulnerable to a Spy or Pyro that sneaks up through an alternate route to take care of them.
The bomb is forced to go into a tiny choke point into Red's container storage room, where it tumbles into a pit and explodes, thus granting Blu the win.
I'm still working on the design of the final CP; I don't like how it looks currently, but it's extraordinarily difficult to tweak sizes and such due to the CP being located under the very floor of Red base and bordered by hallways abound.
With this map, the goal was to have the gameplay near the end come reasonably close to the style of the last point of Dustbowl, requiring Blu to use some semblance of teamwork to win the round.
I also wanted to provide sections for all combat styles; the large, open areas leading up to the first and last caps are perfect for those preferring long-range, while the short hallways characterizing the second and third caps lend themselves to medium-to-short range combat.
Trains, of course, are a major part of the map (it does take place on an Intermodal dock, after all), and I figured they would make for a great addition of danger. I've never seen a Payload map with trains before (someone shall correct me with a link to their map in 3... 2... 1...), so I figured having an extra thing to worry about while escorting a cart with a bomb on it would be fun.
I've never mapped for TF2 before, but I've mapped for Halo 1 (also called Halo: Custom Edition), Star Wars: Empire at War (an RTS game, but still), and Jedi Knight: Jedi Academy. While I still prefer 3DS Max to Hammer, I'm finally beginning to get a feel for how Hammer works and the various controls, and I think I'm starting to get the hang of it.
This map has entered its first alpha, and suggestions are appreciated!
I know I'm a bit talkative, so thanks for reading, and let me know what you think! <3
Here's a Youtube video of the map in pre-alpha for your troubles: